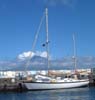
Sailing Vessel (SV) Sarah
Sarah has a new owner as of 7/26/2021. There will be no more updates to these SV Sarah pages
Sarah has a new owner as of 7/26/2021. There will be no more updates to these SV Sarah pages
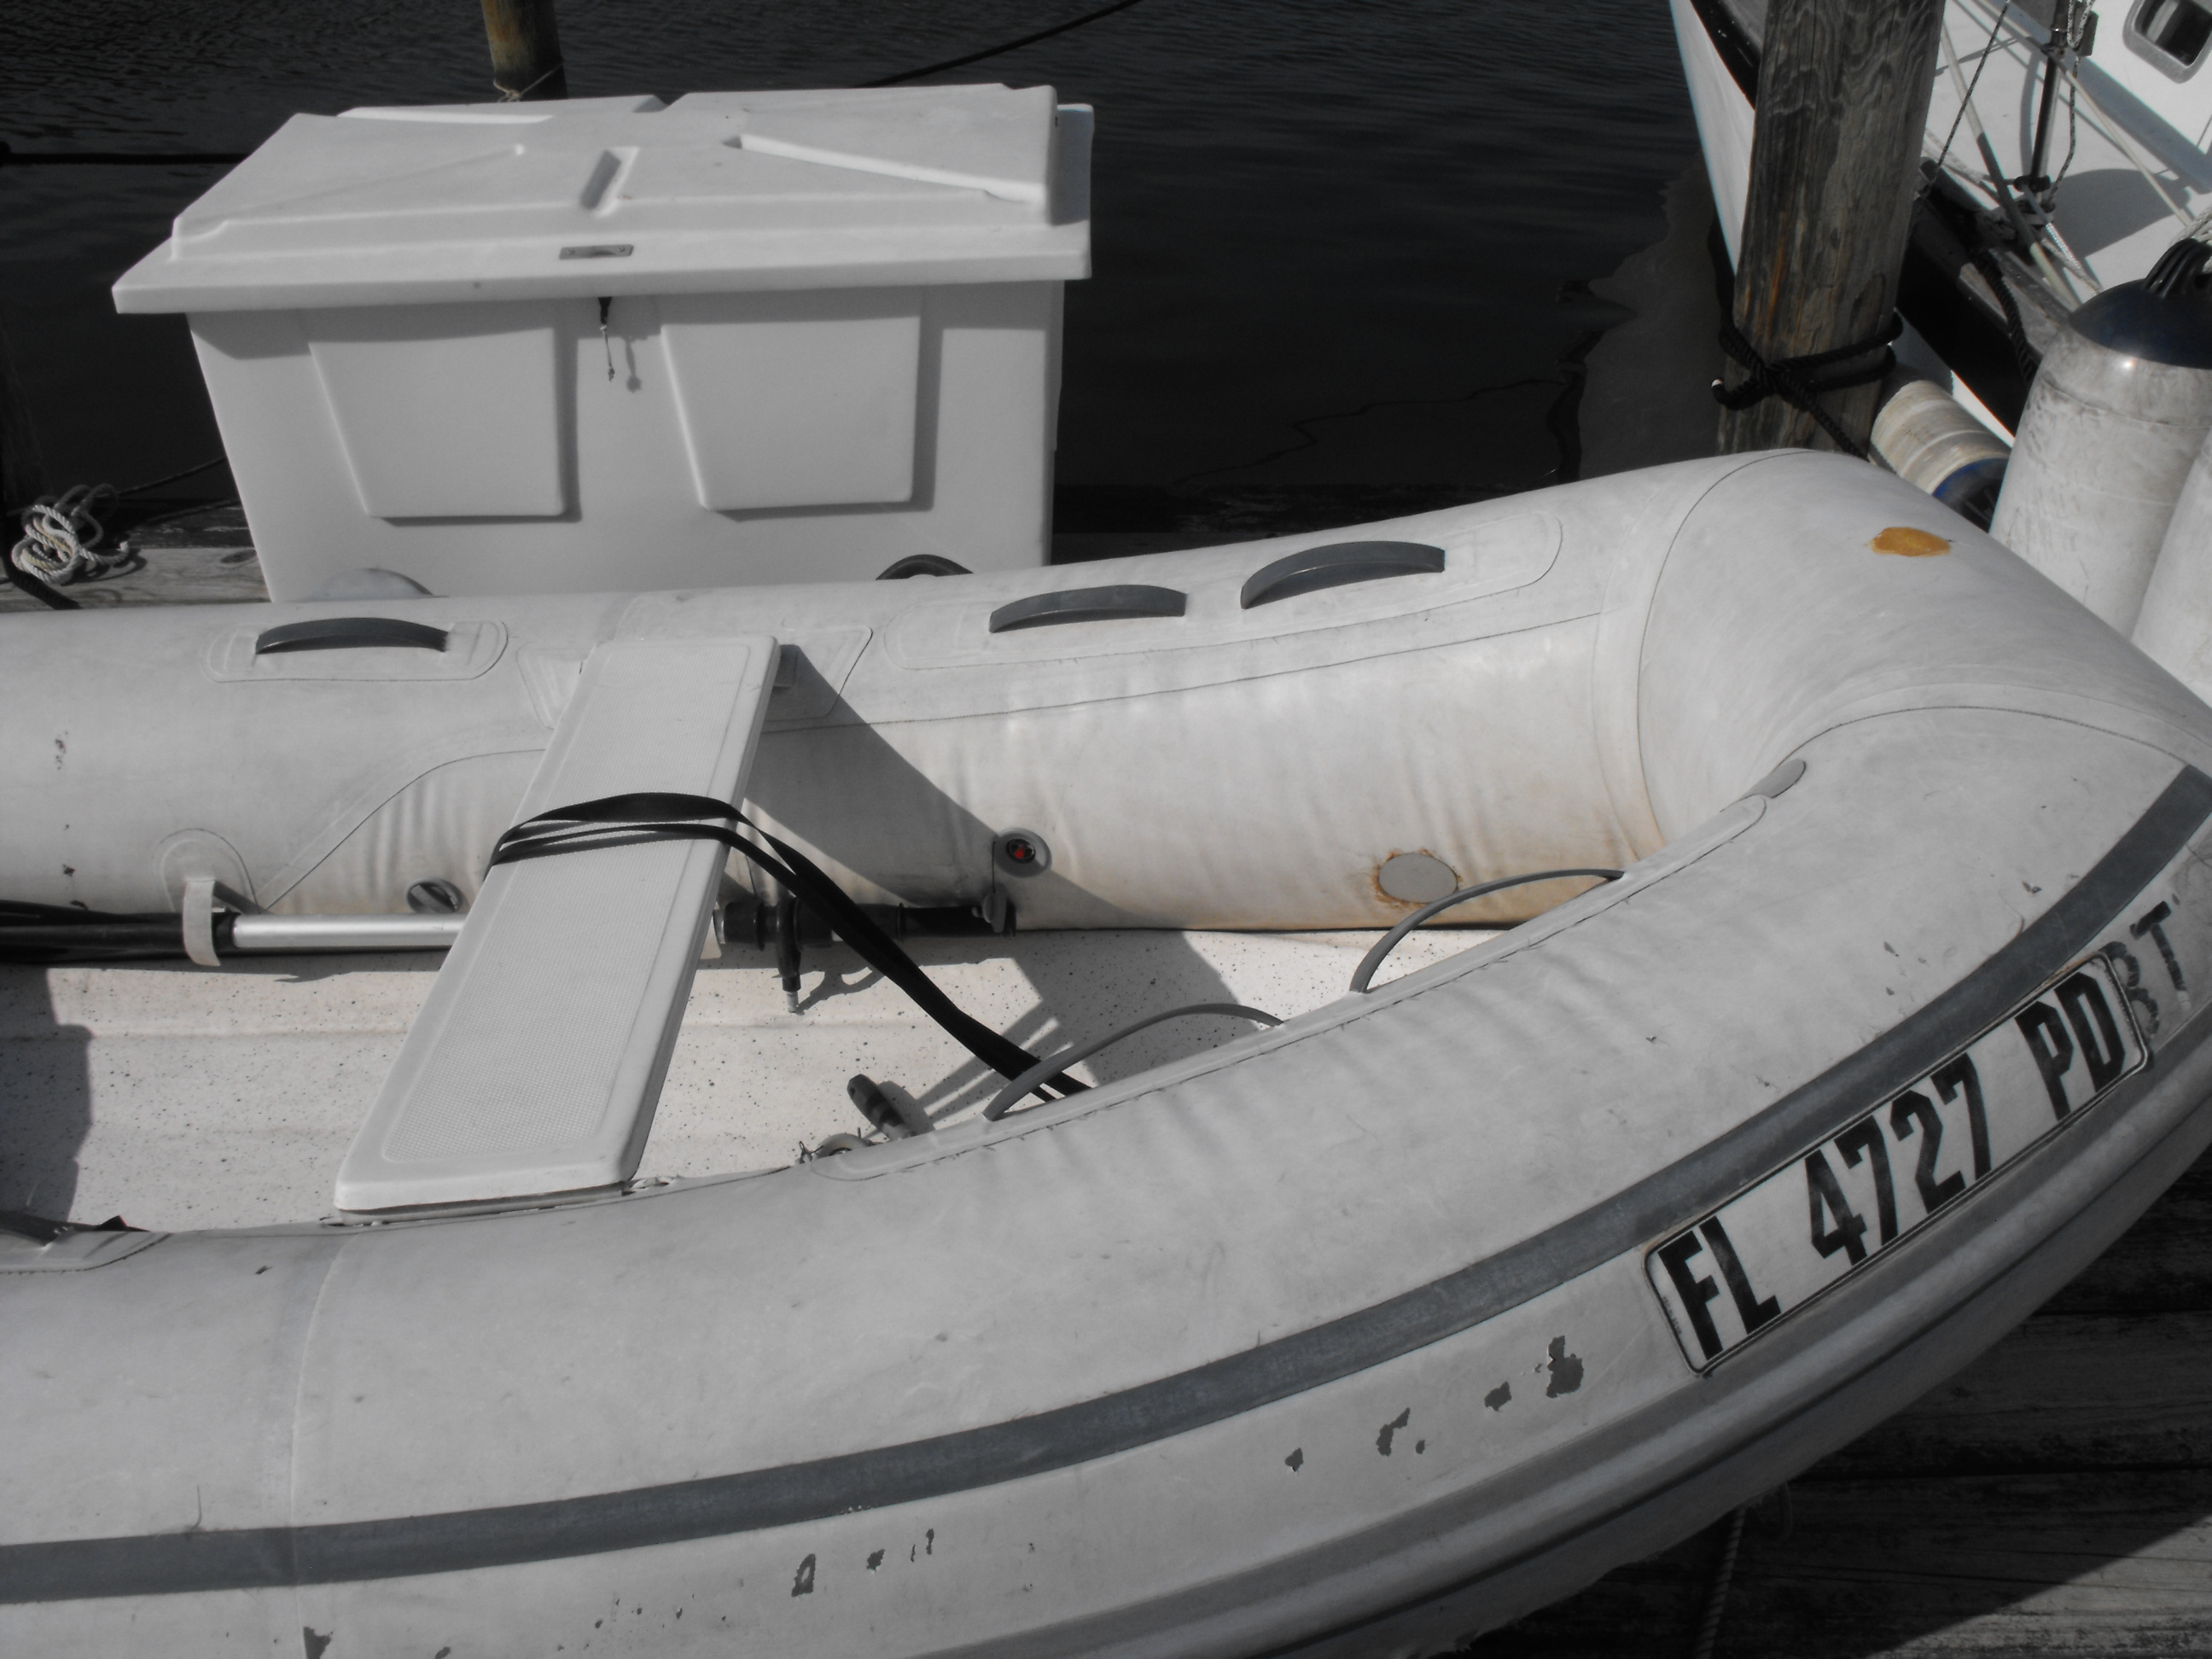
| Maintaining Sarah's Dinghy | |
| In 2003 I purchased a new AB Rigid Inflatable
Boat (RIB). This replaced a cheap Force 4 aluminum RIB
that blew away in Hurricane Isabel. I liked the light
weight of the aluminum hull on the Force 4, although it was a
little scary with a 9.9 HP outboard. The problem with the
Force 4 was the PVC material and cheap construction. By
the time Isabel took it off my hands the 6-year old boat was coming apart.
To replace the Force 4 I purchased the lightest dinghy AB made at the time in fibreglass. A few years later AB introduced an aluminum RIB, which I would have purchased if was available in 2003. The AB dinghy has lasted pretty well for the last 10 years (as of 2013). During that period the dinghy has been stored on Sarah's foredeck when not in use. The dinghy handles well with my 9.9 HP outboard and easily planes with myself and one other person on board. This web page documents the maintenance and repairs I have performed to maintain an operational dinghy. |
|
| Replace Dinghy Air Valve | |
| In the spring of 2011 I re-inflated my AB
RIB for the first time in nearly a year. The dinghy had
been stored on deck since I deflated it in the previous year.
During the inflation of the bow chamber the little red, plastic
stem inside the Halkey-Roberts valve broke off. The stem and the spring
around it control the valve - closing it during operation and
inflation and opening it during deflation. I was still
able to inflate the chamber and the pressure of the air in the
chamber kept the
valve closed after I removed the pump hose. I tested it
for leaks around the valve and found none. I left the
dinghy inflated on deck for two months with no sign of a leak.
I did not use the dinghy until the fall of 2011, when I took a mooring in Annapolis, MD while working for the U.S. Boat Shows (separate sail and power boat shows). Now I needed the dinghy to get from the mooring to the dinghy dock in Annapolis harbor, and now the bow chamber was leaking badly. It would almost completely deflate over night. The valve which had previously stayed closed when the chamber was inflated now was stuck open and only the valve cap proved a poor seal for the valve. I really needed to repair or replace the valve. |
|
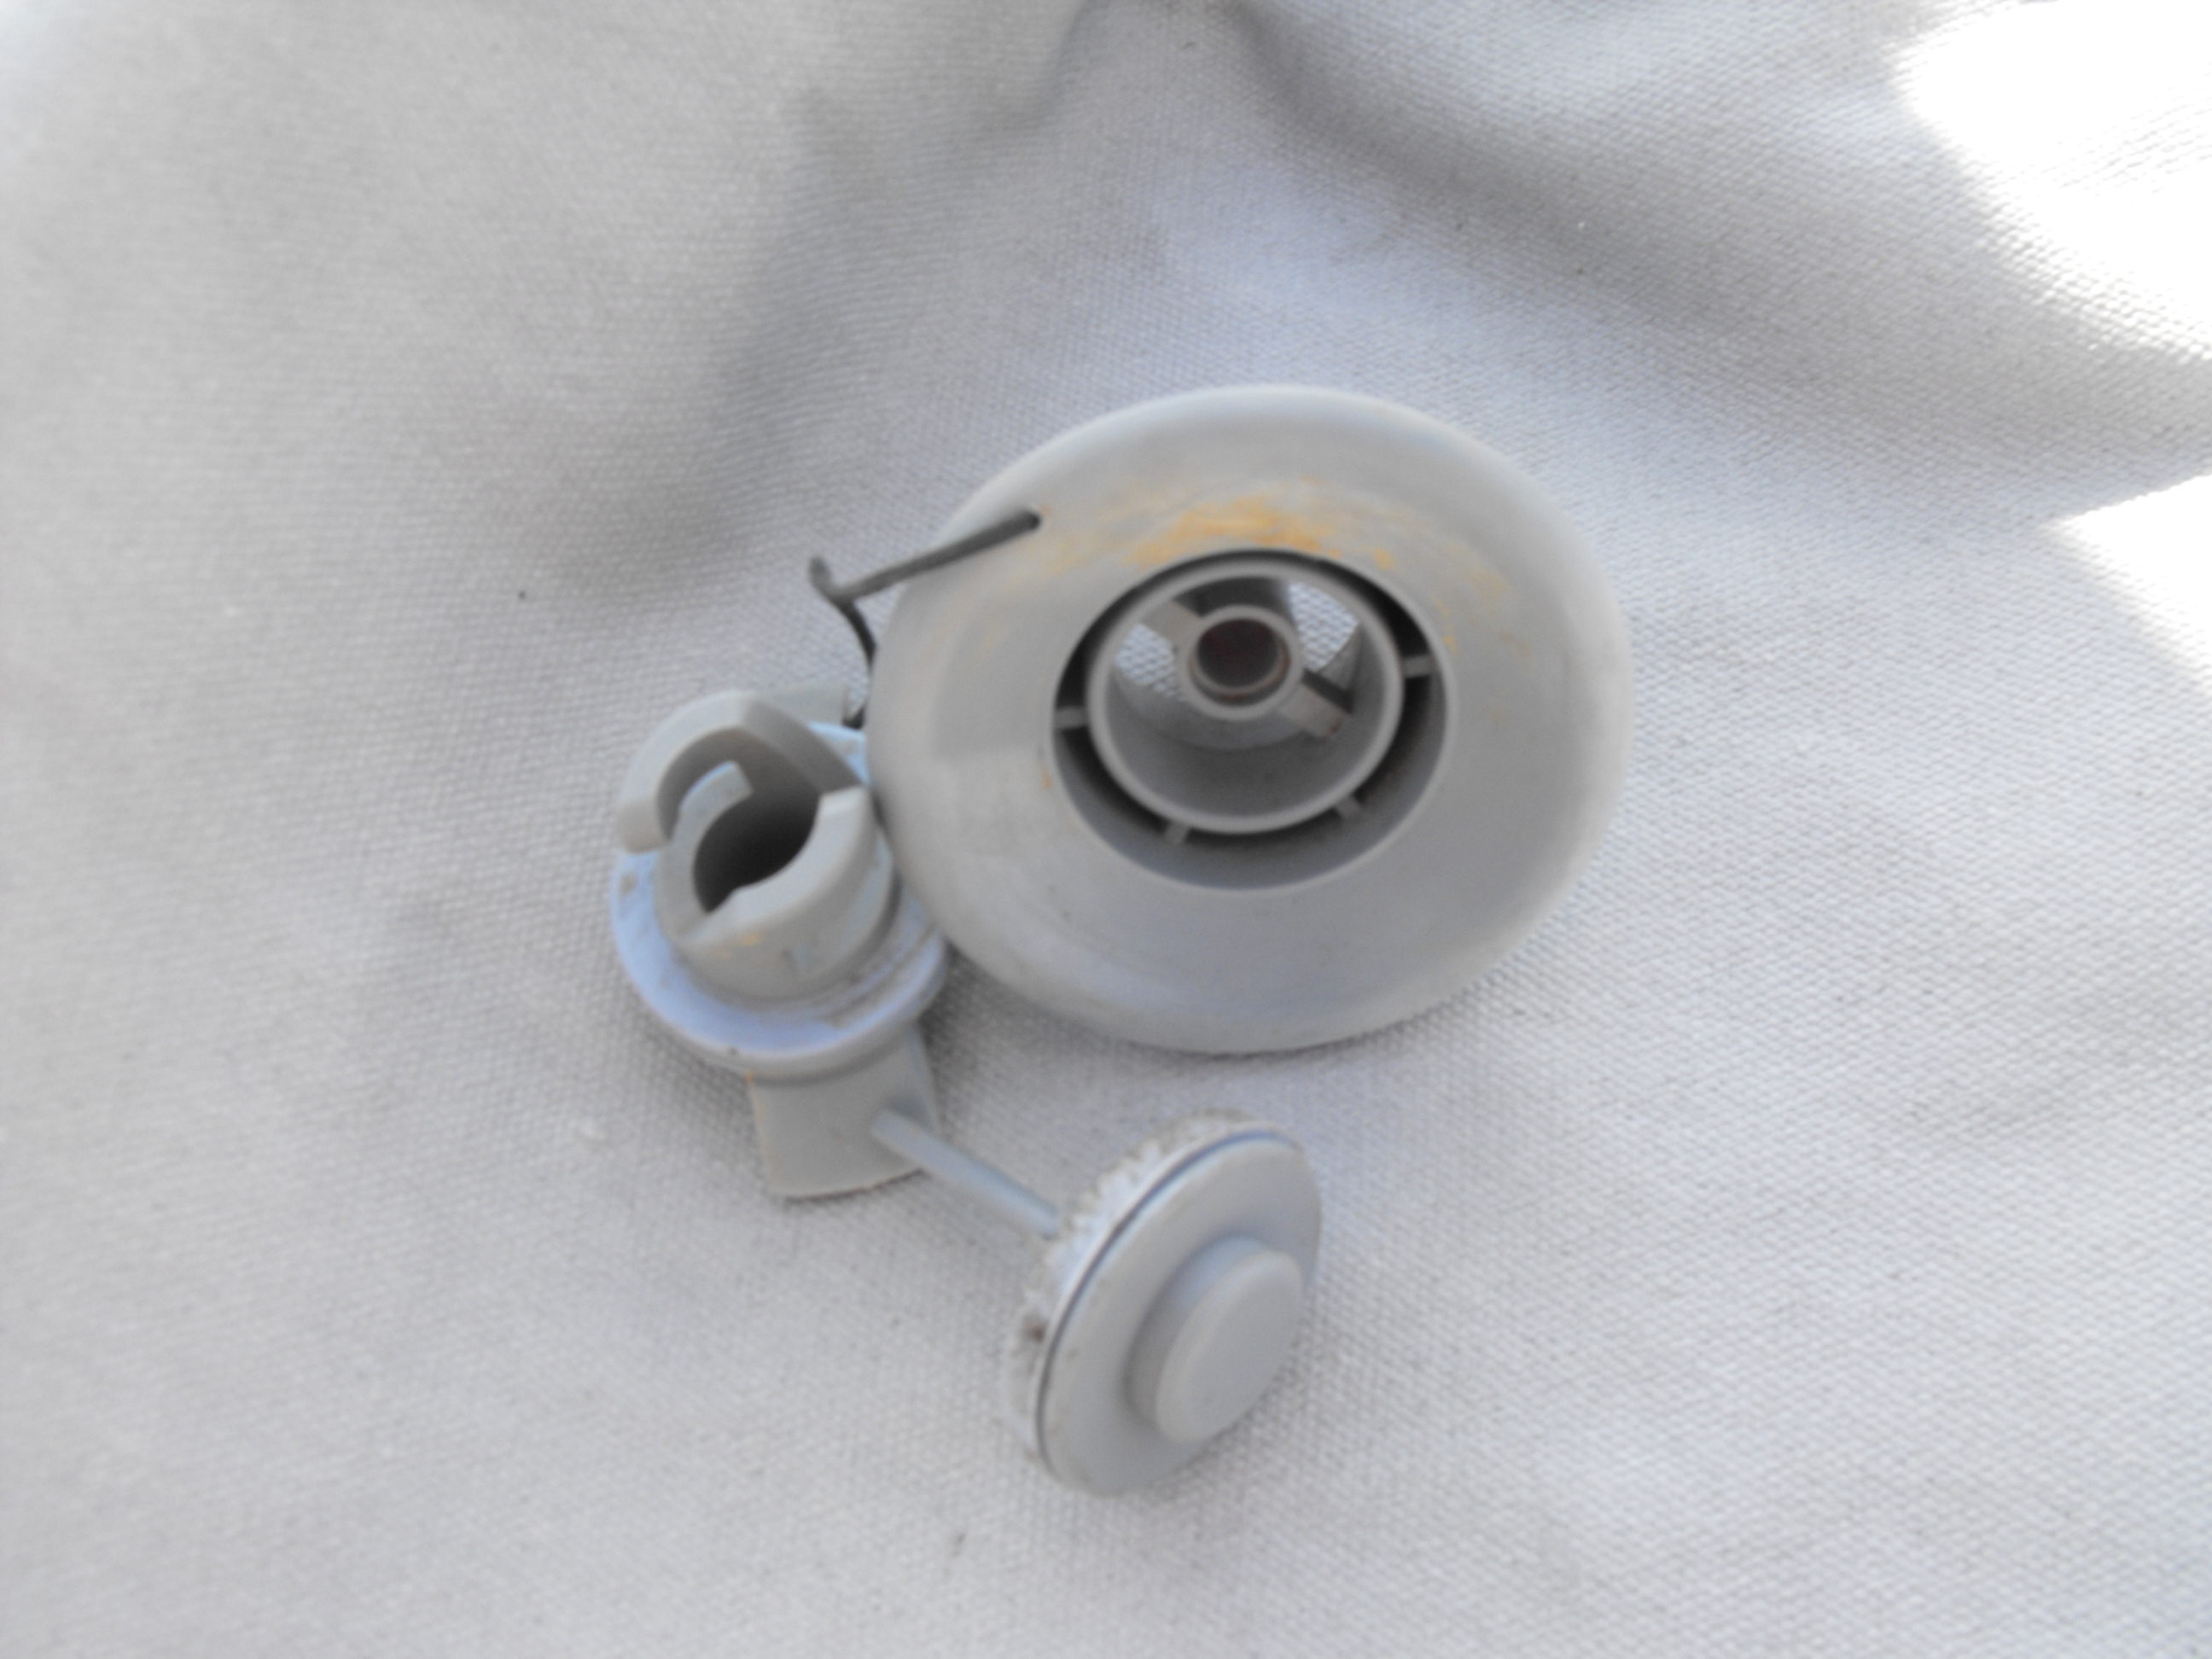
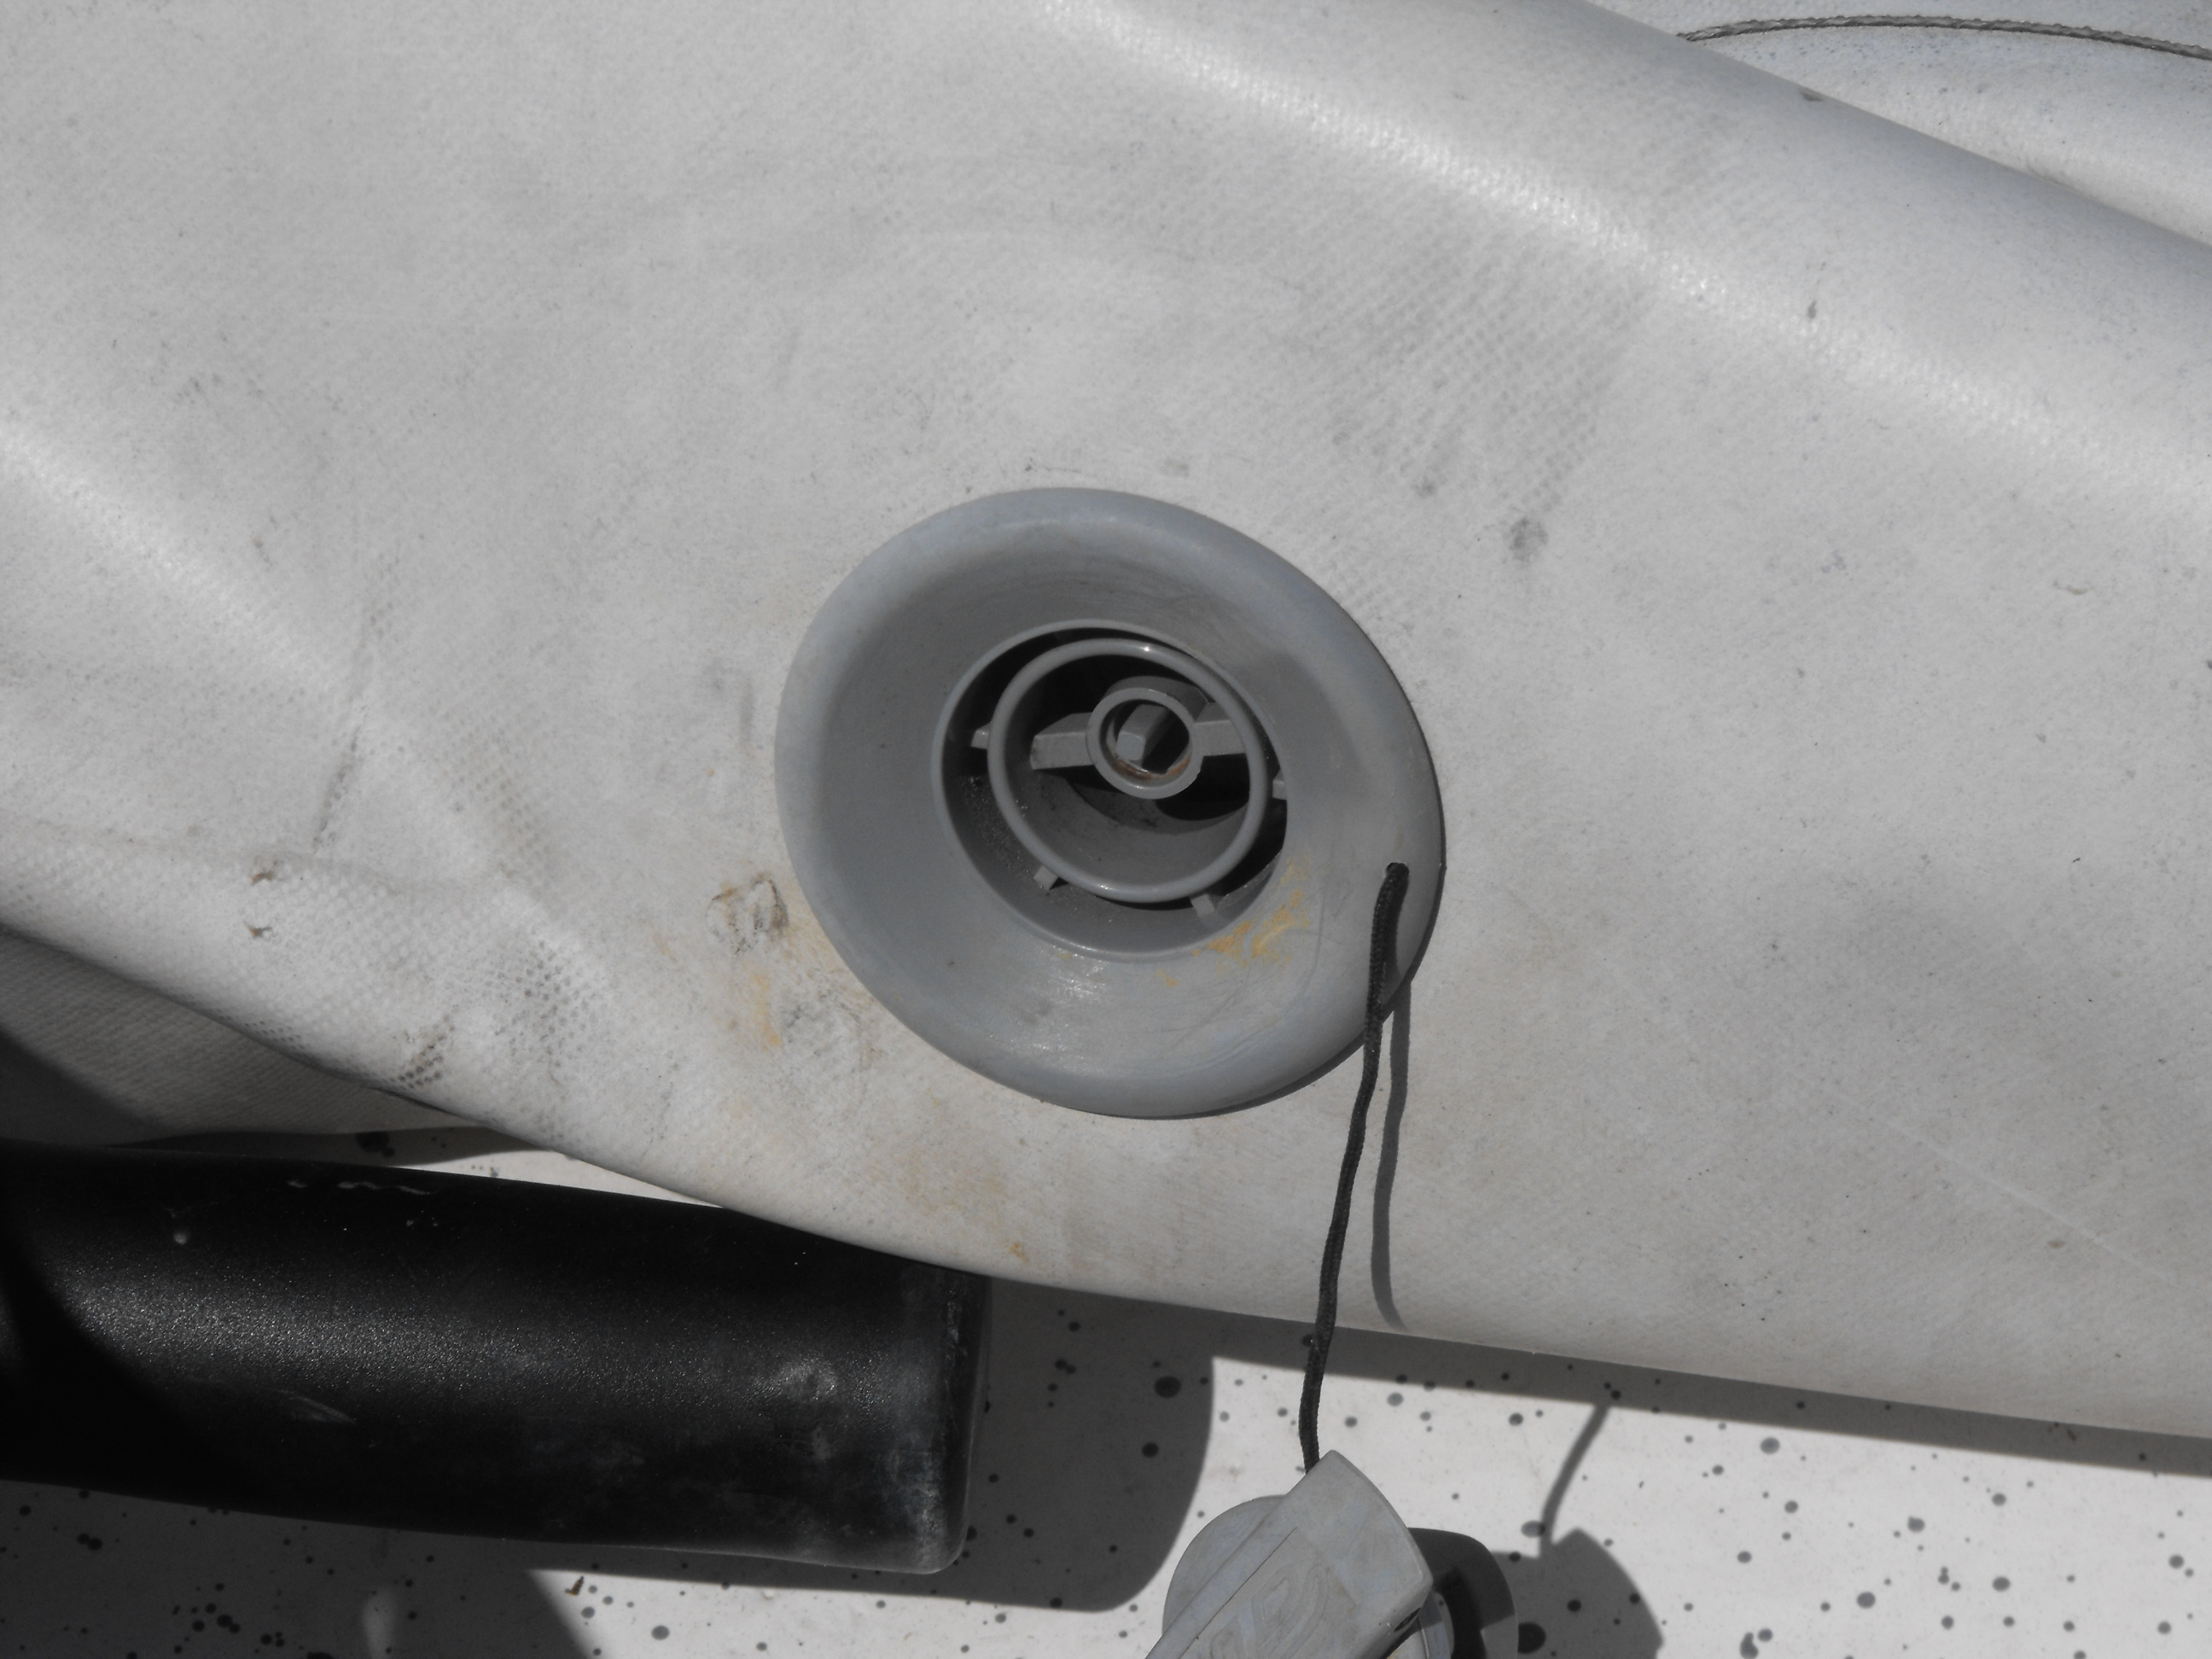 The defective valve, missing the red stem and spring |
On the left is picture of the defective Halkey-Roberts valve, missing the red stem and spring. At this point the valve had once more closed from the internal air pressure and the chamber was holding pressure or leaking very slowly. I talked with the AB dealer in Annapolis and was told the valves could not be repaired, but could easily be replaced. All I needed was a replacement valve and the tool used to install/de-install the valve. The tool is not absolutely necessary, but makes the process much easier, especially for someone who has never done it before. I purchased the tool and three valves from the dealer. |
| The valve unit consists of two pieces - the valve itself and
the base into which the valve is threaded. The base
resides inside the air chamber. On the right is one of the valve units after I unscrewed the valve from the base. When I replace the valve on the dinghy I will use the base that is already inside the chamber and just screw the new valve into that base. There are no sealants or adhesives used with these valves. Also in the picture is the tool used to install and de-install the valves. This is a very simple tool, just a metal tube with two teeth at one end that engage the valve and can be used to turn it to screw it into or out of the base. |
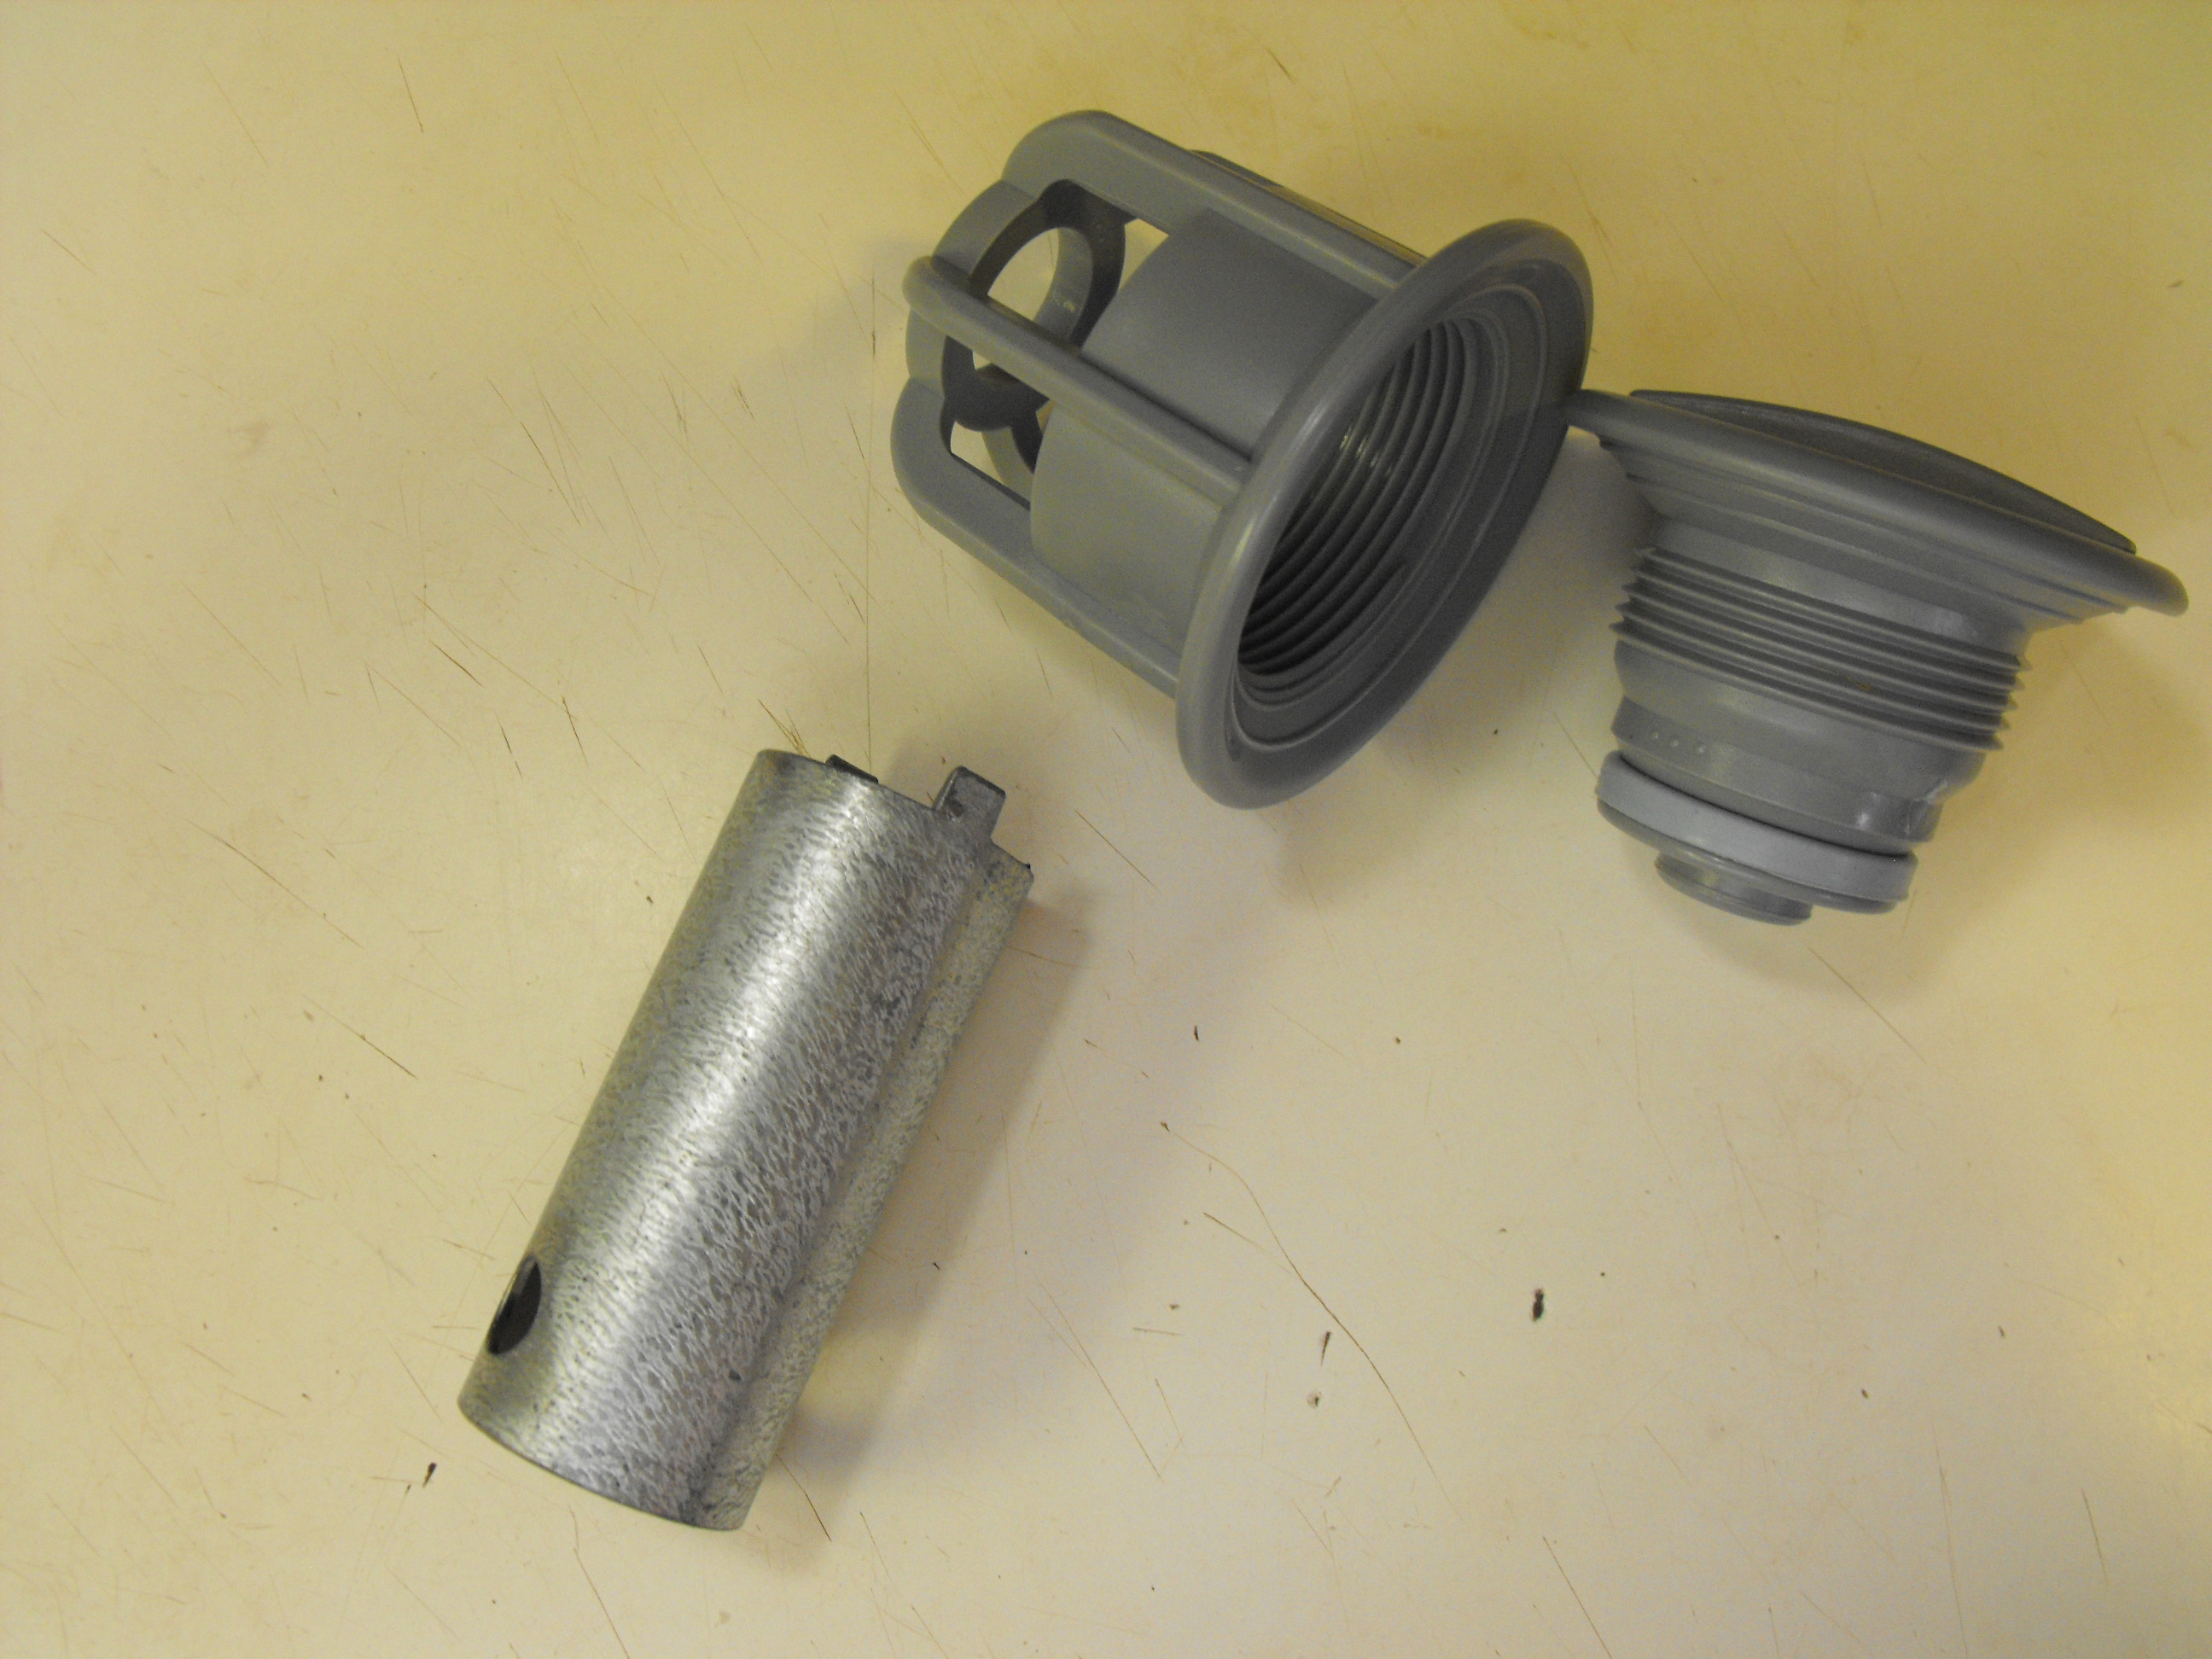 One Halkey-Roberts air valve unit (separated) and the install tool |
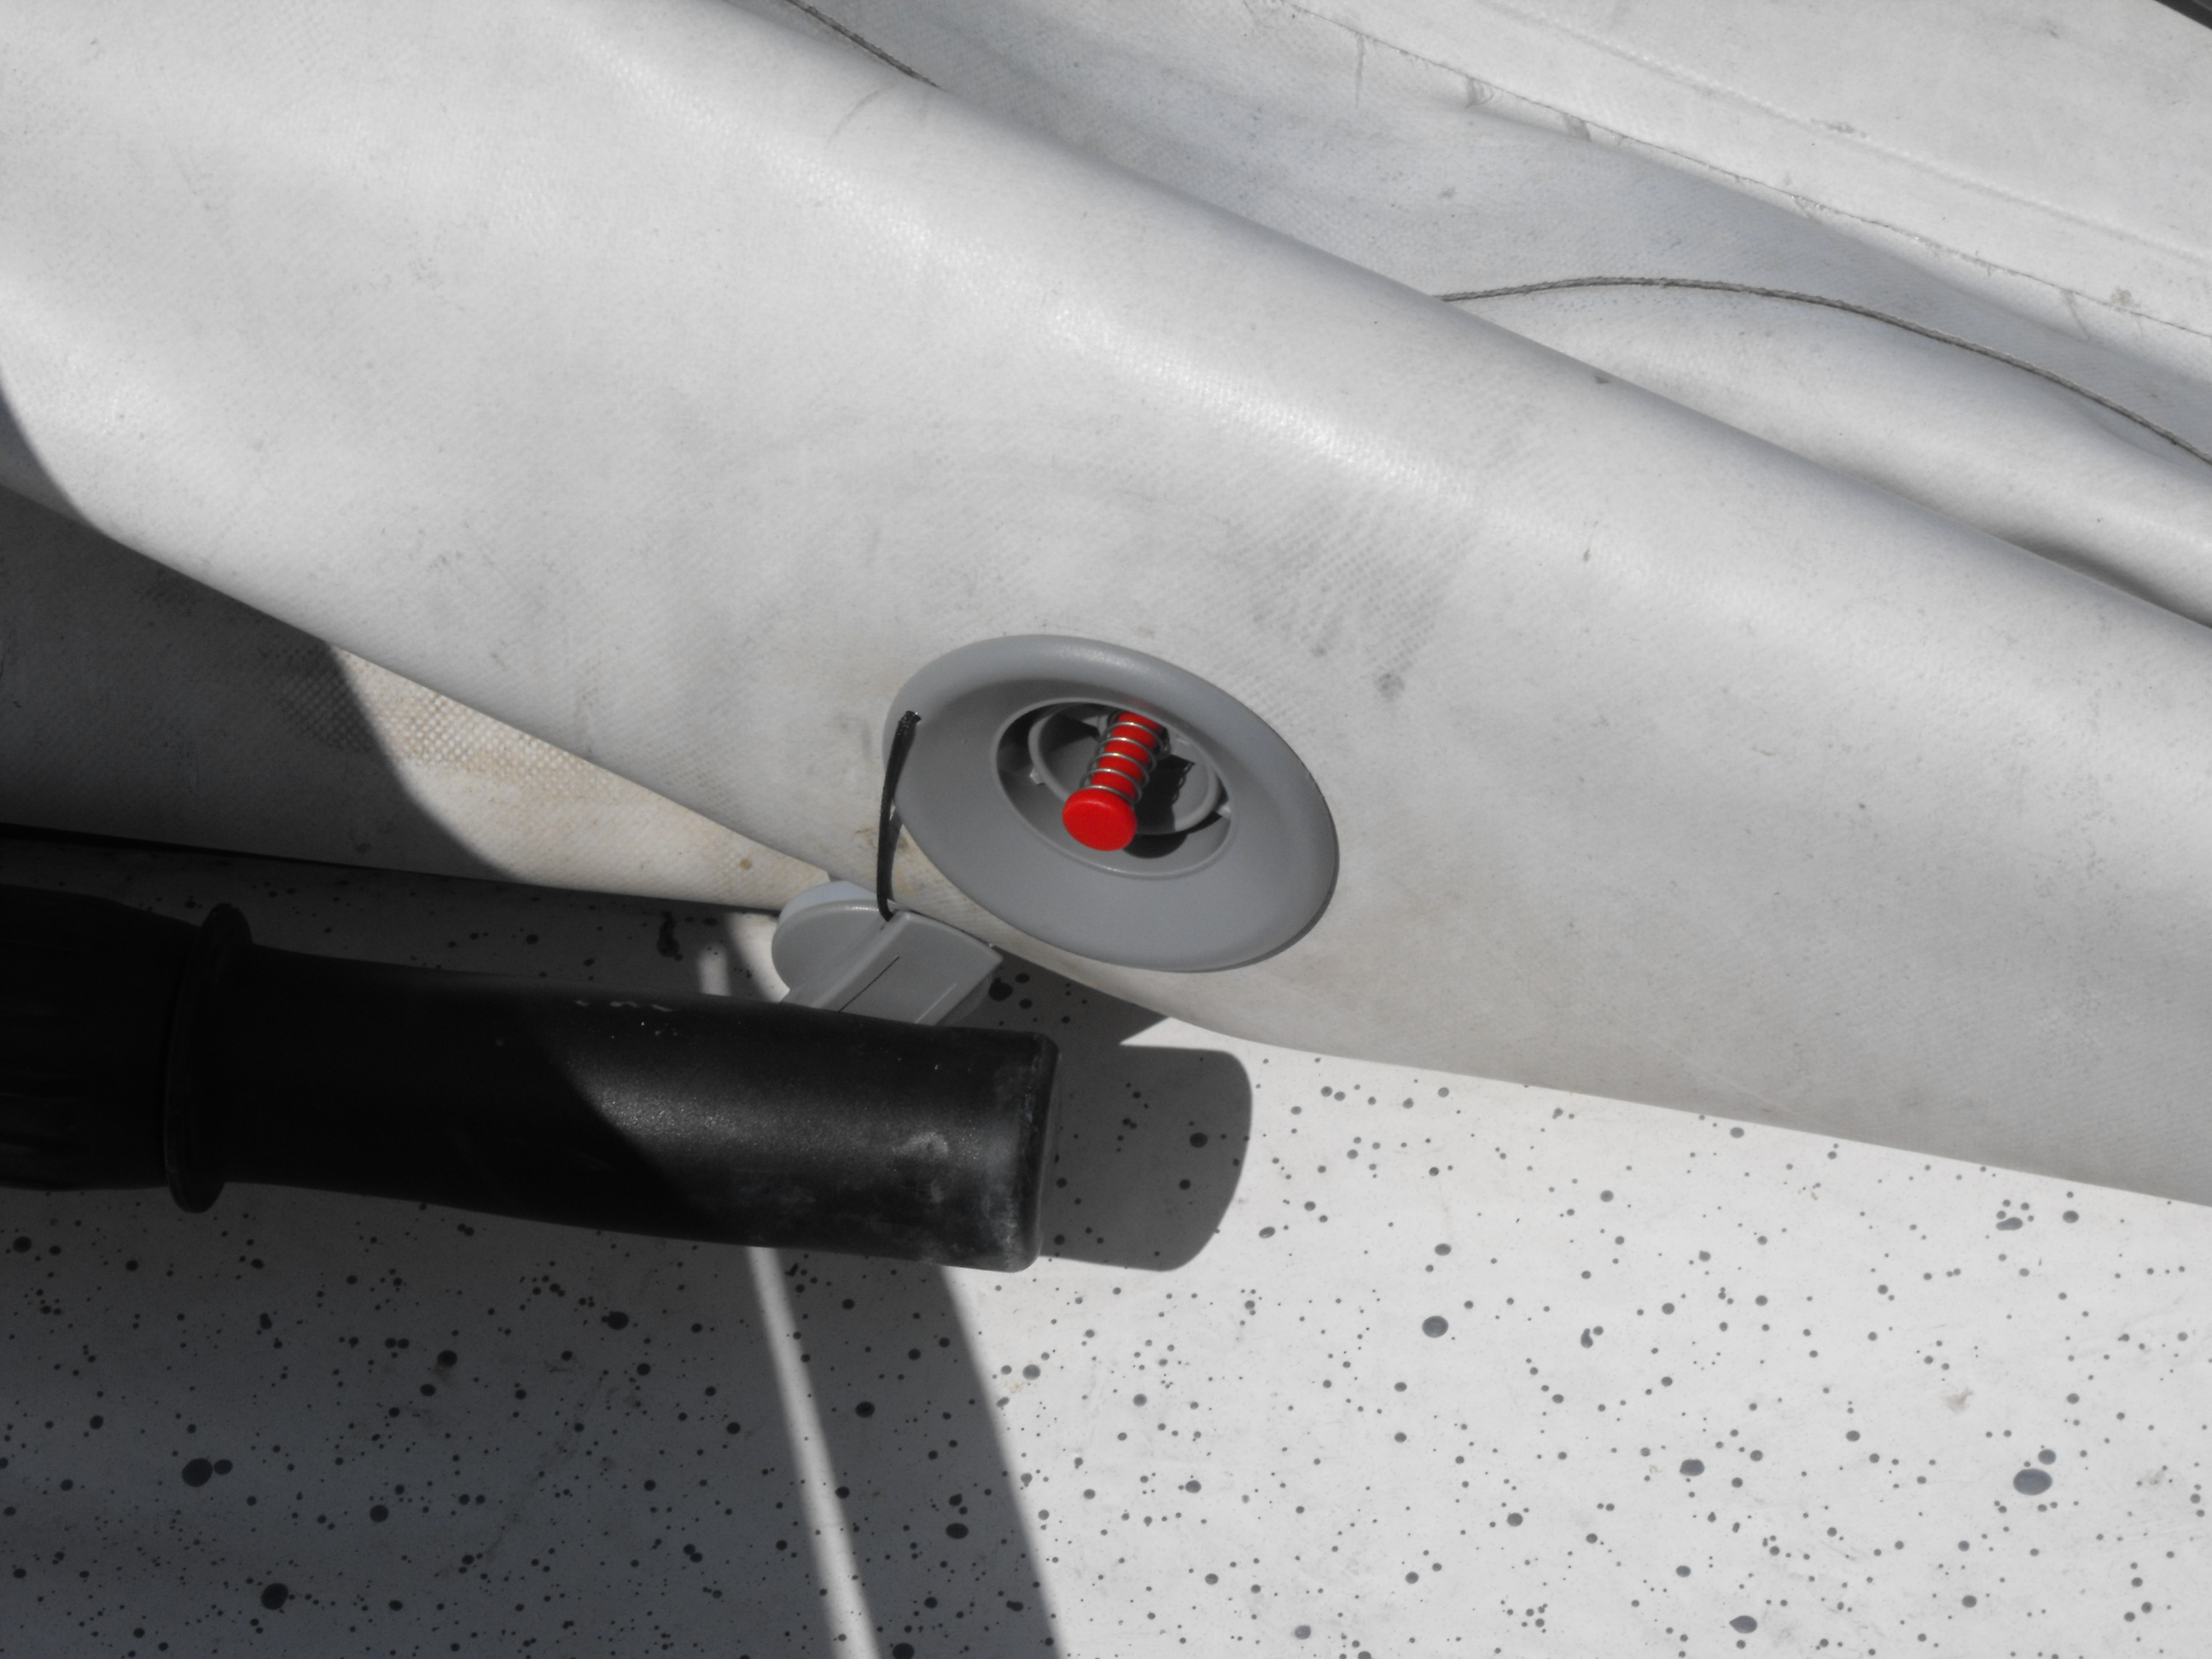 The new valve installed in the dinghy |
The first step was to remove the old valve from the
base. To start I left the chamber inflated. I
inserted a screw driver in the hole in the tool to provide
additional torque and turned the
valve enough to start the unthreading from the base.
Then I deflated the chamber. This was necessary to to allow me to grab the base from outside the chamber and hold it in place. Replacing the base would have likely required the use of a heat gun to soften the dinghy material so the base could be pulled out of the chamber and the new one inserted. Since there did not appear to be any problem with the base, I just replaced the valve. Holding the base in place, inside the chamber I screwed the new valve into the base, then tightened it with the tool and screw driver. |
| Then I inflated the bow chamber and tested it for a leak. |
 Bow chamber inflated. |
 Defective air valve. |
On the left is the removed air valve, missing the stem and spring. |
| This is the valve seat that seals the valve when the spring
on the missing stem forces it up agains the bottom of the valve
housing. Air pressure within the chamber can also press
this seat against the housing and provide a partial seal of the
valve. The missing stem piece fits over the stem on the seat and somehow is fastened to this seat. That fastening is what is broken in this valve. This appears to be an infrequent, but not uncommon problem with these valves. I would advise anyone with an AB or other inflatable that uses these Halkey-Roberts valves to keep a spare valve onboard and the tool in the tool box. In 2013 the valve stem on the starboard tube broke. I'm now down to one spare valve. |
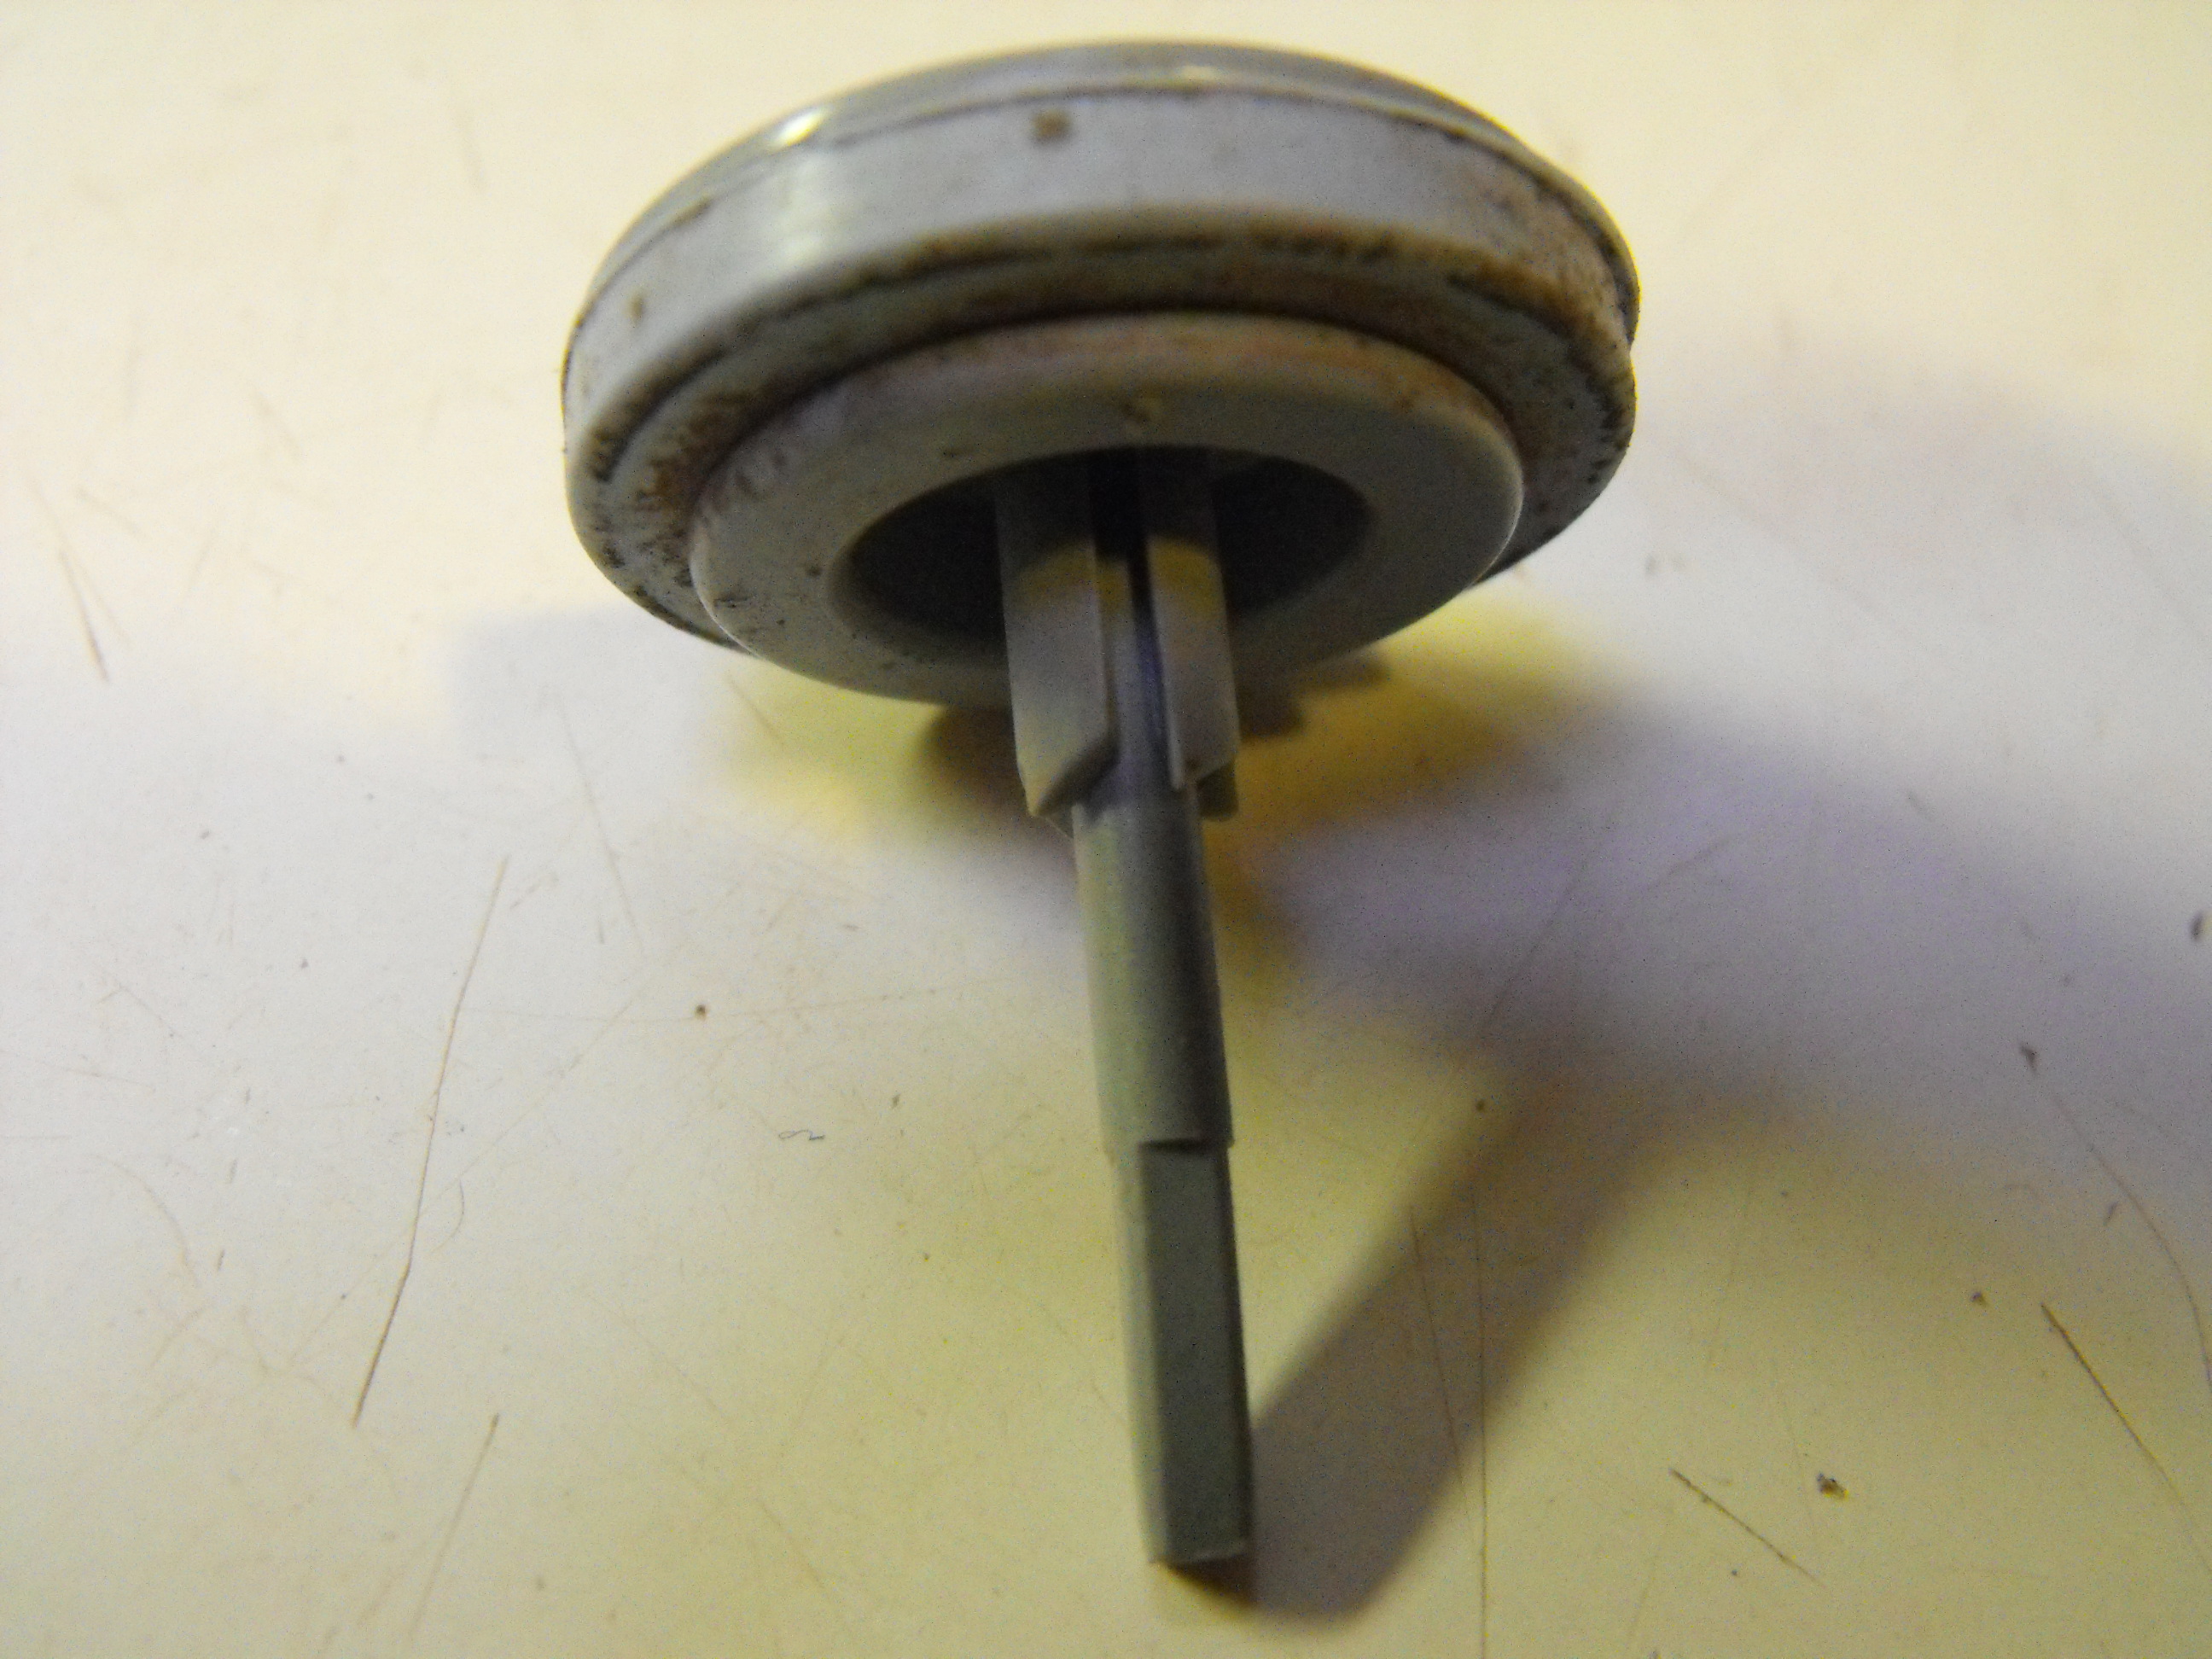 The Valve Seat |
| Inflating the Dinghy | |
| Not really a maintenance subject, but I didn't have a better place for this subject. I normally store my 9' AB RIB on deck, deflated. When I come to an anchorage or mooring field where I will need the use of the dinghy I have to first inflate the beast. | |
| My normal tool for inflating the dinghy is the dual action
hand pump shown on the right. This is an effective air
pump as it pumps air on both the down and up stroke, but it
still takes a long time (and a lot of backache) to fully inflate
the dinghy. I also have the foot pump that is
standard equipment with most inflatables. That's
easier on the back, but much slower than that hand pump, as it
only inflates on the down stroke. I've been looking for an electric pump that would do most of the inflation work for me. |
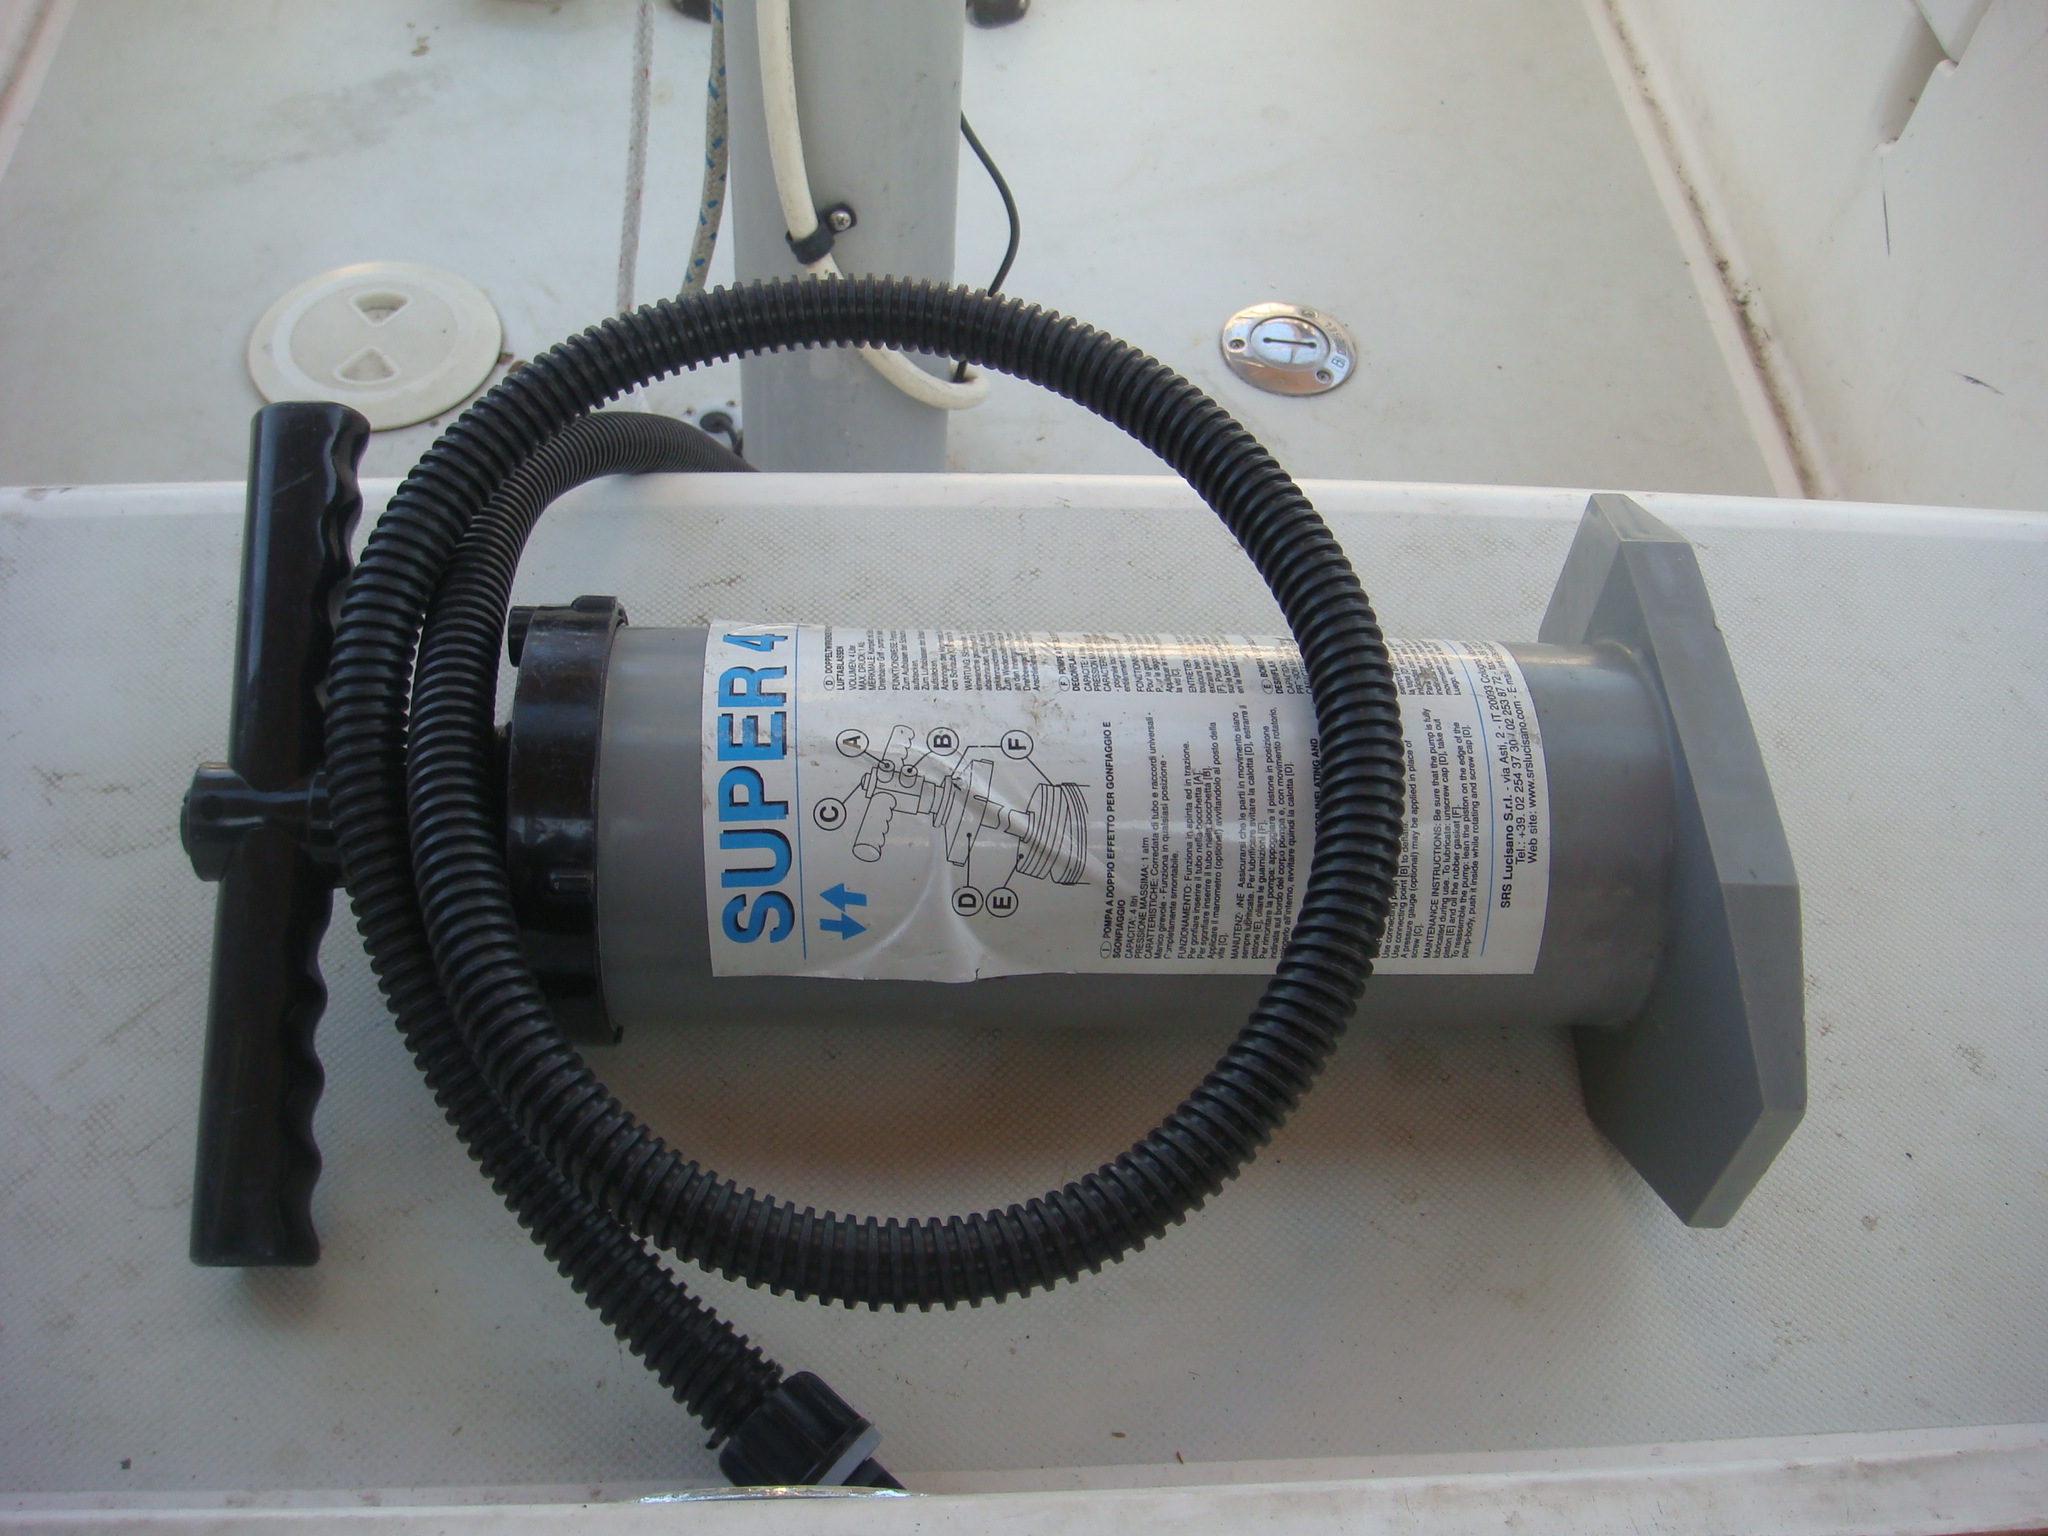 Dual Action Hand Pump |
 Battery Powered Air Pump |
On the left is a battery powered air pump sold by West
Marine. A friend recommended this pump as he uses it to
inflate his dinghy (not a RIB). I was somewhat skeptical
given the small size of the pump, but I purchased one anyway. I was partially right, the small pump will not inflate the dinghy tubes as effectively as the hand pump. The hand pump generates enough pressure to push air through the valve, even when it is closed. This allows the pump hose to be connected and disconnected from the valve without allowing very much air to escape. The battery powered pump does not generate enough pressure to compress the spring in the valve, described above. I was ready to give away this pump, but decided to give it one more test with the dinghy valve openned. I was amazed the little pump filled one tube in less than a minute. Of course I lost a lot of air while removing the pump from the valve and closing the valve. So I still had to use the hand pump to finsh the job, but that was only a minute or so of hand pumping, not 10 or 15 minutes. |
| So I had a partial success, but I was still looking for an electric pump that could inflate the tubes with the valves closed. Other friends recommended using a shop vacuum blower feature. I had a bucket shop vac (fits on a 5-gal bucket), and I decided to give it a shot. |
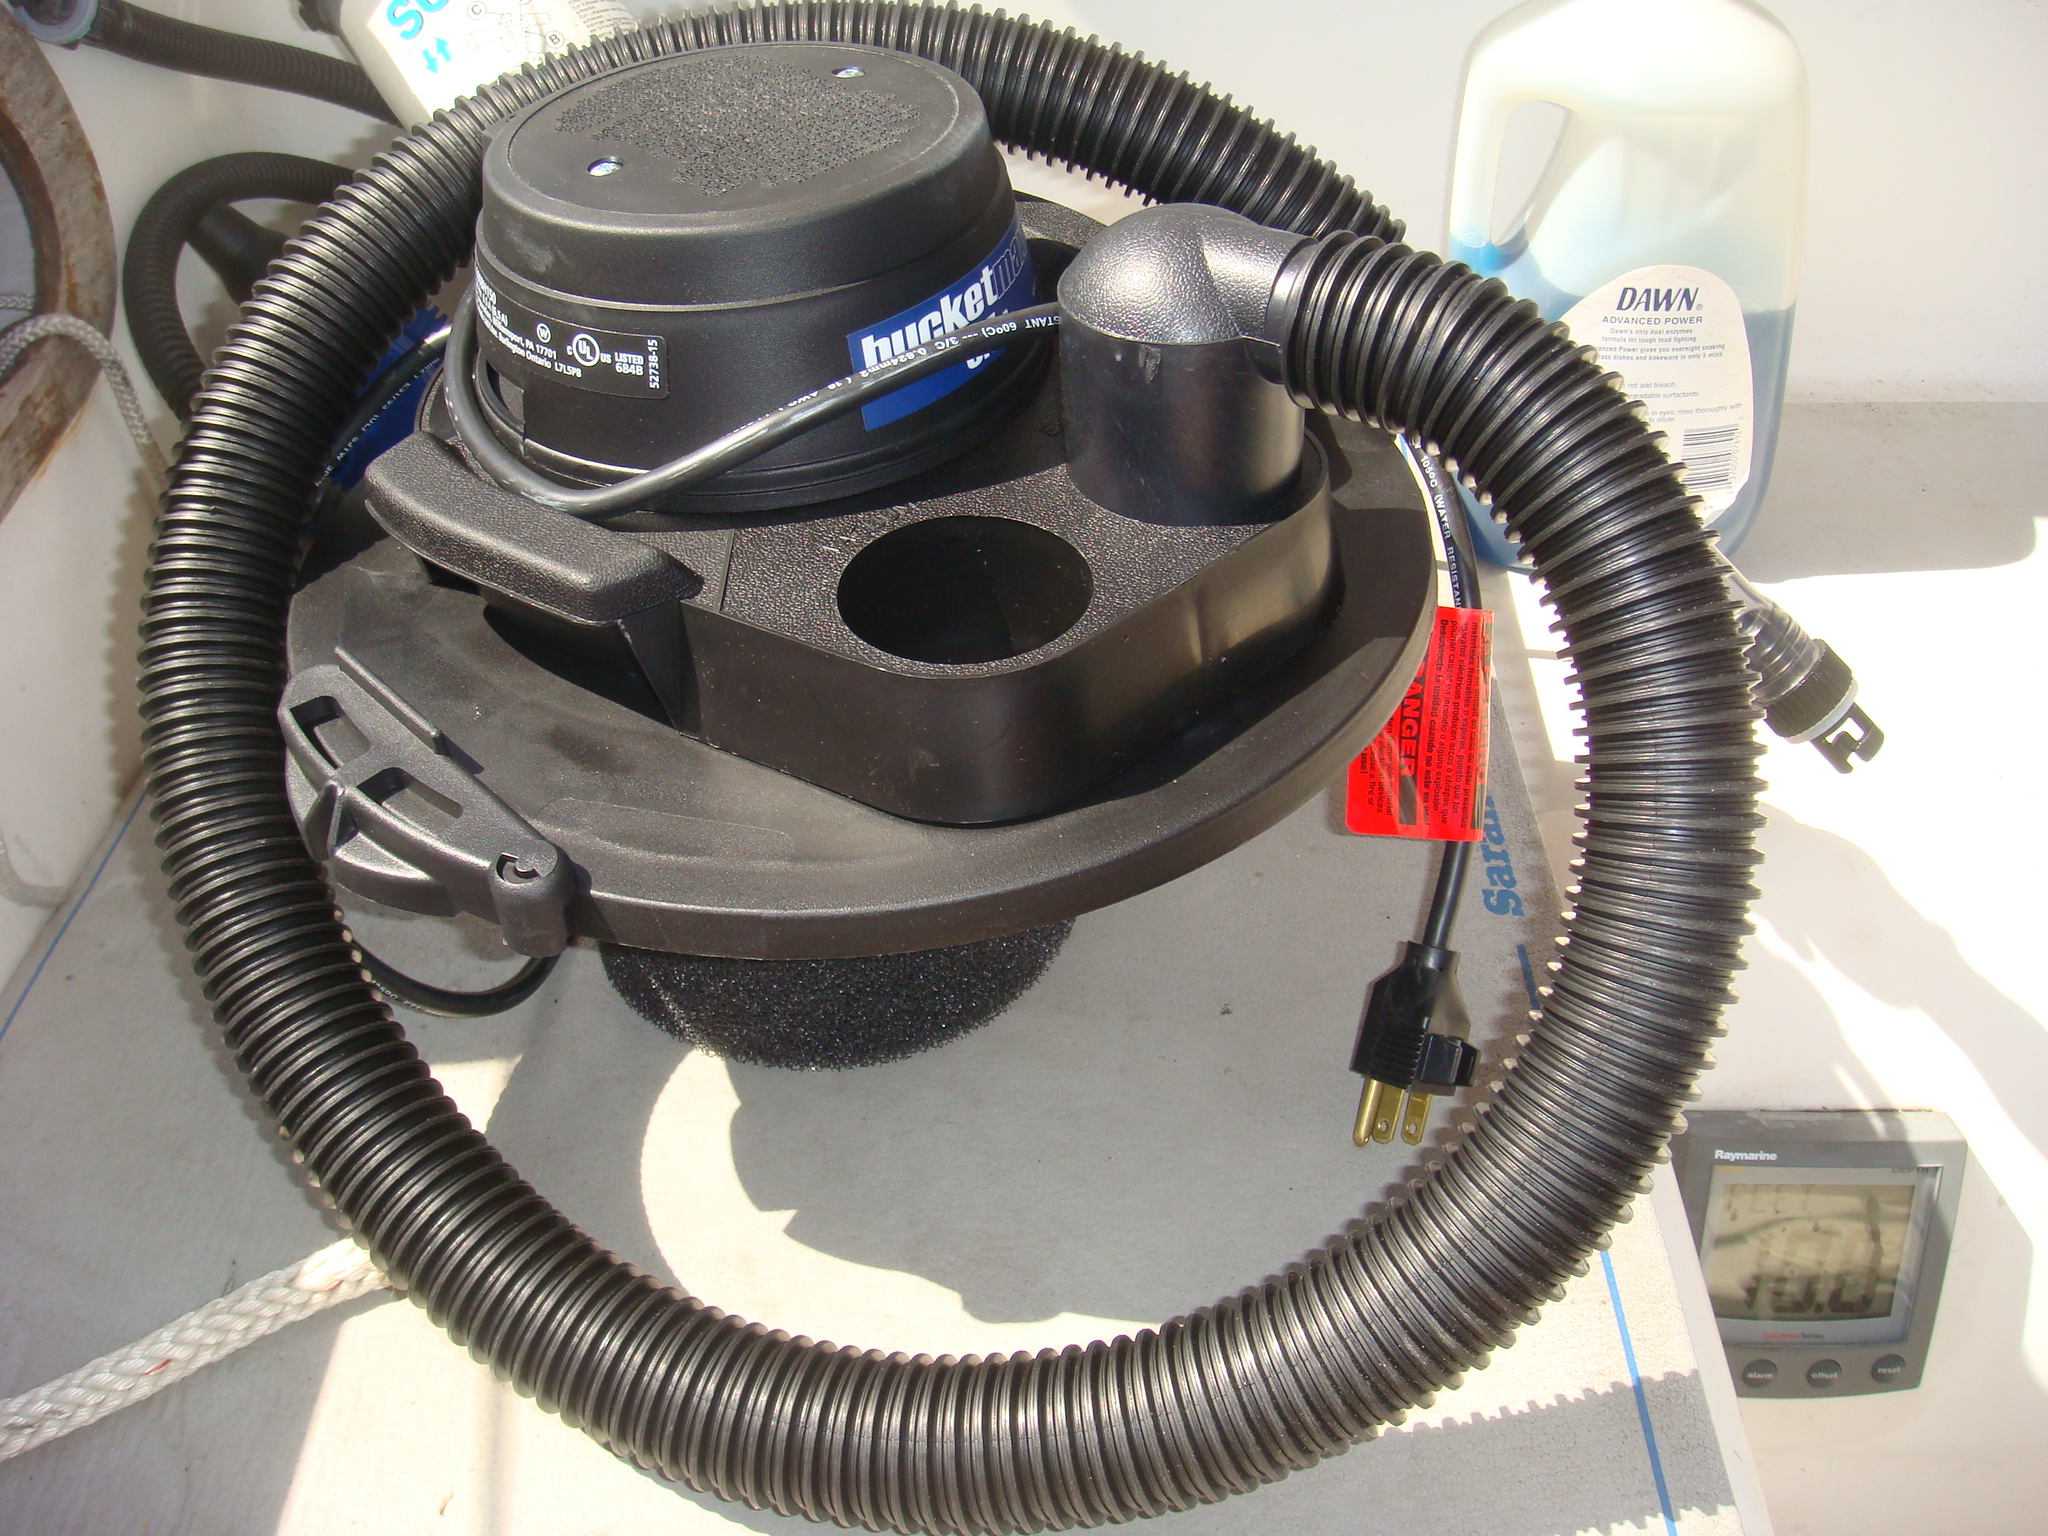 Bucket Shop Vac to Inflate the Dinghy |
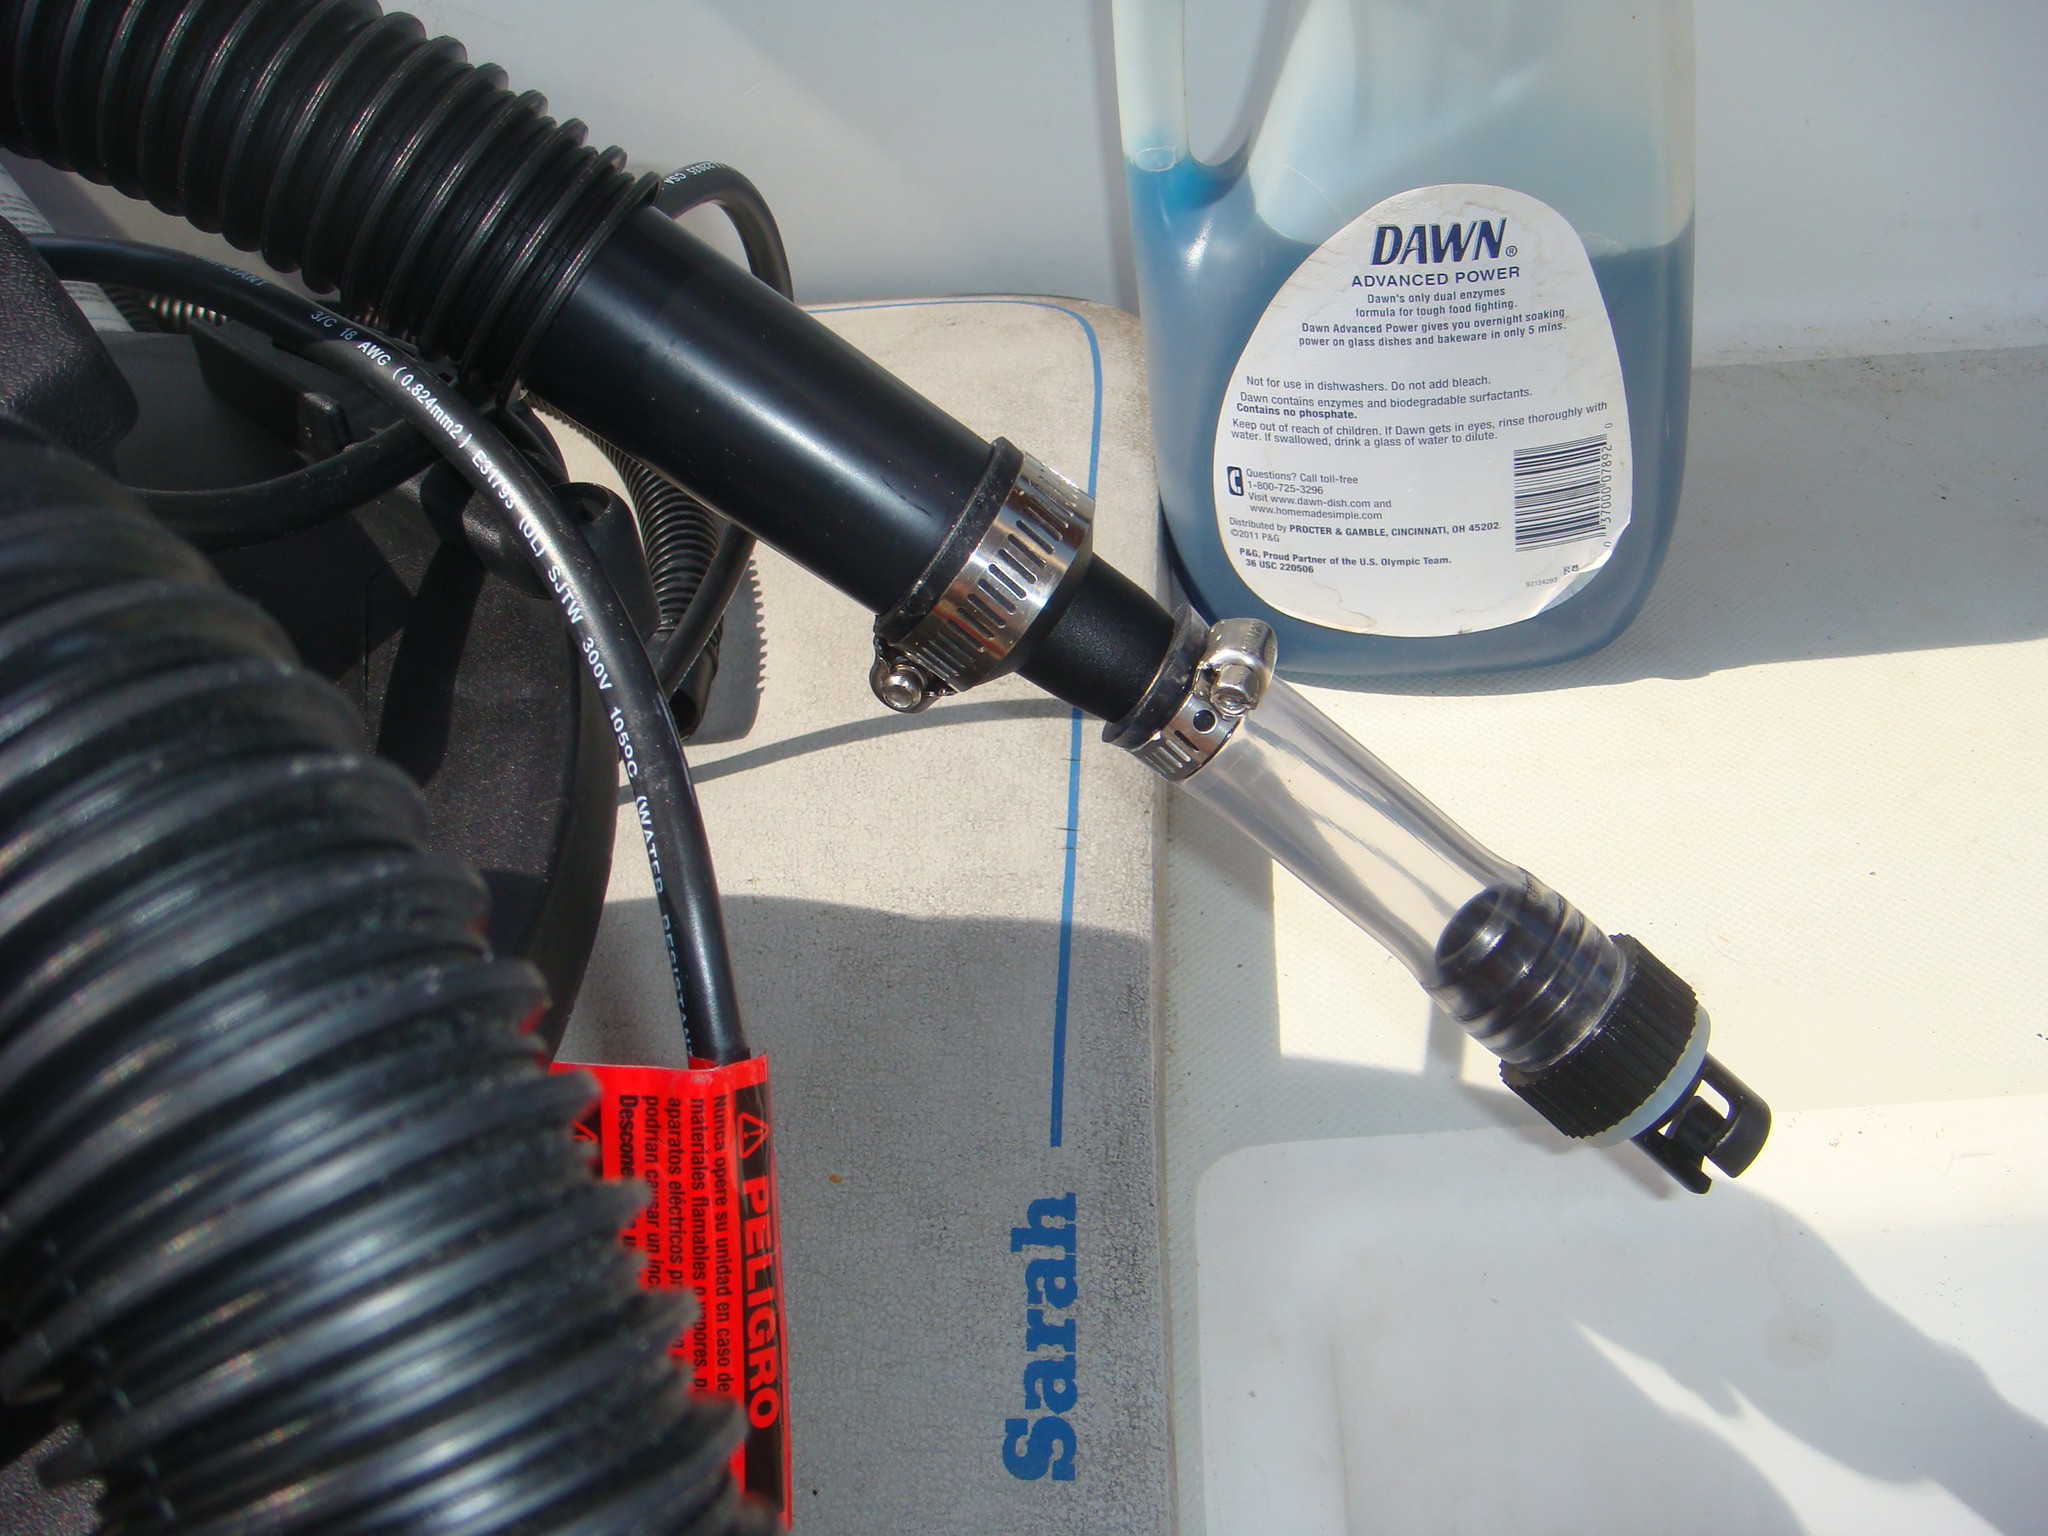 Adapting the Vac Hose to the Dinghy Valve |
First I had to adapt the hose on the shop vac to the fitting
for the dinghy valve. I used one of the adapters that came
with the battery powered pump to reduce the vac hose to 3/4" OD,
which fits the short hose on the dinghy valve fitting. This is a much more powerful pump than the battery powered one, but it still had difficulty pushing air through a closed valve. It will get the job done, but not very fast - about the same speed as the hand pump. At least I can sit down and relax while the dinghy is being inflated. It also does not completely inflate the dinghy. I still have to give the hand pump a dozen or so pumps to finish the job. |
| So I still haven't found a
complete solution. If I'm inflating the dinghy from an
evacuated state I use the shop vac except if I don't want to or
can't start the generator for AC power. Then I use
the battery powered pump. I finally use the hand or foot
pump to fully inflate the dinghy and to maintain inflation. I see that West Marine sells an expensive AC air pump. That might do the job, but right now I have more pumps on board than I want and I can inflate the dinghy with only minor back pains. |
|
| Dinghy Registration | |
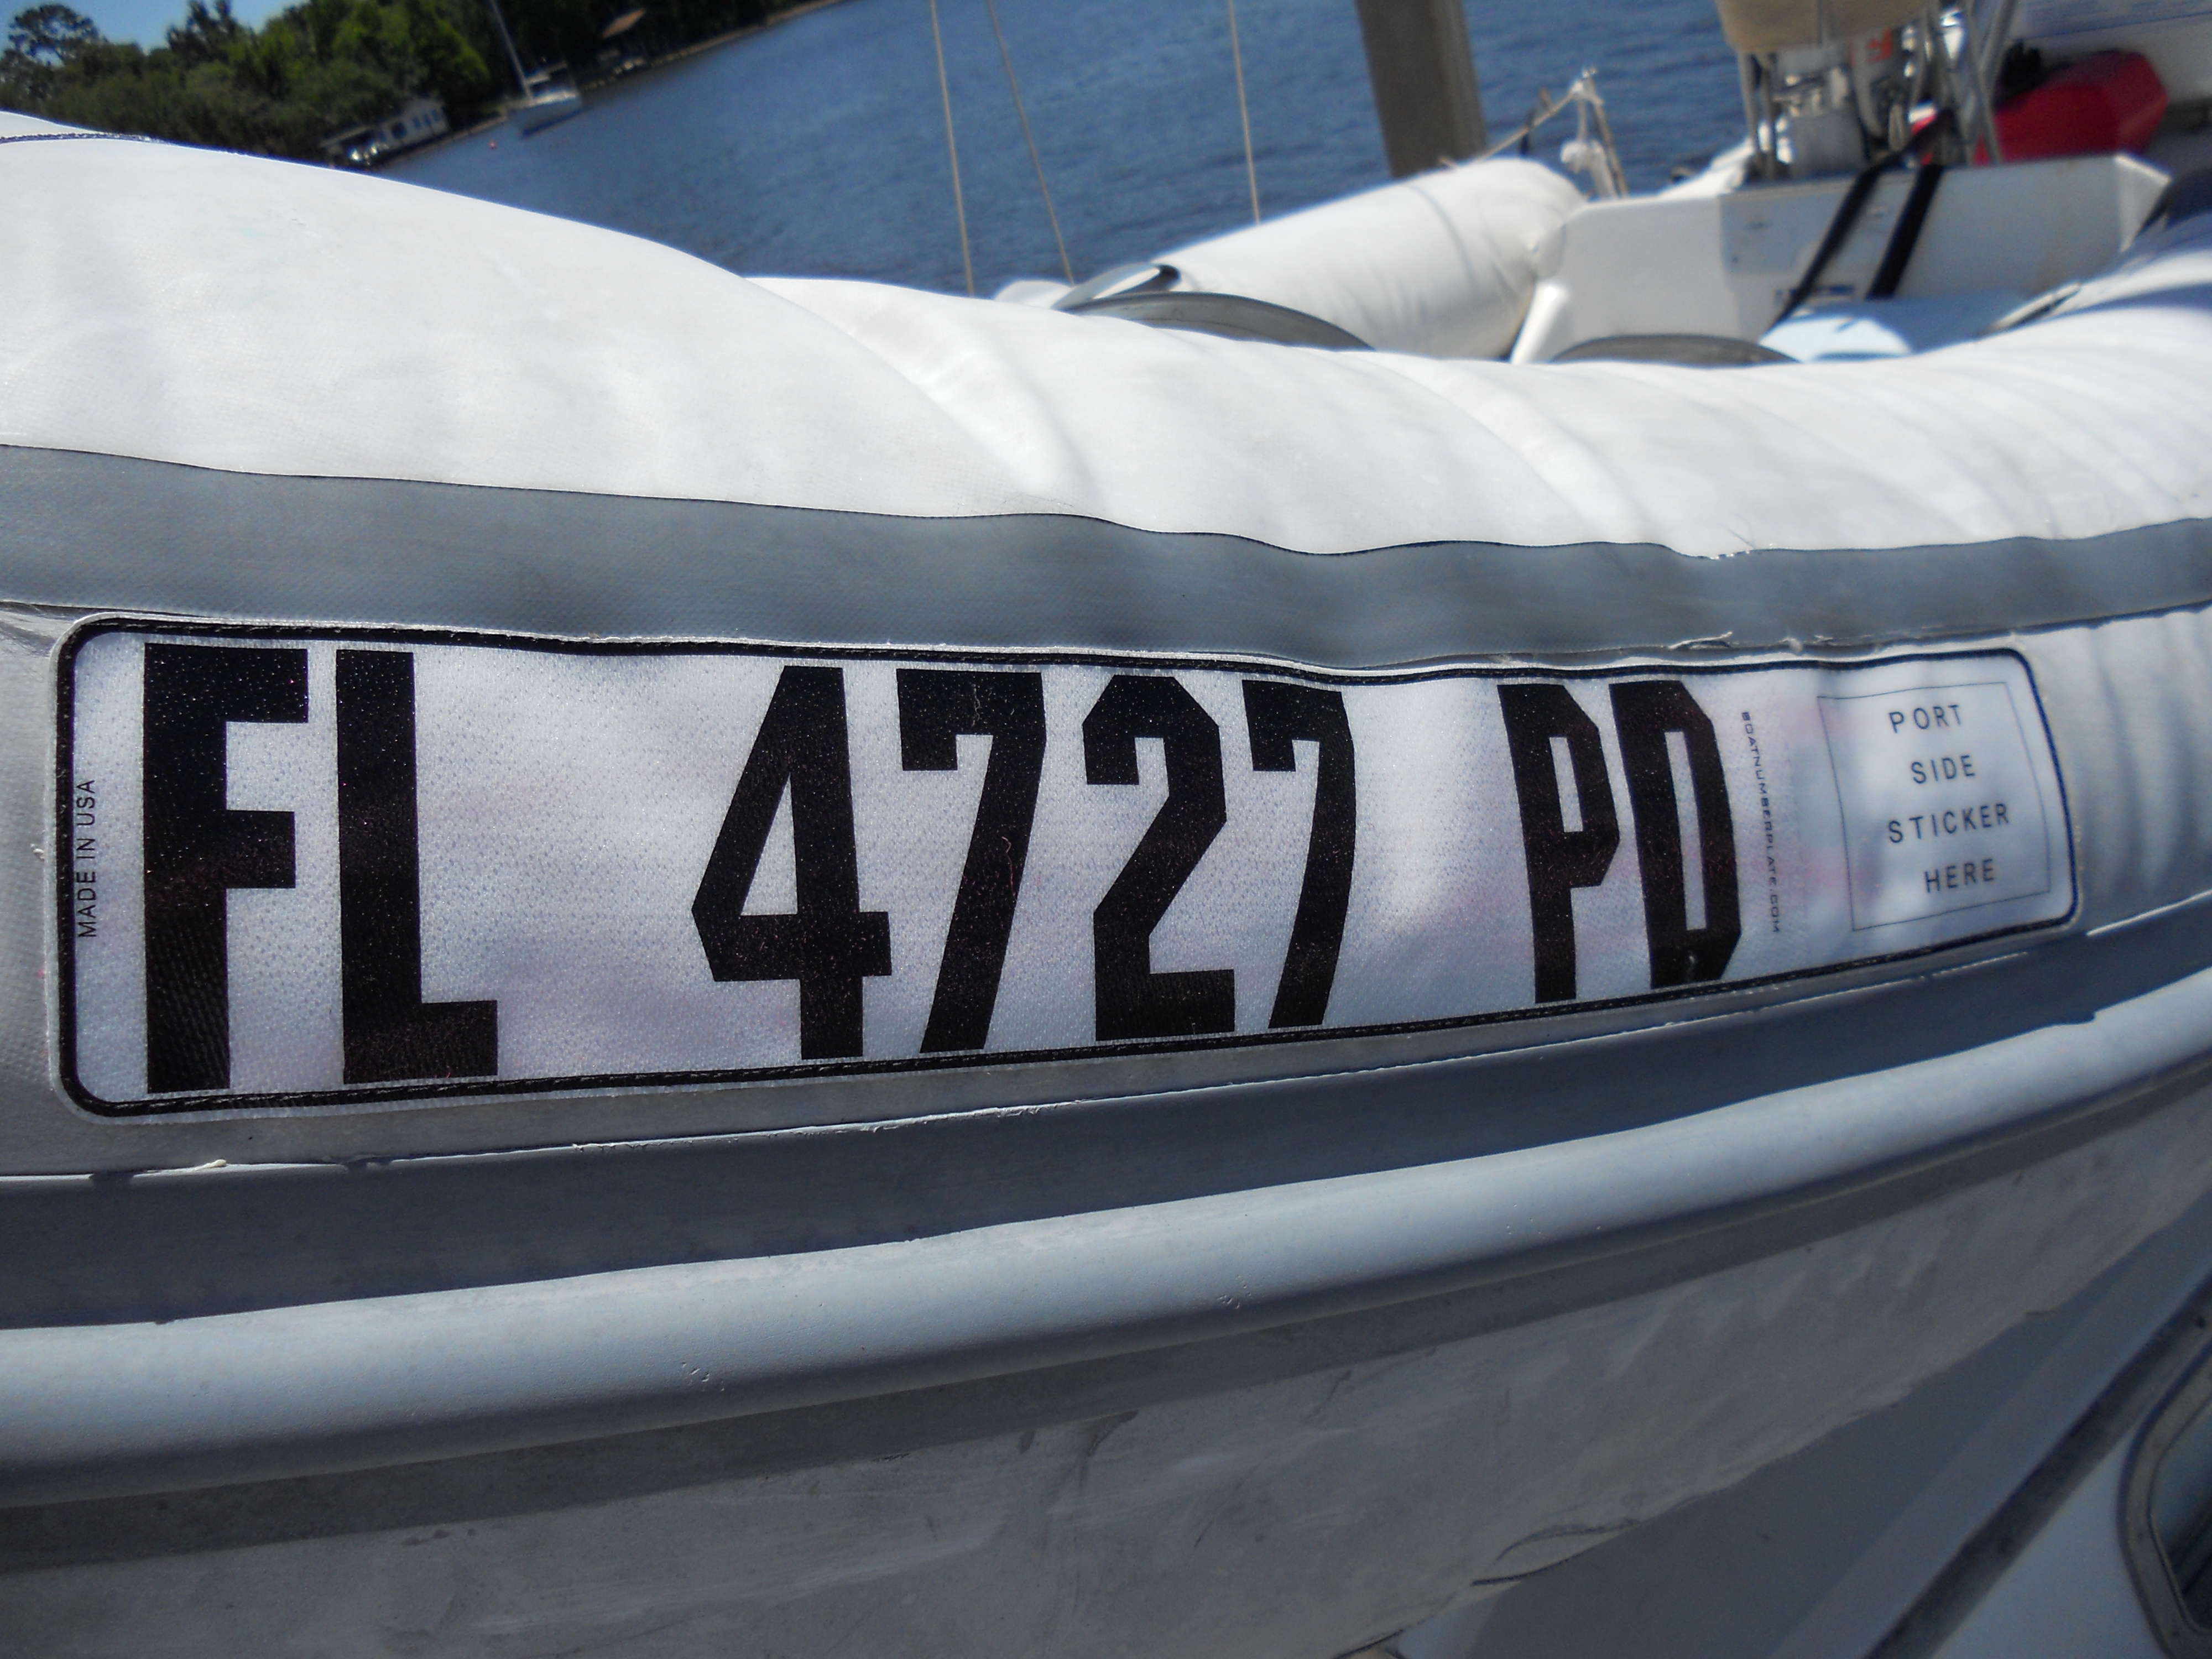
| In 2011, after 7 years as a resident of Florida (Green Cove Springs), I finally registered both Sarah and the AB Dinghy in that state. Since I've owned both vessels they have been registered in the State of Maryland. Florida is very strict about their law that 90 days in the state and the vessel must be registered in Florida. So having spent the winter (6 months) in Jacksonville I decided to bite the bullet and change the registration. It cost me about $250 to register Sarah, due to the very high Florida registration fee ($135) and the difference in tax assessed to boat purchases in the two states. Registering the dinghy cost very little, but I do have to display the Florida registeration numbers and sticker. I used decals to apply the Maryland numbers on the dinghy when it was new in 2003 and they have lasted pretty well. I needed some way to cover the old numbers with the new. | |
 Port Side Numbers |
After
looking at several ways to cover the old numbers I finally settled on a
product from BoatNumberPlate.com
(can be purchased through West Marine and other retailers).
These are flexible plates with the registration number imprinted. The
plates can be made out of either Hypalon or PVC. They are as flexible
as the inflation tubes on the dinghy and should last through multiple
deflations and inflations. In Florida there is only one sticker and it is affixted to the port side. So the port side plate has room for that sticker. |
| When
I applied the Maryland numbers on the dinghy, my spacing was a little wider
than that on the plates, so the plates do not entirely cover the old
registration numbers. The port side plate, with the place for the
sticker, is long enough to cover the old registration as shown above. However, the starboard plate, without the sticker, leaves a portion of the old registration visible. I'll probably just let those old number fade away. |
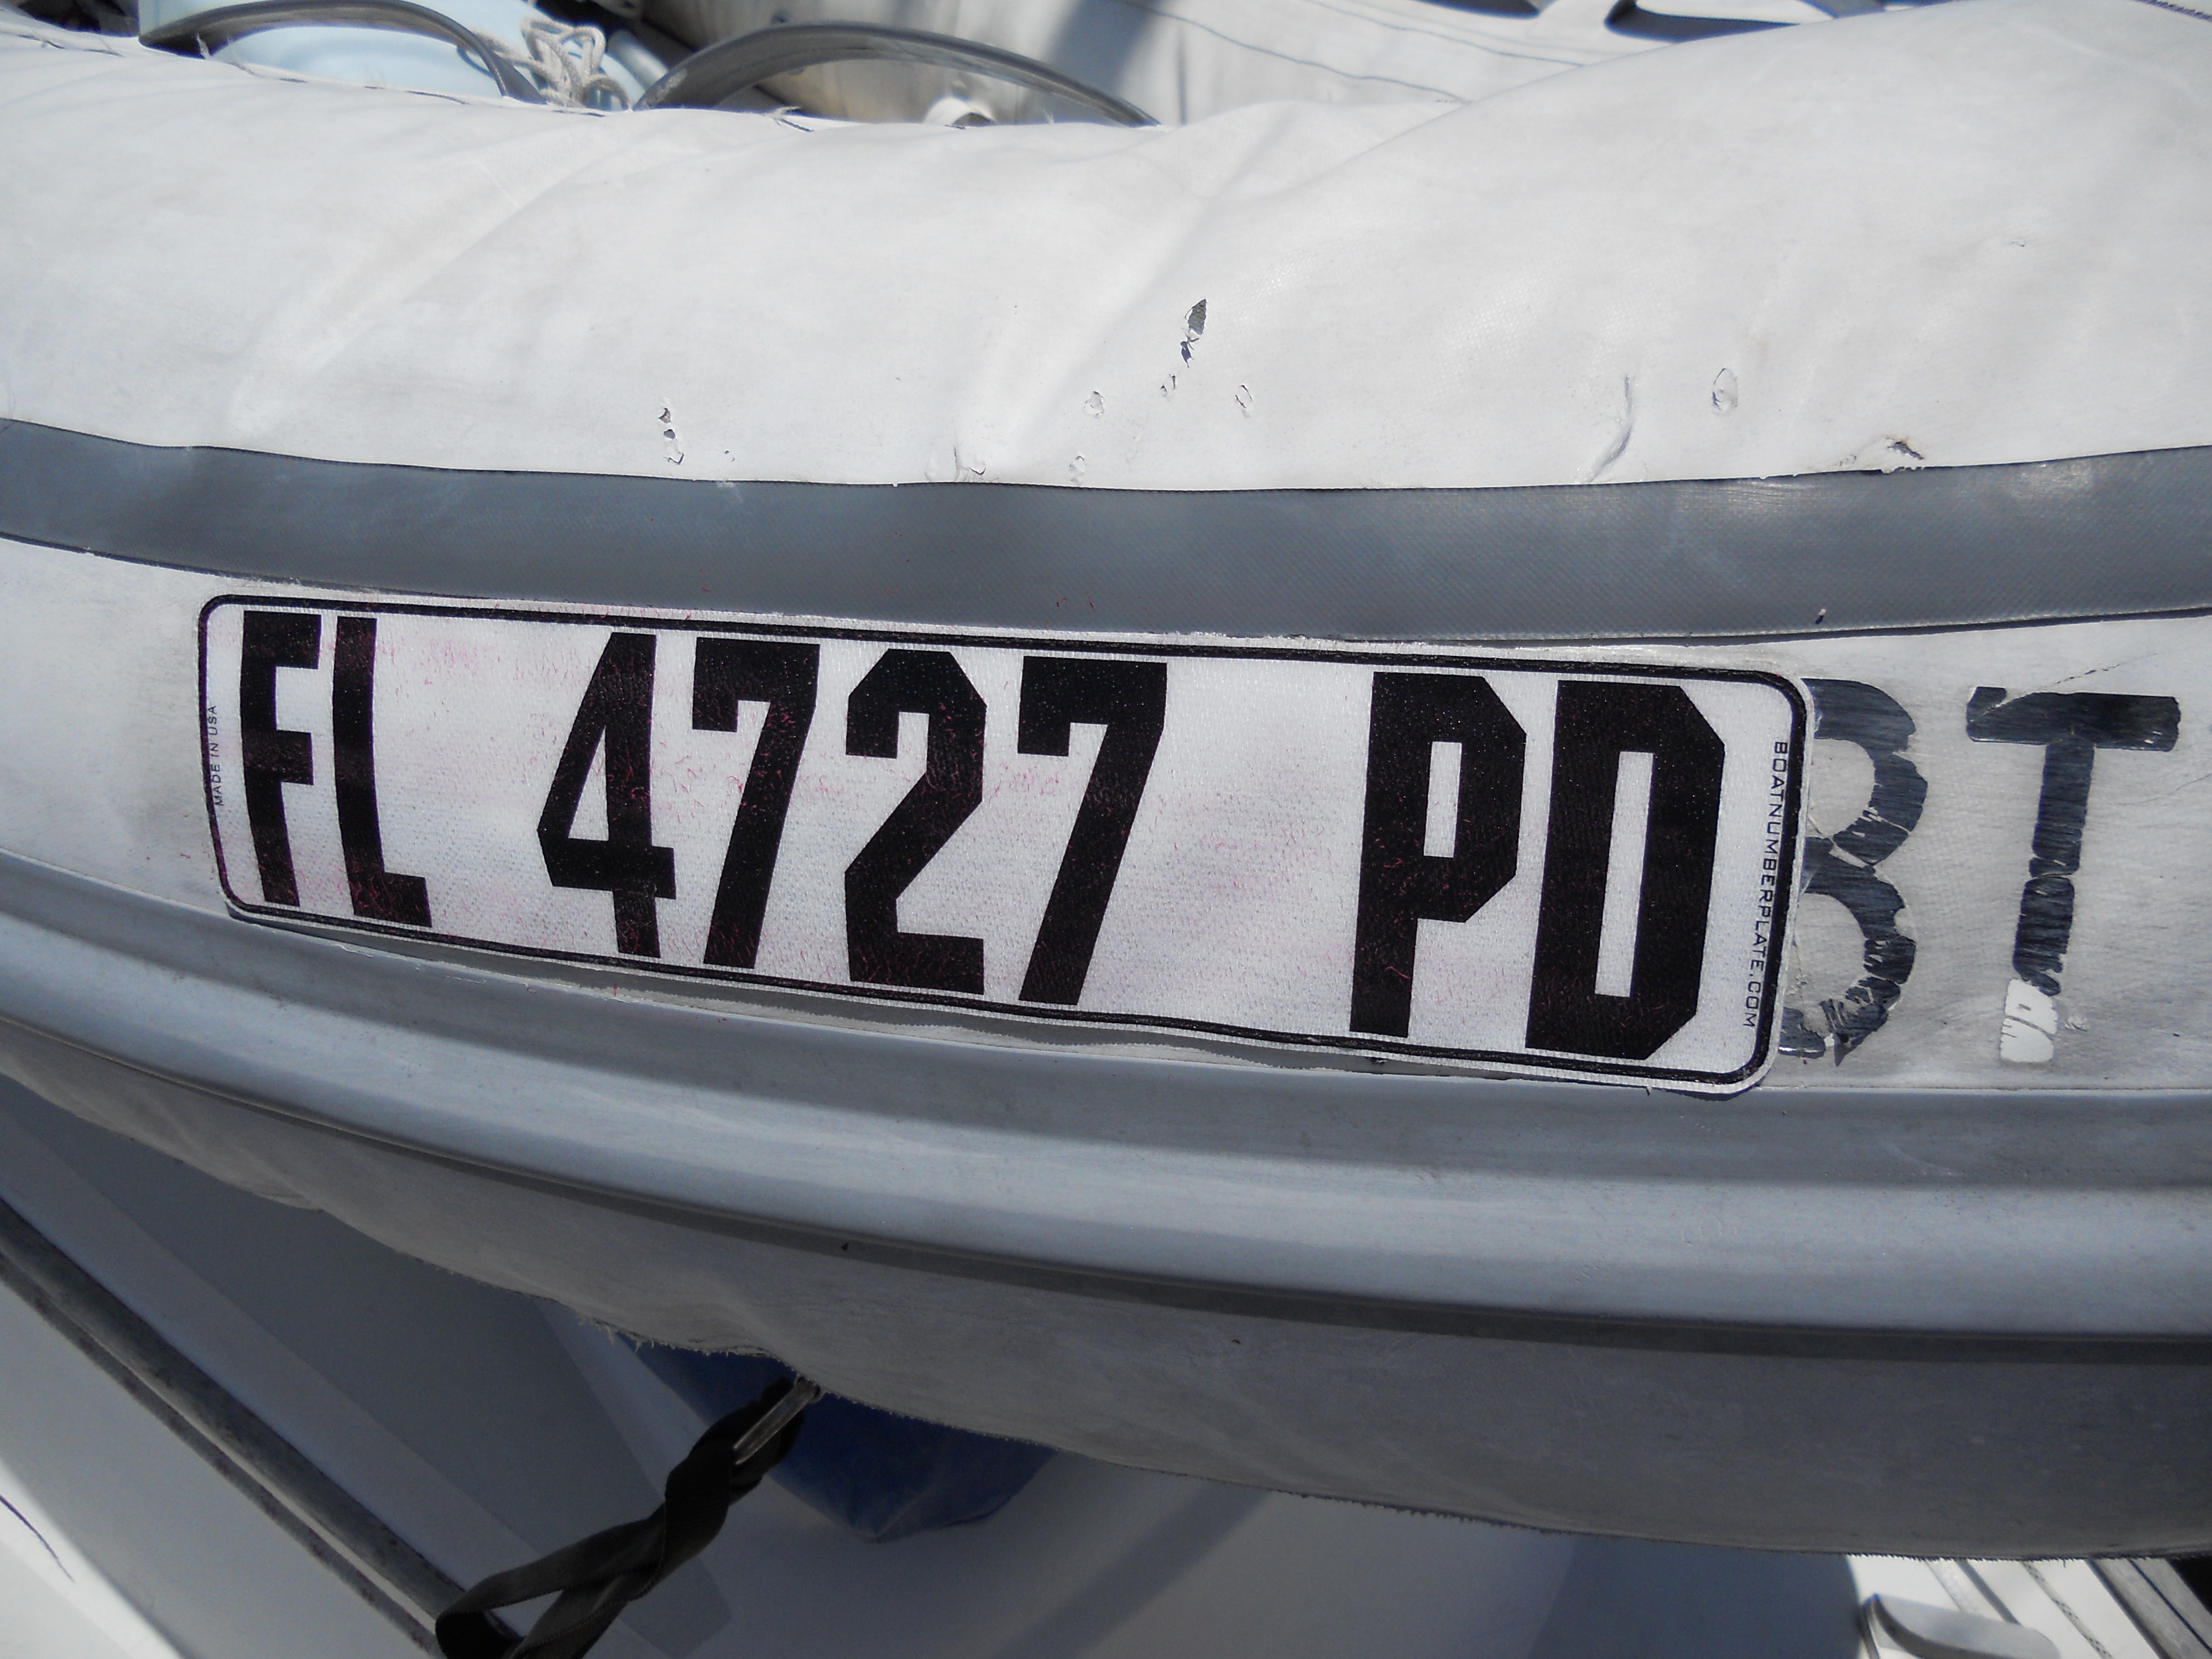 Starboard Side Numbers |
| Patching the Dinghy | |
|
An inflatable dinghy is almost the perfect product for a
cruising sailboat. They are relatively light weight and
can lifted on davits or as in my case lifted on deck with with a
halyard. They are very stable allowing one to get on and
off the dinghy with minimal risk of taking an unplanned swim.
Of course the working description is "almost perfect". The
Achilles Heal of of the inflatable dinghy are the inflation
tubes. Owning an inflatable dinghy means a continuous
battle to find and fix leaks in the tubes. Over the 10 years I've owned my AB RIB I've patched 5 or 6 punctures or leaks in the tubes. Every year I've had to patch a new leak or fix a previously patched leak. |
|
| In October, 2013 I spent several weeks
tracking and patching leaks. I planned a Bahamas cruise in
2014 and a working dinghy is essential in the Bahamas. The most troublesome leak was in the bow tube. I've patched this leak several times, but it is located at the seam of the tube cover and the bow liftinging handle. |
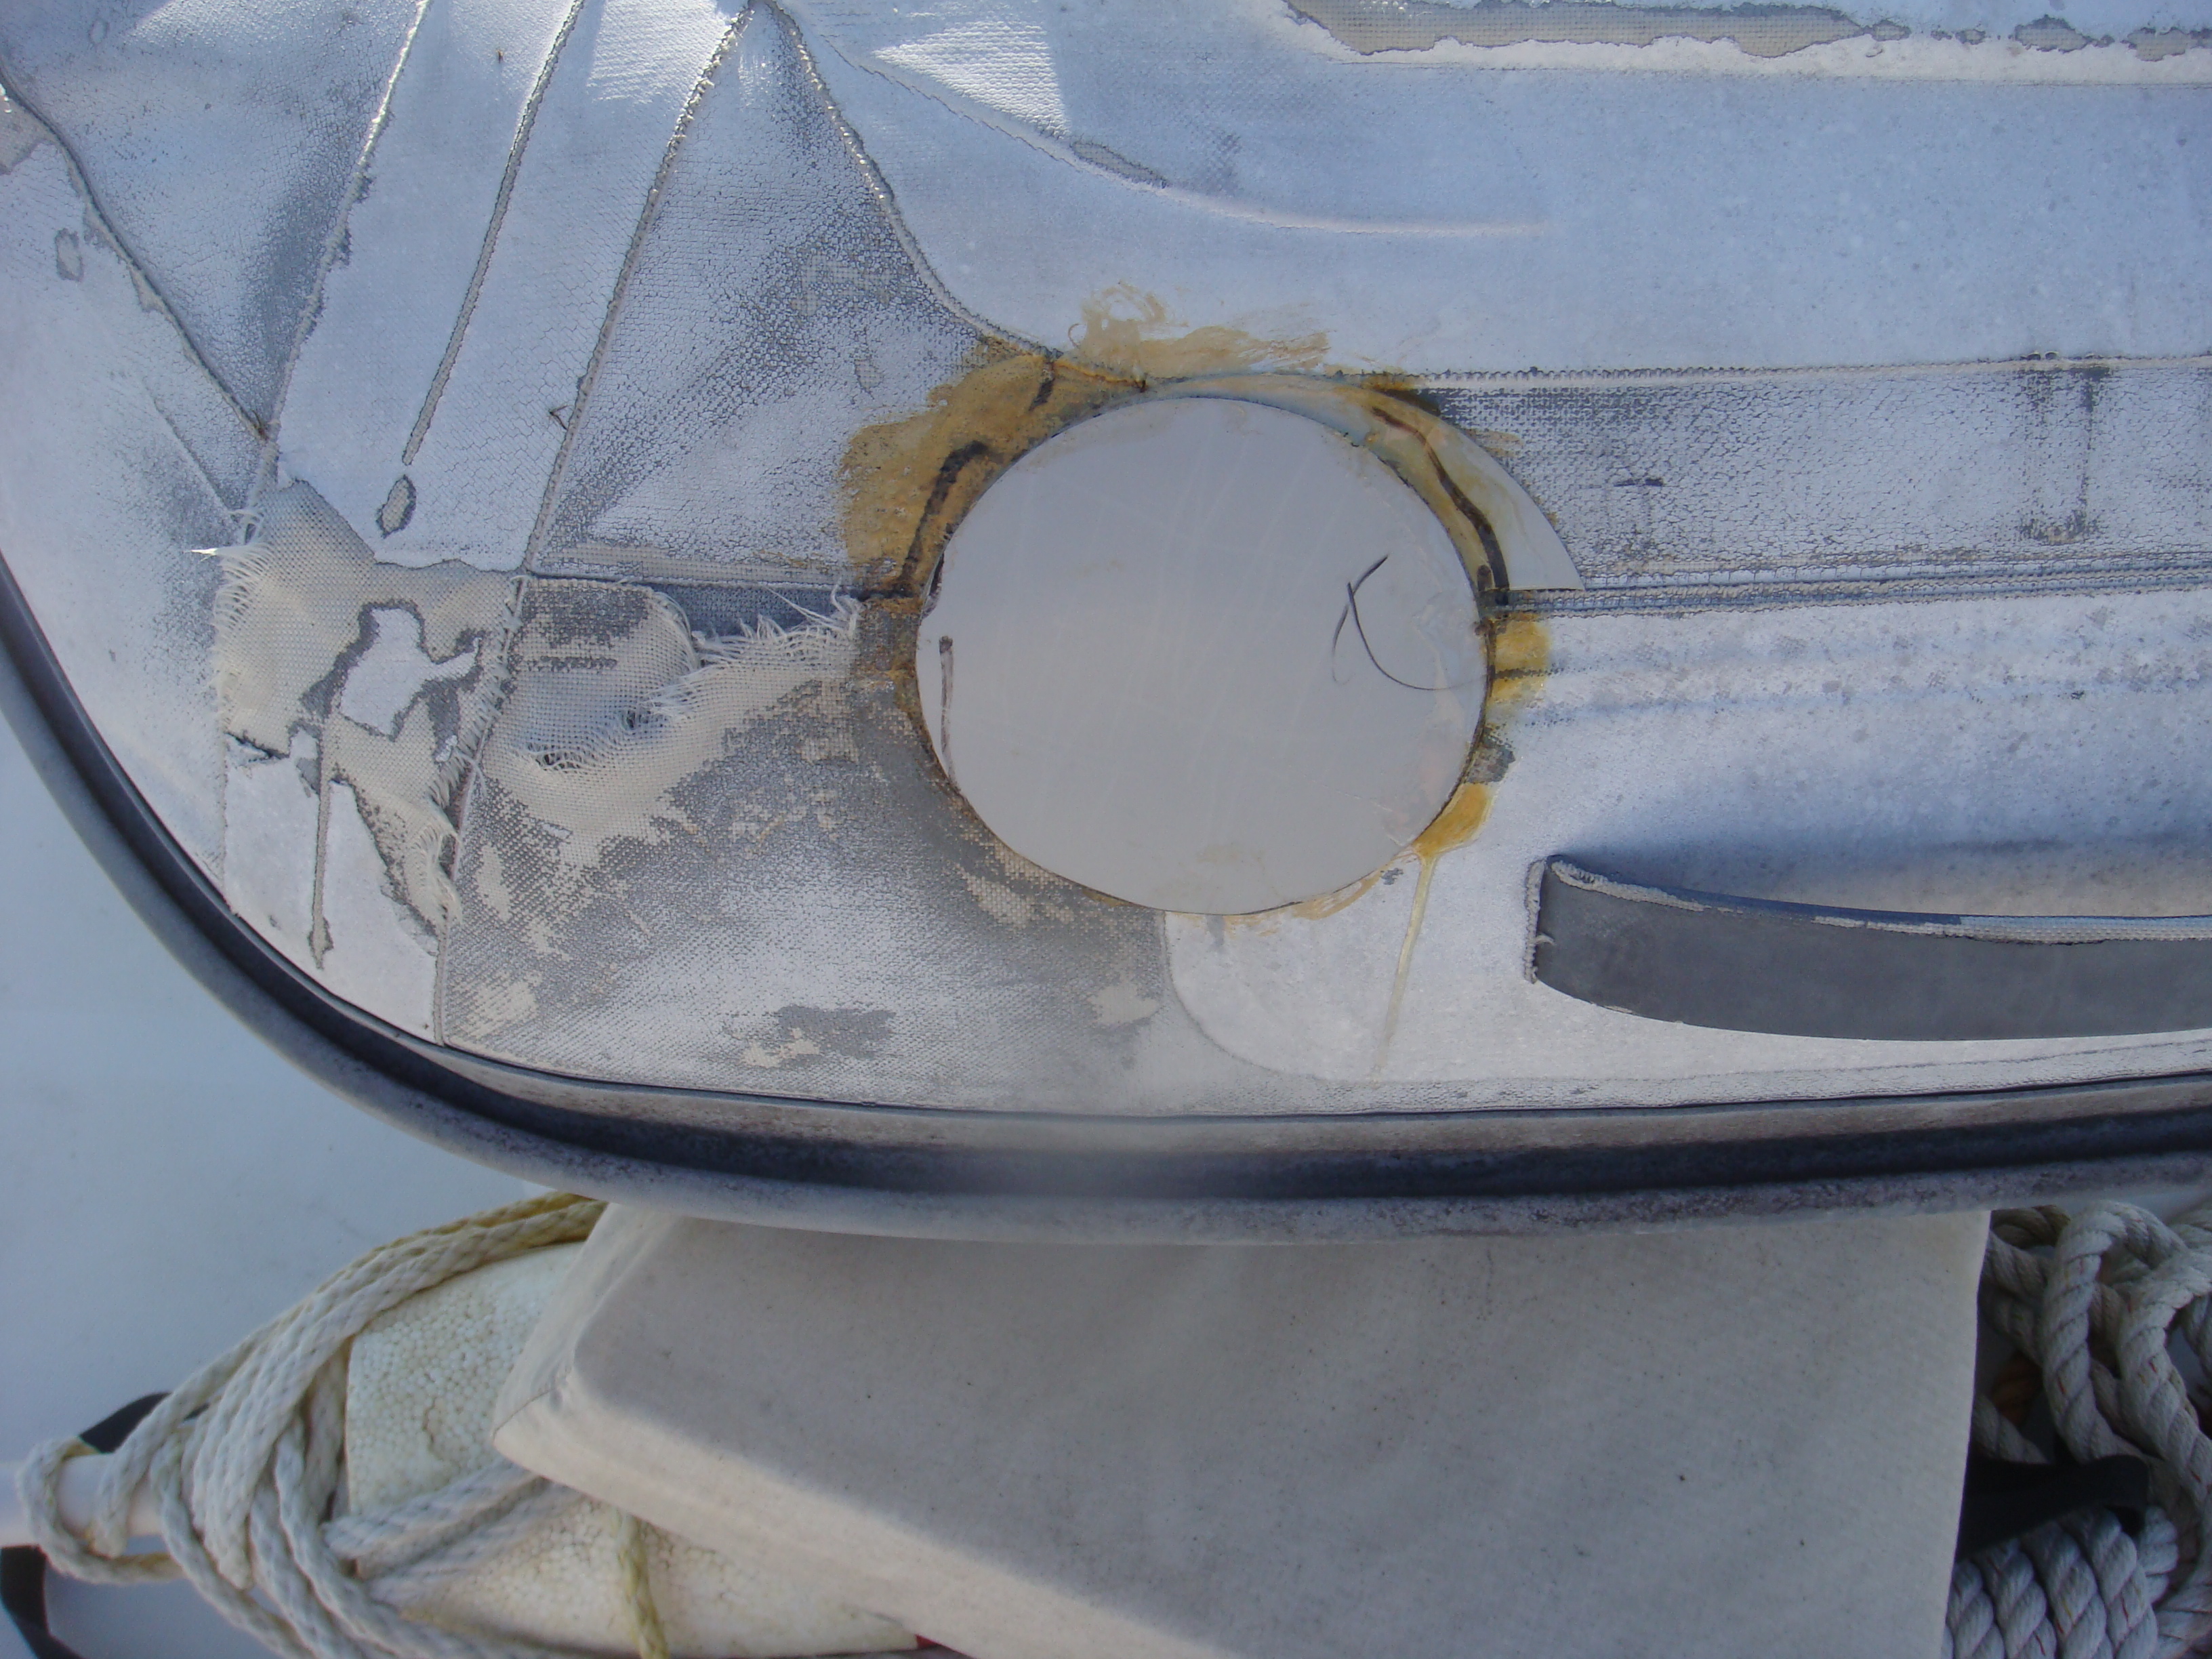 Problem Patch on the Bow Tube |
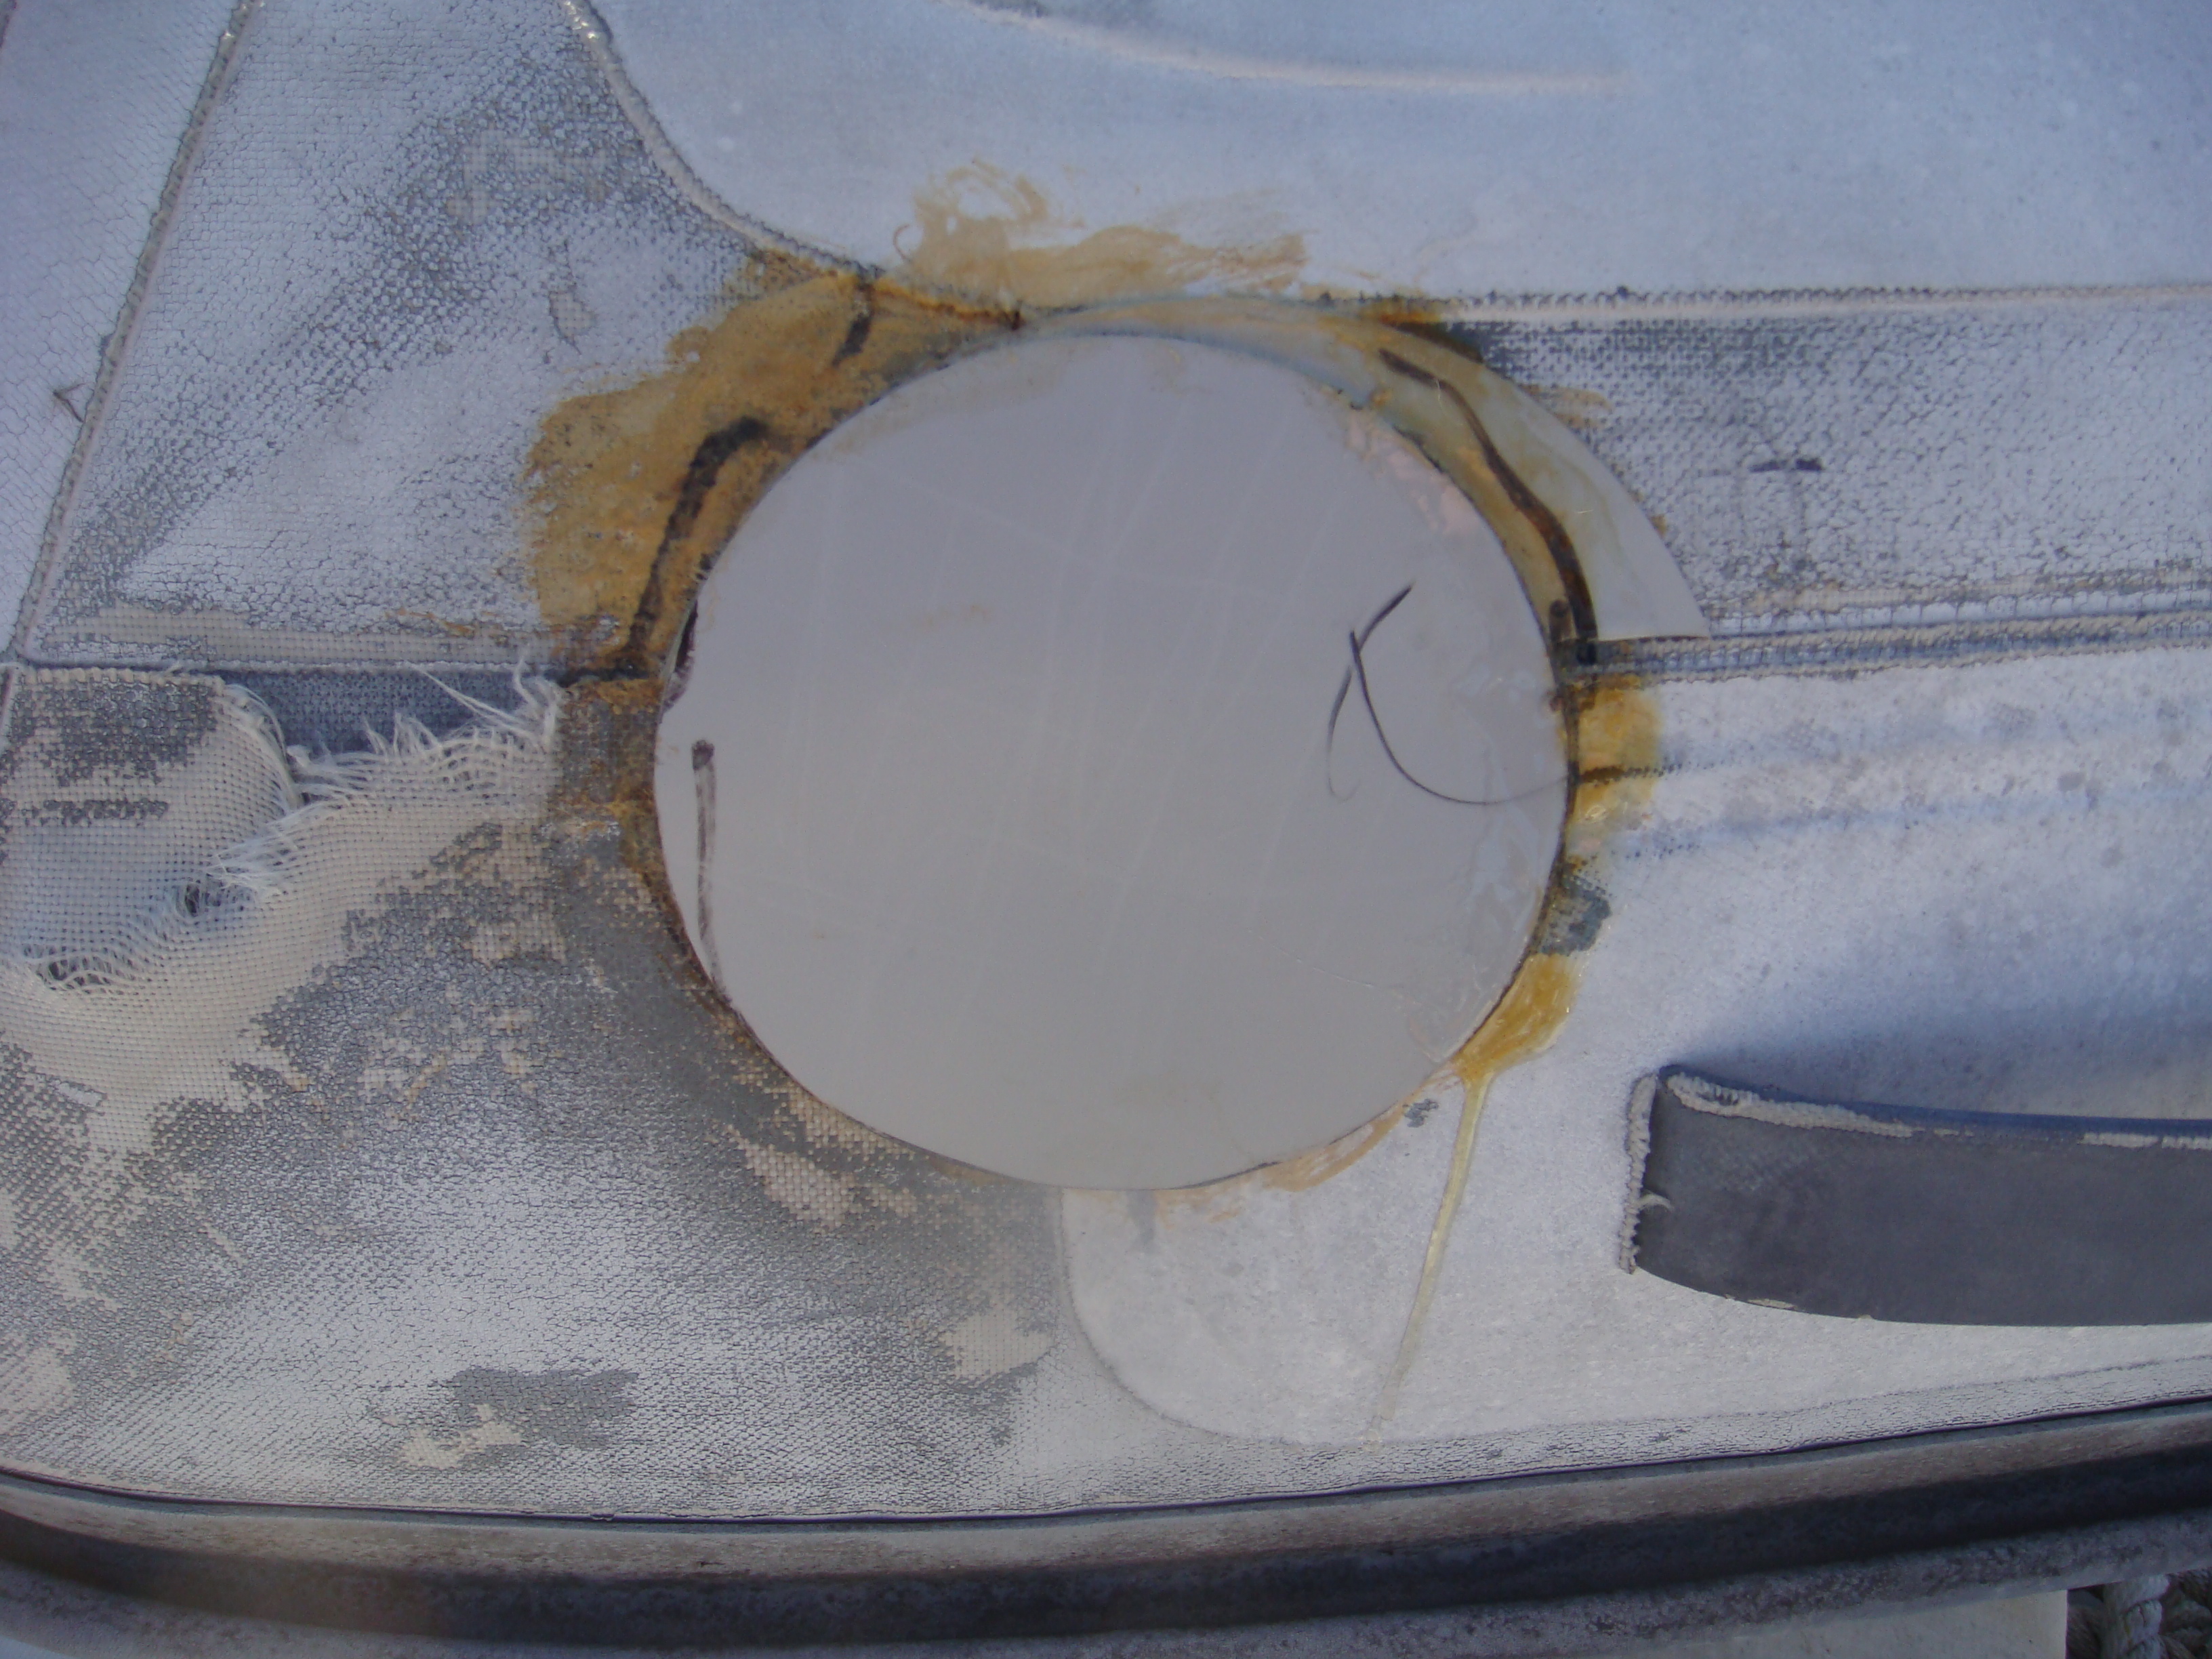 Close Up of the Bow Tube Patch |
The irregualar surface around the leak prevented the patches from totally sealing the leak. In the picture above and on the left I have attempted to seal the leak with several patches. Still there is a small leak. The bow tube is the most important as it creates pressure on the two aft tubes. If the bow tube goes soft so will the aft tubes. If the bow tube stays solid it will keep the aft tubes solid, even if they have very slight leaks. |
| I thought I had solved the problem of the irregular surface by using Stormsure sealant. This product was recommended to me by a professional diver. I applied it to the leak in the bow tube and it appeared to have sealed it as I could not detect any bubbles when I applied soapy water to the patch area. However the bow tube was very soft 24 hour later. I think this is a useful product especially for a temporary seal for small leaks. |
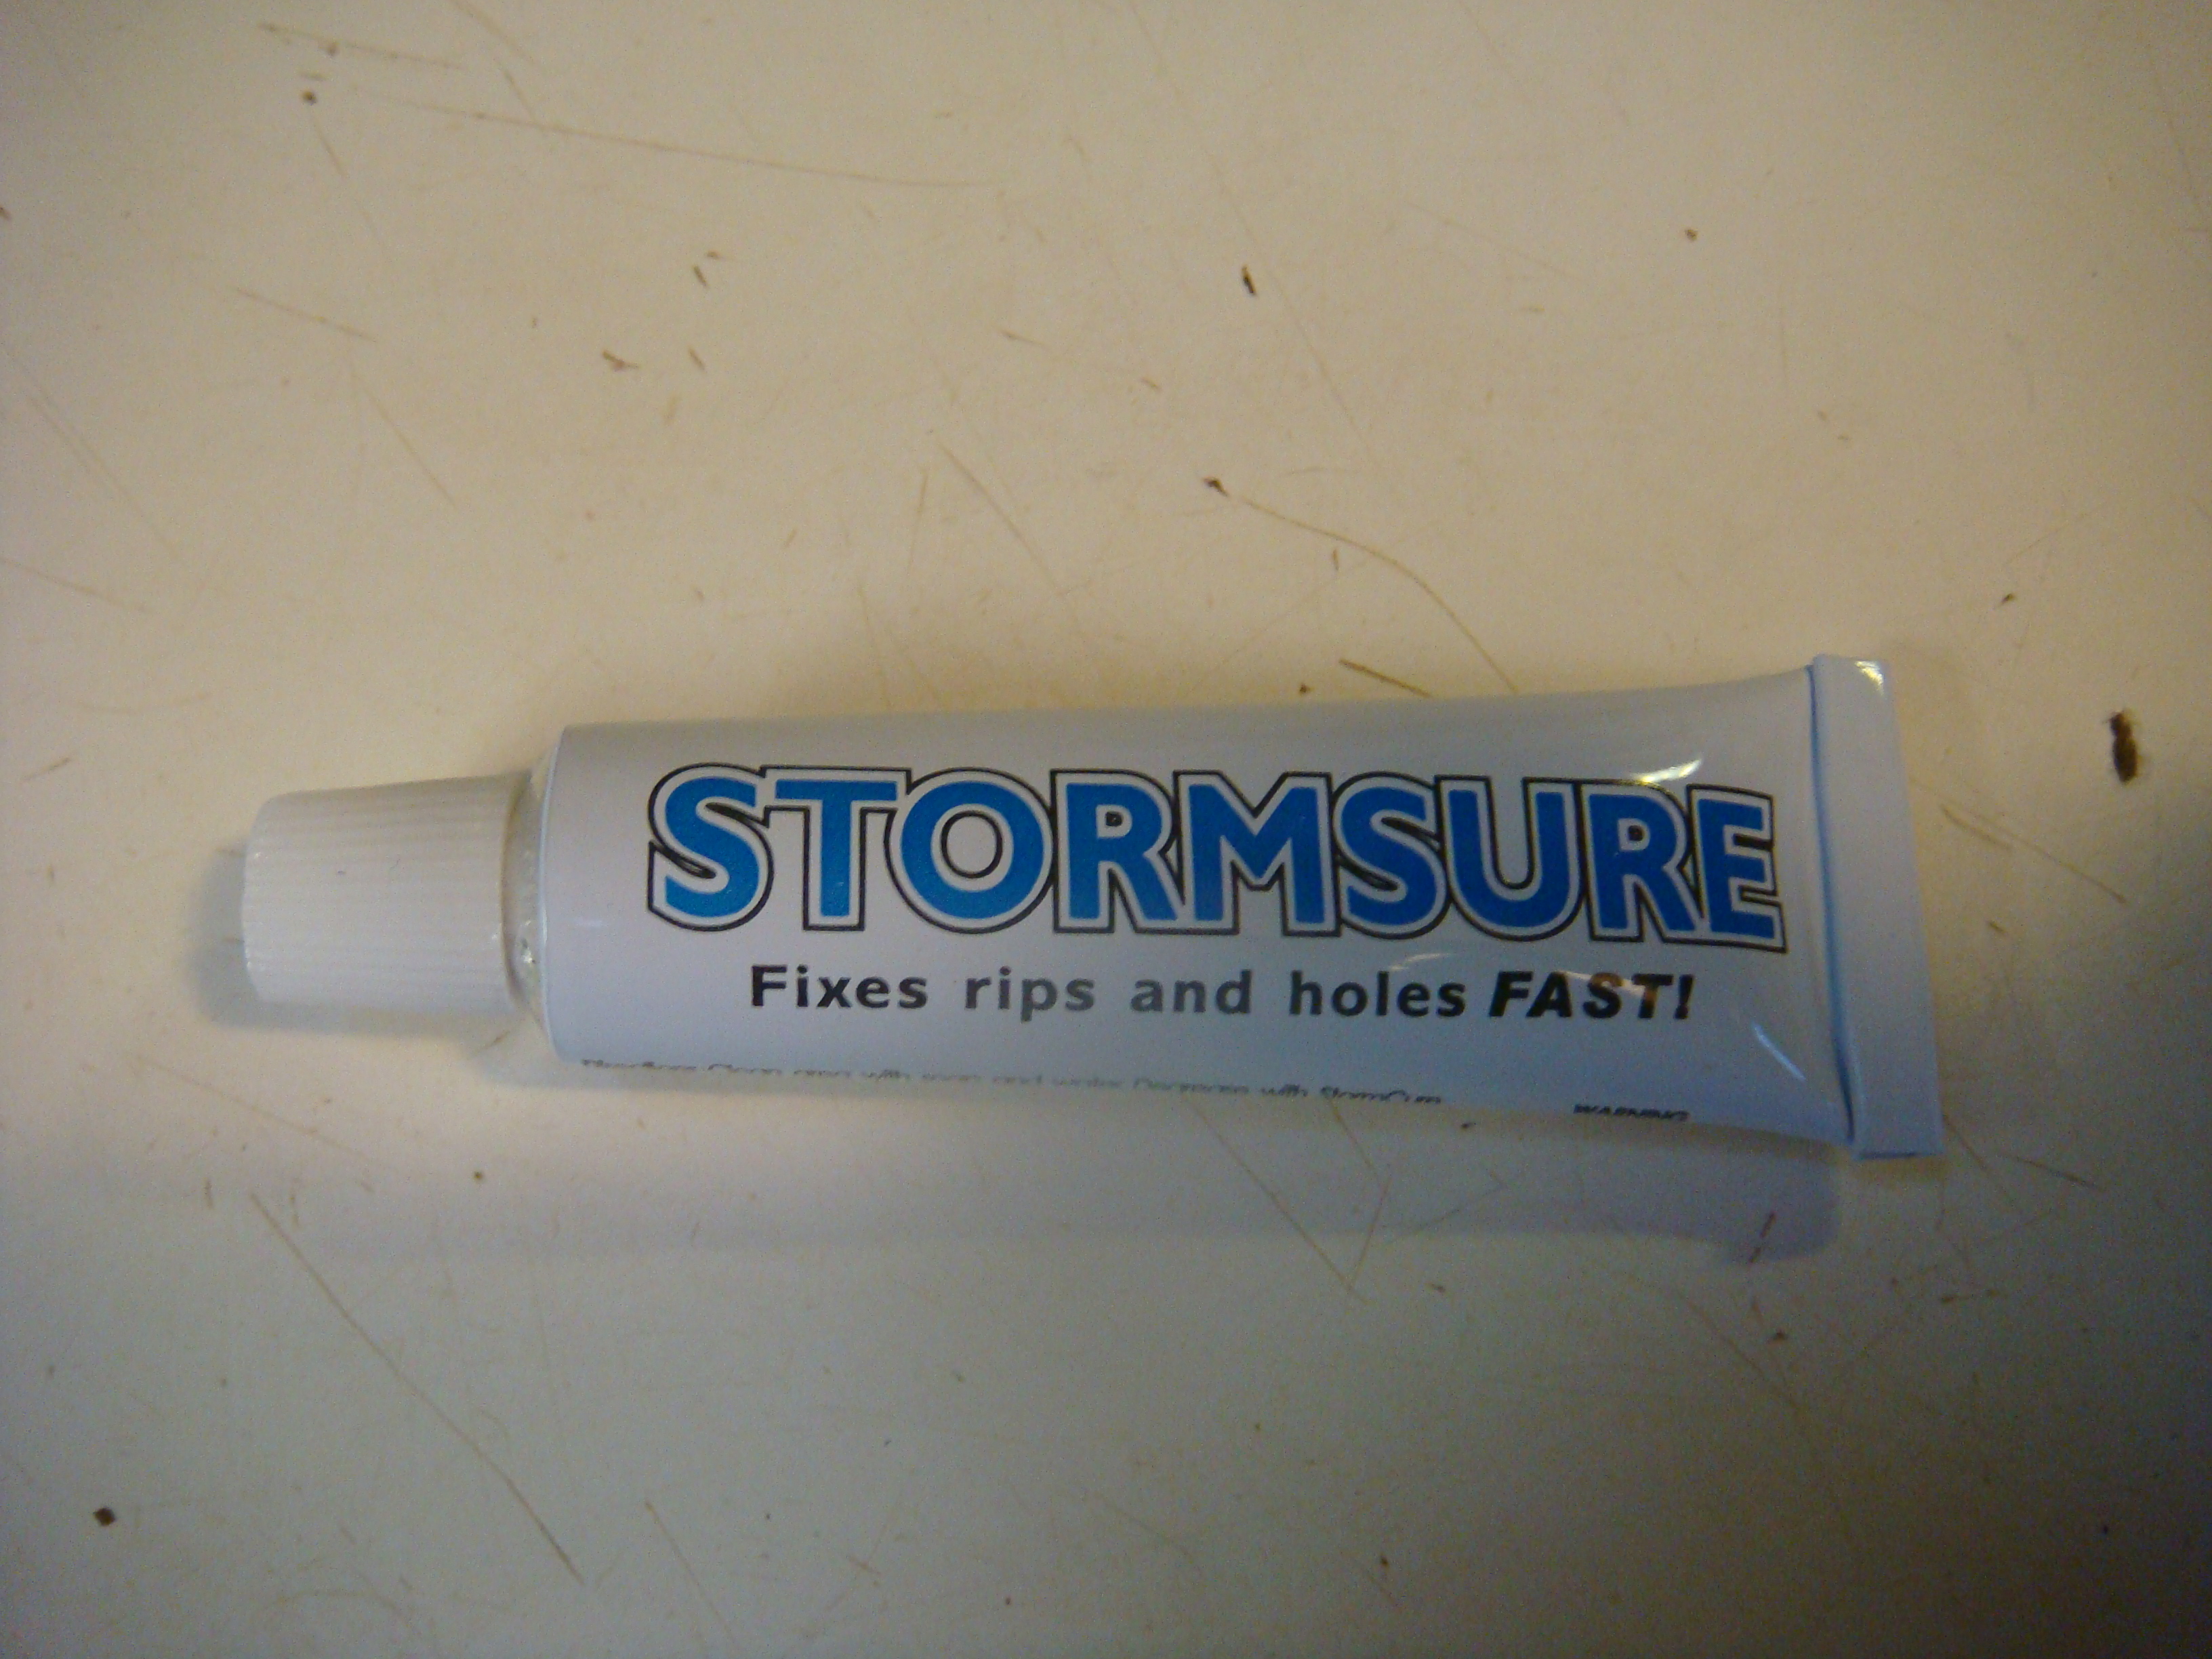 Stormsure Sealant |
 Bow Patch Sealed with Epoxy and then Painted |
The eventual solution was to abandon contact adhesives and use West System G-Flex epoxy. When cured this epoxy is still flexible, which makes it useful on an inflatable. It's hard to see in the picture on the left, but I have expoxied a patch over the bow leak and it has held pressure for over 3 days. I've painted over the patch, which makes it difficult to see. |
| Painting the Dinghy | |
| 10 years of storing the dinghy on the
foredeck has taken its toll on tube fabric. I also have
spent several summers on the Chesapeake and a winter in the
Bahamas with the dinghy in the water most of the time.
During those extended times in the water the dinghy tubes
accumulated a lot of baranacles, weed and scum that required
some agressive cleaning to remove. The result (in 2013) of the time in the sun and the process of removing sea growth has severely damaged the outer cover of the tubes. In the picture on the right you can see that the Hypalon material has been exposed. |
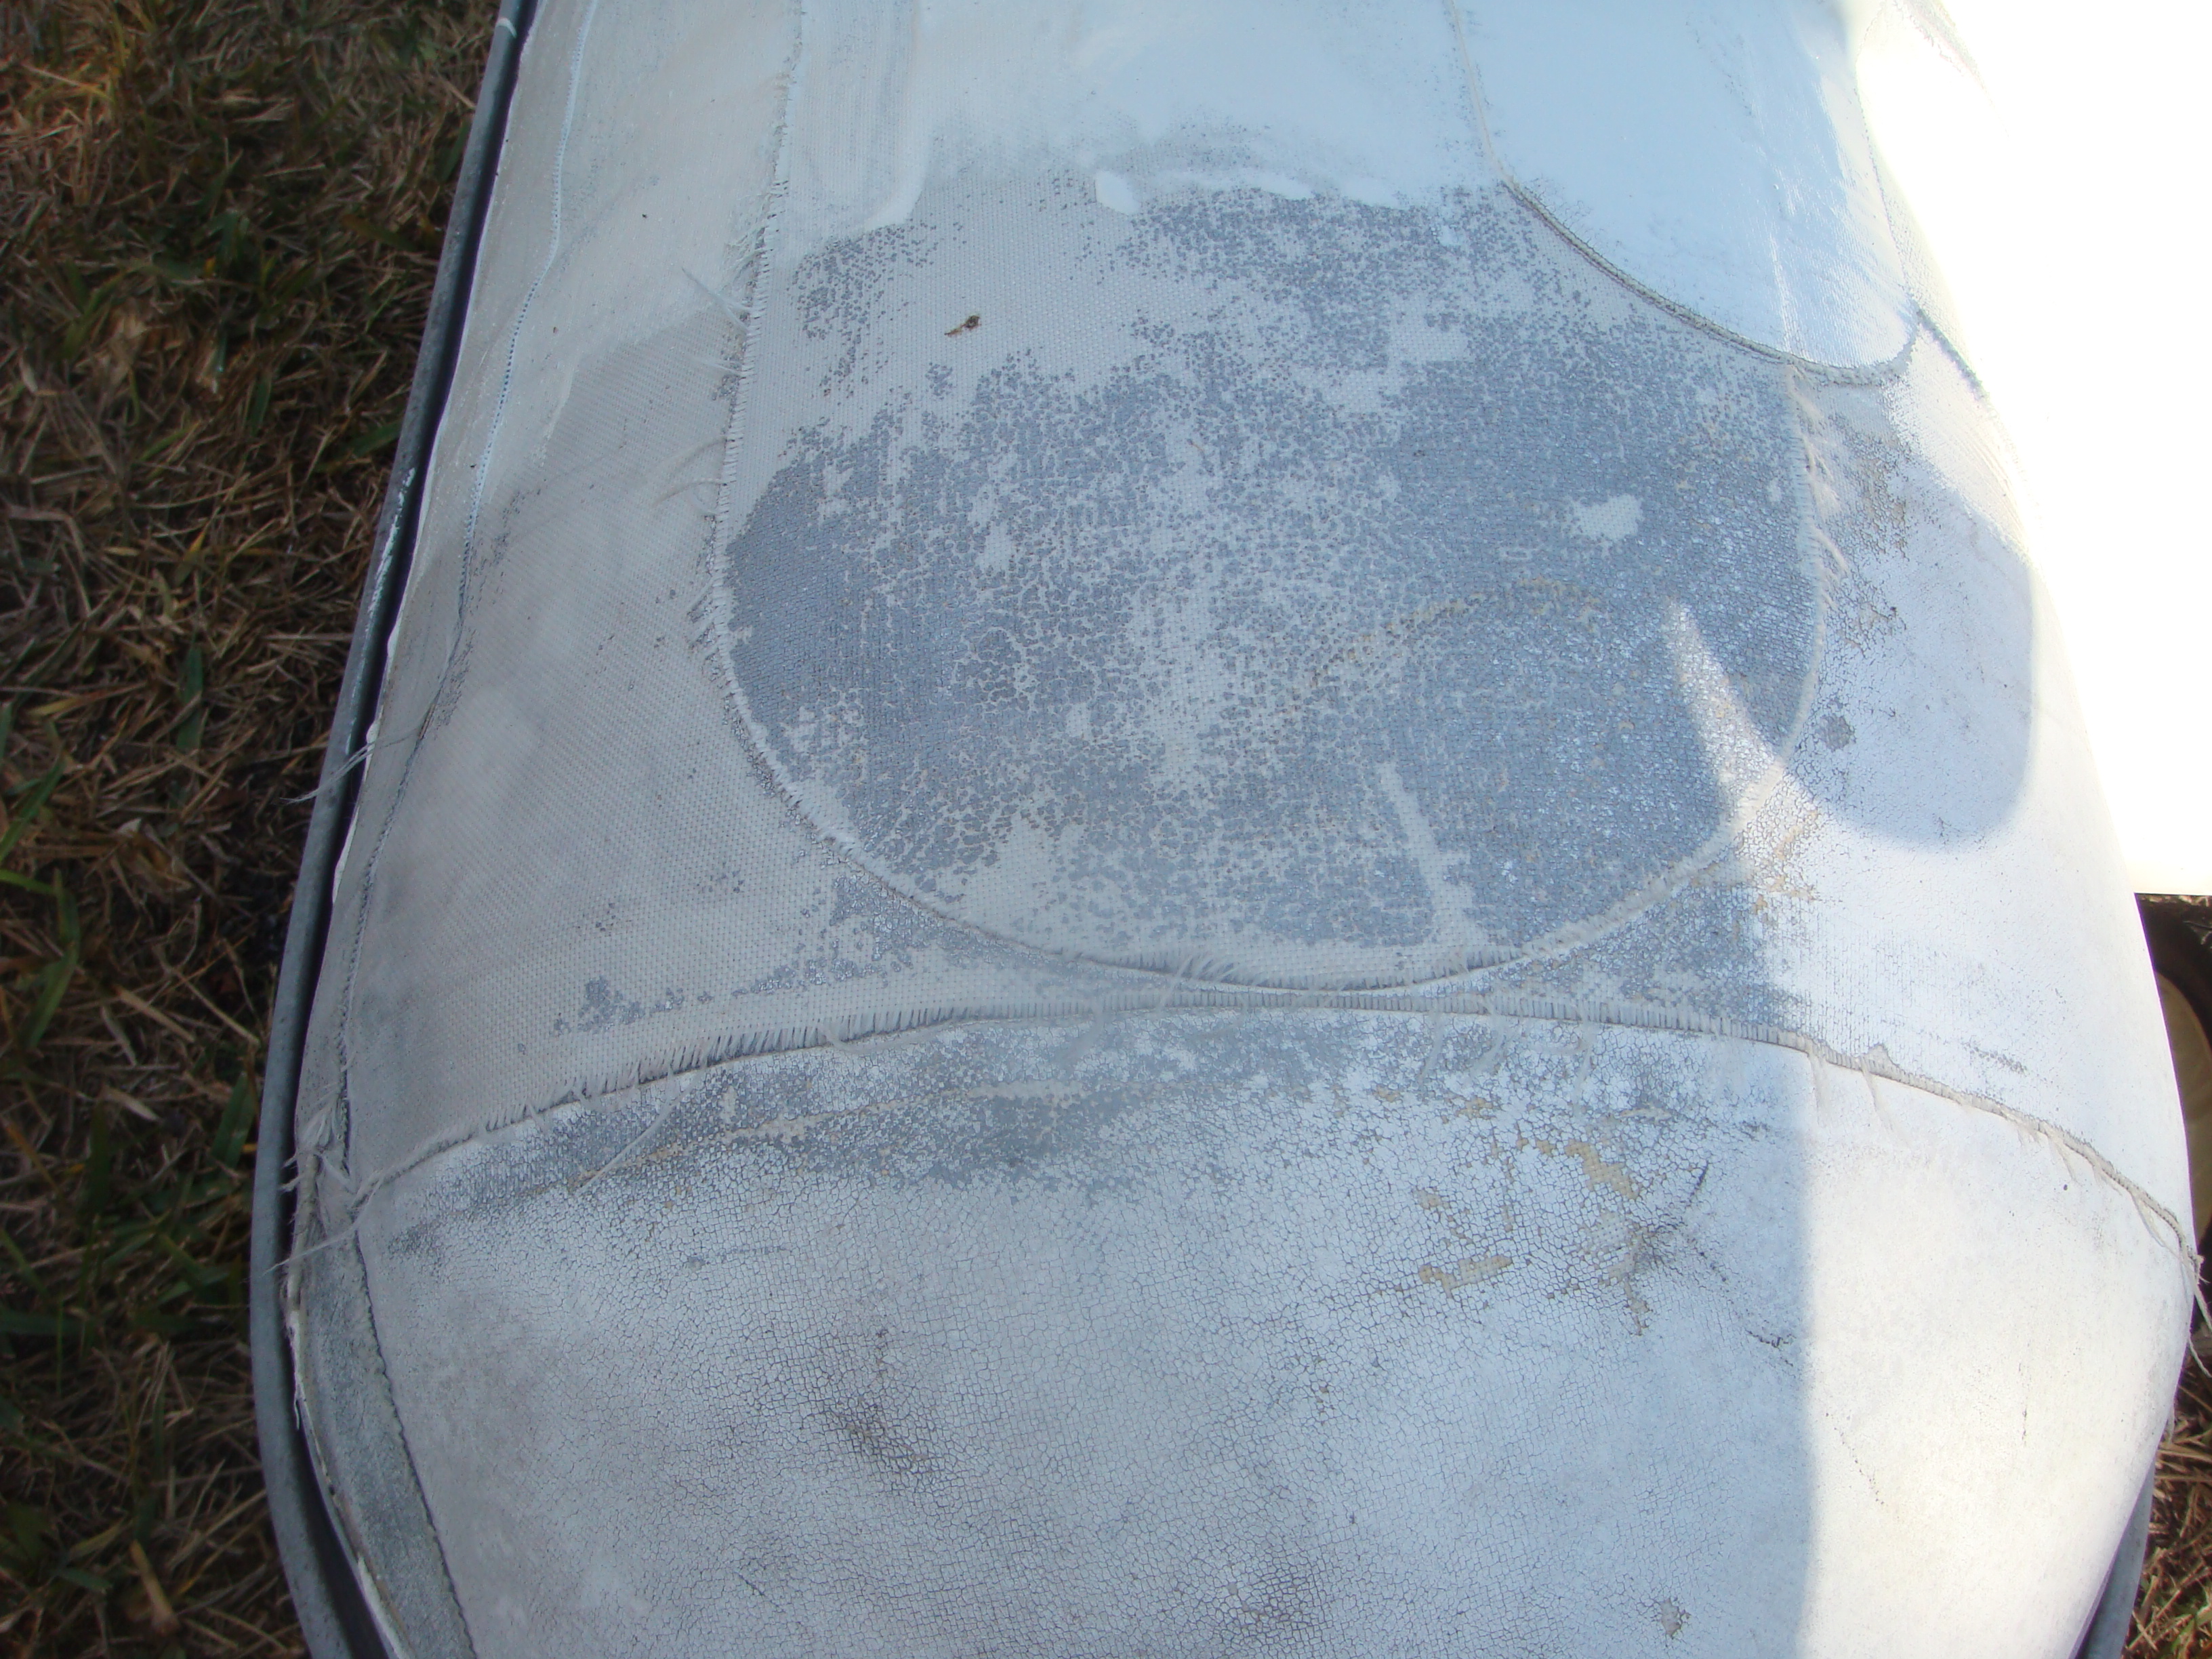 Exposed Hypalon on the Bottom of the Starboard Tube |
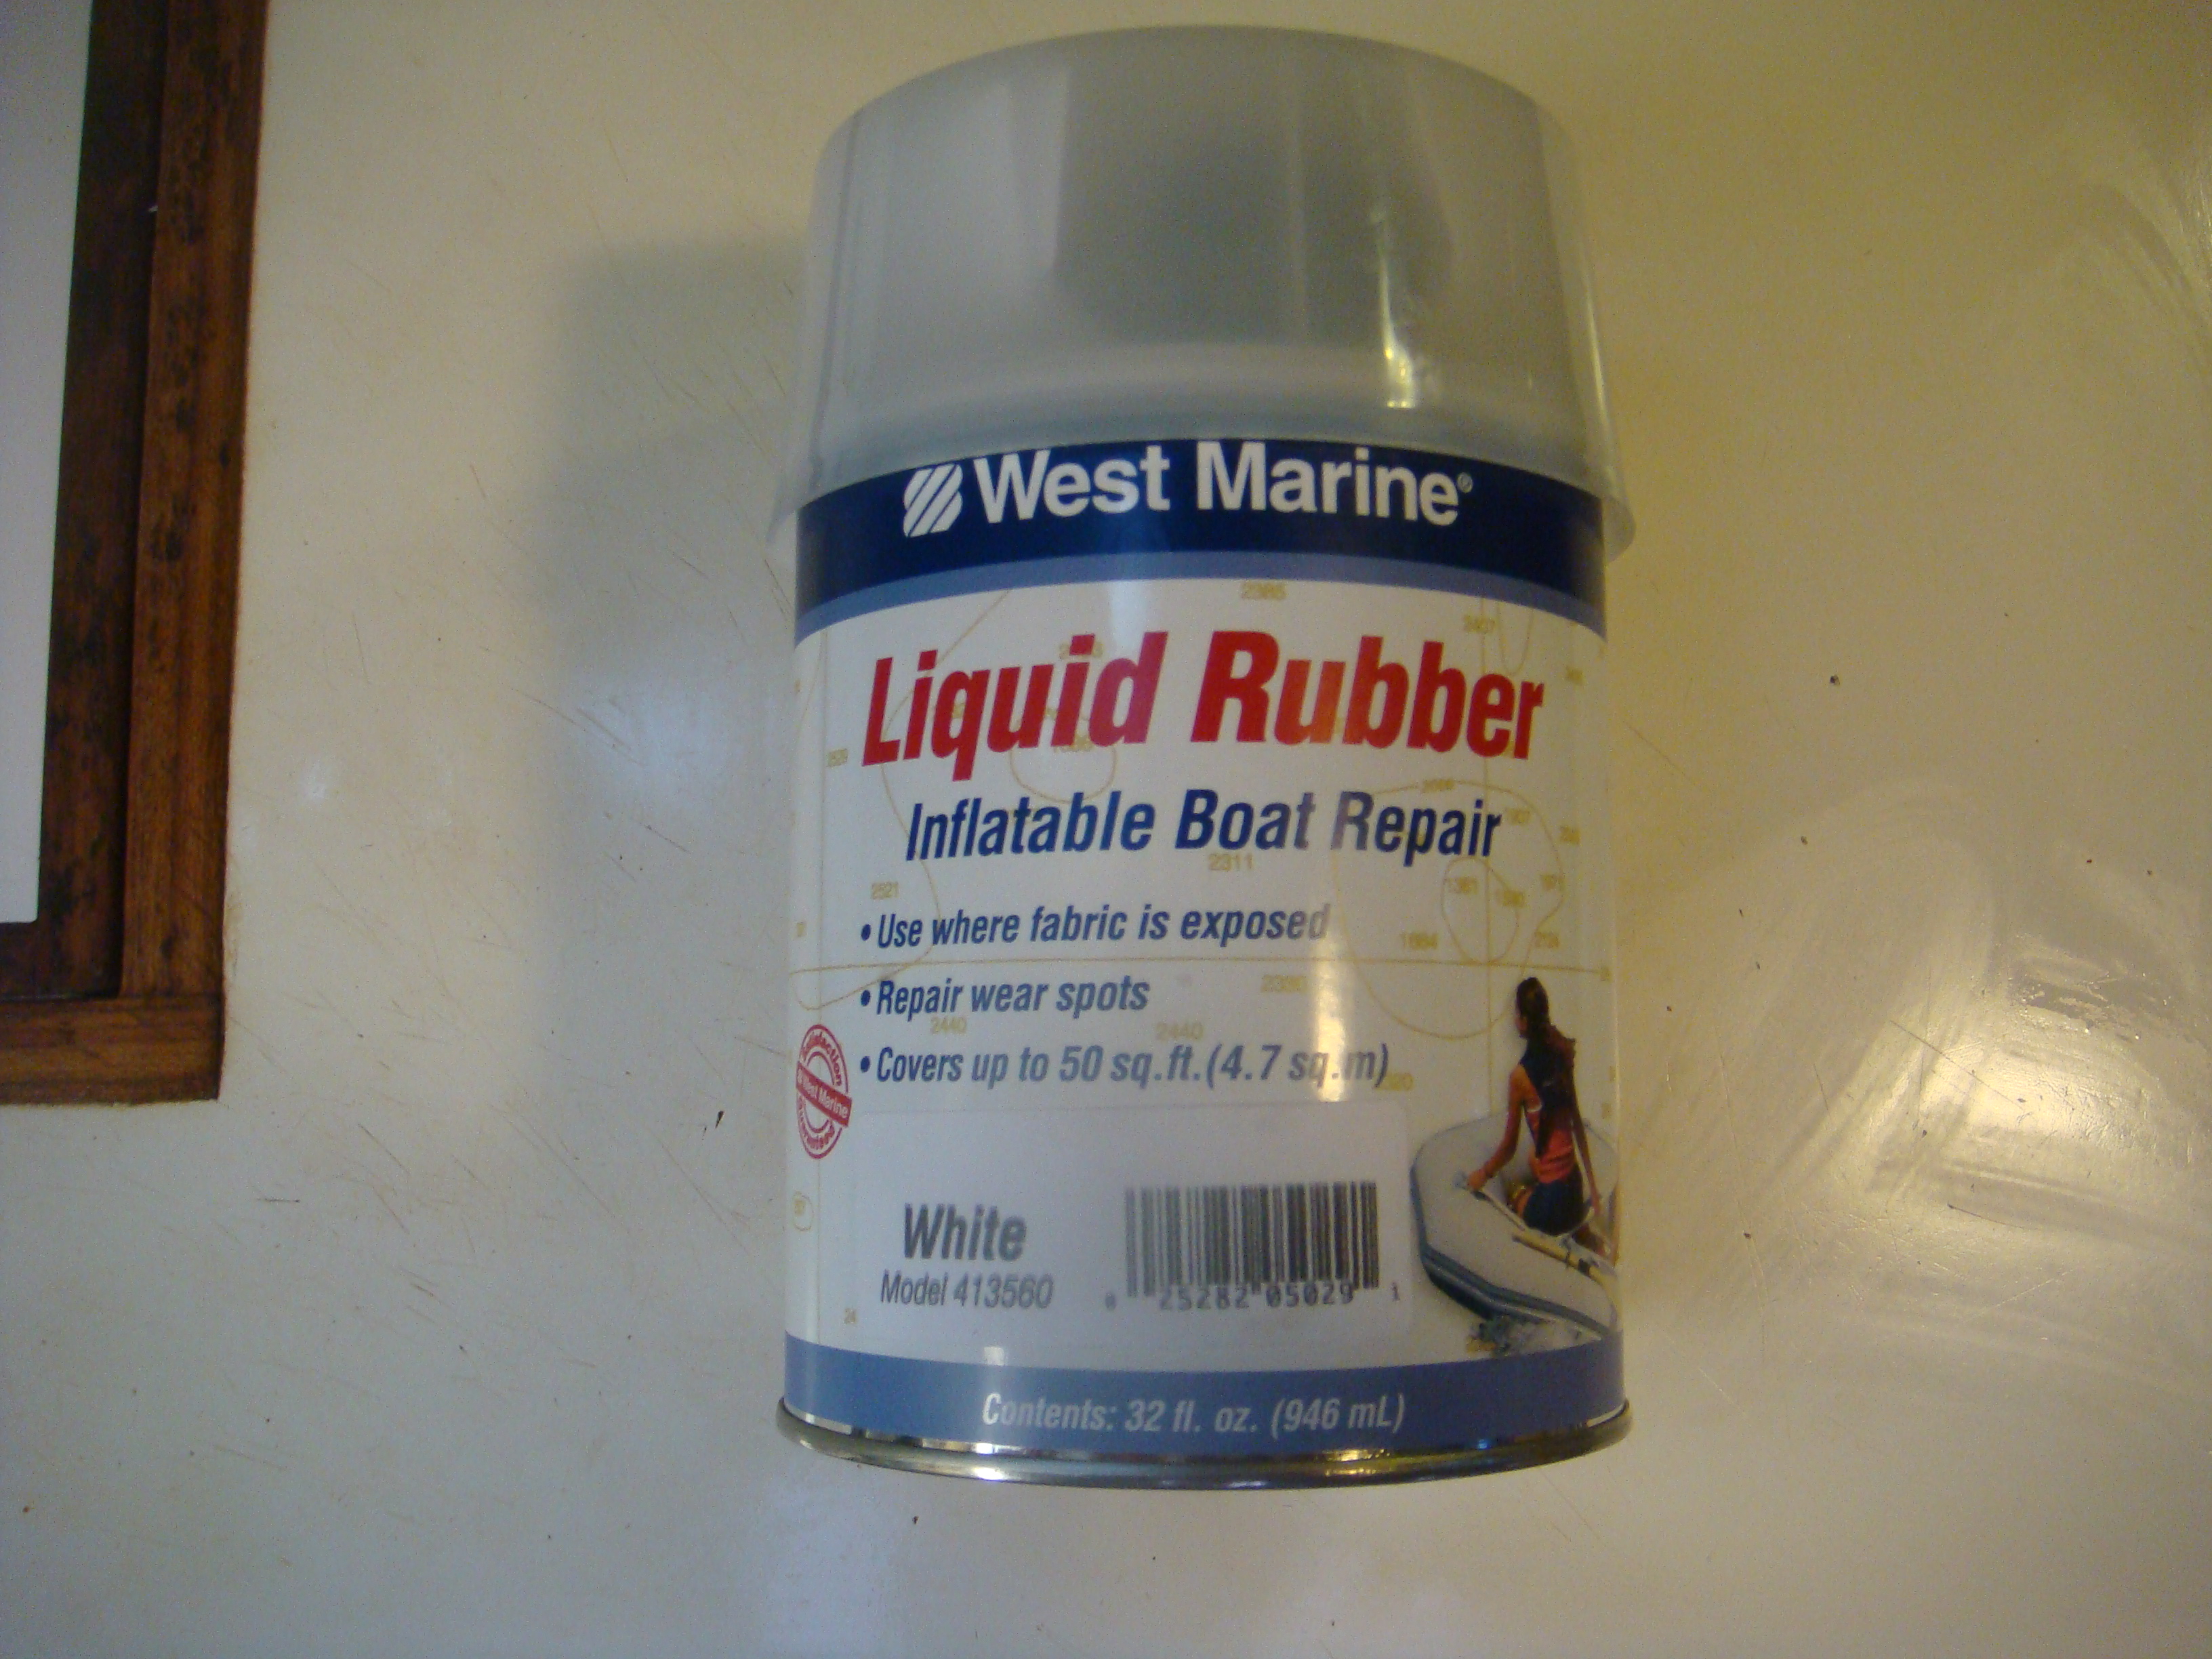 West Marine Liquid Rubber |
With the leaks seemingly under control for now, it is time to deal with the exposed Hypalon fabric. On the left is a picture of the Liquid Rubber sold by West Marine and seveal other retailers. My plan is to use this product to cover the exposed Hypalon fabric on the tubes. |
| In the picture on the right I have
painted one coat of Liquid Rubber onto the bottom of the dinghy
tubes. The aft end of the port tube (shown in the picture above) was not covered by this coat. Not being familiar with this product I did not thin the first coat enough to cover the bottom of all threee tubes. I should be able to cover the top of all tubes with another can of Liquid Rubber and an appropriate amount of the thinner (Xylene). |
 First Coat on the Bottom of the Tubes |
 Top of Tubes Partially Covered with Liquid Rubber |
After painting the bottom of the tubes I
discovered that I still had leaks that were eventually sealed
using expoxy (see above). After I was satisfied that the leaks were finally under control, I flipped the dinghy over an painted the areas of exposed Hypalon on the top of the tubes. Ultimately leaks emerged in the painted portion of the tubes. Additional coats of Liquid Rubber might have held off those leaks for a while, but I think the better option is to protect the tubes and not allow them to deteriorate as have the tubes on this dinghy. |
| New RIB in 2014 | |
|
After all of the efforts to extend the life my dinghy
described above leaks continued to surface. The Liquid
Rubber coating did not prevent the continuing deterioration of
the Hypalon material and eventually I had a large area of
leakage through the material with no puncture. That dinghy
has been stored uncovered on deck for 10 years. I also
allowed sea growth to accumulate on the tubes on several
ocaisions when the dinghy was in the water for extended periods
of time. The lessons learned are: |
 Port Tube Deflated in Less Than 24 Hours |
With those lessons learned I went shopping for a dinghy that was light enough to allow easy hoisting along side with the motor attached (e.g., overnight) . The fiberglass AB and the 9.9 HP outboard were just too heavy to hoist using my spinaker halyard. Having to remove the motor in order to hoist the dinghy was a hassle and the dinghy usually was left in the water until I was ready to leave an anchorage. The result was a lot of growth on the tubes, which caused me to use agressive cleaning and I damaged the covering for the Hypalon material. I want my next dinghy to be light enough that the combined weight of the boat and motor is less than 150 Lbs. That means an aluminum hulled RIB or a non-RIB inflatable. |
|
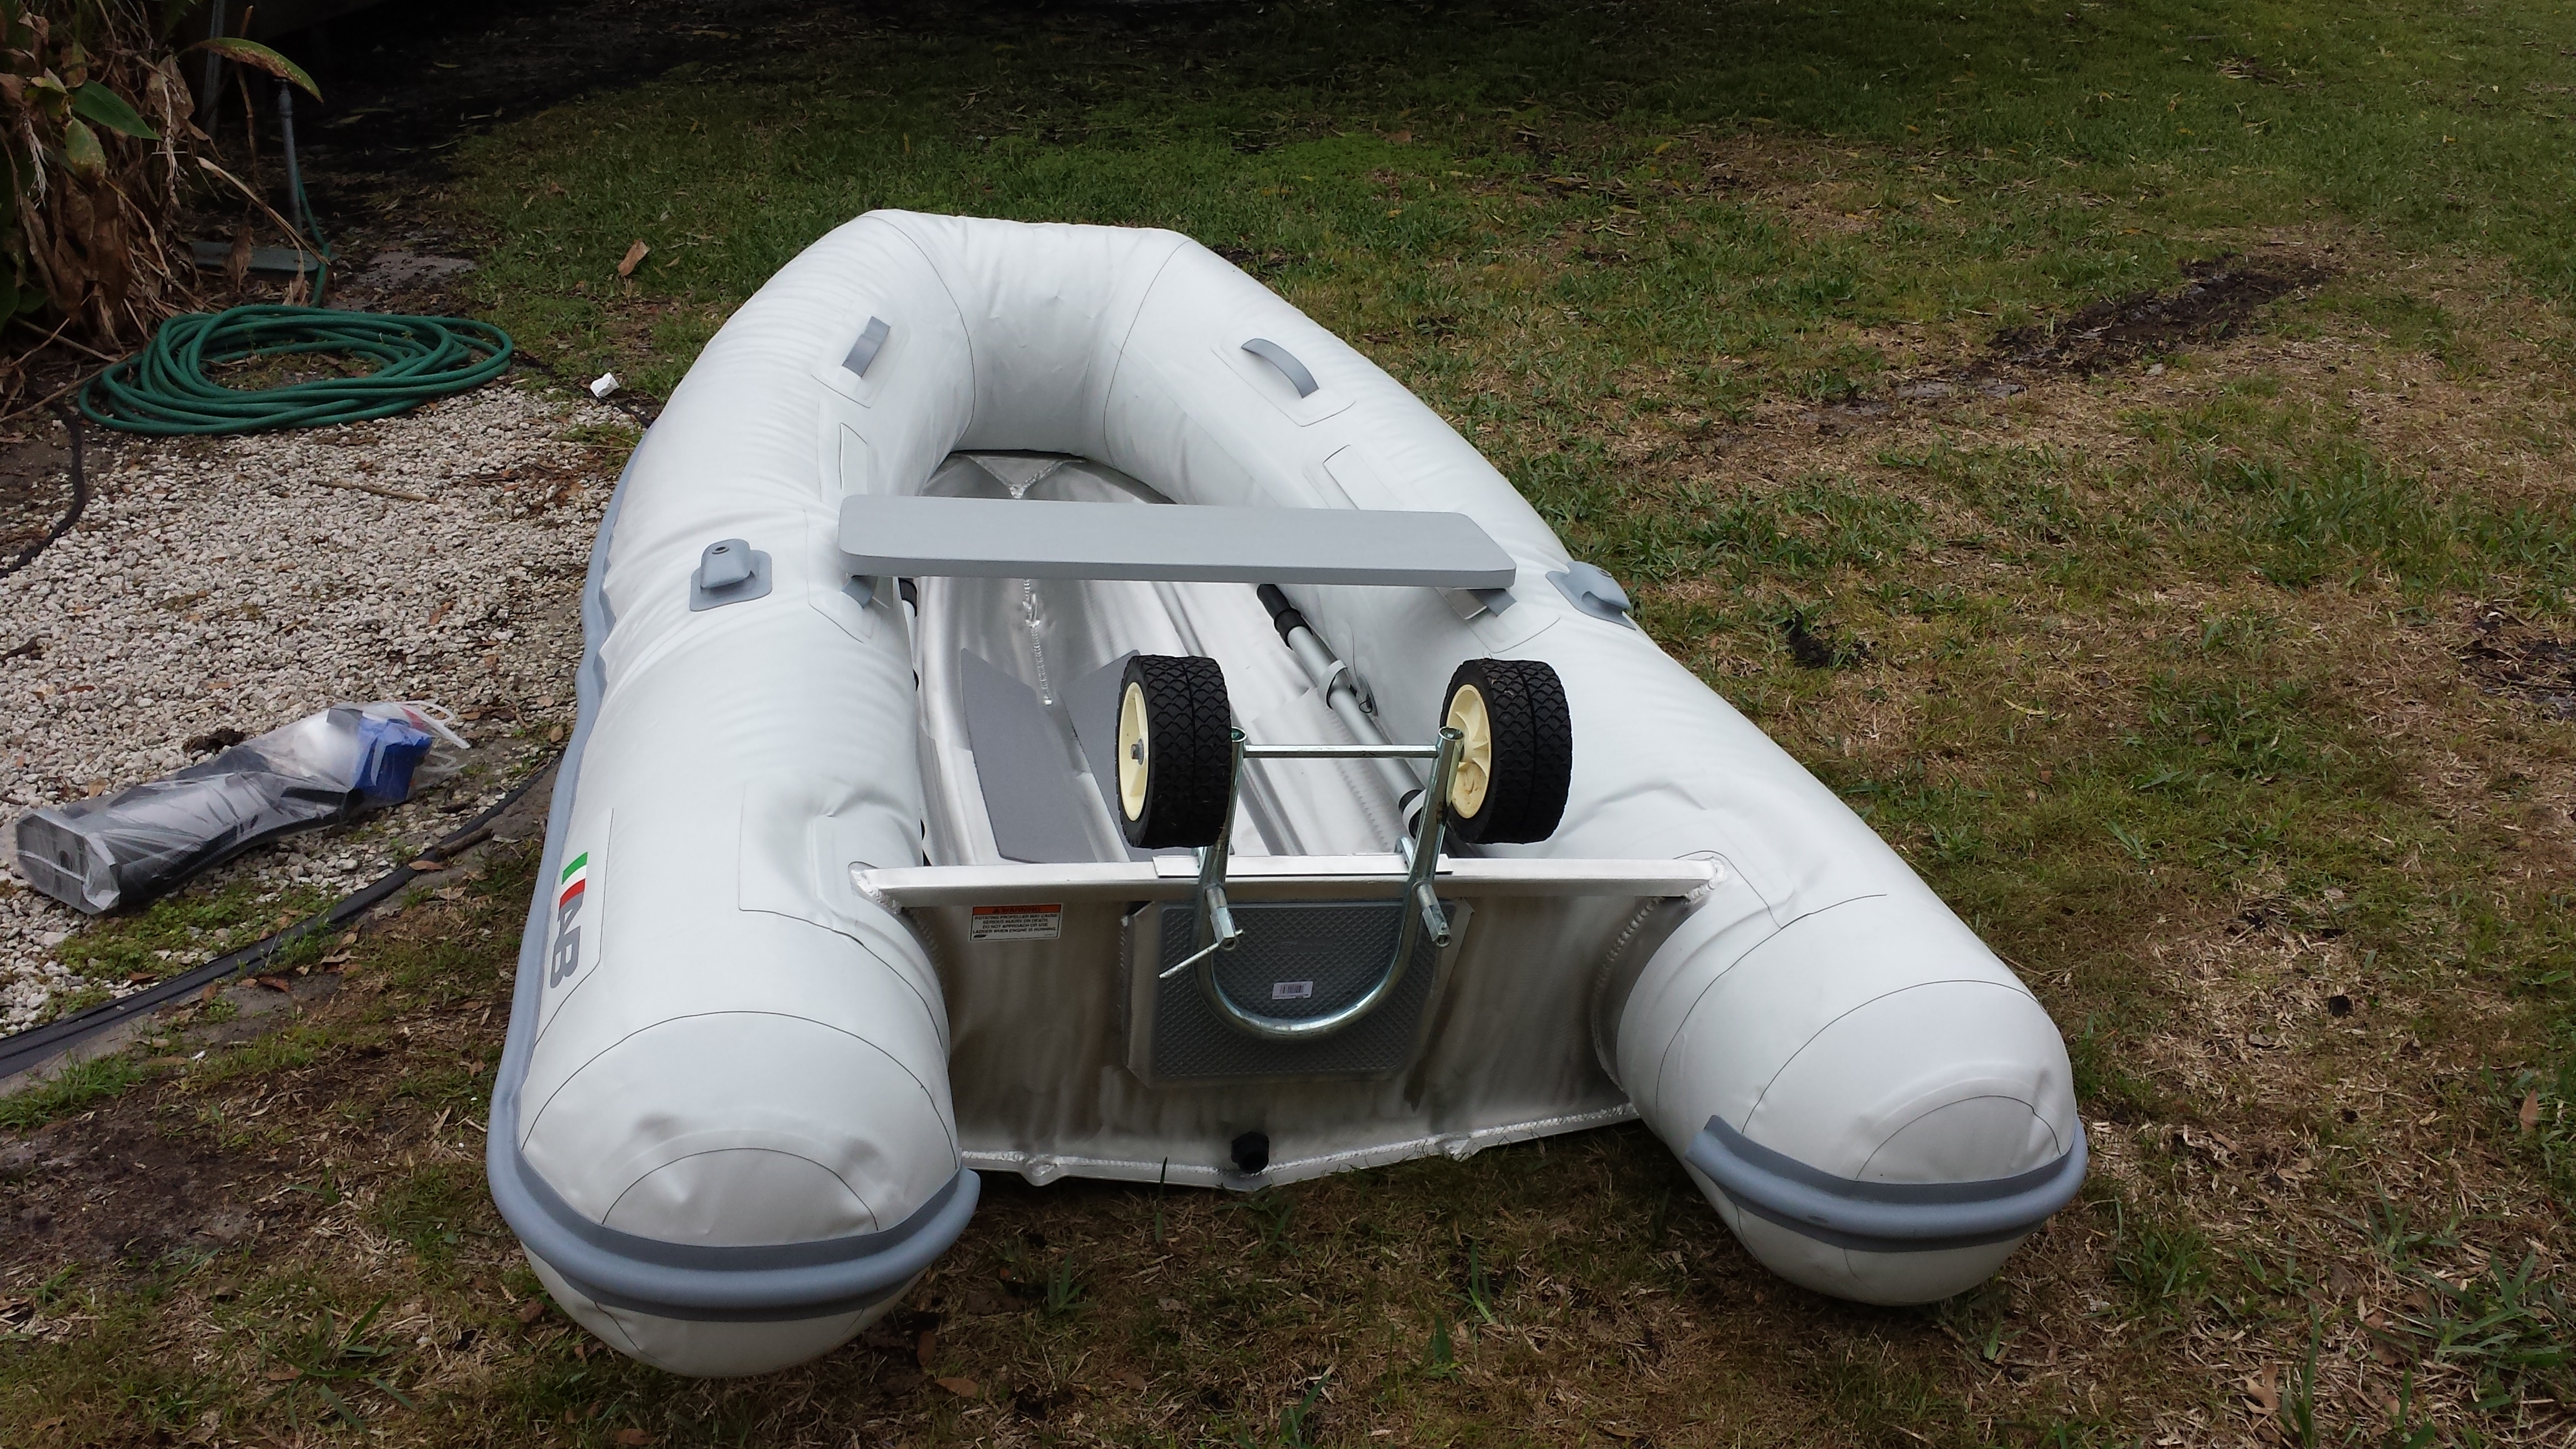 AB UltraLight (UL) 8'6" RIB |
Shortly before Christmas, 2013 I purchased an
UltraLight AB dinghy from Defender. It arrived New Year's
Eve, and I quickly inflated it and checked it out. In the picture on the left and below the dinghy is only partially inflated - just enough to test for any leaks. |
|
This dinghy is supposed to weigh about 68 Lbs, which is almost
half what the fiberglass RIB weighs. Combined with the 75
Lbs for my outboard the total weight is still less than 150 Lbs. It also about 6" shorter than the old RIB, which should make storing on deck a little easier. |
 My 2013 Christmas Present to Myself |
|
The dinghy is only rated for an 8 HP outboard with a 5 HP recommended.
I will continue to use my 9.9 HP outboard. I used the same
outboard on a previous aluminum RIB, which was about the same
size and weight as this one. Running that previous dinghy
at WOT was kinda scary, but I did have one of the fastest
dinghies in any anchorage. I expect this dinghy will be just as fast and just as scary. |
|
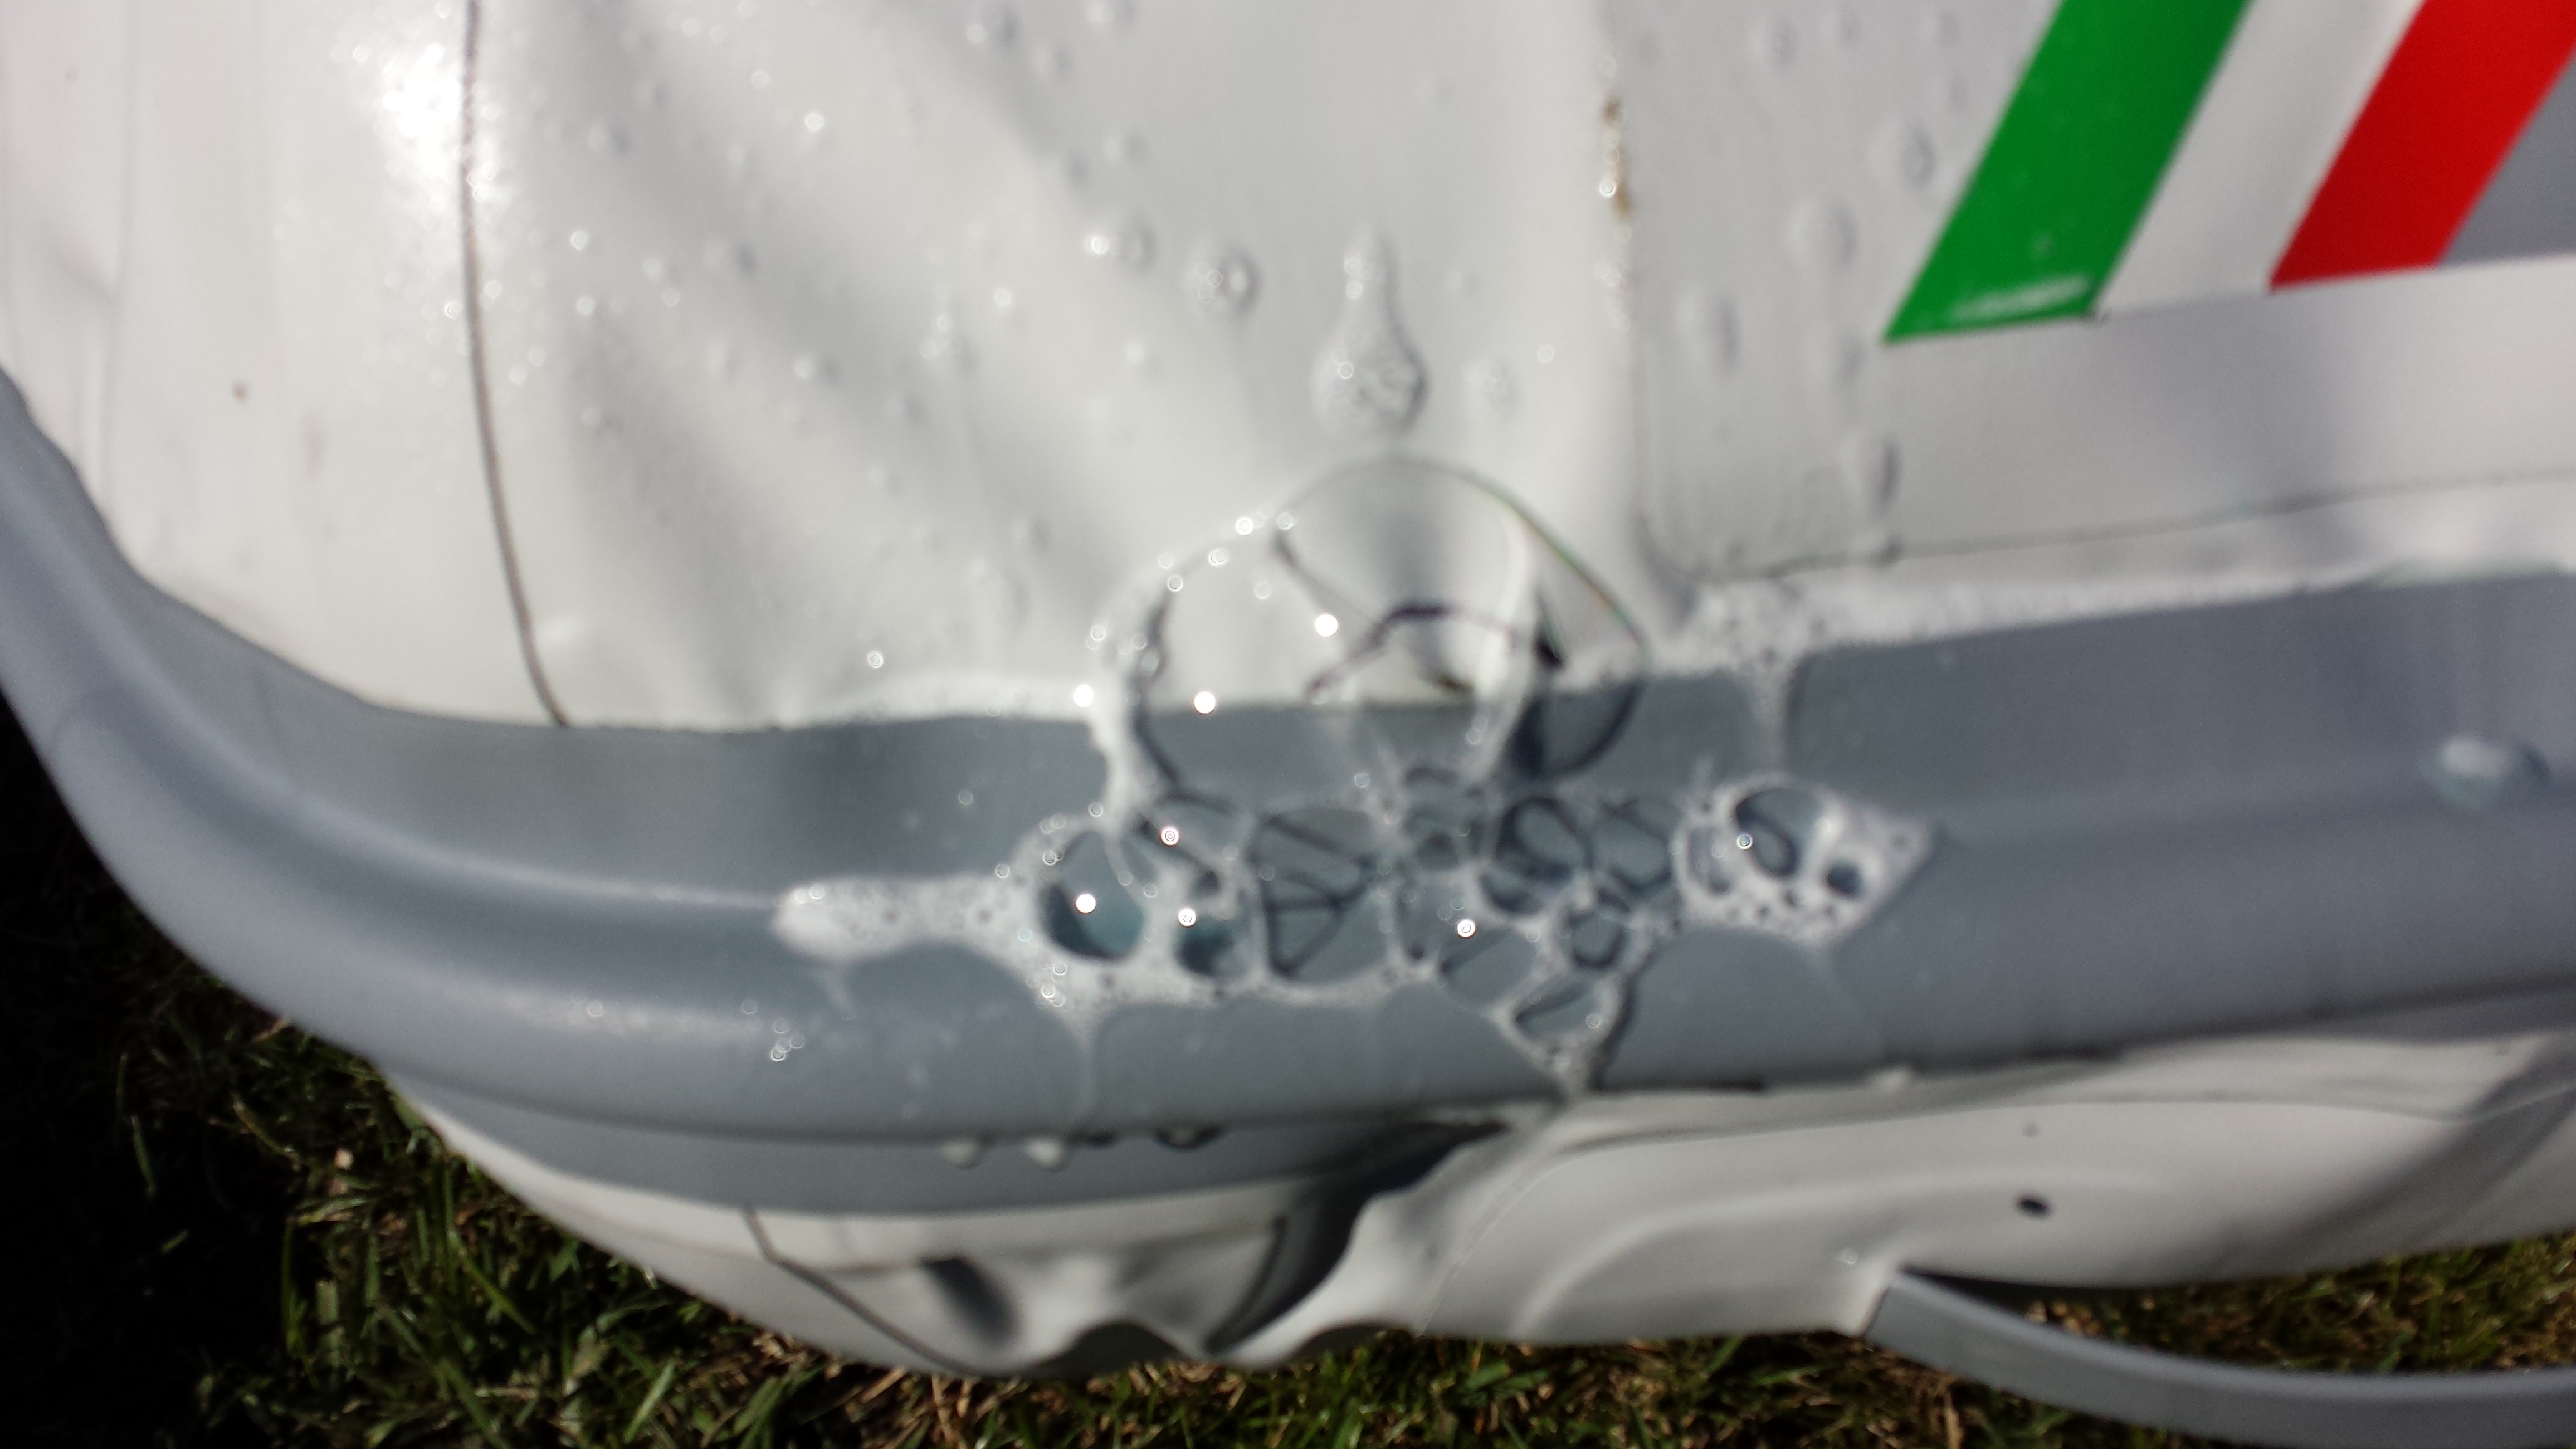 Punture Identified by Soap Bubbles |
Maybe I shouldn't own an inflatable. The next day after the initial inflation the starboard tube was almost completely deflated. I found a puncture on the bow section of the tube just above the rub stripe. |
|
On the right is a picture of the new dinghy immediately after I
initially inflated it - straight out of the packaging. At
the time I didn't notice the puncture in the bow which is
visible in the red rectangle drawn over the picture. After AB reviewed this and other pictures they concluded that the dighy struck or was struck by another object. That appears to be the case as this picture shows some scuff marks around the puncture. Those marks must have been removed in the picture above by the soapy water. Although I agree with AB that the puncture was not a manufacturing defect, they took the position I caused puncture. I think I provided as much evidence as possible through pictures that this puncture was there when I removed the dinghy from the packaging. I received no warranty consideration from AB. |
 Puncture Marked by Red Rectangle |
 Patch Applied by Suncoast Inflatables |
Defender supported my position with AB and did provide
compensation to cover the repair and my good will. I
learned from Defender that they received the dinghy from AB
already packaged and the only handling they provided was to put
the package on a palet for shipping. The package as
delivered to me showed to no sign of damage. I believe the
puncture ocurred prior to or during the time AB packaged the
dinghy for shipment to Defender. Hoping AB would reconsider I took the dinghy to the closest AB dealer in Clearwater, FL. The patch applied by Suncoast Inflatables is shown on the left. |
|
I could have saved 5 or 6 hours of driving by taking the
dinghy to a non-AB dealer in St, Augustine, but I was hoping the
AB dealer might have some credibility with AB and get them to at
least cover the cost of the repair. No joy there. So I am satisfied with the customer support provided by Defender, and I think this dinghy is a very good product, however; it will be the last new AB dinghy I ever purchase based on the level of support I received from the company on this purchase. |
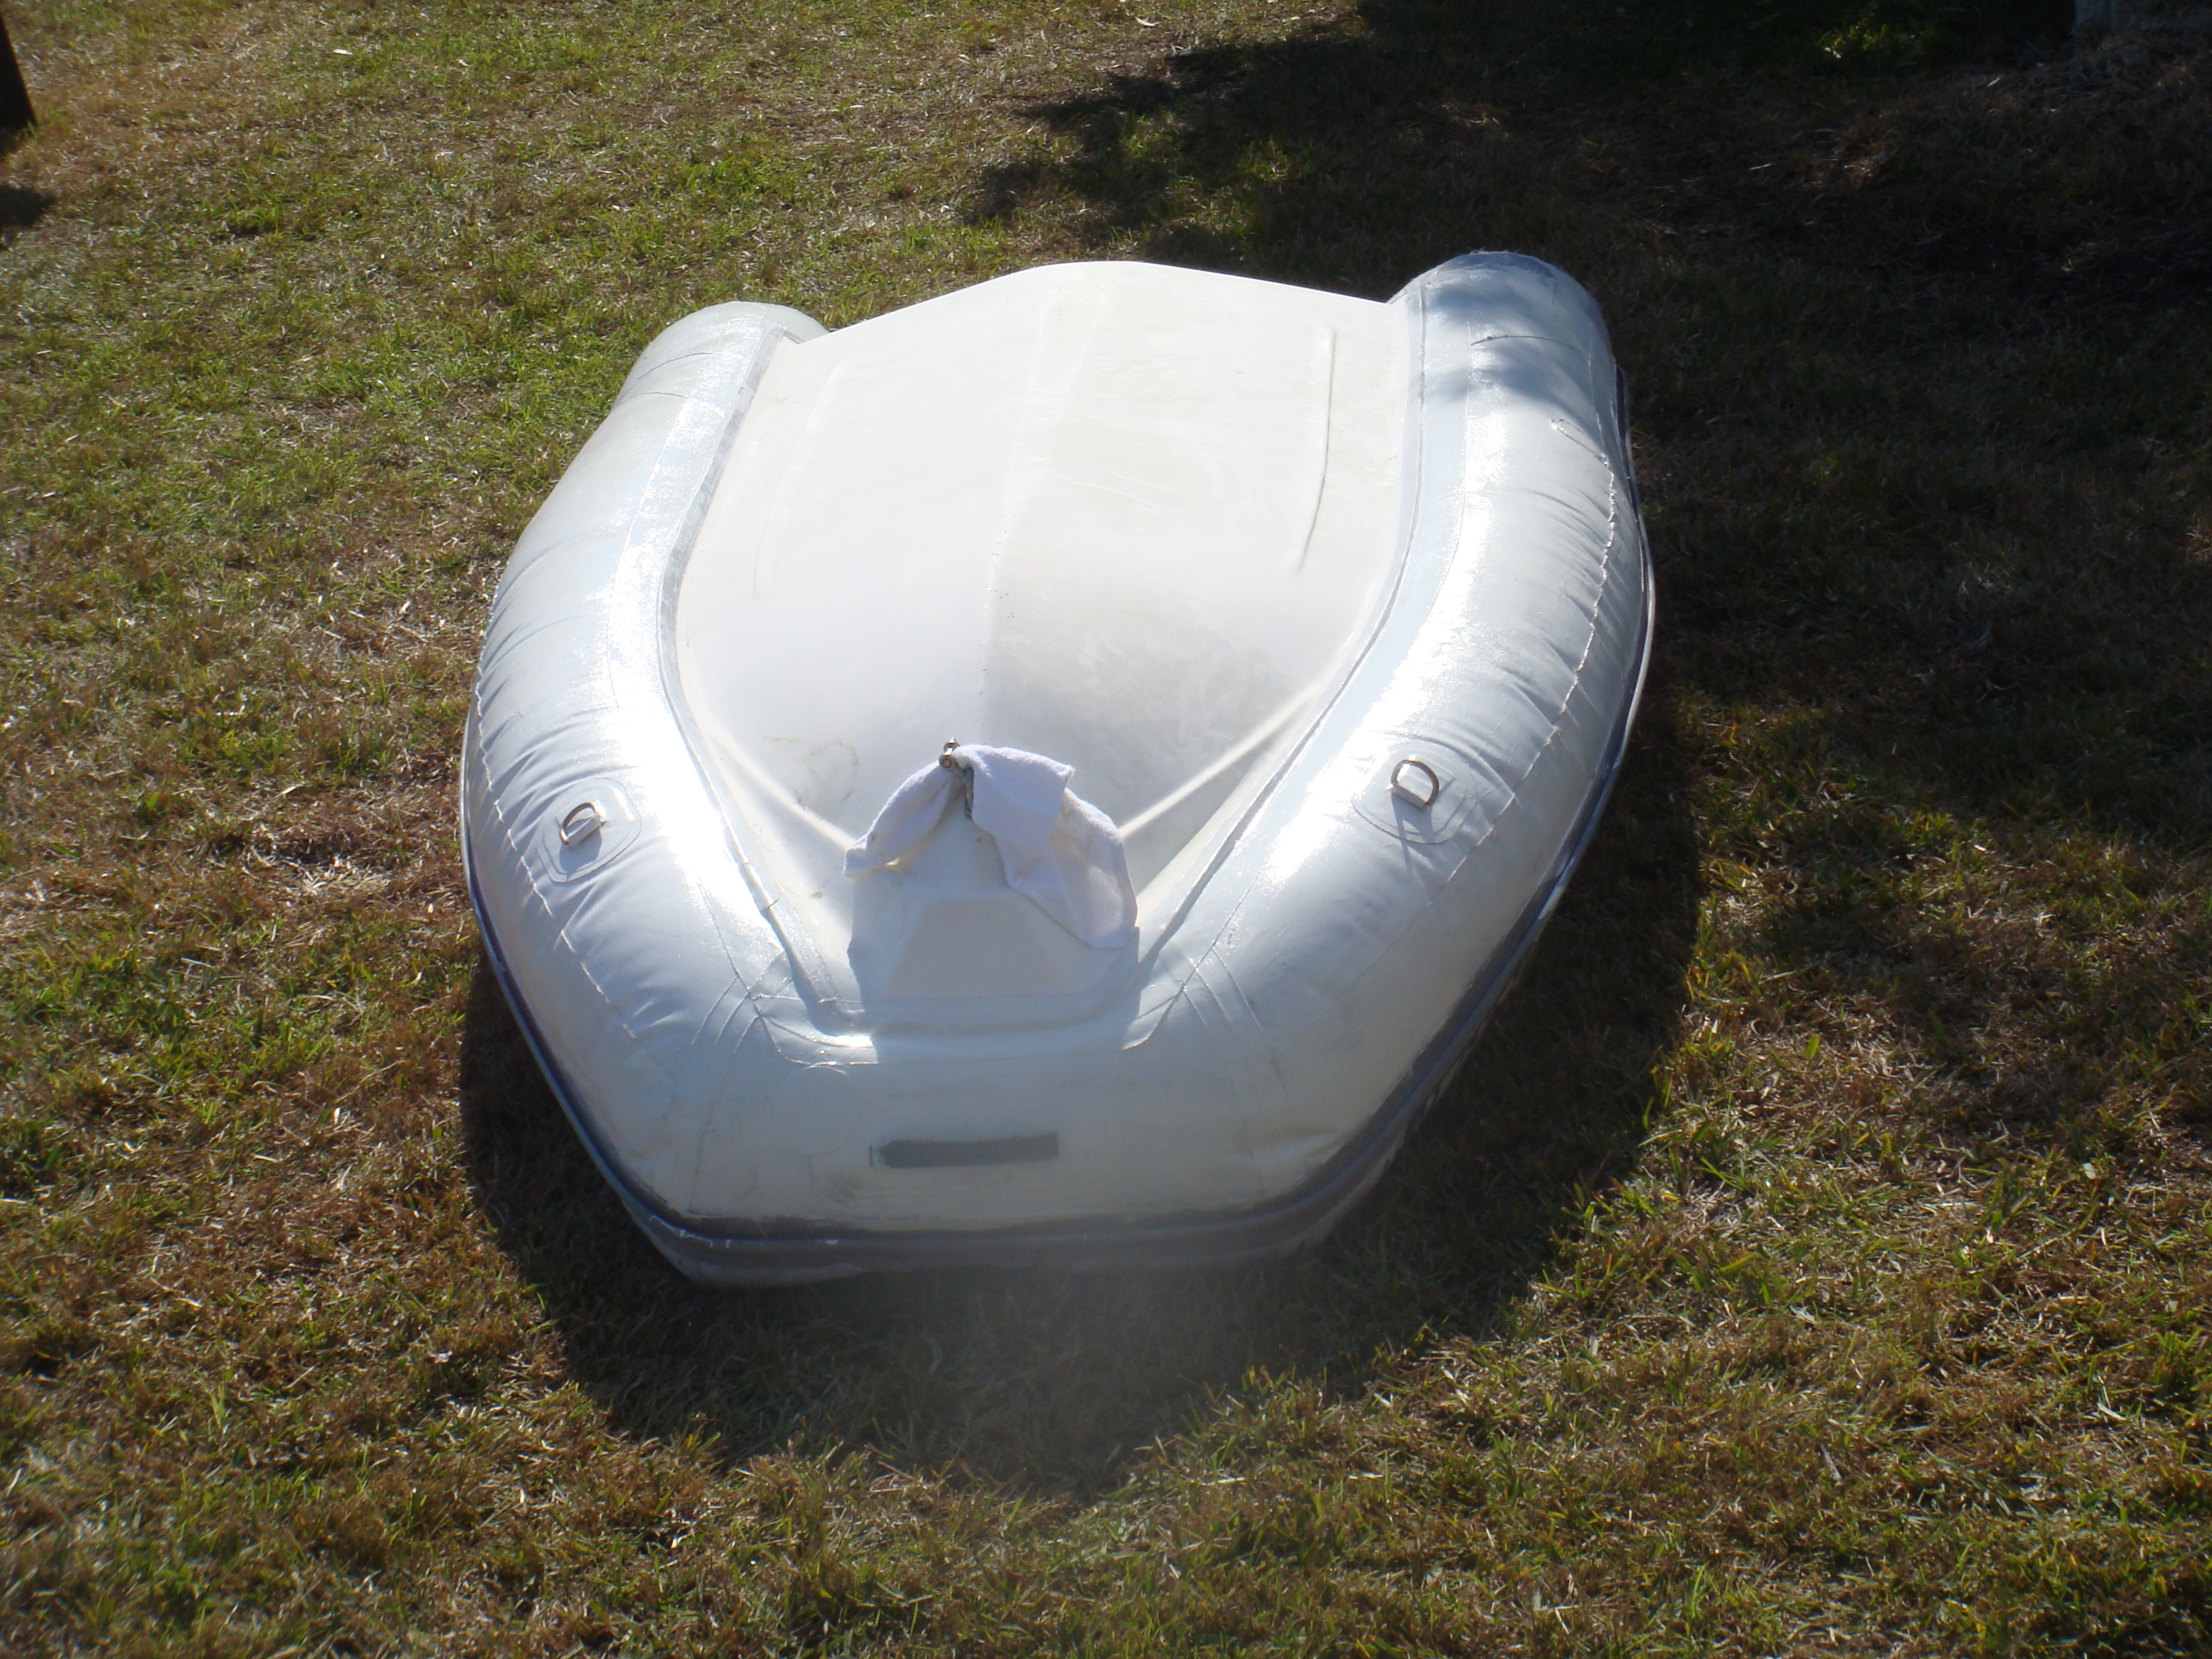
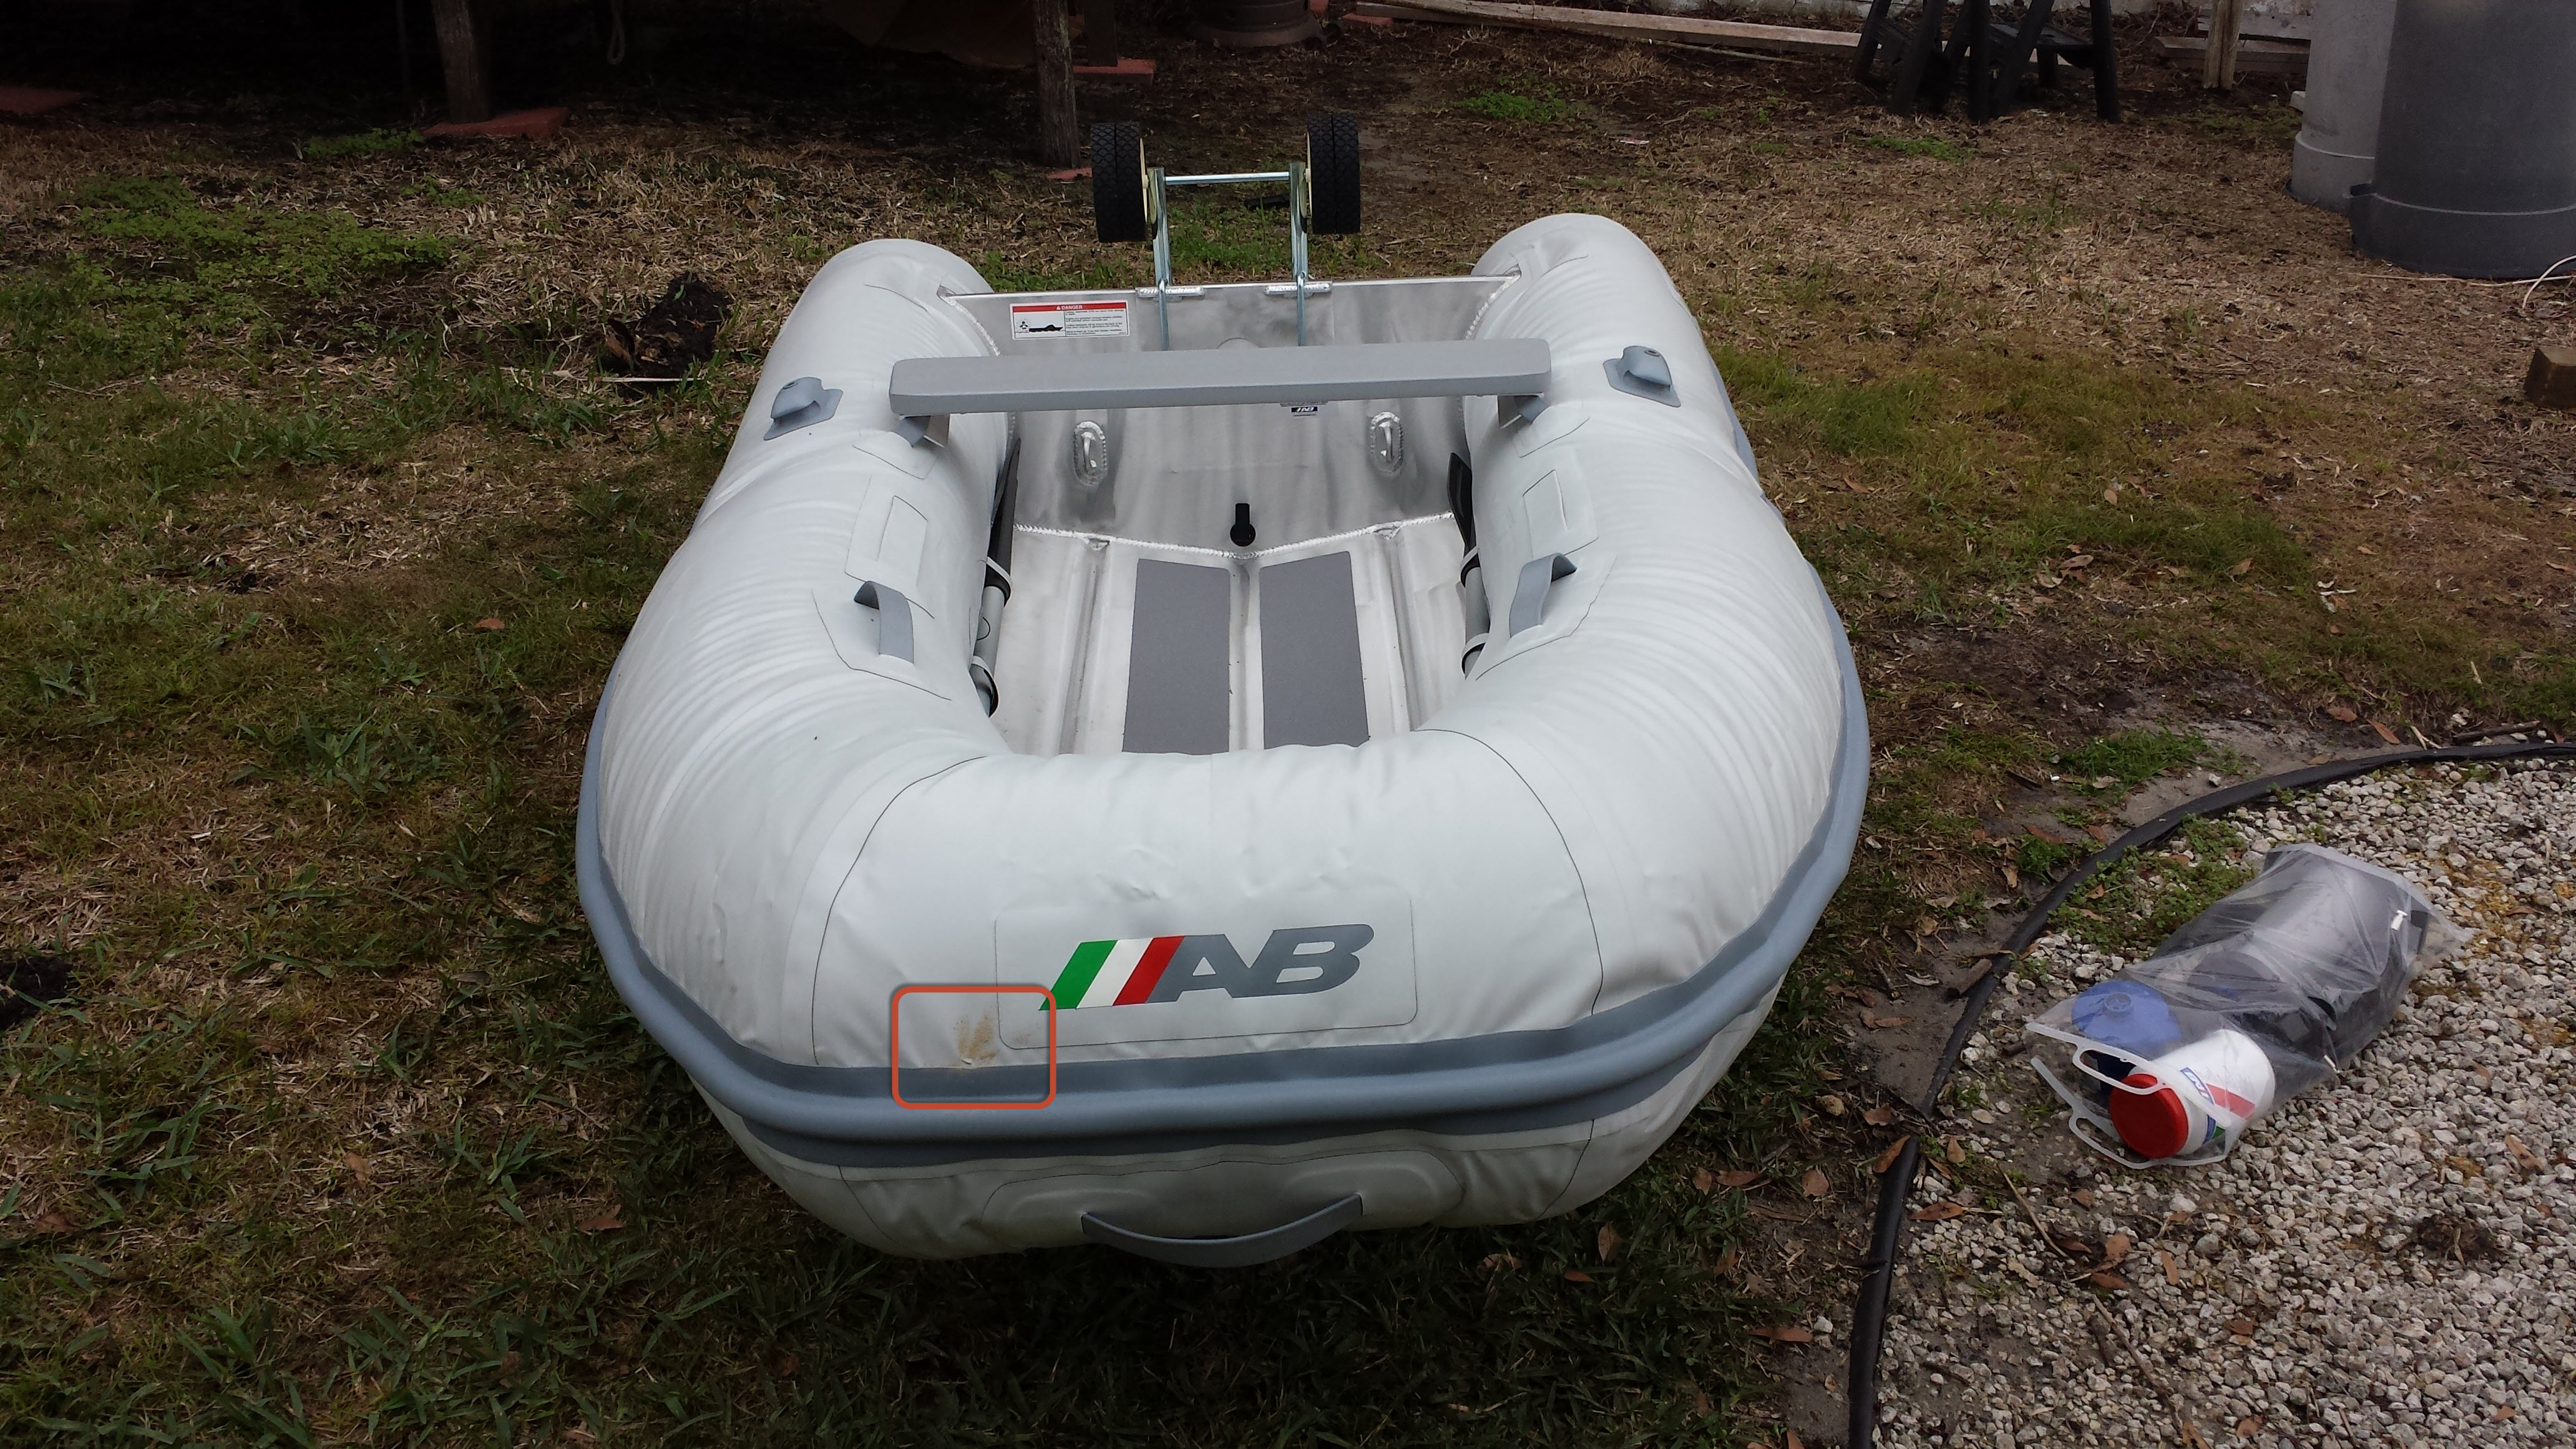
 New Dinghy on Deck with Florida Registration Numbers |
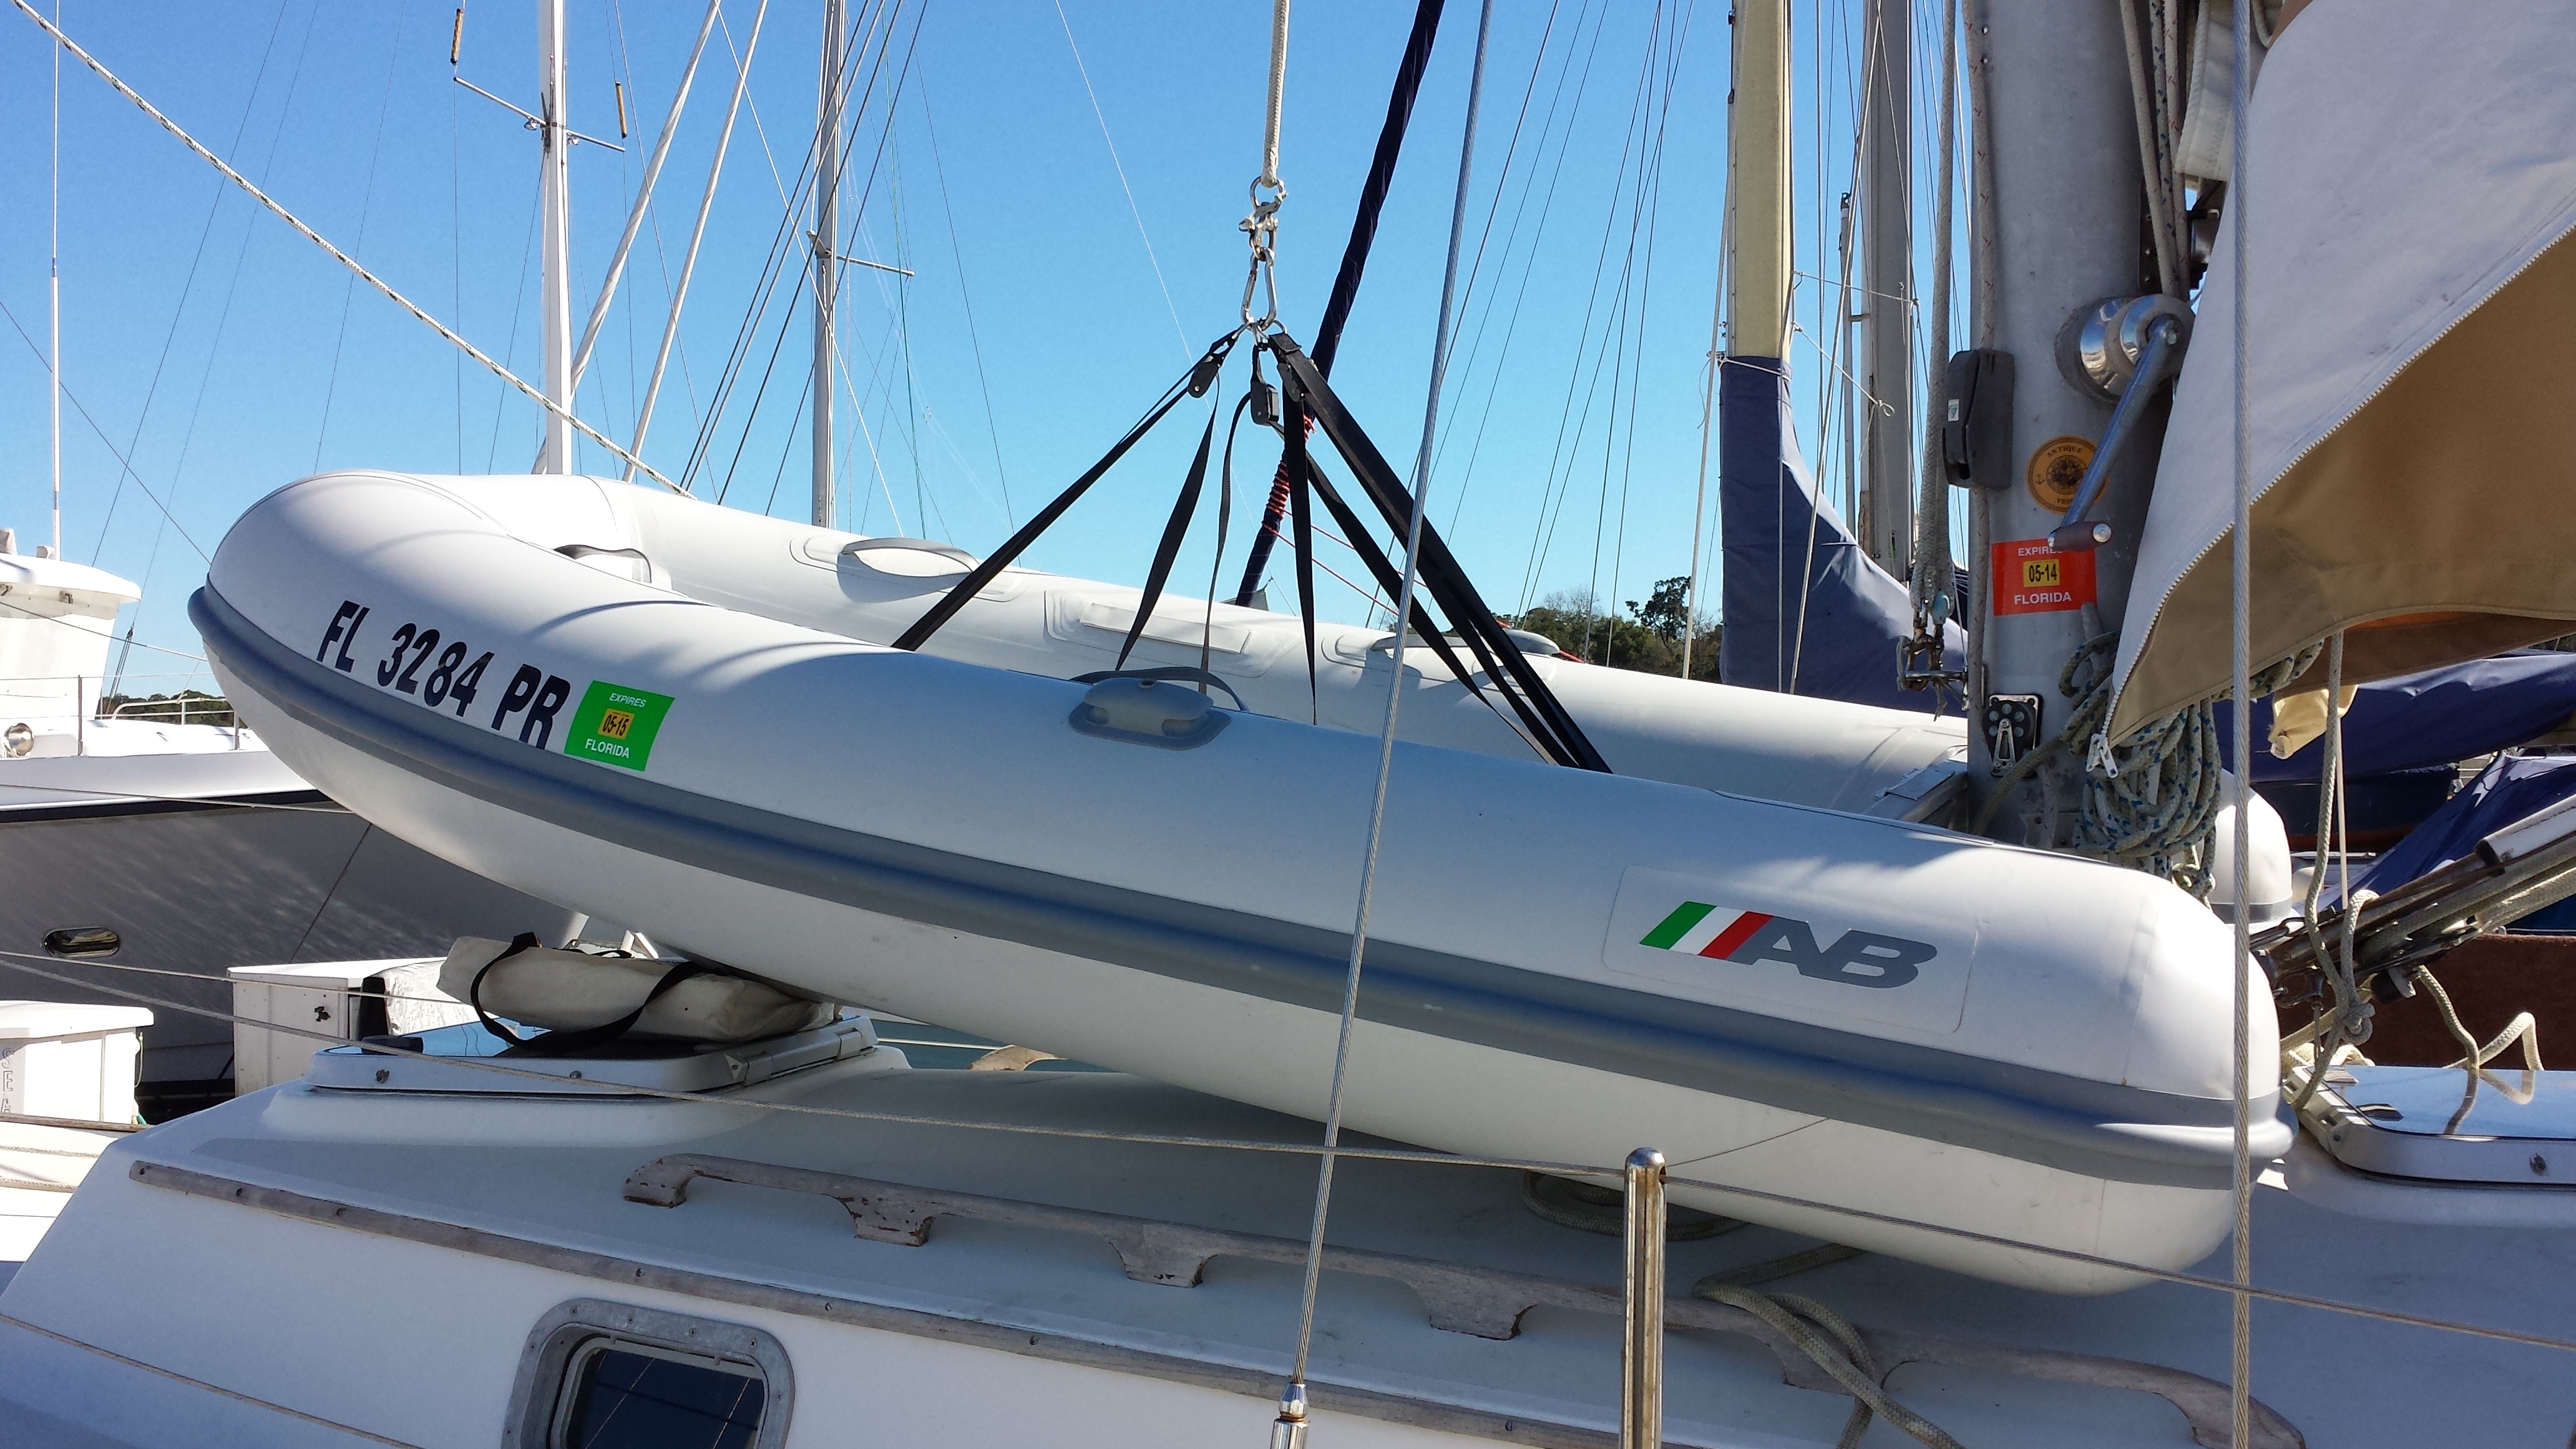
 RIB Secured on the Trunk Cabin |
Two things I like right away about the new dinghy are how easy
it is to get it on and off the boat and how well it fits fully
inflated on the
trunk cabin, forward of the mast. With the previous AB, I
had to partially deflate the dinghy when under way to allow easy
passage from the cockpit to the foredeck. The small size and light weight may make this the best RIB I've owned. After one winter in the Bahamas, I am very pleased with the performance. It's a little cramped with two people and more than a couple of bags of groceries, but it is still scary fast even when loaded. |