Sailing Vessel (SV) Sarah
Sarah has a new owner as of 7/26/2021. There will be no more updates to these SV Sarah pages
Sarah has a new owner as of 7/26/2021. There will be no more updates to these SV Sarah pages
| Galley Upgrades |
| Contents: |
| Galley Stove (2002) | |
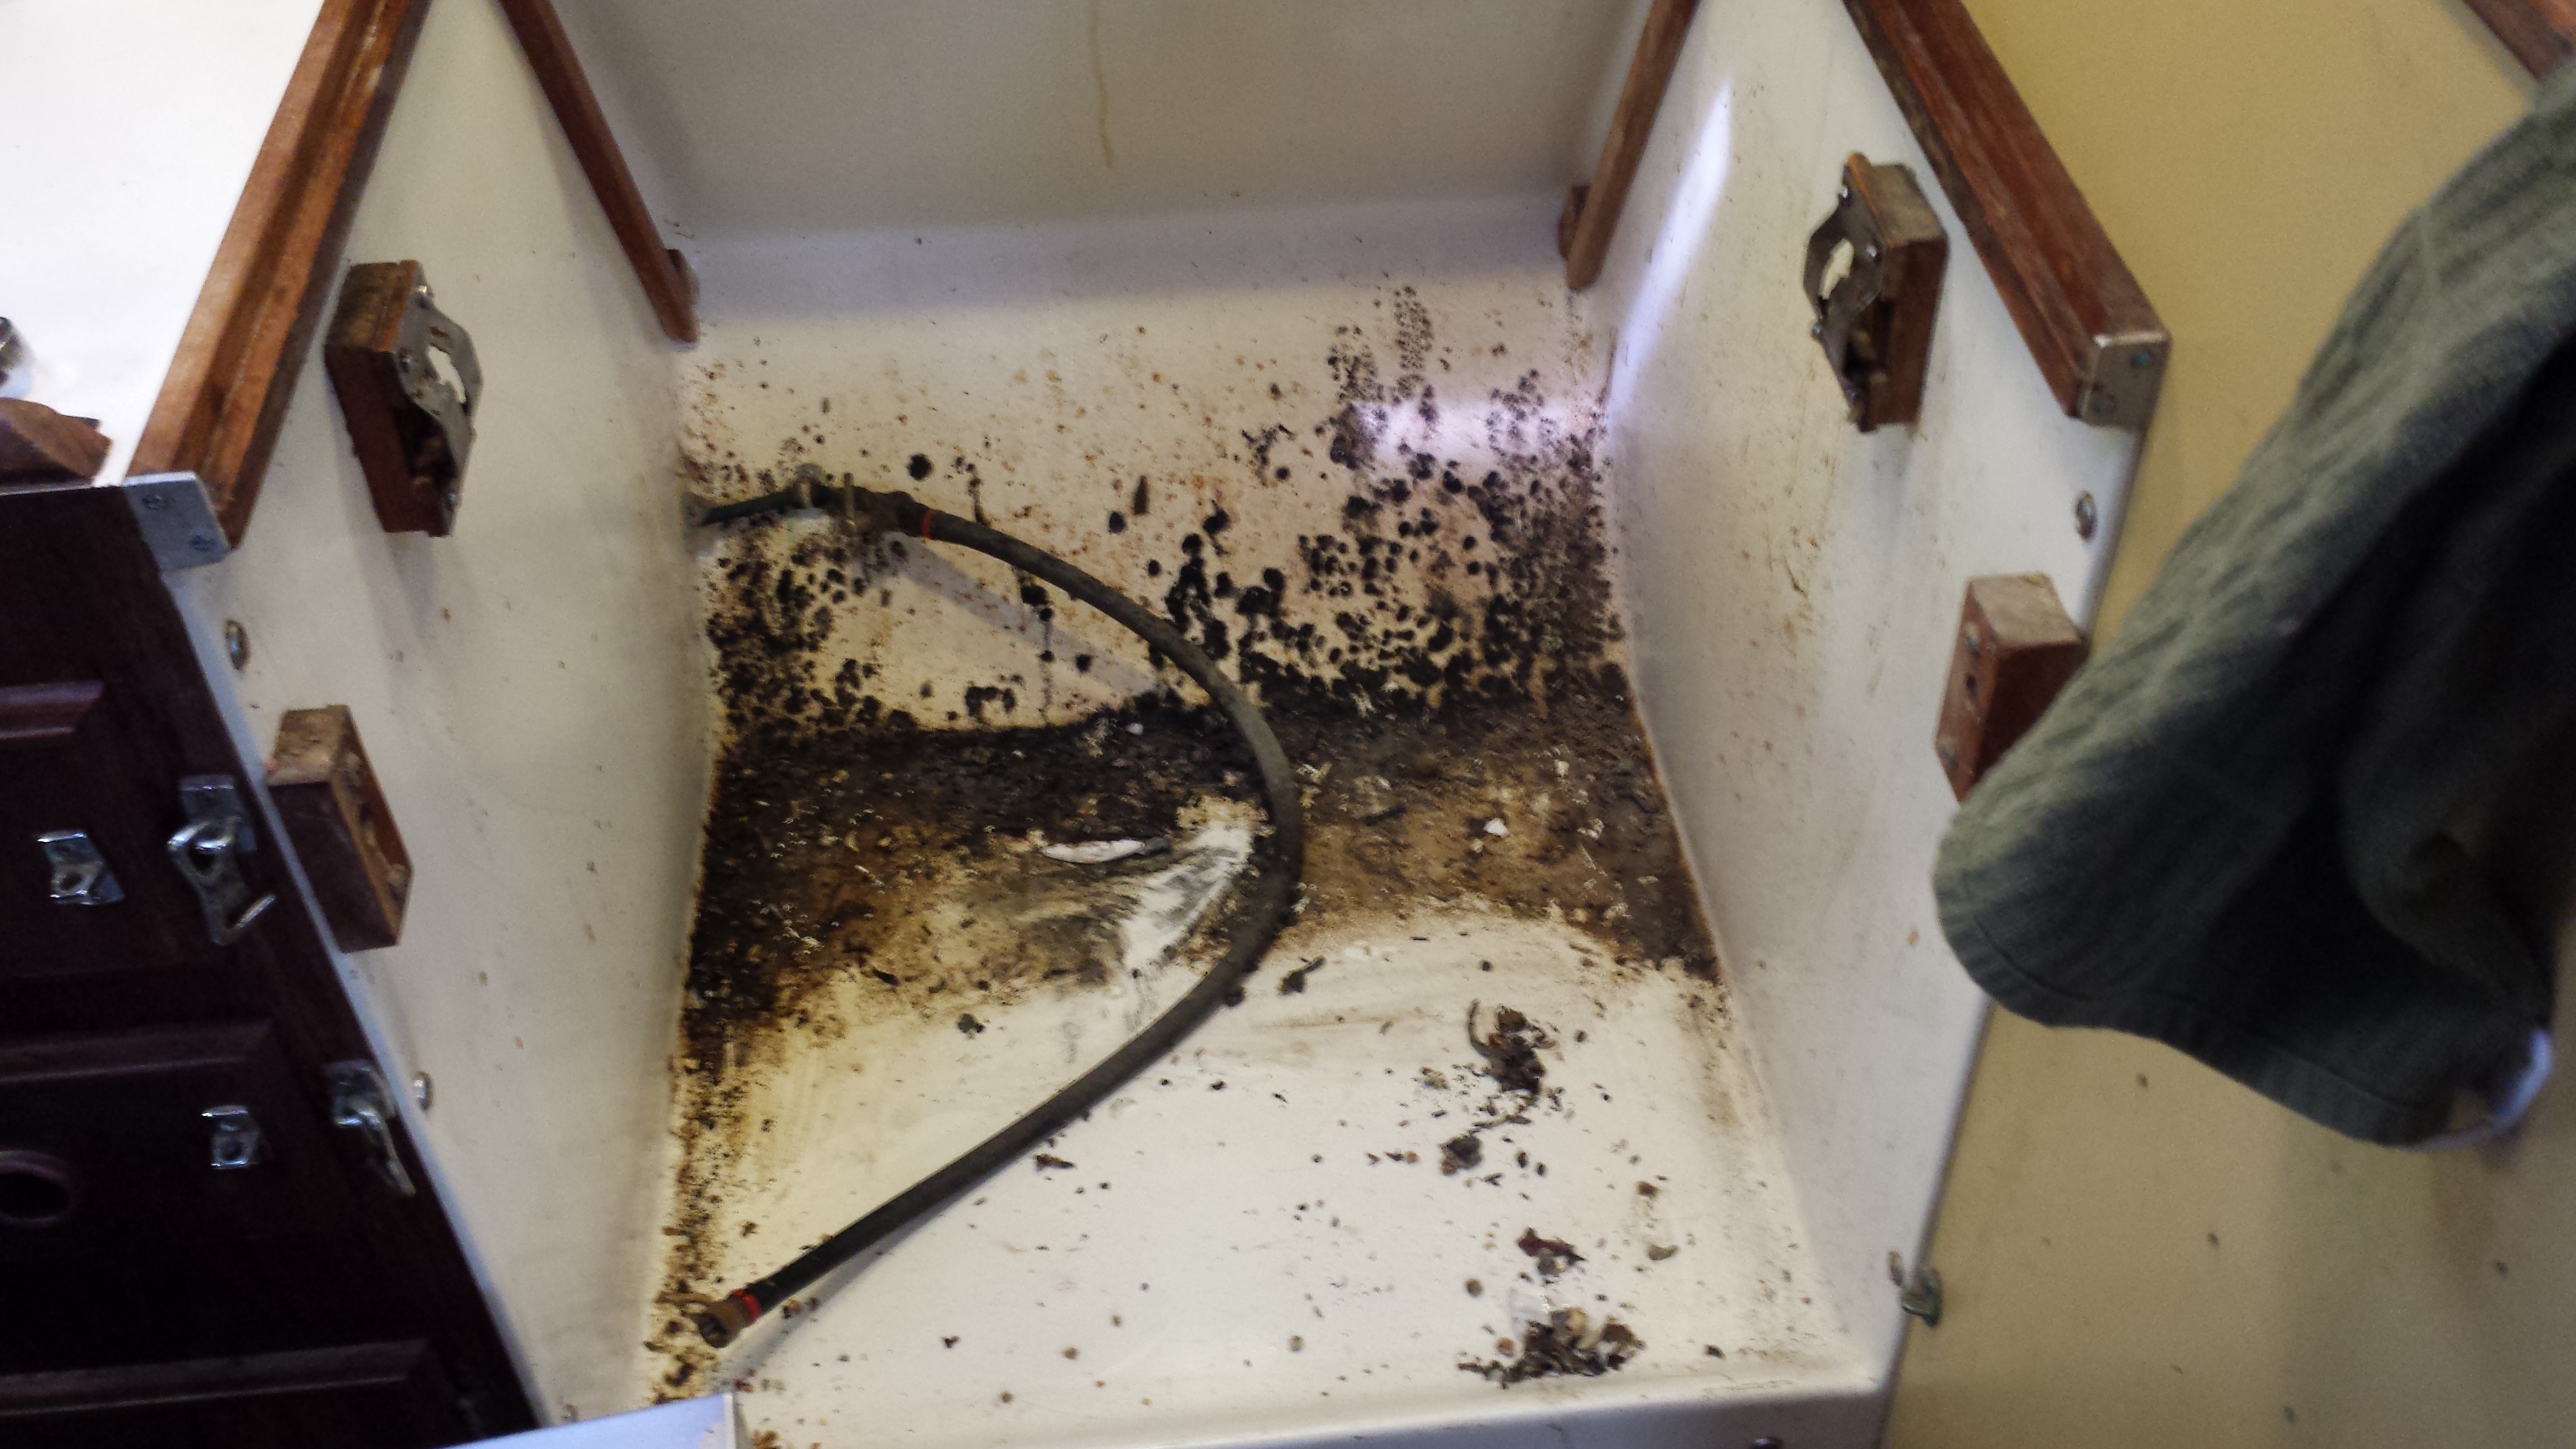
 Oven Cavity After Kenyon Was Removed |
I replaced the old, I assume original equipment, Kenyon stove with a Force 10 3-burner stove with oven and broiler. The Kenyon was a functional cooker, but the oven control was not working and most of the enameled steel components were showing some level of corrosion. Also it was impossible to quickly move the Kenyon out of the stove cavity to clean behind, under and beside the stove. Consequently when I removed the Kenyon what was left was pretty disgusting (picture on the left). |
| Force 10 has made a lot of improvements in their stoves in the ten years since I installed one of their 2-burner units on my old Columbia 8.7. Not the least of the improvements is the thermostatically controlled oven - although I don't expect temperature control anywhere near that of a home oven (which is pretty poor itself). The Force 10 is about 1/2" narrower than the Kenyon, and about 1" deeper. Therefore I had to add some additional cleat stock for the gimbaled mounts. |
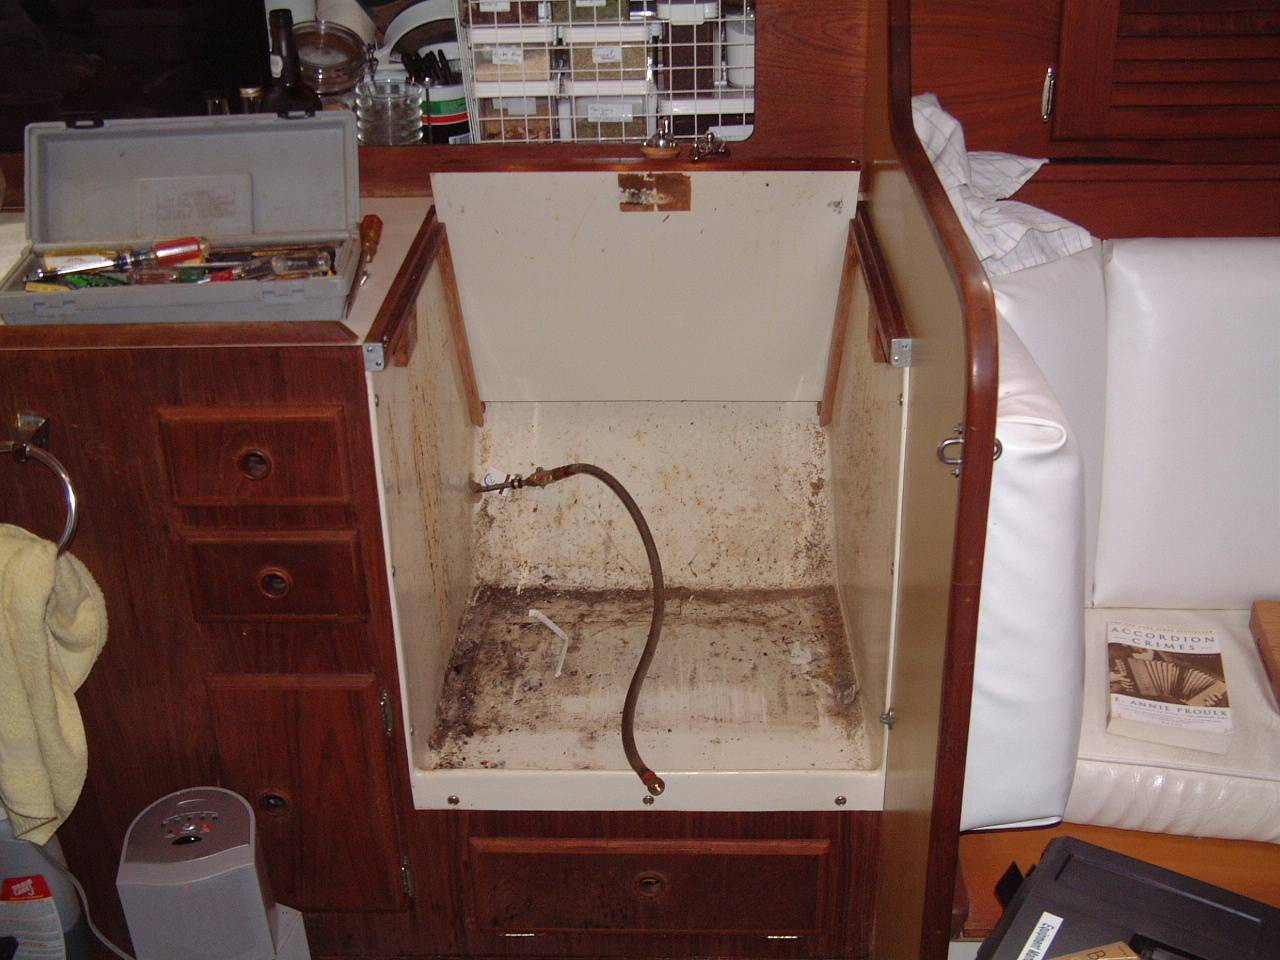
 New Stove Installed |
 Force 10 3-Burner Stove |
Because the Force 10 is deeper, the slide over counter top-cover (picture above) for the stove top does not slide behind the stove. I would have to move the stove mounts out about 1-1/2" to provide enough room for the cover to slide behind the stove as it did before. I'm not sure that is worth the effort, so for now the cover will be stowed elsewhere . |
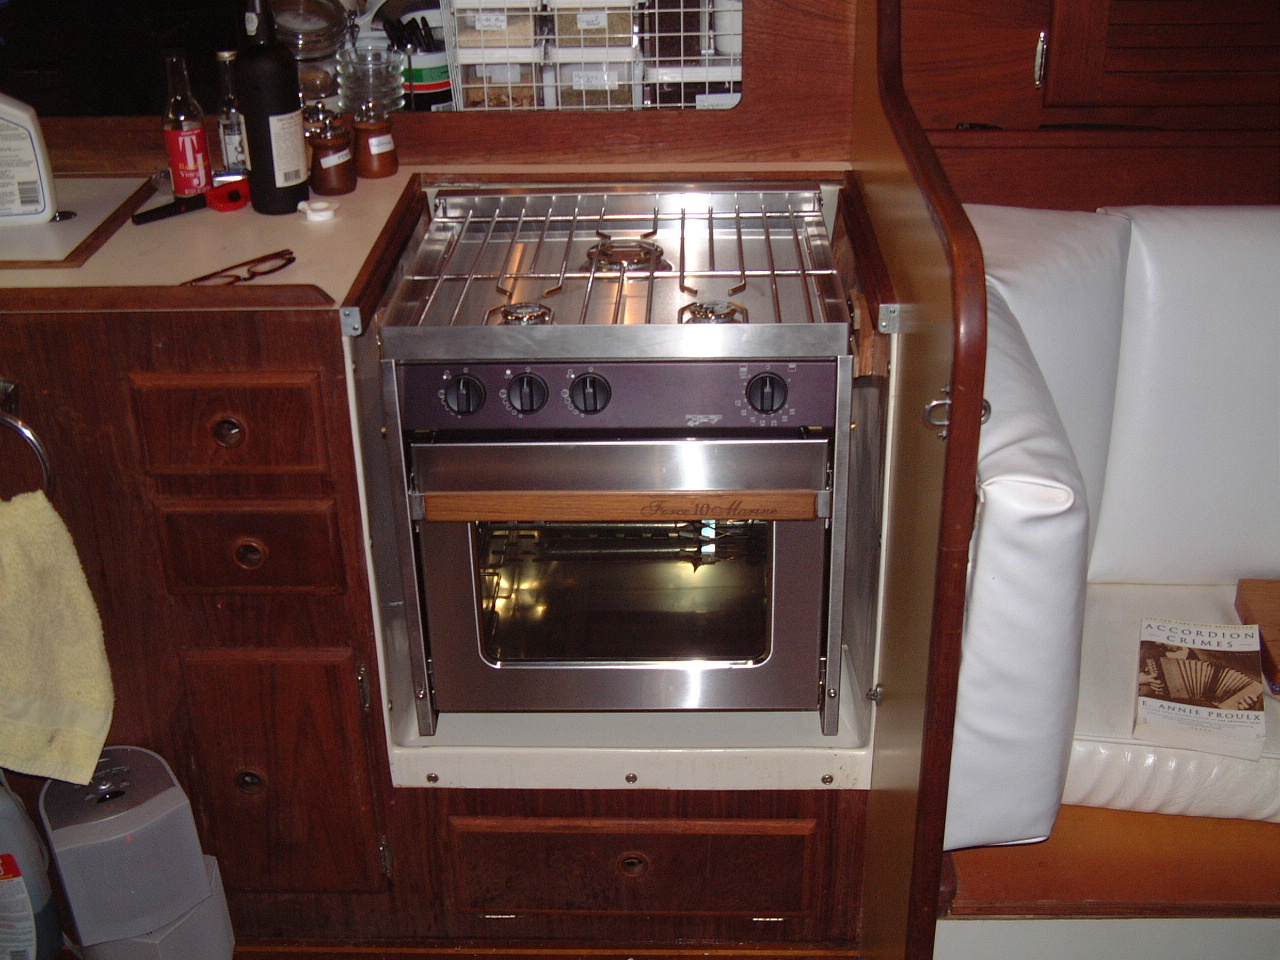
| Finally the new stove is in place. One thing is for sure, the stove will never again be as clean and shiney as in this picture. |
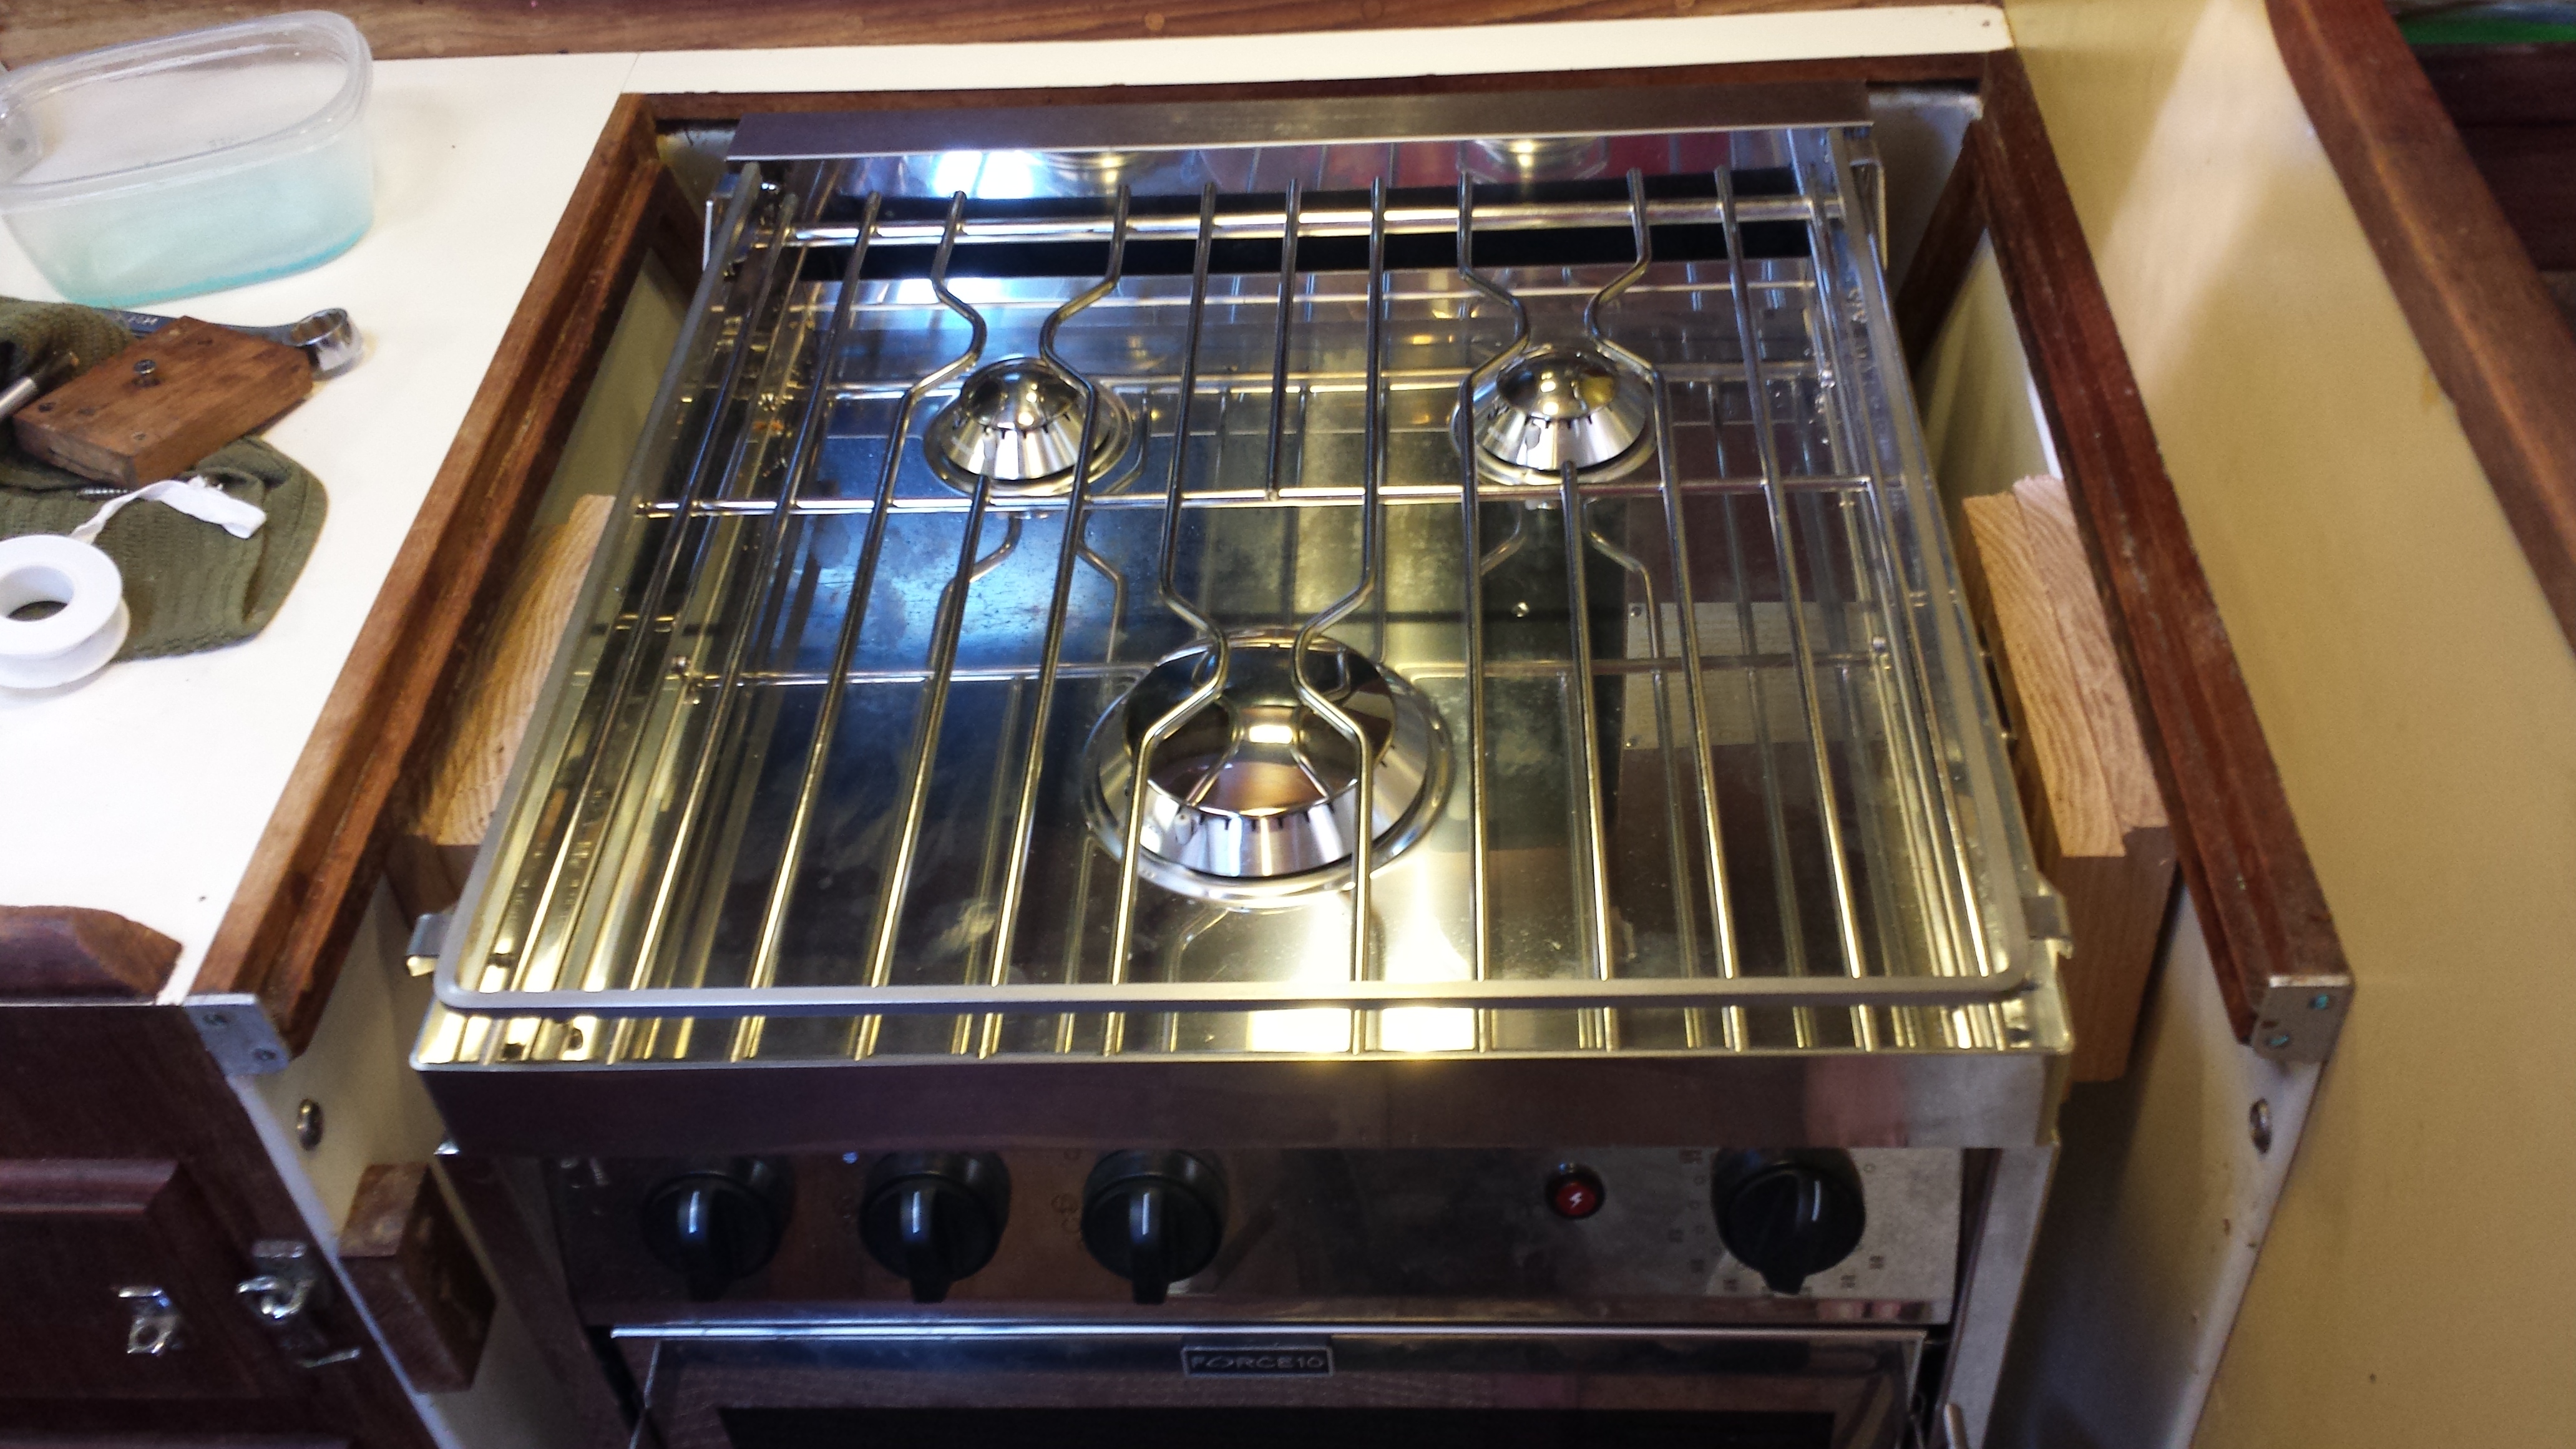
 Force 10 Stove Top |
| Second Stove Replacement (2014) | |
|
After 12 years of daily use it was finally time to replace the Force 10
stove. The small machine scews that secured the flame disbursing tops had
all seized. I tried to remove them and eventually drilled them out, but I
still could not remove the screws. The burners would light only with
difficulty. In order to fix these problems I would need to take the stove
apart, remove the burners (probably a destructive removal) and purchase
replacements. Eventually the stove top burners were almost impossible to light or keep lit. For the last month of a Bahamas cruise in 2014 I used a portable single-burner cooker that uses Butane cartridges. When I returned to the states in May, 2014 it was clearly time to either repair or replace the Force 10 stove. |
|
 12 Years of Crud under the Stove |
I figured 12 years of daily use
gave me good value from this stove, so I decided to replace it with another
Force 10. I have been very satisfied with the Force 10 product, but
the main reason for staying with Force 10 was the expectation that it would
be a drop-in replacement. That didn't quite work out. First I had to remove the old stove, and just like before I found a lot of crud (and a few lost utensils) in the stove compartment. |
| A messy job, but it only took an hour or so to clean up the crud. |
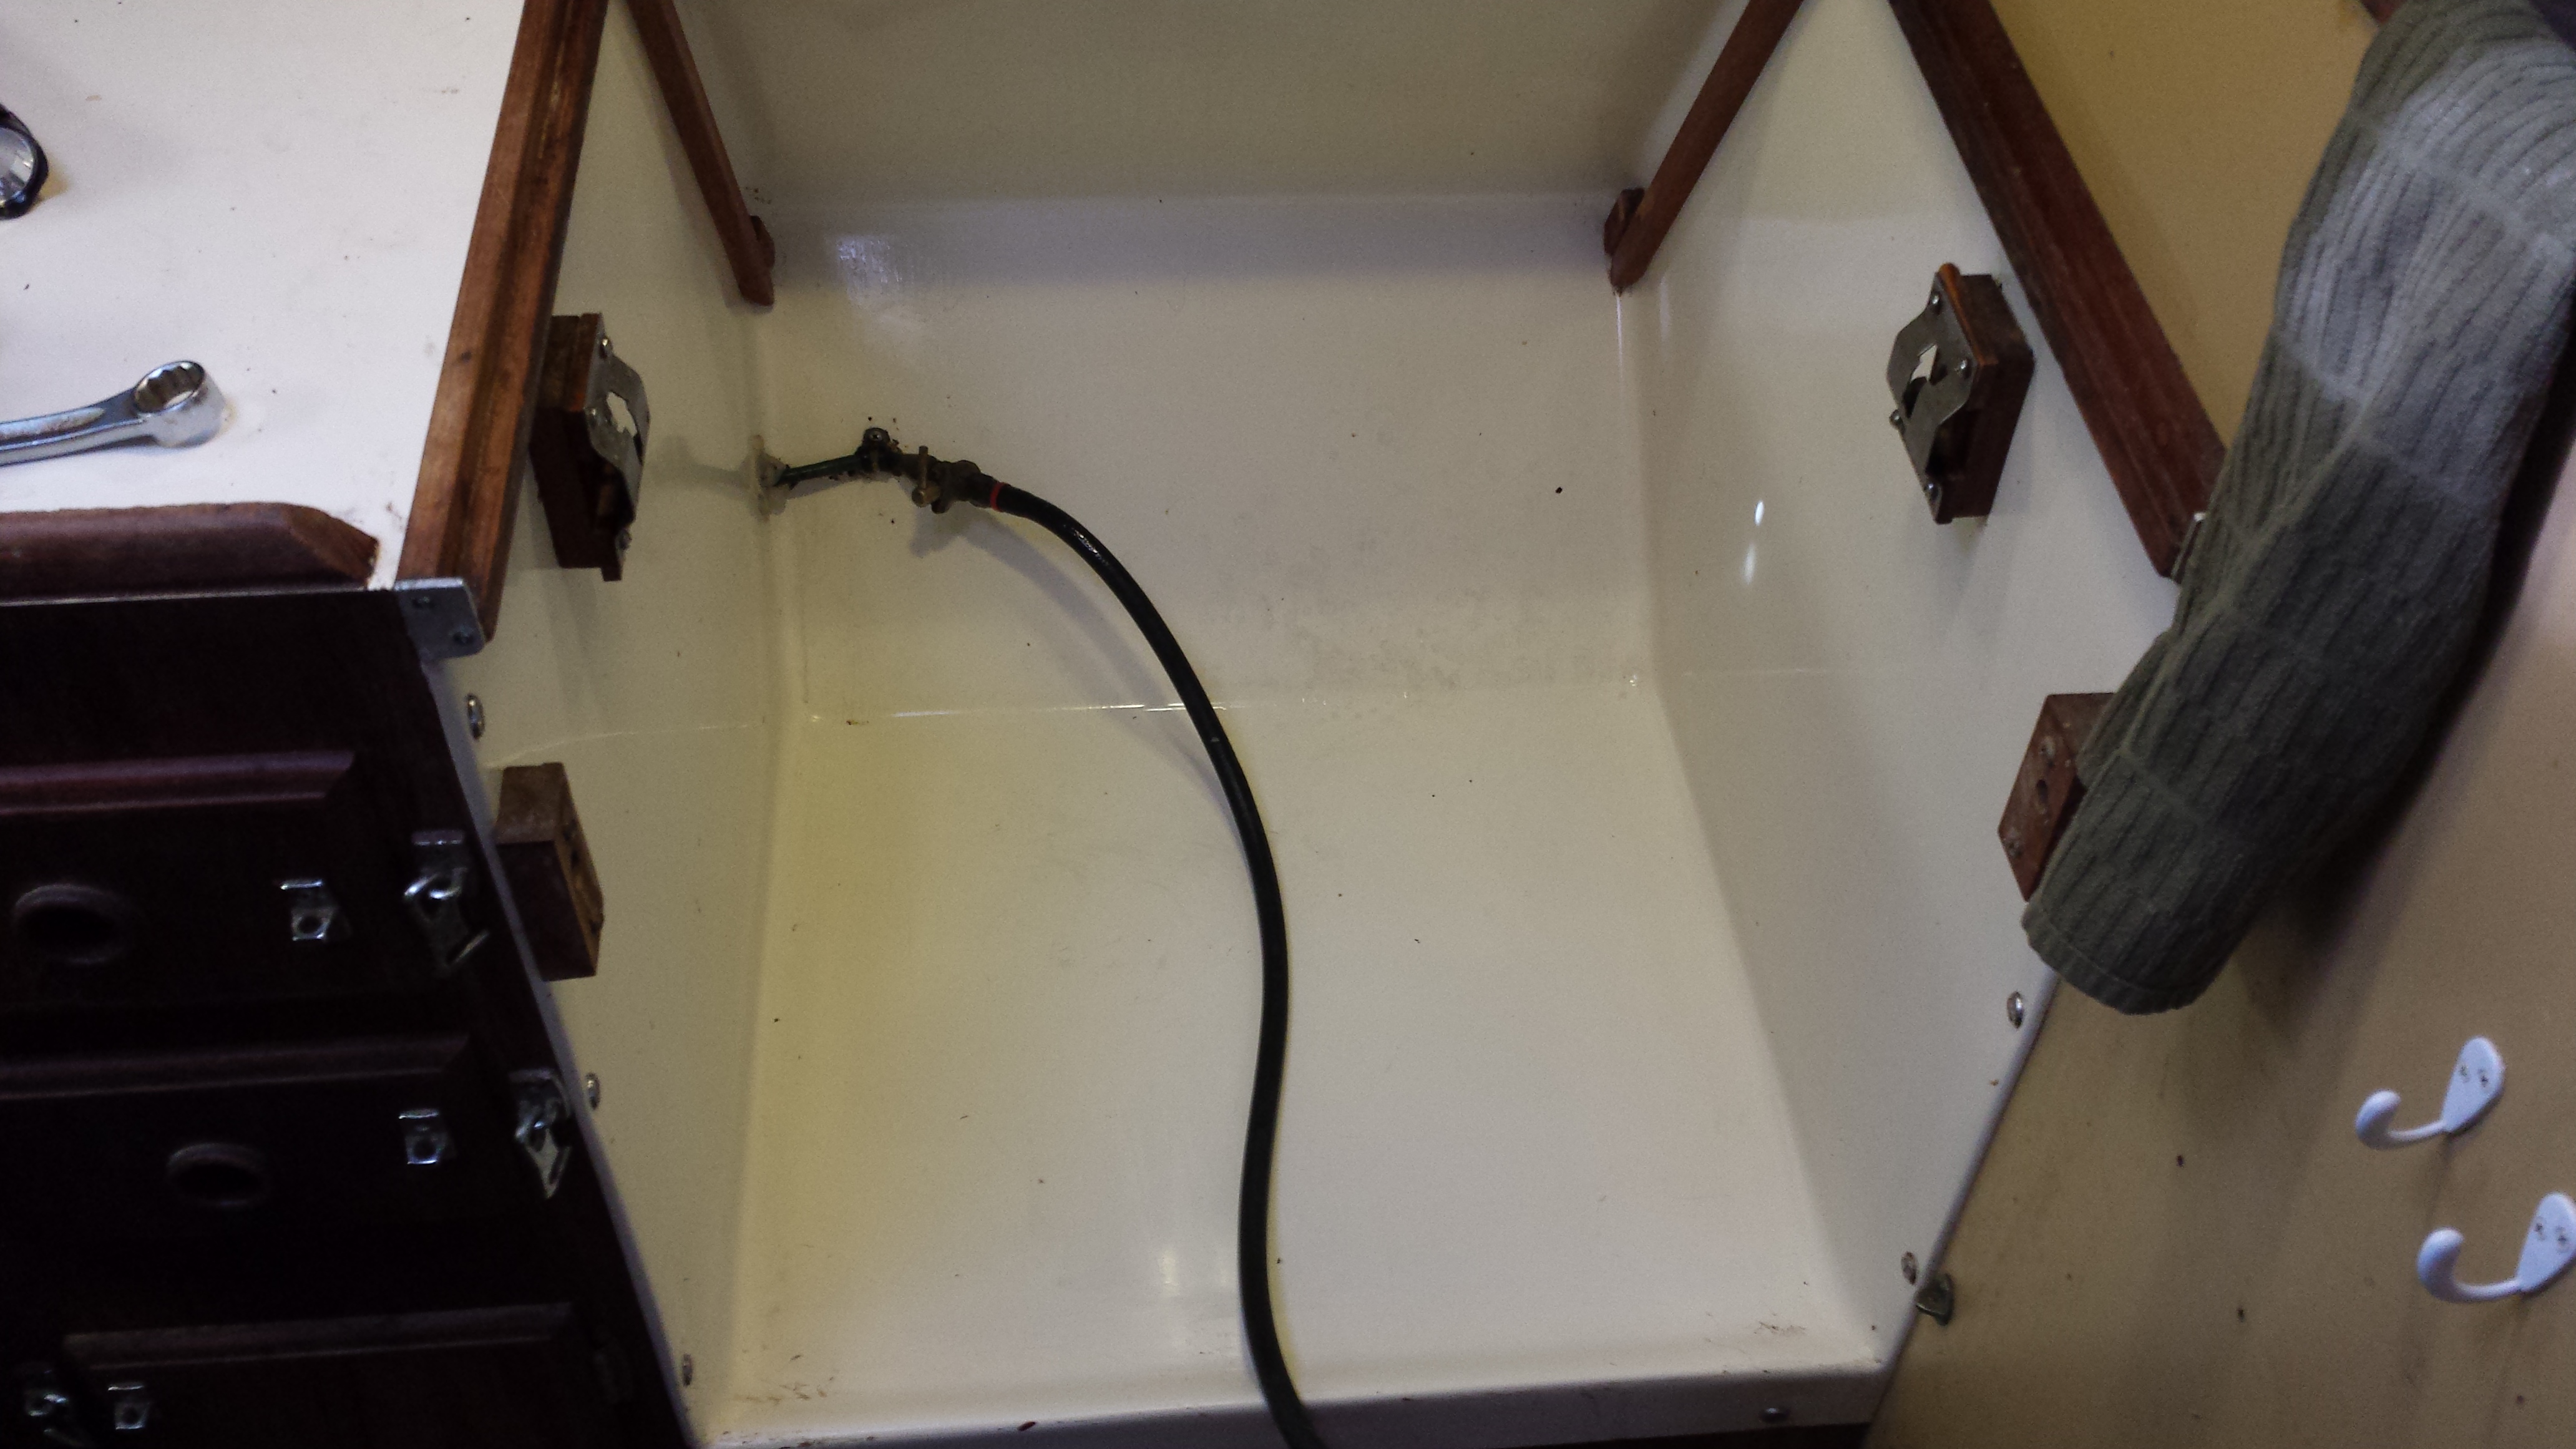 Crud Cleaned up Again |
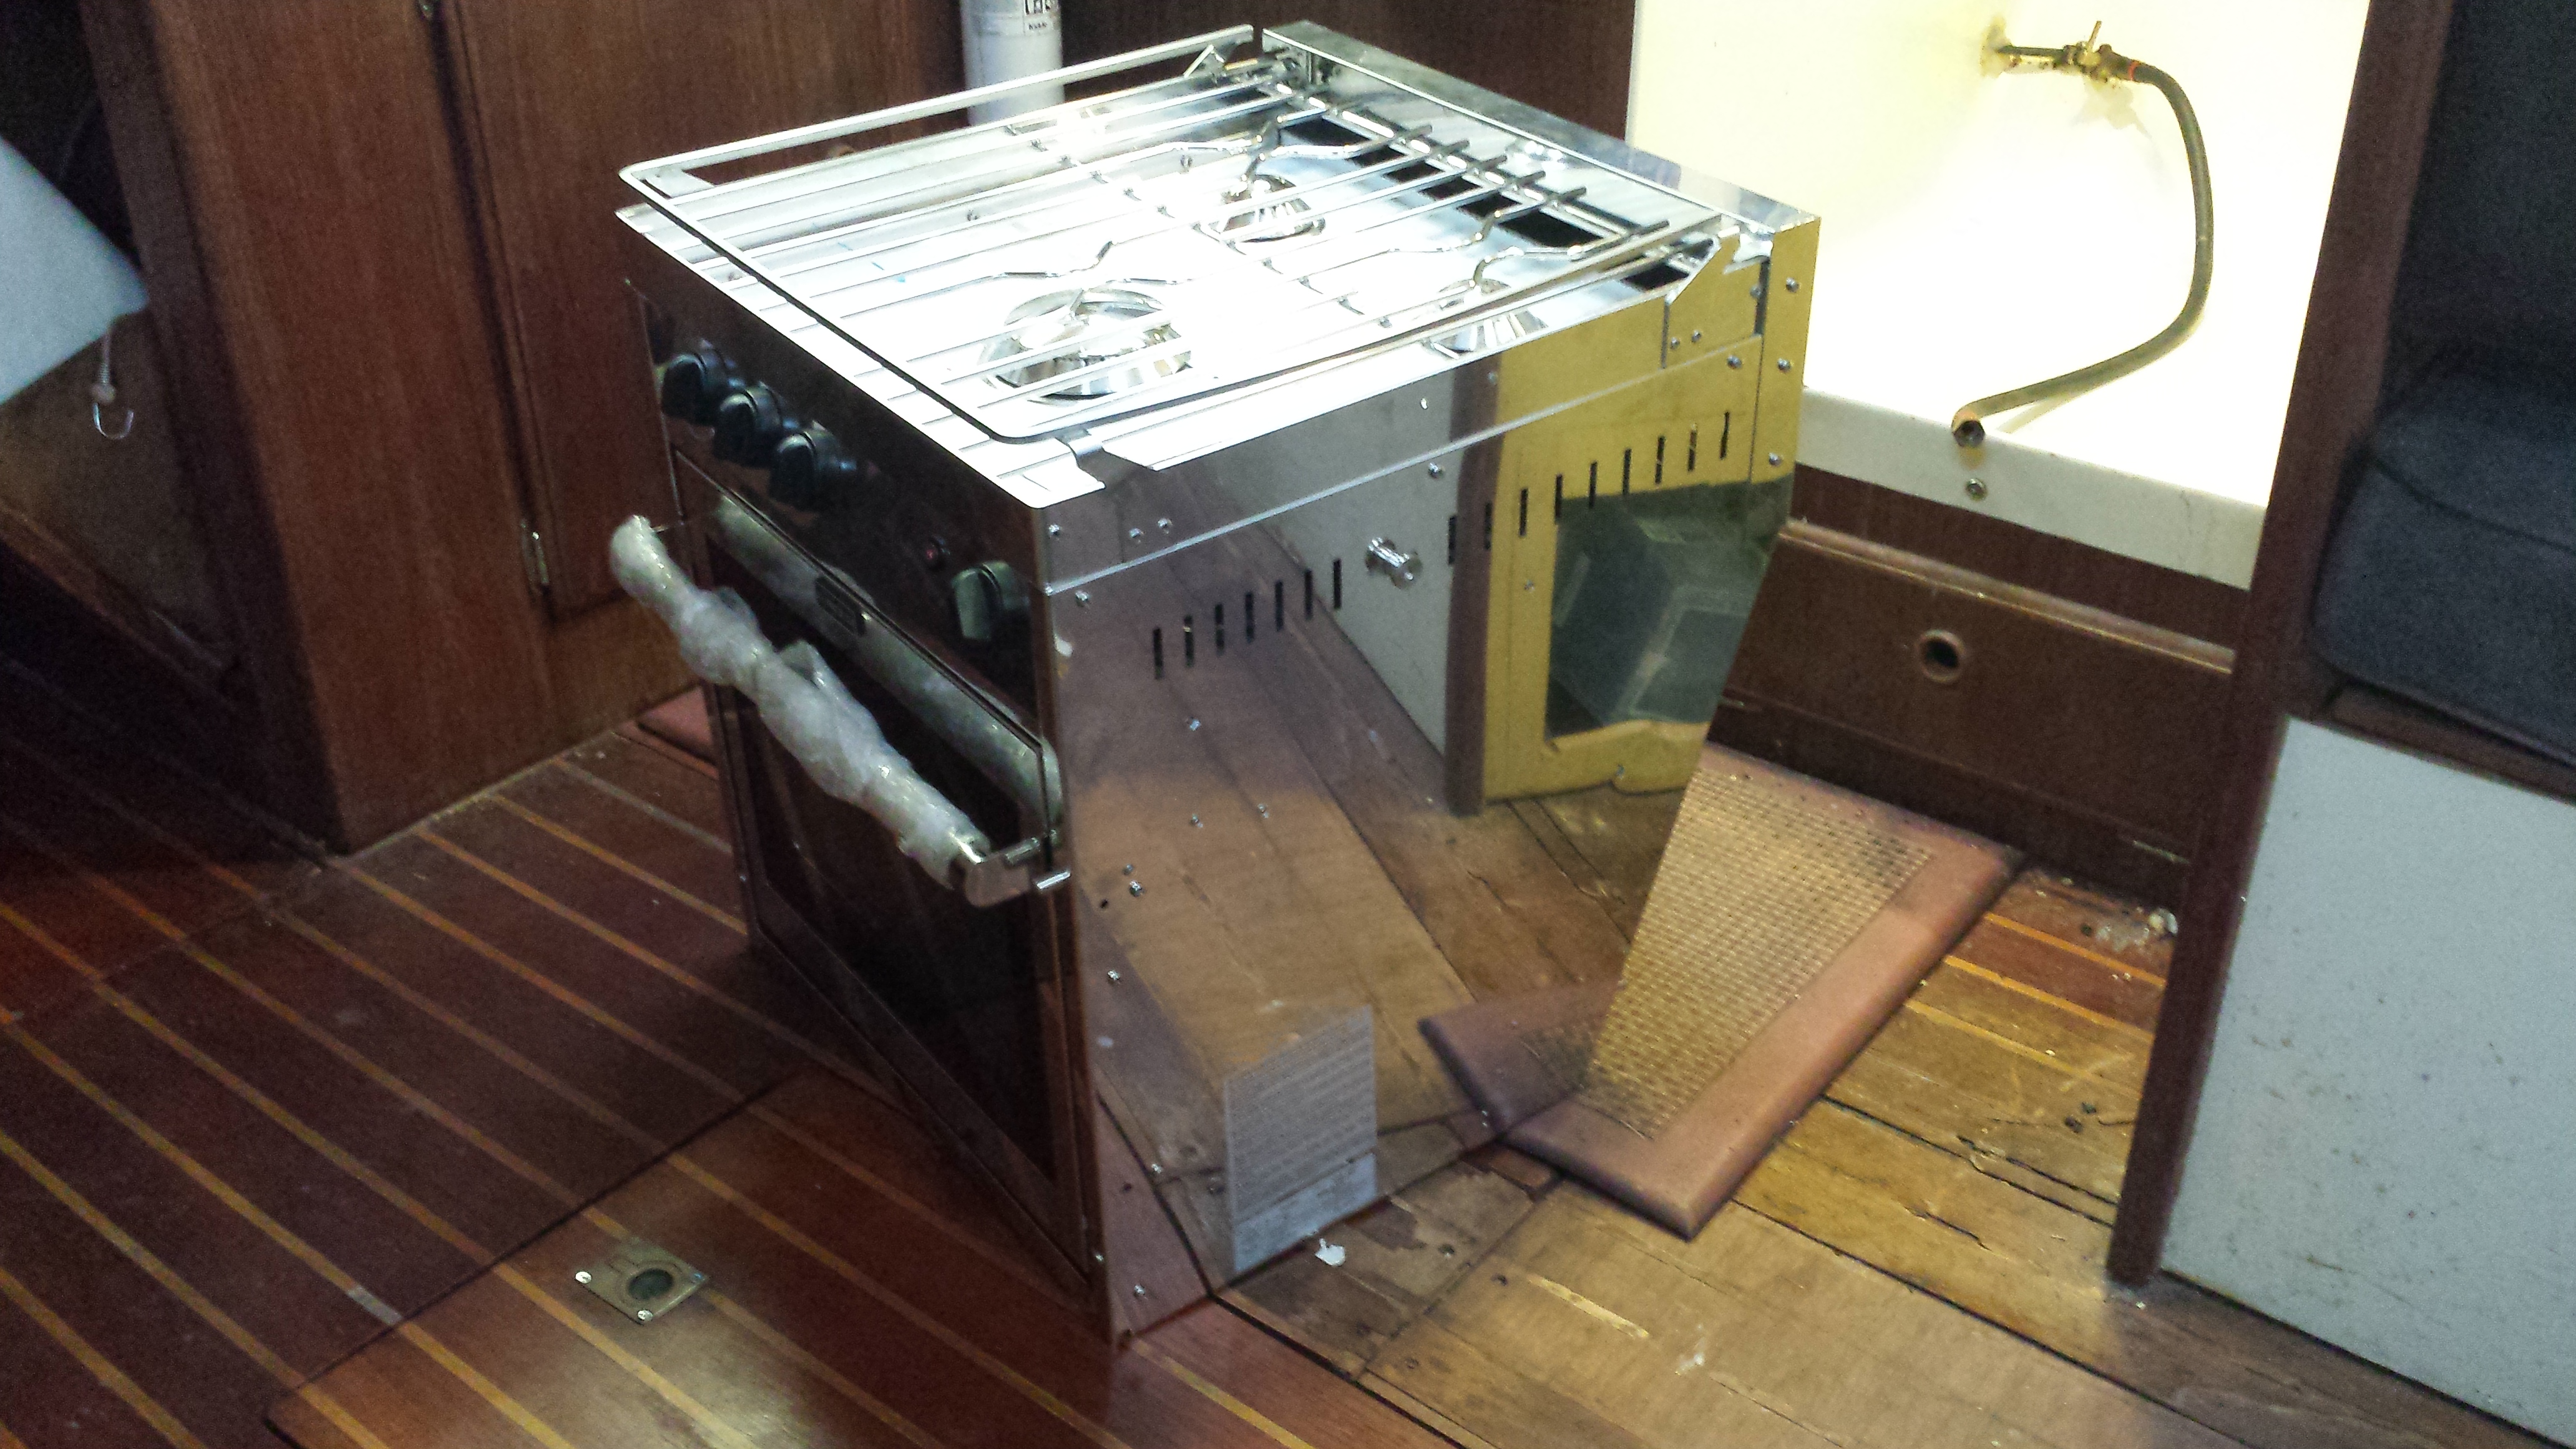 New Force 10 Stove, Ready to Install |
One of the reasons I acted at this time (October, 2014) is that I was able to purchase a new Force 10 stove at a very attractive price. I was told this stove was acquired from excess inventory at Hunter Marine in Aluchua, FL. When I first saw this stove on the floor at Sailor Exchange next door to the Ortega Yacht Club Marina (OYCM) it looked a little smaller than my existing stove. I was concerned it was the compact model, with a much reduced oven capacity. I measured the depth and the height of the stove and they matched the specs for the Standard North American size stove from Force 10, so I purchased it. |
|
As expected there have been a number of changes in this stove since I
purchased the previous one in 2002. As you can see in the picture on
the right, they have moved the large burner from the back of the stove top
to the front. This is a much better arrangement for me because I do
most of my cooking on that burner and use the smaller burners for simmering
or heating small amounts of liquid. Also the oven door is held closed by a positive latch that must be released to open. The door on the old stove was released by just pulling up on the handle, and several times it came open accidentally. As soon as the stove was on board I removed the plastic covering on the stove top, hooked up the propane and attempted to drop the stove onto the gimball brackets from the old stove. I was surprised to discover the new stove was much narrower than the old stove and would not fit on the existing brackets. Then I discovered that this was not the Standard North American stove, but the Standard Euro stove. No wonder I got such a great price. So no drop-in installation. |
 The Standard Euro Stove is Approximately 1.5" Narrower Than the Standard NA Stove (front of the stove at the bottom of the picture) |
 Wood Spacer for the Gimball Mounts Required by the Narrower Stove |
I was lucky in that the gimbal brackets used by my NA stove are the same as
used for the Euro stove. When I installed the 1st Force 10 in 2002 I
had to use a couple of wood spacers for the brackets because the stove
cavity is about 2" wider than gimball mounts. Now with the narrower
Euro stove I had to use even more spacers to compensate for the narrow
stove. I used some Red Oak to fabricate the spacers as shown on the left. I just rough cut the wood blocks expecting to clean them up once the oven installation is complete. |
| In the picture on the right I have mounted the stove on the gimbal brackets and hooked up the Propane. I tested each of burners and for the first time in 4 years experienced the joy of burners that light without an exernal flame. |
 New Stove Mounted on the Gimballs |
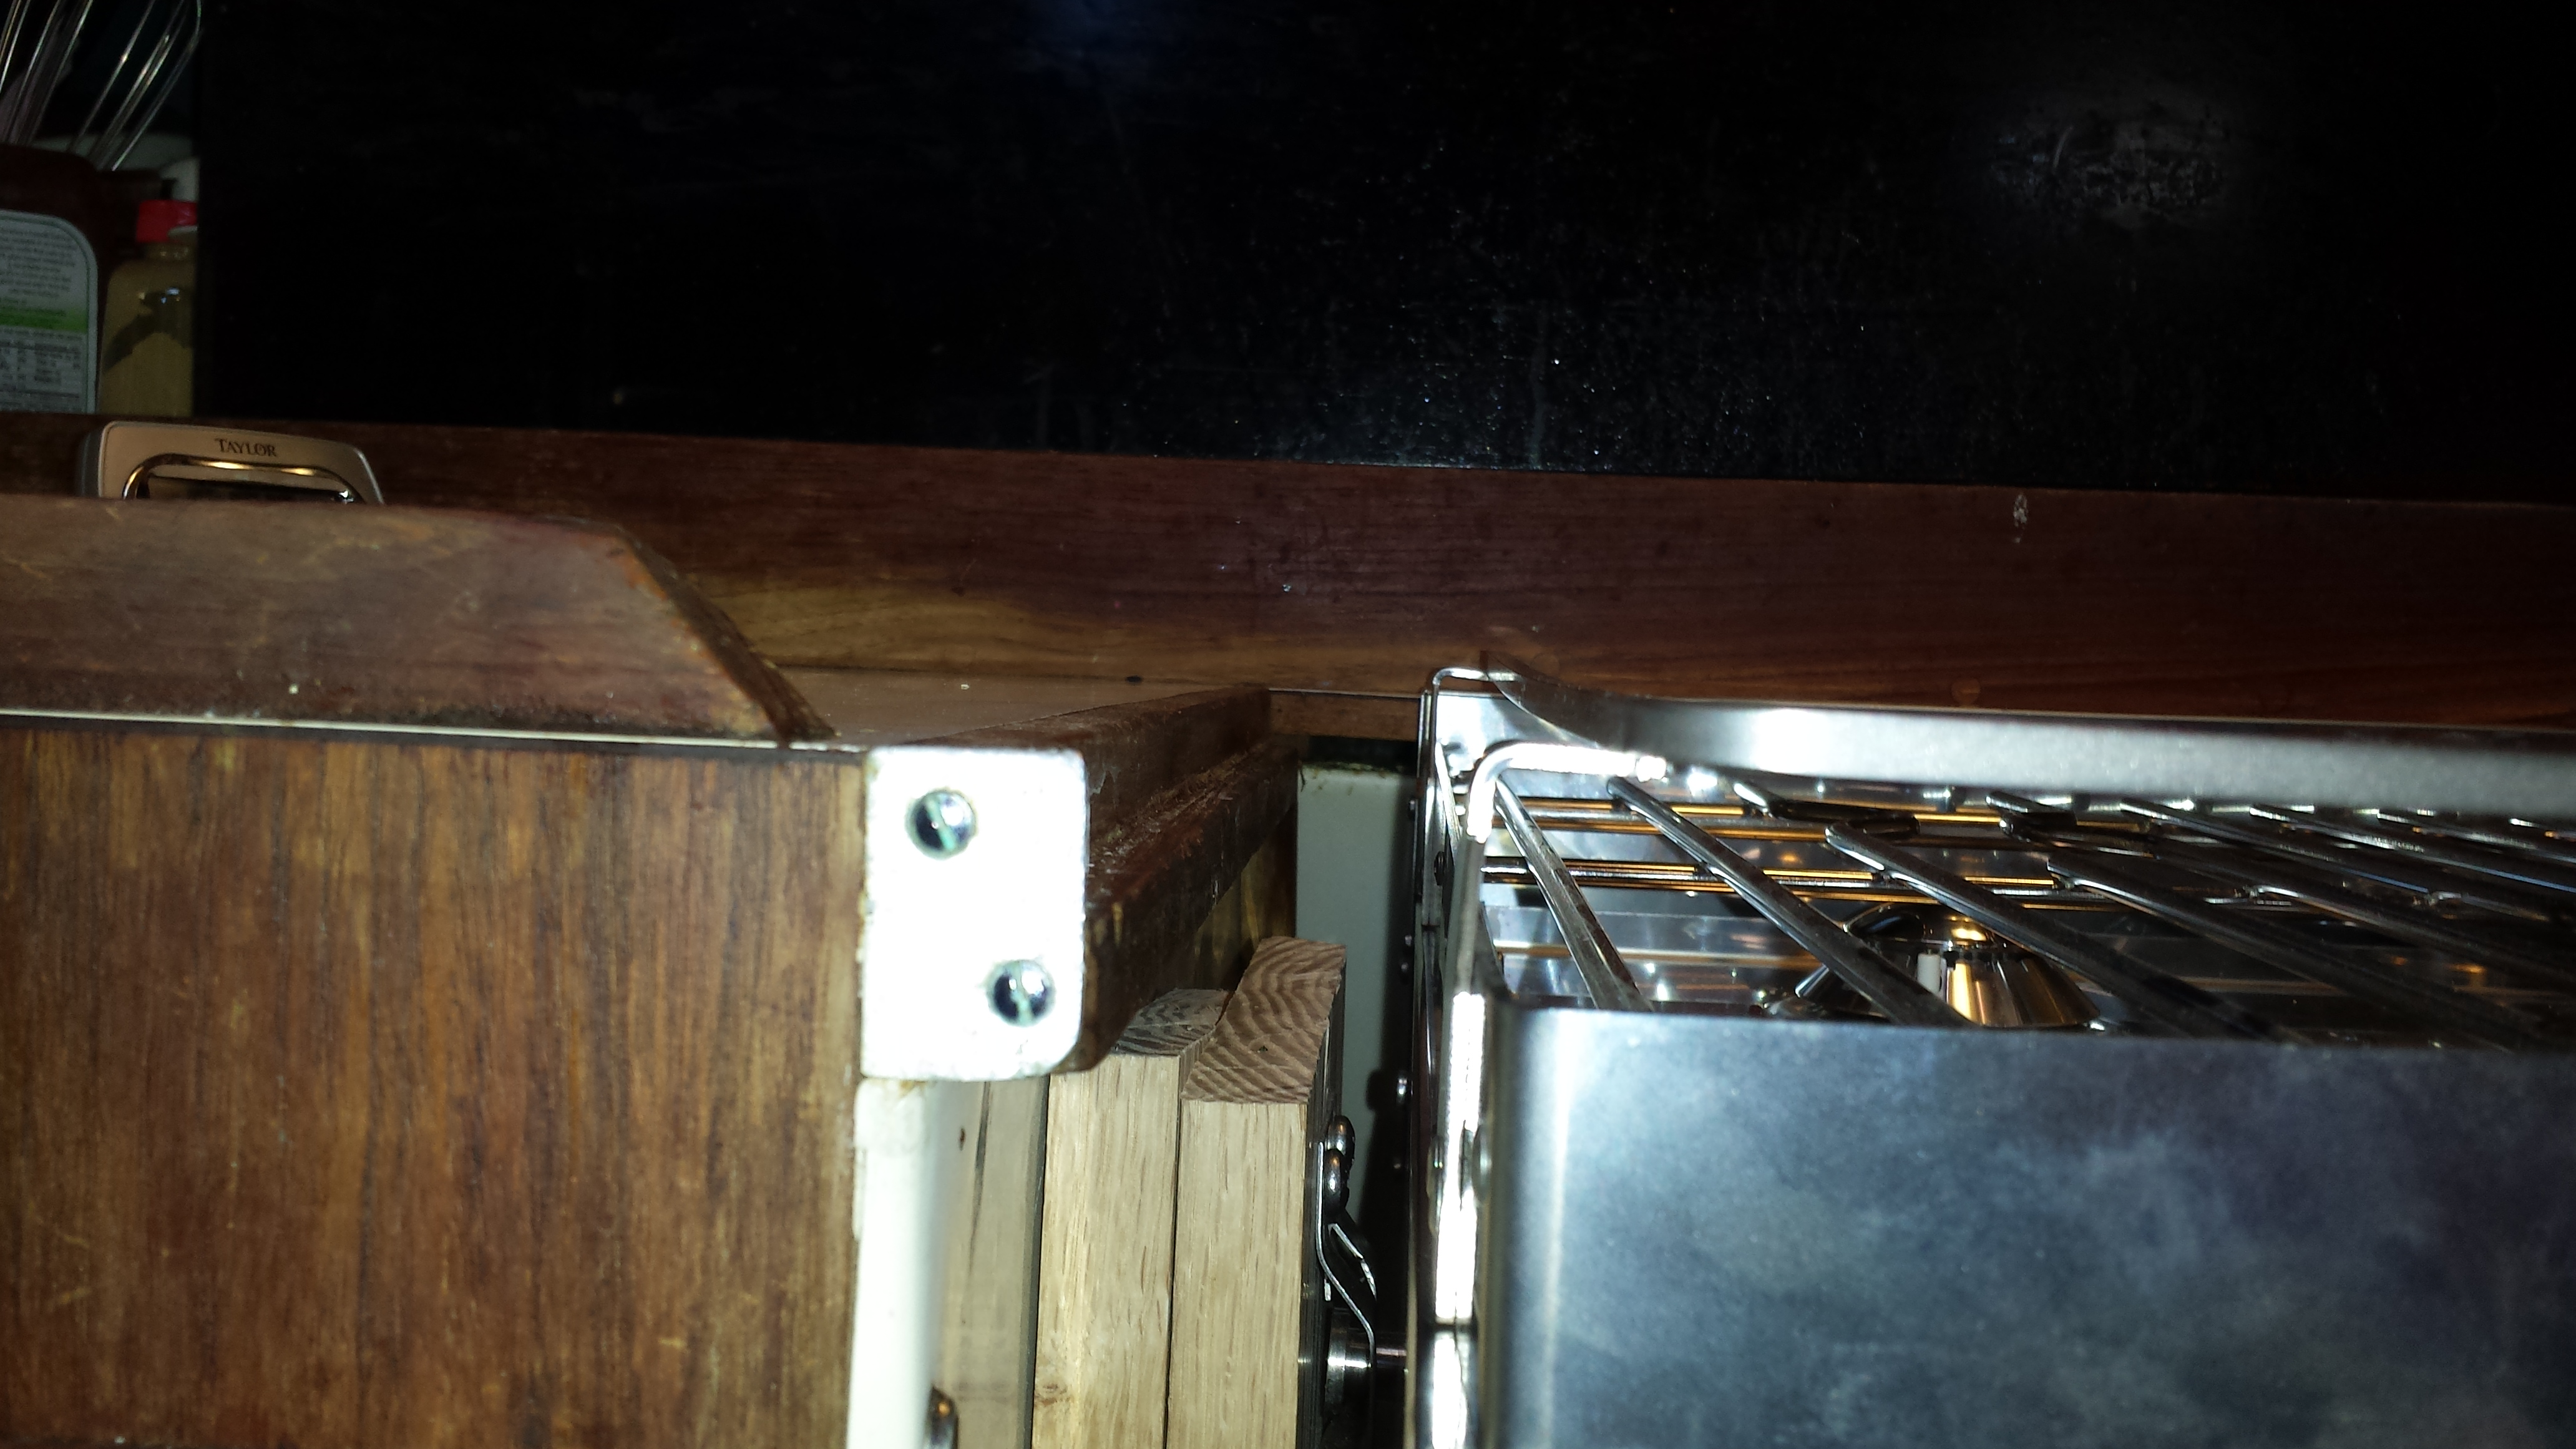 The Rails on the New Stove are Higher than the Mount for the Stove Top Cover |
The picture on the left shows another difference between my previous stove
and the new one - a rail has been added above the grill. The top of the
rail is about 3/4" higher than the grill, which means
the cover I normally place over the stove to provide additional counter
space will no longer fit. I need to lower the gimbal brackets about
3/4" in order for the cover to fit. I'm not sure there is enough room
below the stove bottom for the stove to swing on the gimballs if I were to
lower the stove by that much. I still need to mount a block of wood for the gimball lock on the stove, but I can't fix that block until I have finalized the location of the gimball mounts. At least now I can resume cooking on a stove rather than the grill or my small butane burner. The cover and the gimball stop can come later. |
|
I procrastinated for months trying to determine if I could lower the stove
enough to allow the stove cover to sit in place at the same level as the
rest of the galley counter top. I finally decided there just wasn't
enough room to clear the lip at the bottom of the stove enclosure, so the
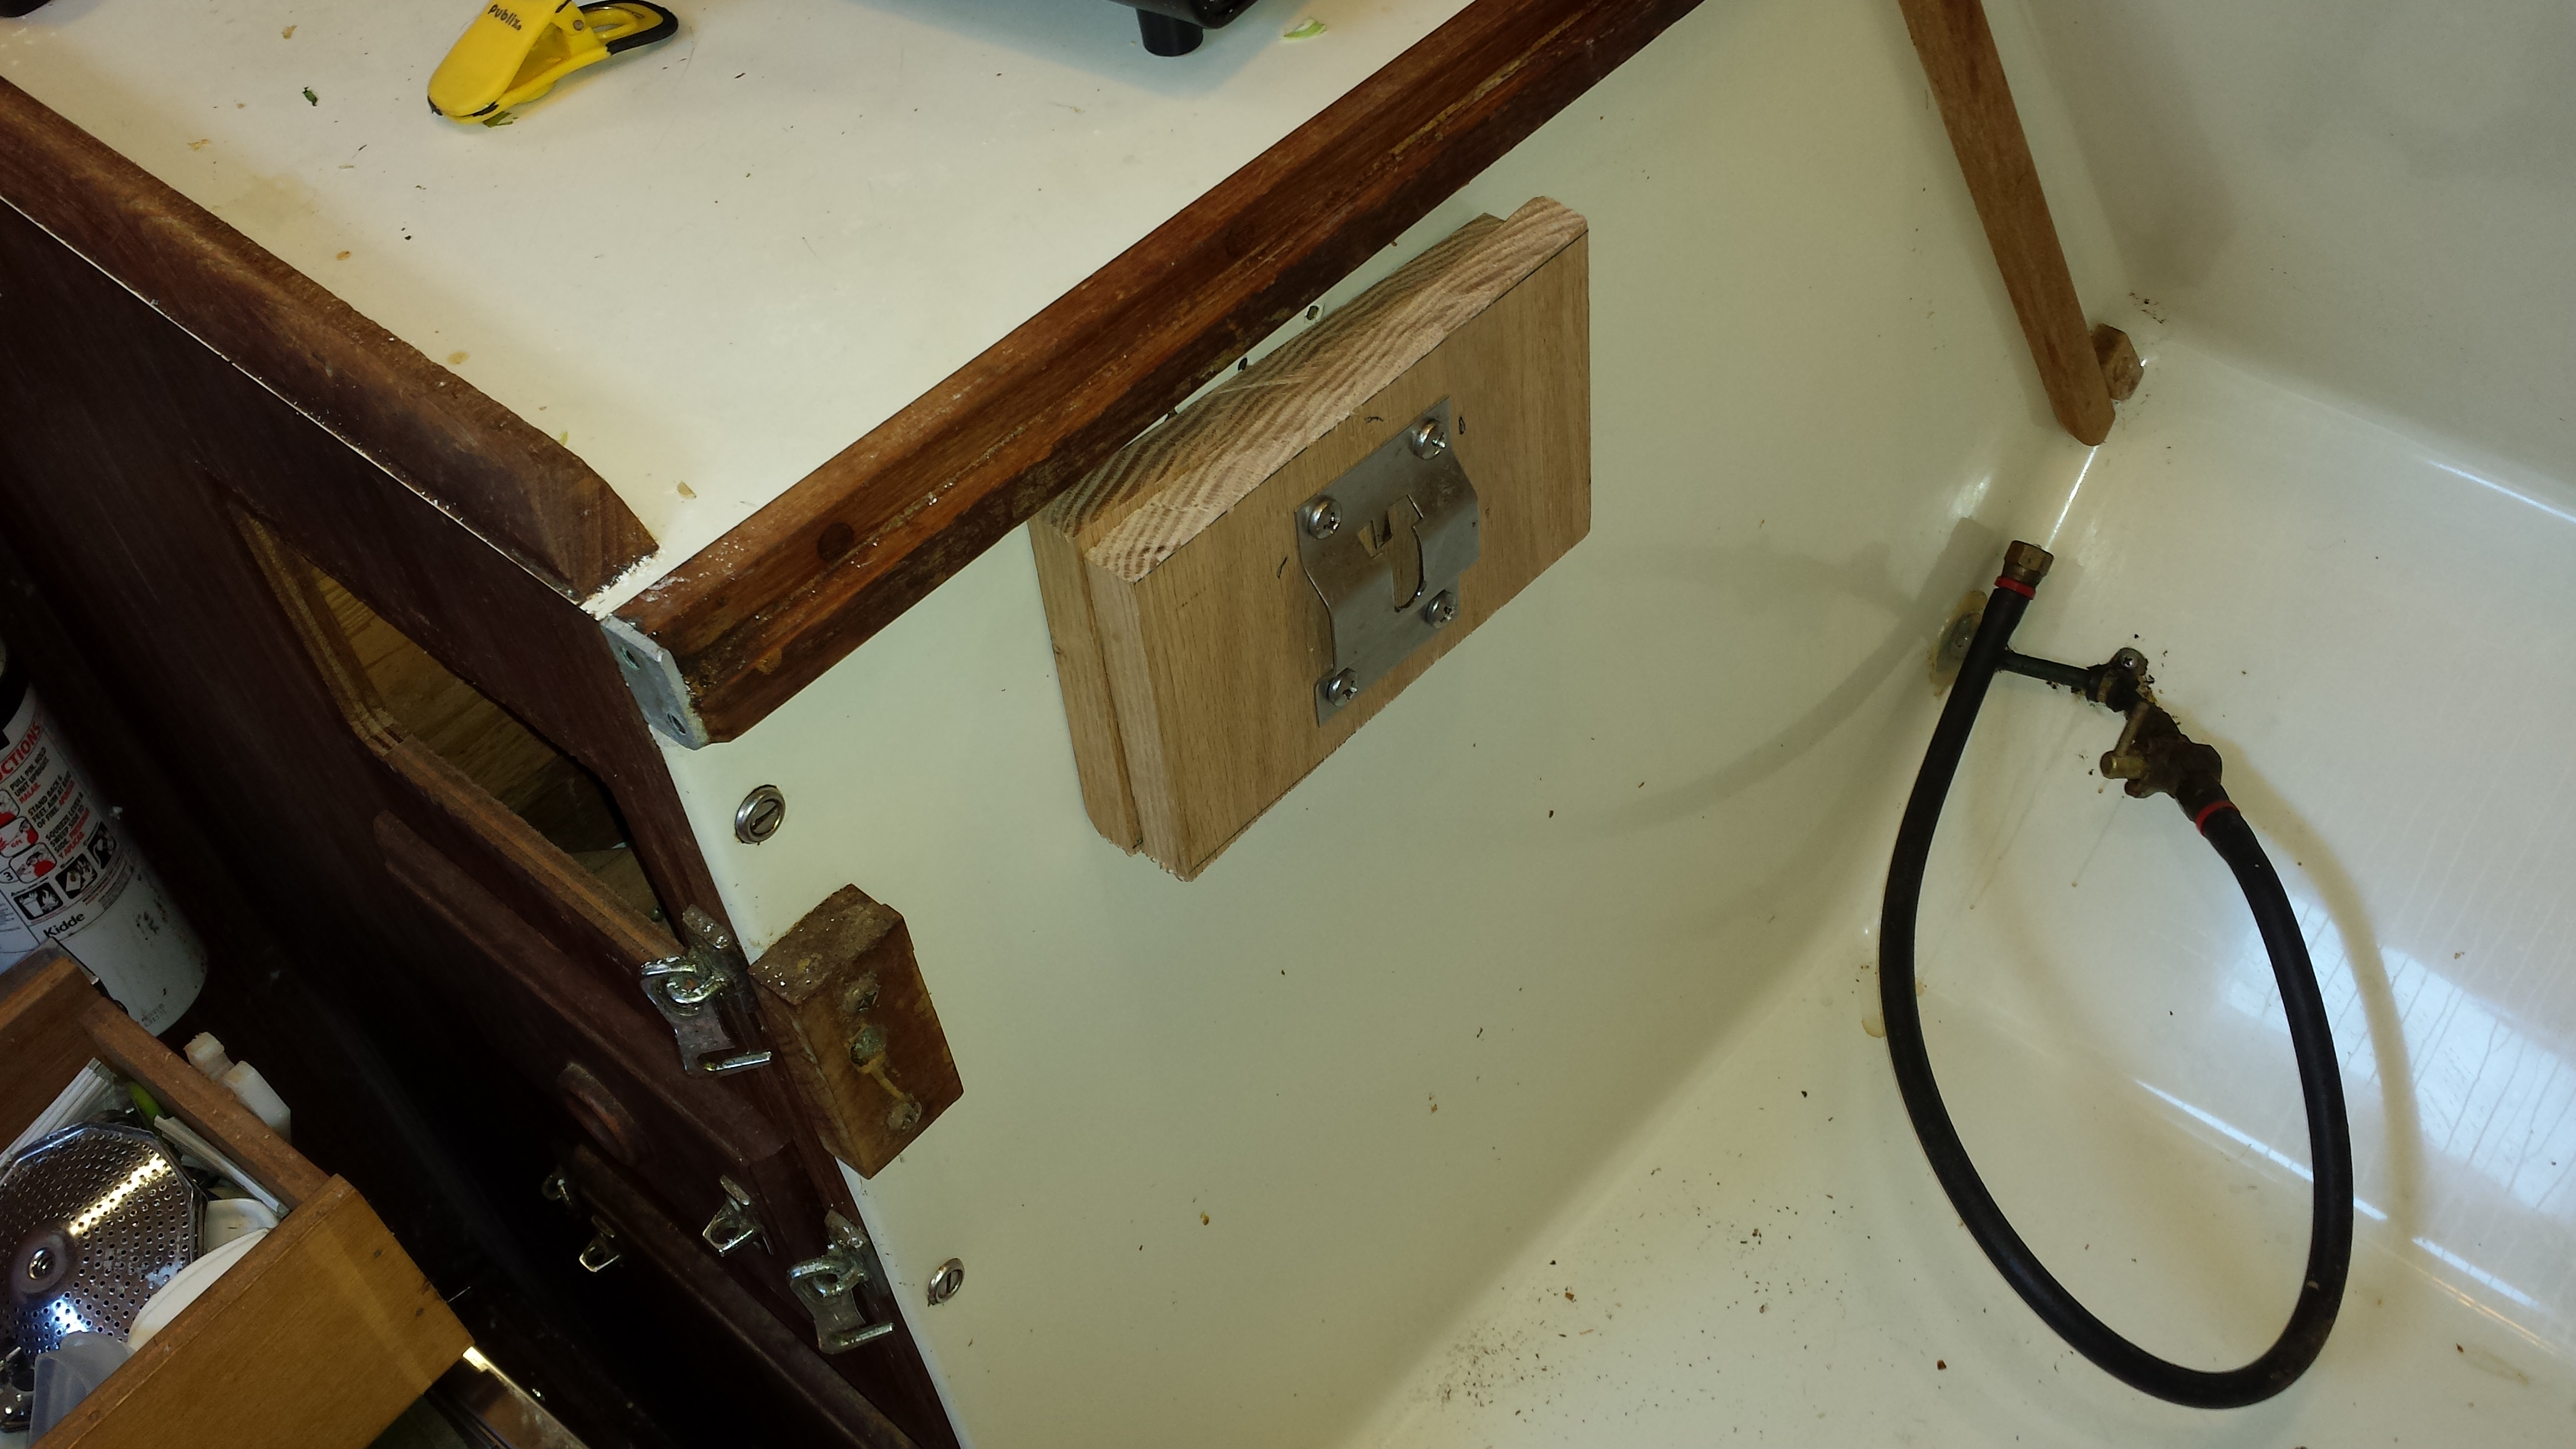
cover would just have to rest on the top of the stove rail. Having decided the stove would not be lowered, I finally could install a block of wood for the gimbal lock. Installing that block such that it would hold the stove top level was going to be a little more difficult than with the previous stove. |
|
|
With the previous stove the locks were near the top of the stove such that I could watch a level guage while I was positioning and marking the wooden block. With the new stove the lock is at the bottom of the stove. Now I had another reason for procrastination - figuring out how I could check the level of the stove while I was marking the location for the lock. Then one day I noticed that I could level the stove by installing a piece of cleat stock on the bulkhead next to the stove such that the cover, when placed on top of the rail and pushed under the cleat would hold the stove in place. |
 |
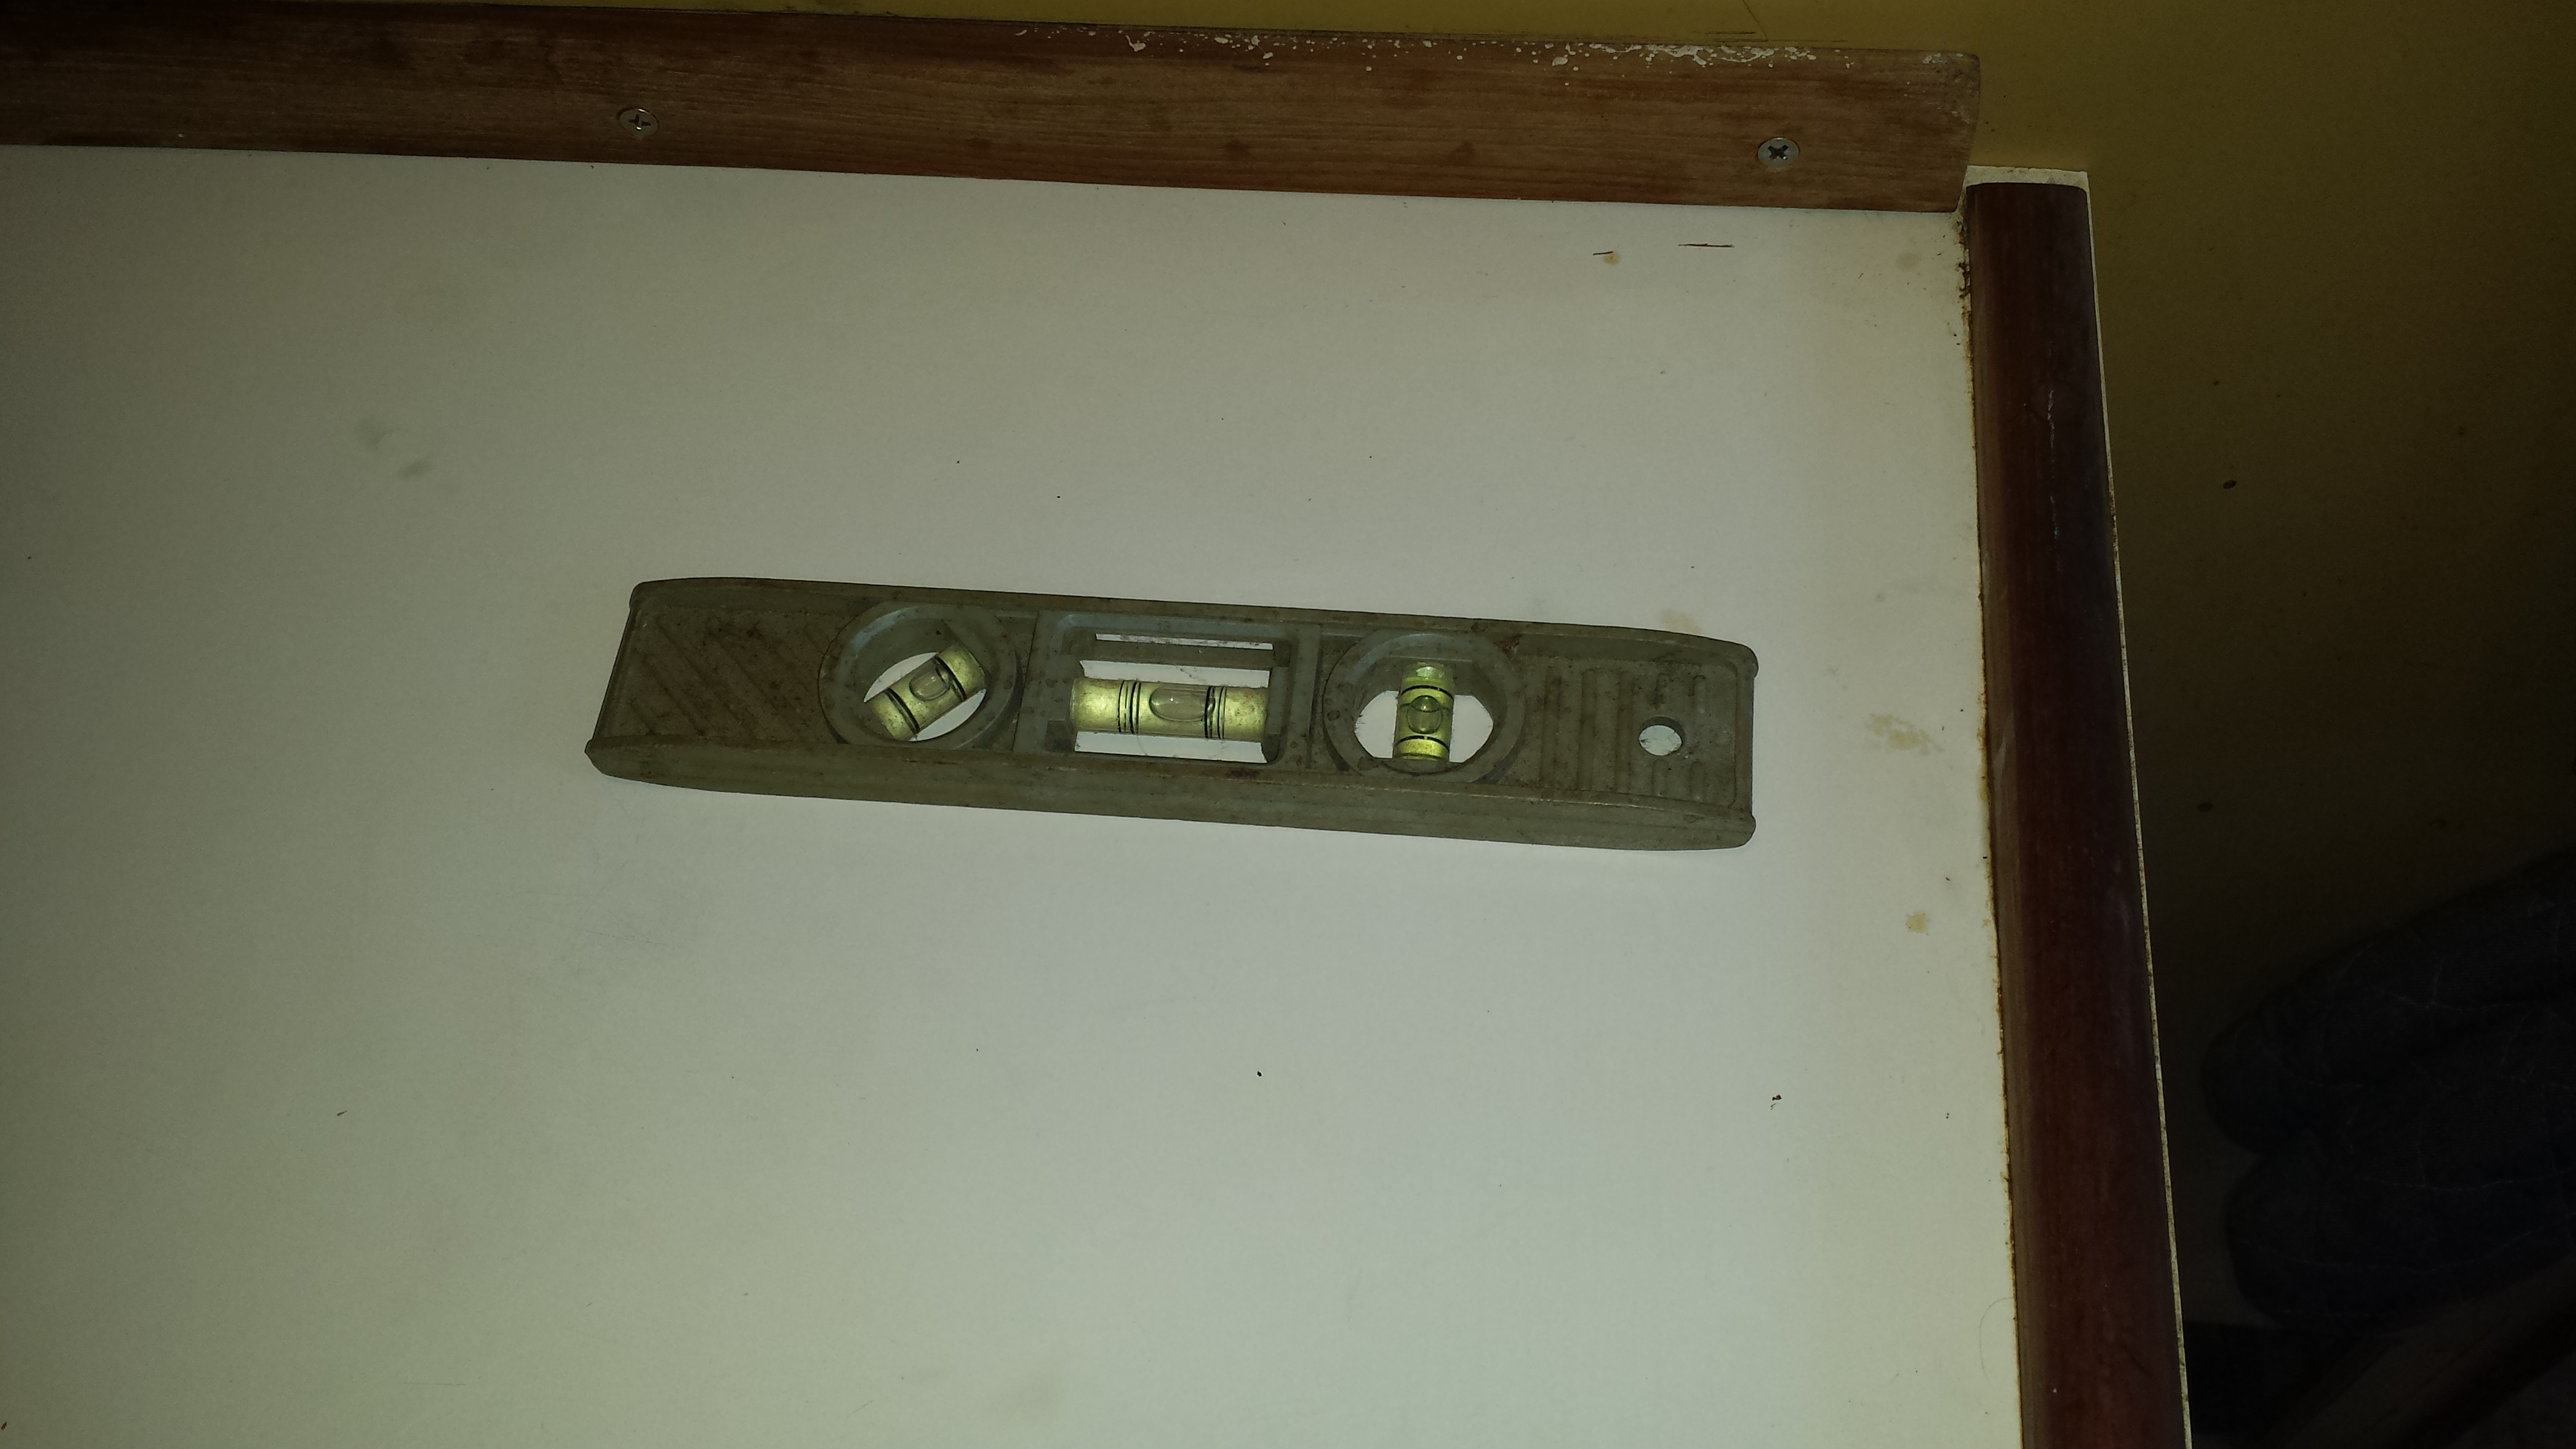 |
With the stove held in a level position by the cover, setting up the block for the gimbal lock would be easy. So I placed the cover on top of the rail against the bulkhead, and using a level guage marked the position for the cleat to keep the cover level. Once I had the cleat held in place with screws (pictures above and on the left), I could slide the cover onto the rail and under the cleat and the stove top was level and held in place. Now let's see how long I can procrastinate on finishing the job of installing the gimbal lock for the stove. |
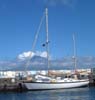
| Spare Propane Tank Storage (2009) | |
| The propane locker on Sarah, which
appears to have been installed by a previous owner (PO), holds
two 6 LB tanks. I replaced the single tank regulator with
a two-tank regulater early in my ownership. The two tanks
served me well when I was a week end and vacation cruiser, but
when I moved on board I discovered the need for a 3rd tank. This 3rd tank could be used for the gas grill instead of removing one of the tanks from the locker. It also provided an extension to the time between going to the propane re-fill station. In the USA, the Blue Rhino type of tank exchange has taken over the home grill market. Today there are fewer and fewer places to get a tank re-filled and virtually none of them are close to an anchorage or marina. Several times I've put into a marina just because they provide a service or courtesy car to take propane tanks to a re--filler. So I finally purchased the 3rd tank in 2009, but now I needed to find a place to safely store the new tank - no room in the locker for more than two tanks. |
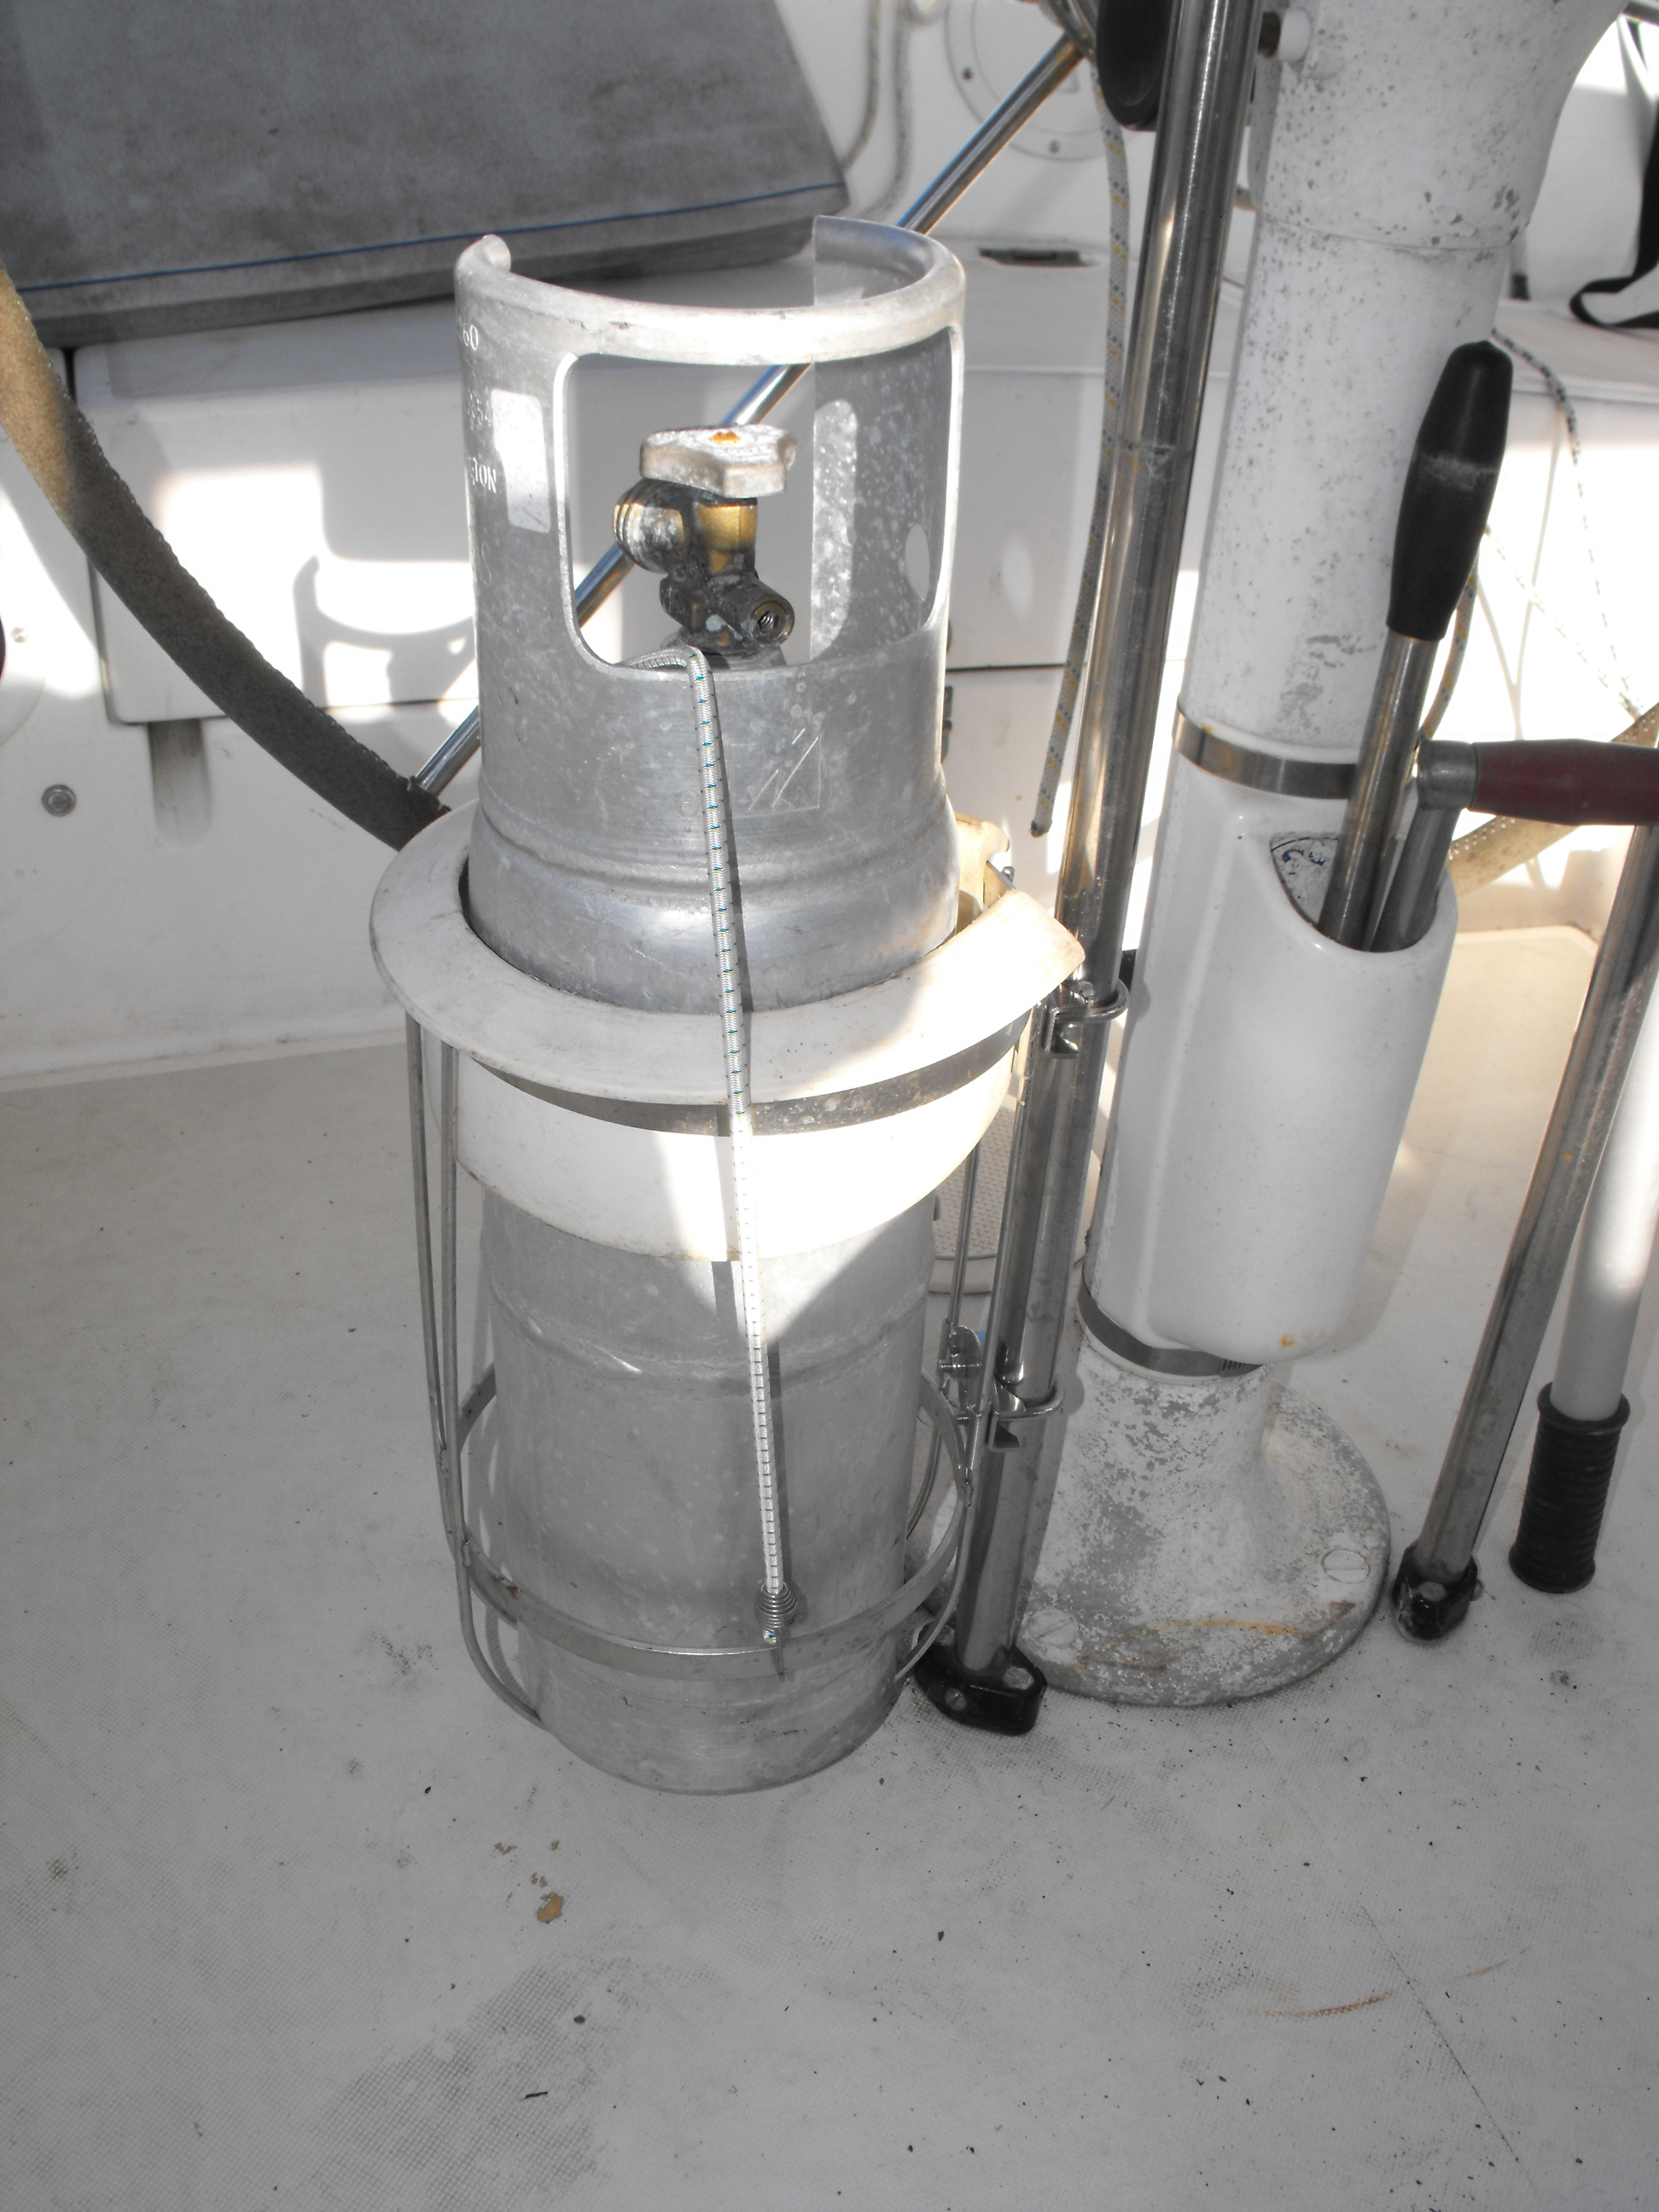 Spare Propane Tank Storage |
|
Initially I just tied the tank to the
stern rail, near where I mount the gas grill when it is in use.
This was less than satisfactory as the tank always seemed to
come loose when the boat was rolling. I got the idea of
using a fender holder to secure the tank to the transom from the
SSCA Discussion Forum. So I purchased a single fender
holder, but when I started planning to install it on the transom
I realized it might interfer with the Monitor Windvane or would
be vulnerable to a docking fiasco (my specialty). Then I realized I could use the rail mounts provided with the fender holder to attach it to the steering pedestal. |
|
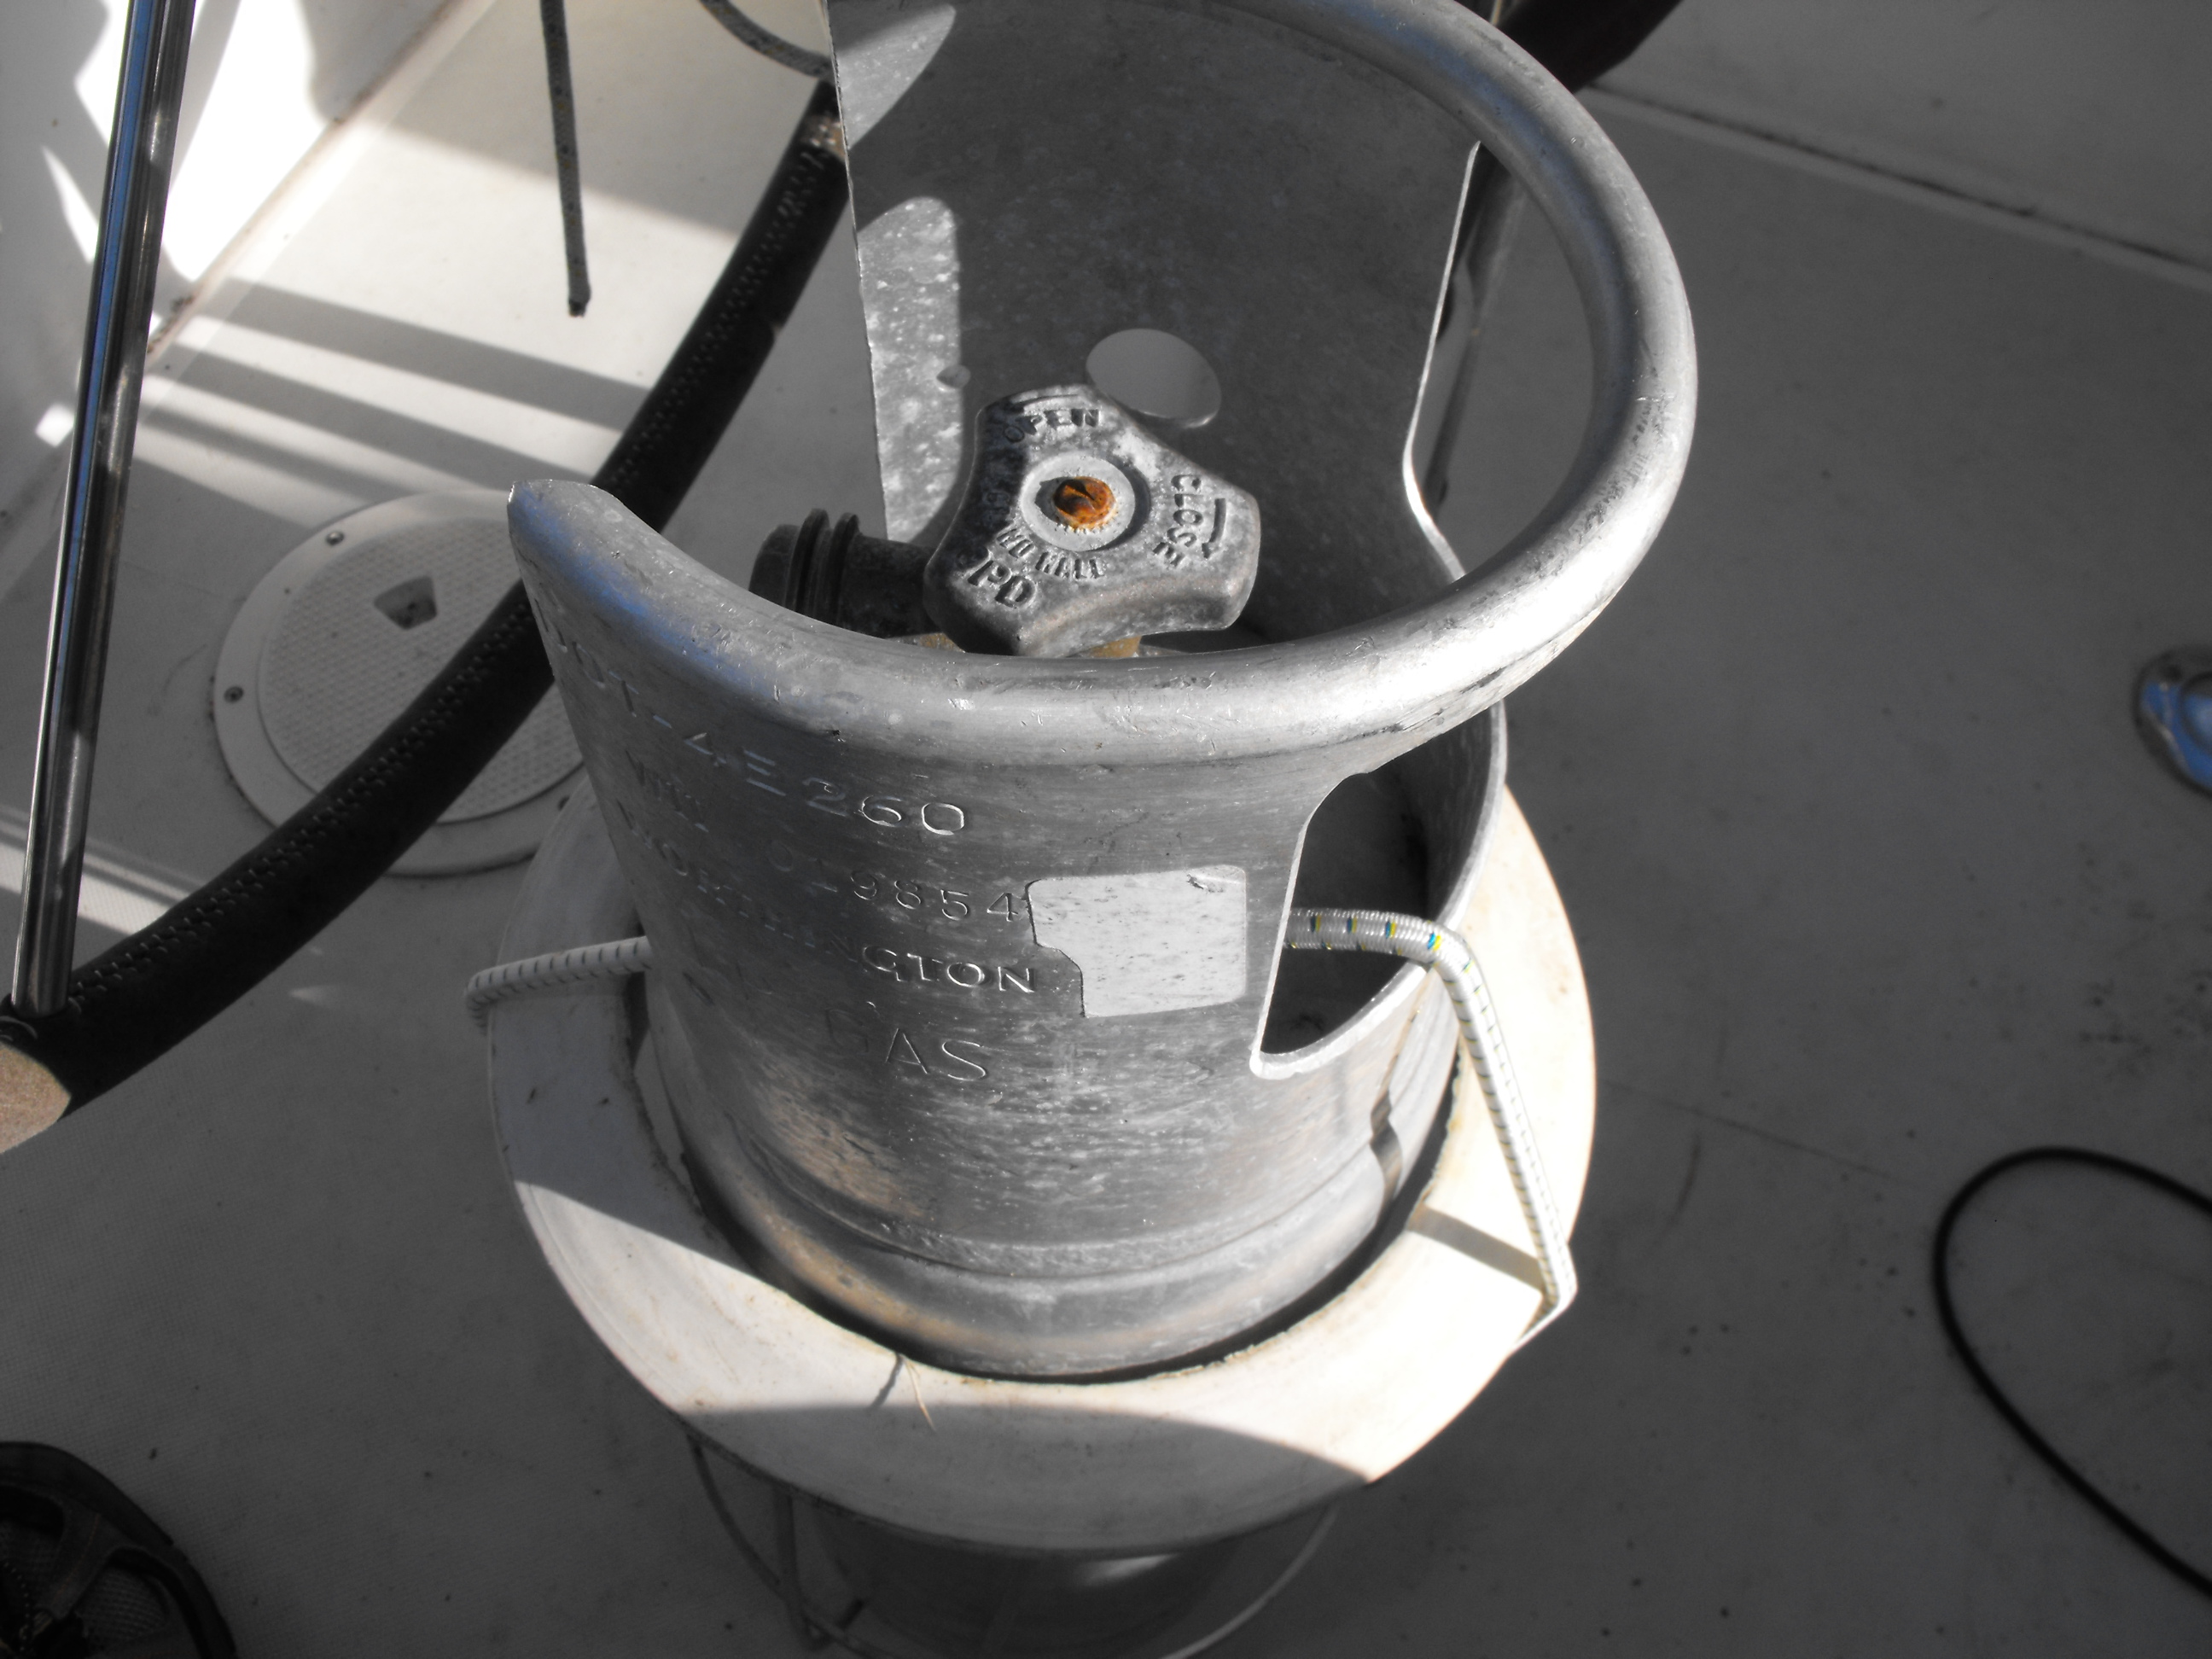 Collar and Elastic Cord Tie-Down |
The picture above shows the tank in the fender holder attached
to the pedestal. The white collar came with the boat and
was intended to keep the tanks in the locker from rattling
around. That was necessary when only one tank was
connected to the regulator, but with both tanks connected it was
no longer necessary. So I have a 2nd collar should I
decide to add a 4th tank and secure it to the other side of the
pedestal. In the picture on the left you can see that the tank is secured in the fender holder with elastic cord. |
| I don't know if this
installation violates any ABYC or UL practice. One of the
reasons I considered mounting the holder on the transom was that
any propane that leaked from the tank would be immediately
overboard. With the tank inside the cockpit, any propane
leaks would not be immediately dispersed overboard. The
propane would seep into the cockpit drains and eventually be
absorbed by the water, or at least that is what I believe.
I still plan to add drains at the aft end of the cockpit that
would drain off the transom, above the waterline. That
should resolve my only concern about this storage.
In the mean time I think I'm reasonably safe. In 2011 I purchased a fourth tank and another fender holder, which I attached to the other side of the pedestal. |
|
| European Gas for Cooking (2005-2007) | |
| While Sarah was in Europe I had to run the stove on whatever
European Gas was available, mostly Butane. See
Jack Tyler's detailed
discussion on this subject when he and Patricia first took their P424 to
Europe in 2003.
The Force 10 stove operated fine on Butane.
Initially in the Azores and Cascais, Portugal I was able to get my aluminum Propane tanks filled with Butane. This was expensive, but I did not have to deal with adapting European tanks to my existing system. Before departing the U.S., I did purchase several adapters that I expected would allow me to connect the standard European Camping Gaz bottles to the propane regulator in Sarah's propane locker. Camping Gaz is stored at lower pressure than U.S. propane, but the regulator should still deliver the correct gas pressure to the stove. What I really hoped to be able to do with one of the adapters is to have European gas suppliers fill my propane tanks with Camping Gaz. That was not possible. Camping Gaz is distributed in most European countries via only a few companies. Most of these are actually government regulated monopolies. It appears their business model is to distribute portable gas via a bottle exchange (like Blue Rhino in the U.S.) rather than re-filling stations (that are also becoming rare in the U.S.). The result, with few exceptions, is that bottle exchange is the only means of replenishing the onboard gas fuel while in Europe. The exceptions so far are local marine supply and services dealers in Portugal. In Horta, Mid-Atlantic Yacht Services (MAYS) will re-fill gas bottles of almost any kind. In Cascais, Tuttamania was able to get my propane bottles re-filled somewhere in Lisbon. Most of these re-fills were done at a local LPG (GPL in Portuguese) gas station for automobiles. Portugal, like much of the EU, subsidizes LPG automobiles and there are several stations around major metropolitan areas that service these automobiles. I could have used these stations myself (although my limited Portuguese would have made that difficult), but Portugal does not allow LPG bottles to be transported in private vehicles. So (to avoid a heavy fine if caught) I was stuck using boatyards and marine retailers to ferry my bottles to and from the refill stations. |
|
| Once faced with dealing with the standard little blue Camping Gas bottles, my preferred solution would be to transfer the gas from the Camping Gaz bottles to my propane tanks via a propane hose with connectors for each type of bottle. Unfortunately the standard connection to the Camping Gaz bottle is built into a regulator, which would not work in a transfer hose. So for now I am stuck connecting the Camping Gaz bottles directly to my propane regulator via one of the adapters I purchased before departure. | |
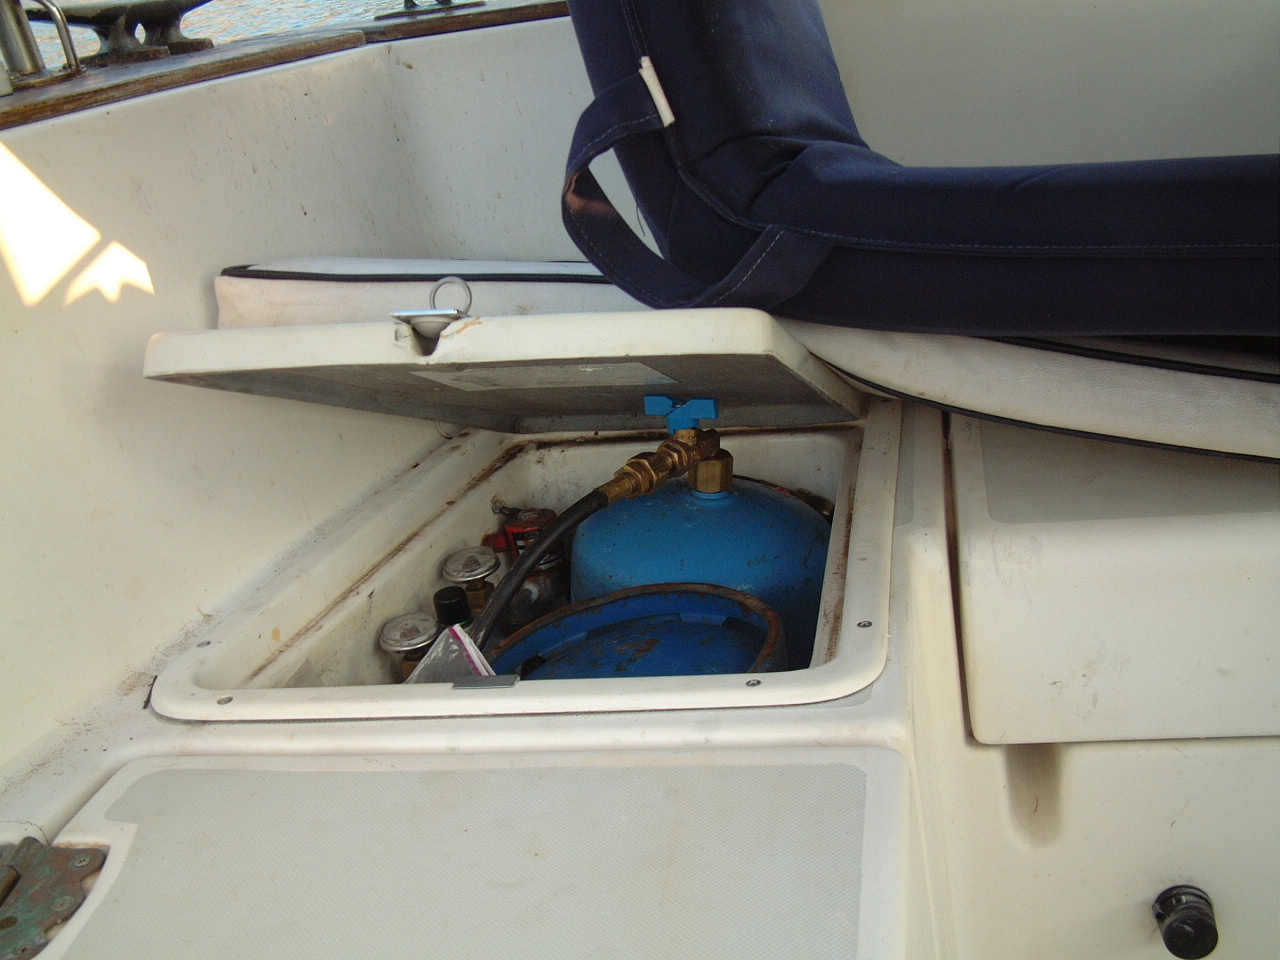 Camping Gaz Bottle in Sarah's Propane Locker |
This works, but the Camping Gaz bottles do not fit my propane locker and with the adapter connected, stand well proud of the top of the locker. With the bottle connected I cannot close the lid to the propane locker (see picture on the left). This presents a minor (in my opinion) safety risk, but it also takes away one corner of the cockpit for sitting. |
| I finally decided to set the Camping GAZ bottles in the locker upside down. The spare bottle is inverted in the picture. I inverted the active bottle, which allowed the locker cover to close and the bench space to once more be used for sitting. There is some risk that liquid Butane may enter the system and cause a serious flare-up on the stove, but I don't believe that will happen. I think having the bottle valve below the level of the regulator prevents liquid from entering the system. Anyway that's my theory and I'm sticking to it. I used the Camping GAZ in this way for over a year with no problems. | |
| Refrigeration (2003) | |
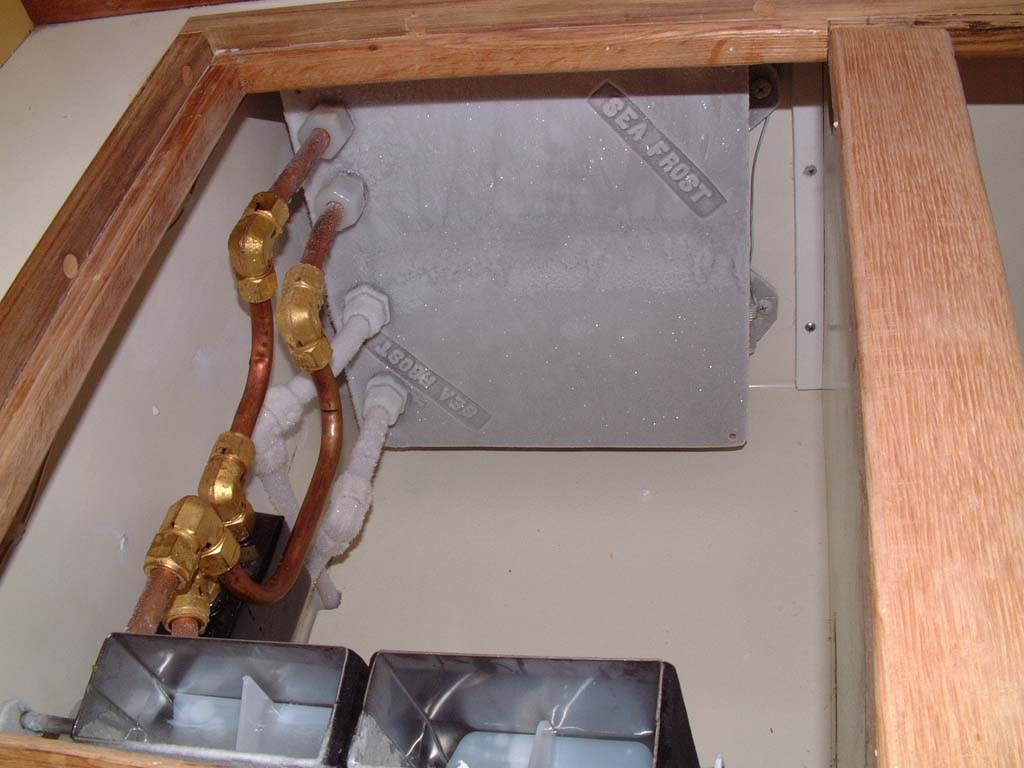
| I replaced the Grunert system with a dual compressor system from Sea Frost. One compressor is engine-driven, ED - the other runs on 110VAC electricity (shore power or generator), SA-III. The ice box was also modified to provide a small freezer compartment. | |
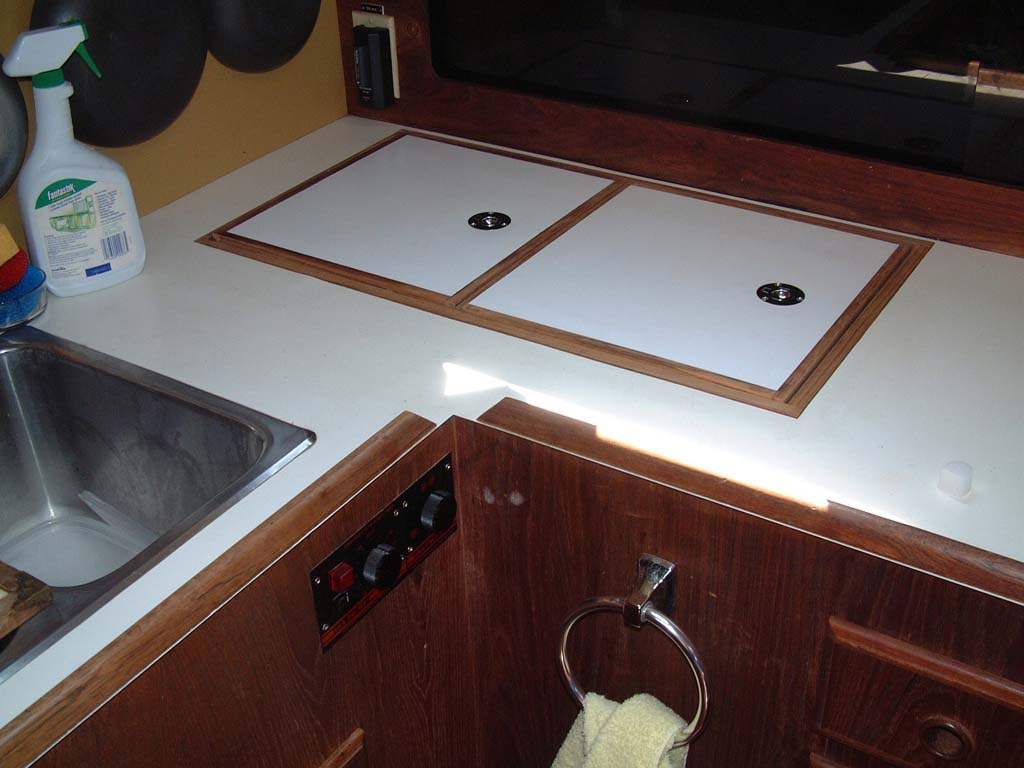 Freezer and Refrigerator Hatches |
The installation, including the box modifications, was performed by Zahniser's Sailing Center in Solomons, MD. The picture on the left shows the two hatches (one for the freezer, one for the frig). |
| The picture on the right shows the two controls (one for the engine compressor, one for the AC compressor). |
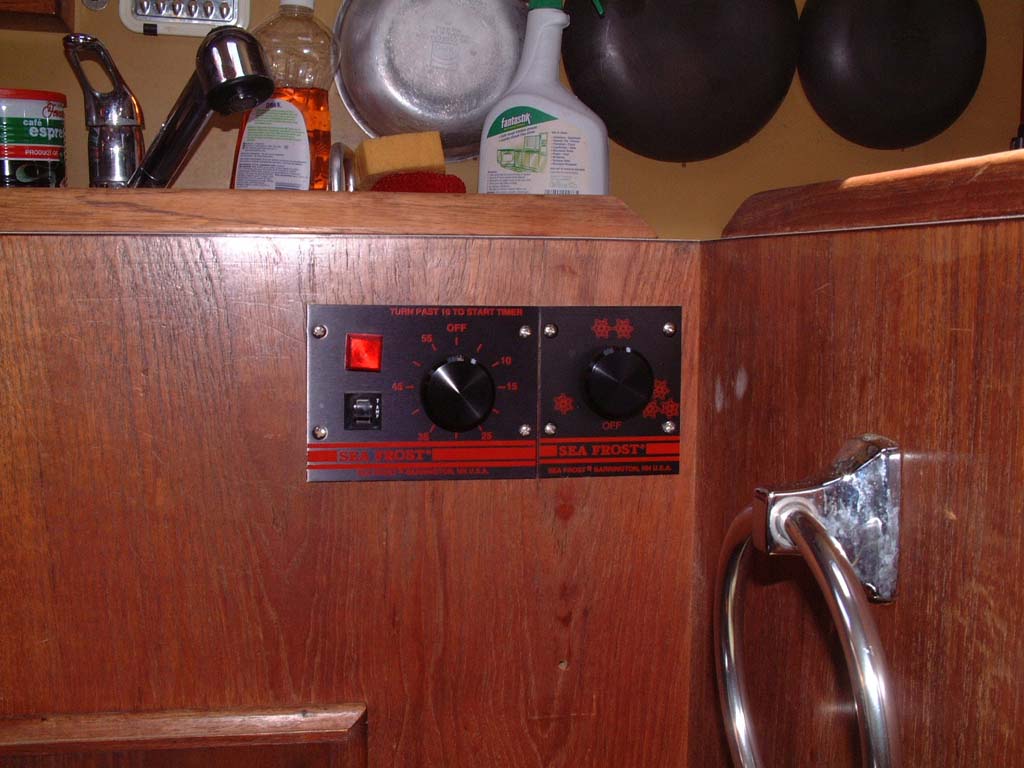 Controls for ED and SA-III Compressors |
 The Freezer Compartment |
|
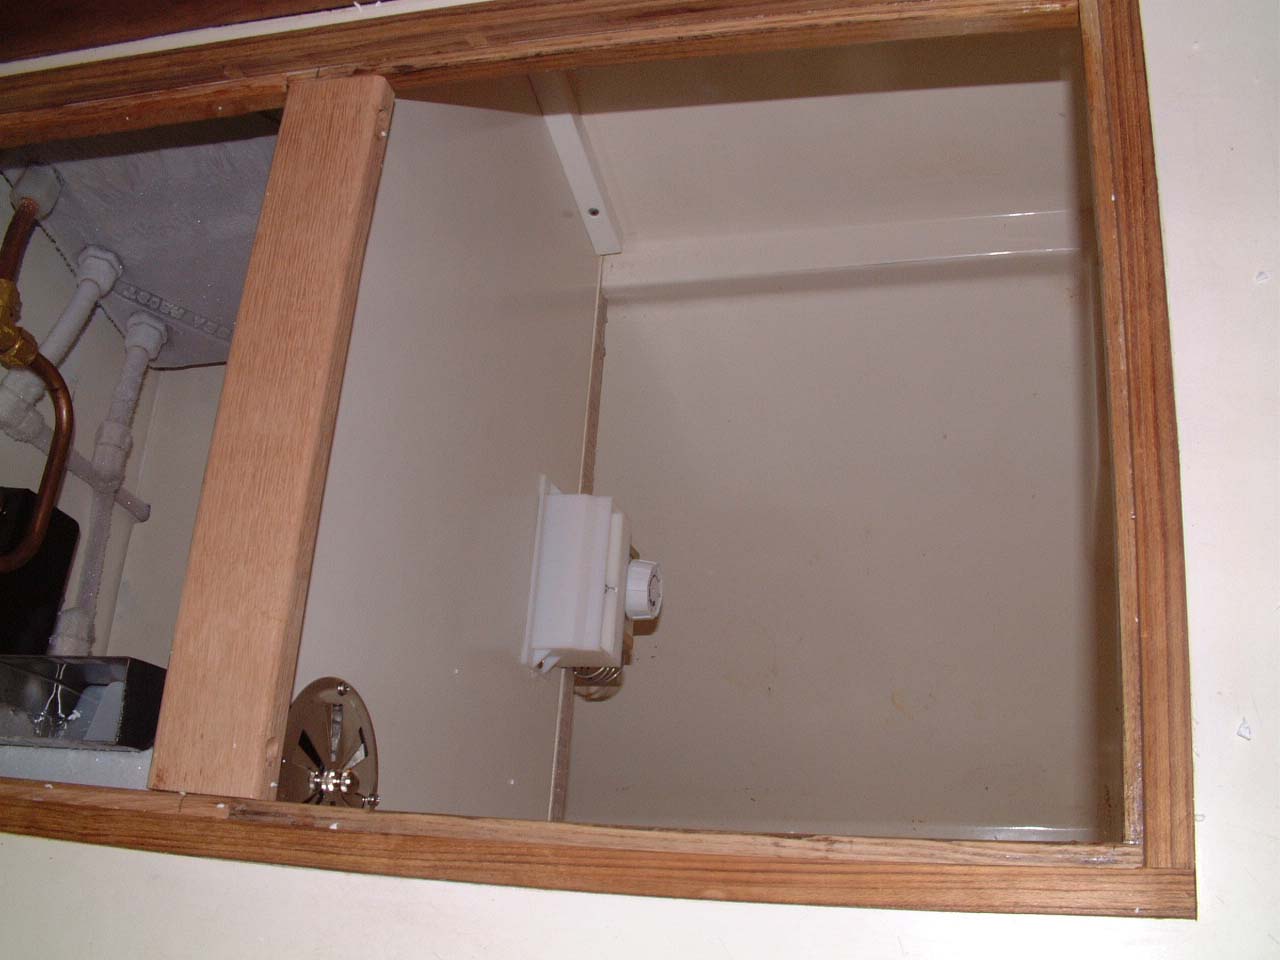 The Refrigerator Compartment |
|
 SA-III Compressor |
The SA-III compressor is located in the aft locker under the aft cabin berth. |
| The picture on the right shows the engine compressor as it was mounted on the Westerbecke W60 engine. The W60 was replaced by a Yanmar 4JH4AE engine in 2008 and a new mounting was required for the compressor. |
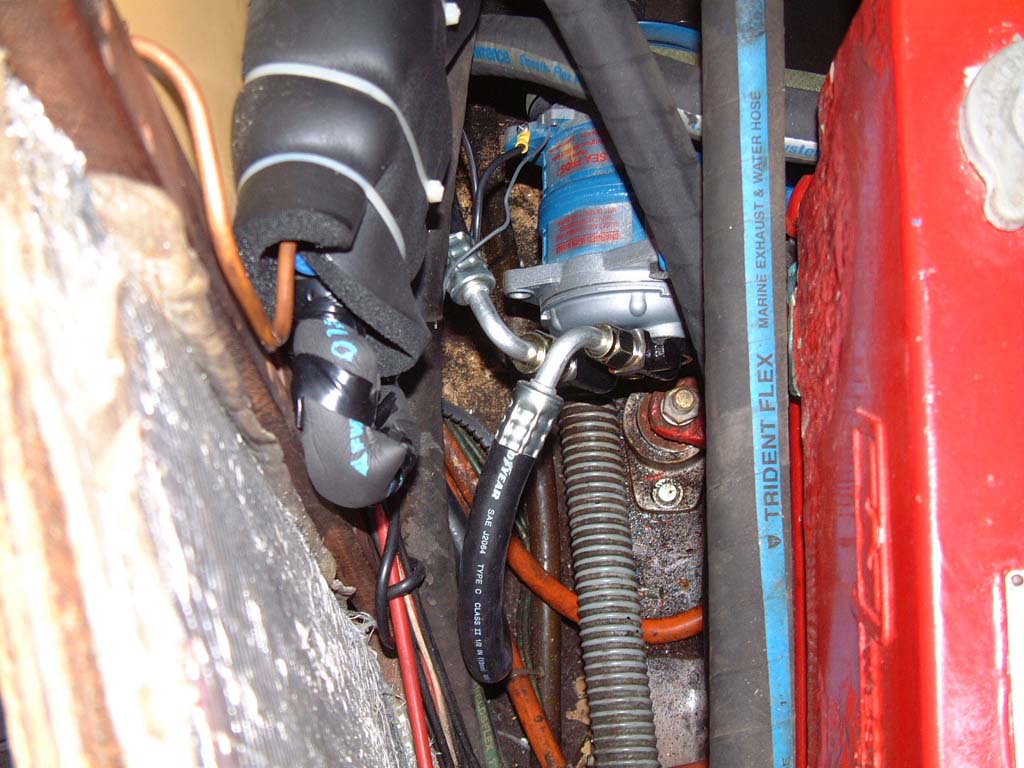 The ED Compressor On the W60 Engine |
 The ED Condensor in the Hanging Locker |
The condenser for the engine-drive compressor. This located in the hanging locker next to the engine compartment. It takes the full flow of the seawater pump before the water enters the heat exchanger. This provides a lot of water to move heat out of the condenser coils. |
|
So far the freezer compartment has been a success. I haven't been able to acquire any metrics on its operation, but in the first weekend of operation I was able freeze several articles while maintaining the refrigerator at a temperature between 35 - 40 degrees. Continuing use in 2002 indicates that this installation will be very satisfactory. Because I didn't re-insulate the box, it appears I will be limited to less than 24 hours of freezer operation during warm months. That is, frozen items will start to thaw within that time frame. The refrigerator compartment appears to be able to hold the temperature below 40 degrees for well in excess of this time frame. Therefore, the use of the freezer when anchored for an extended time may be limited to supporting a gradual de-frosting of previously frozen food. This is an acceptable limitation. When underway we will be running the engine or the generator every day to maintain the batteries, and that should be sufficient to keep everything frozen. Dockside I will be able to maintain frozen food indefinitely. In 2003 I did discover that the seawater coolant for the 110VAC condenser is vulnerable to clogs from the pump sucking in our Chesapeake Bay Sea Nettles (Jelly Fish). Normally I leave the compressor running all the time when connected to dockside power. Twice this summer I arrived at the boat for the weekend to discover that the compressor has shut down and the box had de-frosted. In both instances a Sea Nettle had been ingested by the system and trapped by the seawater strainer. The Sea Nettle quickly decayed and produced a goop that coated the strainer basket and significantly reduced the water flow to the condenser. The SA-III system detected the reduced flow and shut down the compressor. Fortunately I do not leave any perishable food in the refrigerator when I am off the boat for more than a day so there was no mess in the ice box - just warm beer. I cleaned out the strainer basket, pressed the reset button on the compressor and the refrigeration started back up. The only problem was that given the size of the ice box and freezer compartment it takes several hours to bring everything back down to temperature and then several compressor cycles to stabilize everything. |
|
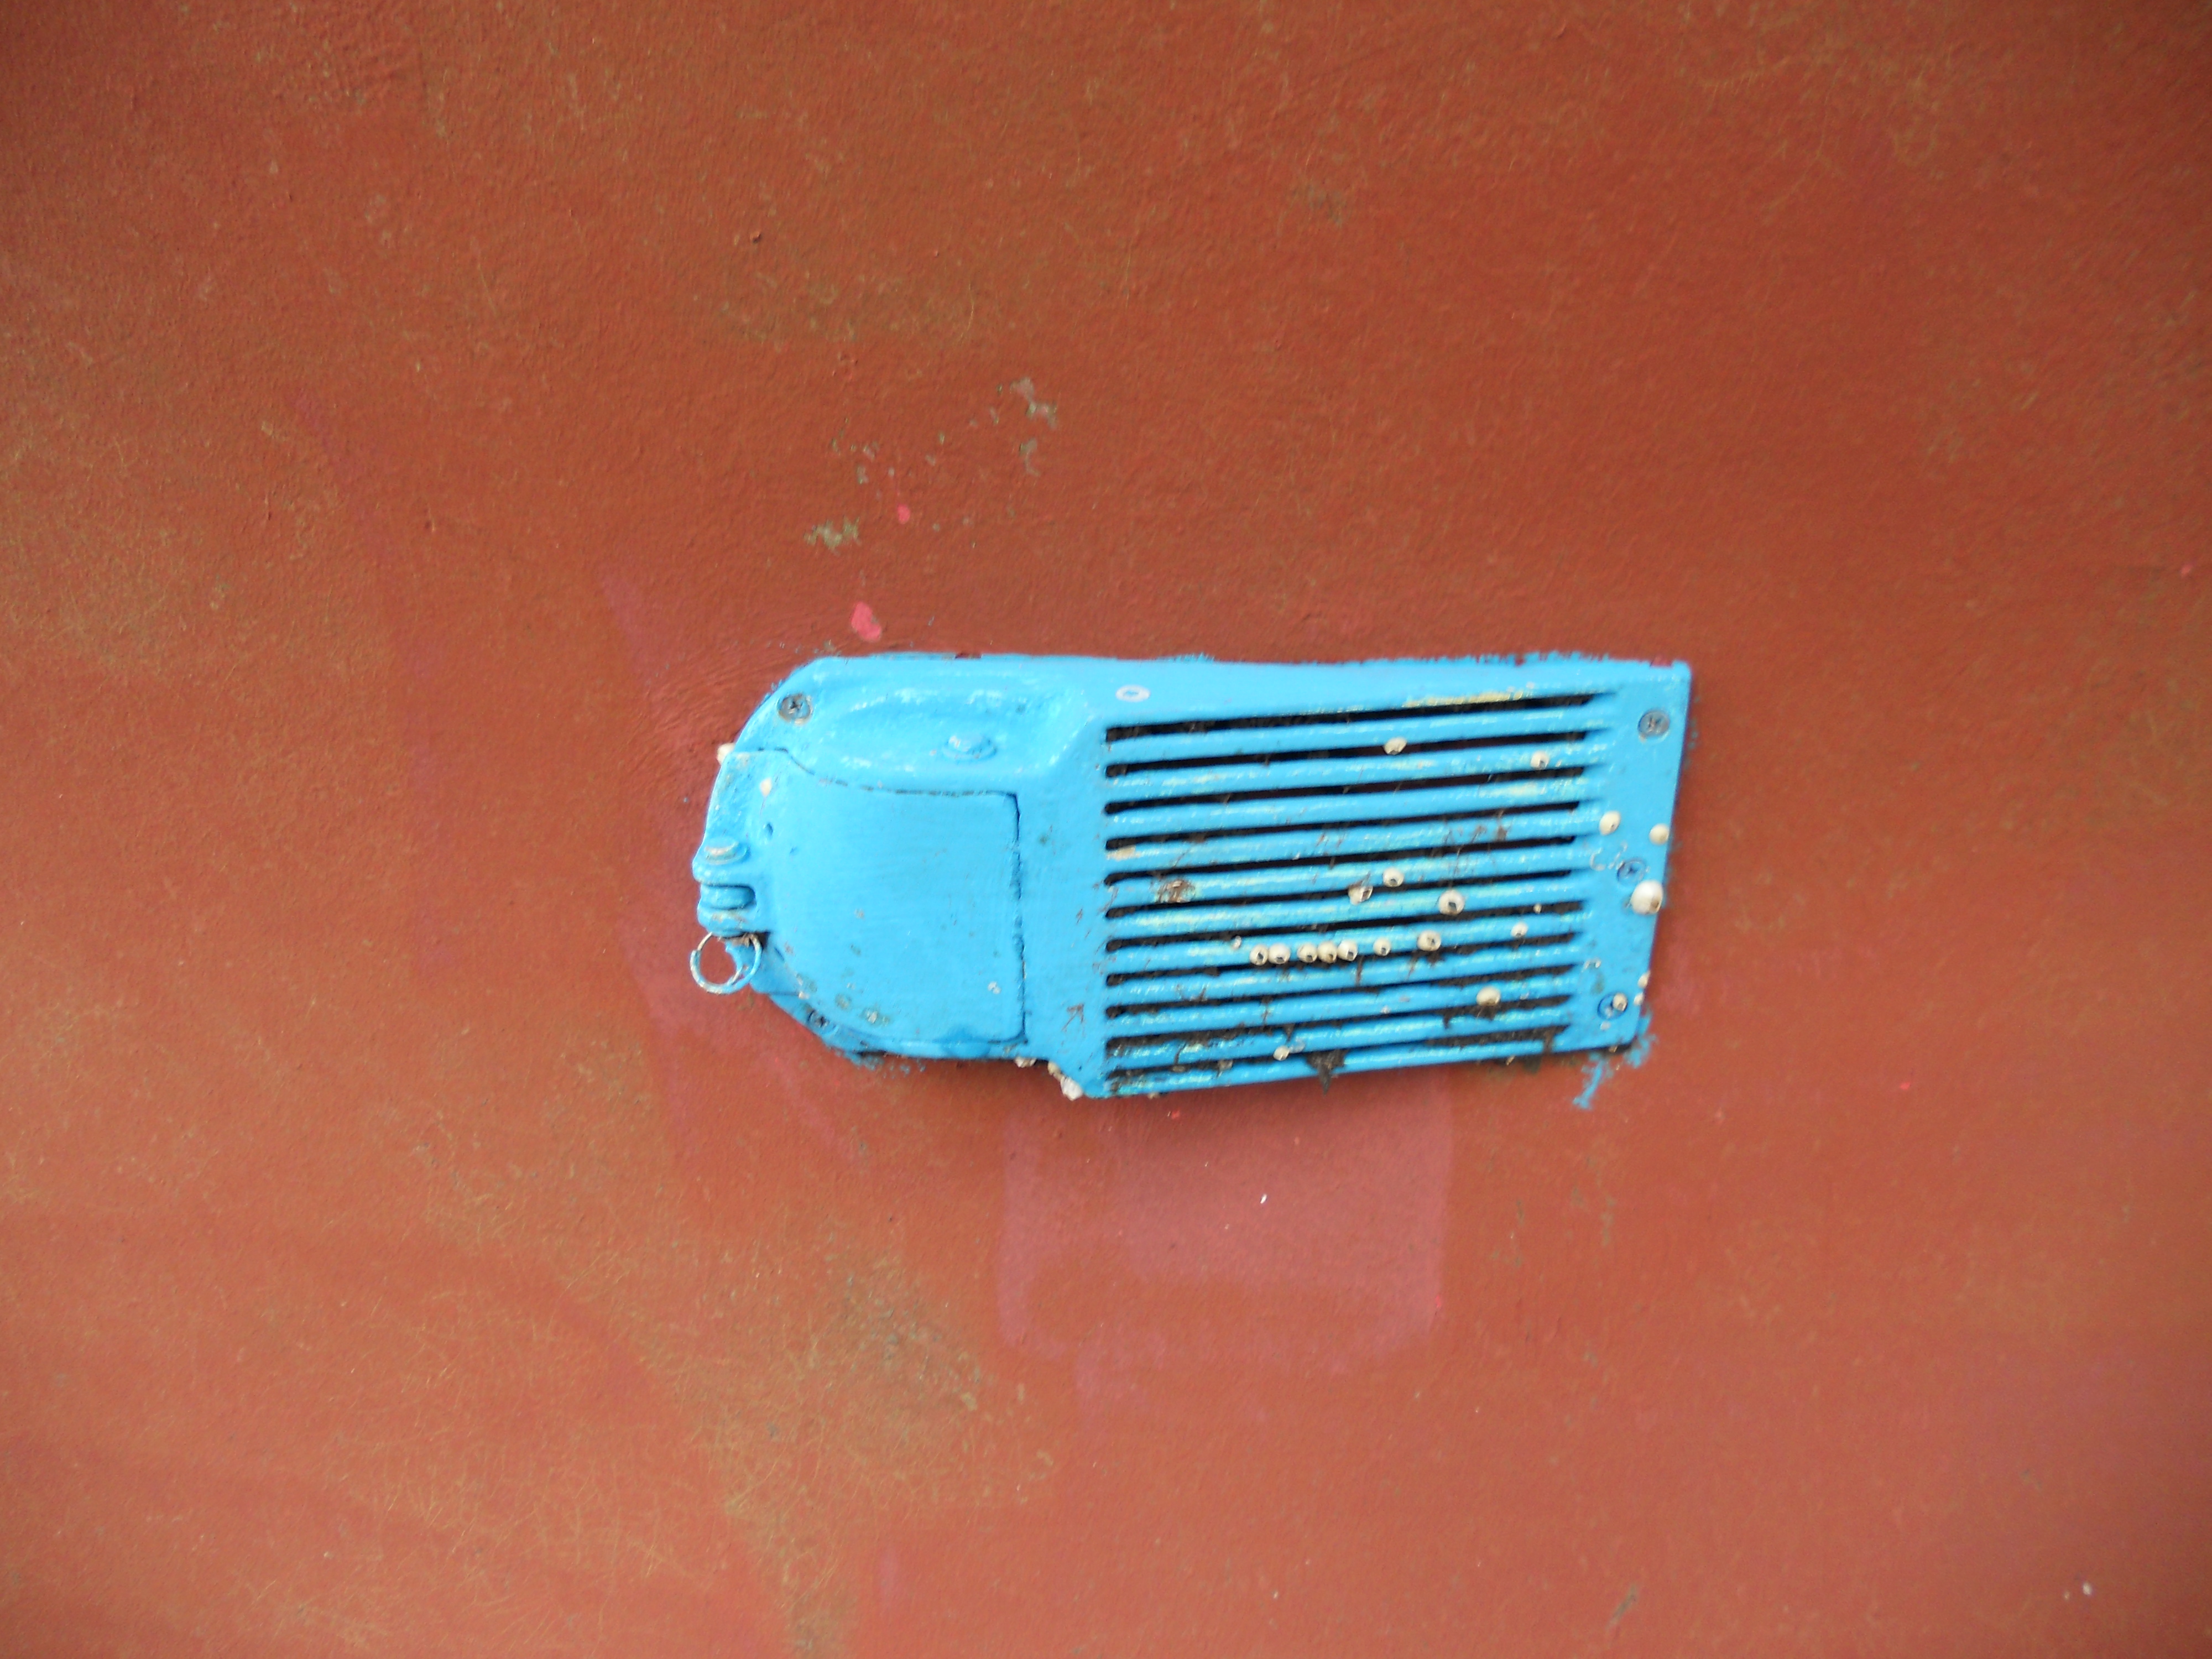 Scoop Grate Over Low Volume Intake |
In 2010 I installed a scoop grate on the outside of the through-hull intake
for the low-volume
seawater manifold that feeds the refrigeration pump (among others).
That year and in 2011 I returned to the Chesapeake Bay and had no problems
with Sea Nettles (at least not in the water manifold). The blue anti-fouling paint had been on less than a year when this picture was taken. It appears the Barnacles love the stuff. |
|
Once the refrigeration was installed and operational, my next project was to fabricate a set of baskets that can be set into the refrigeration compartment to improve the food storage and access. The baskets are partially shown in the picture on the right. One basket is actually a shelf on the outboard section of the refrigerator which contains items that do not have to be always below 40 deg. F. to prevent spoilage. This includes items such as condiments, cheeses, butter, cream, etc. Items that you are constantly reaching for when cooking, and would otherwise migrate to the bottom reaches of the box. |
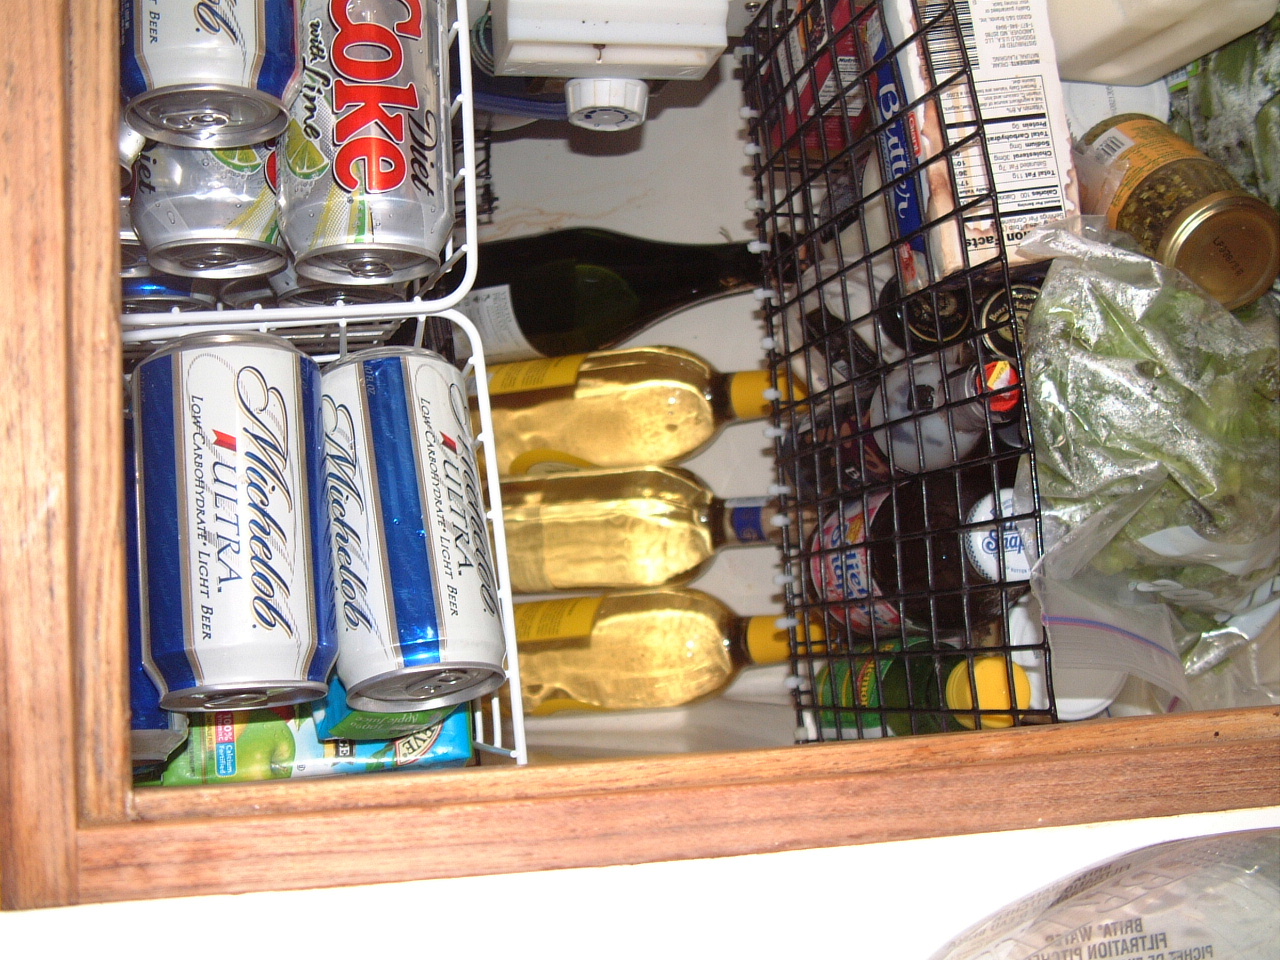 Food Baskets In Refrigerator |
|
The small white baskets contain loose items such as soda and beer.
These baskets sit on top of a tall basket that is used primarily for
vegetables. Under the freezer compartment is a long covered basket that normally contains meat, fish and other highly perishable items that will be consumed within the next 48 hours. This is the coldest spot in the refrigeration compartment. |
|
| Now when I have to go to the bottom of the frig to get an item, I have a reasonable expectation that I will find what I'm looking for and I will only have to remove three or four baskets to get to it. Previously I had to remove each item from the box, and whatever I was looking for was always the last item reached. Because of this I would often forget I had placed some expensive and perishable piece of meat in the refrigerator and discover it several weeks later when the smell required a complete emptying and defrosting of the box. | |
| New SA-3 Unit in 2018 | |
| At the end of June, 2018 the SA-3 compressor froze. The compressor attempted to start, but failed. The initial hope was a failed starter capacitor. I had one expedited from SeaFrost and had Hansen Marine Services install it with no success. So a new compressor was required. That meant replacing the entire unit, which was accomplished on July 16,2018. During the interim period I had to run the ED compressor twice a day to maintain refrigeration. | |