Sailing Vessel (SV) Sarah
Sarah has a new owner as of 7/26/2021. There will be no more updates to these SV Sarah pages
Sarah has a new owner as of 7/26/2021. There will be no more updates to these SV Sarah pages
| Cabin Upgrades | |
| Contents: | |
| Cabin Lighting | |
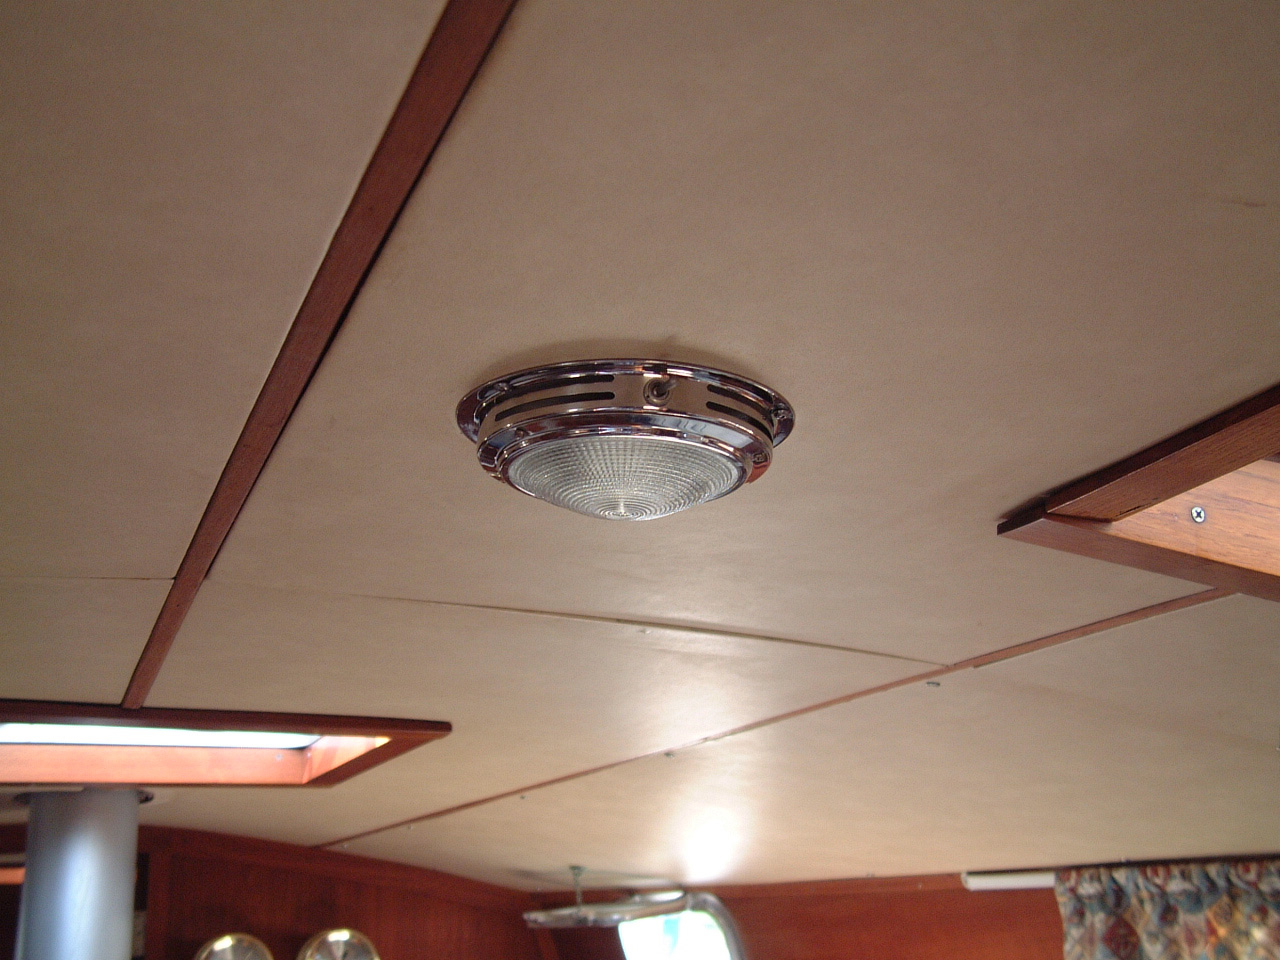 West Marine Dome Lamp with Xenon Bulb |
In 2000 I replaced four original equipment cabin bulkhead lights with gooseneck reading lights, as well as all of the overhead dome lights. The dome lights in the aft cabin both can be switched to red light during night sails. |
|
As
of 2006 the reading lights have held up pretty well, but the brass tarnishes
very quickly and requires a lot of polishing. The Xenon bulbs also
draw a lot of current. The dome lights did not hold up as well. |
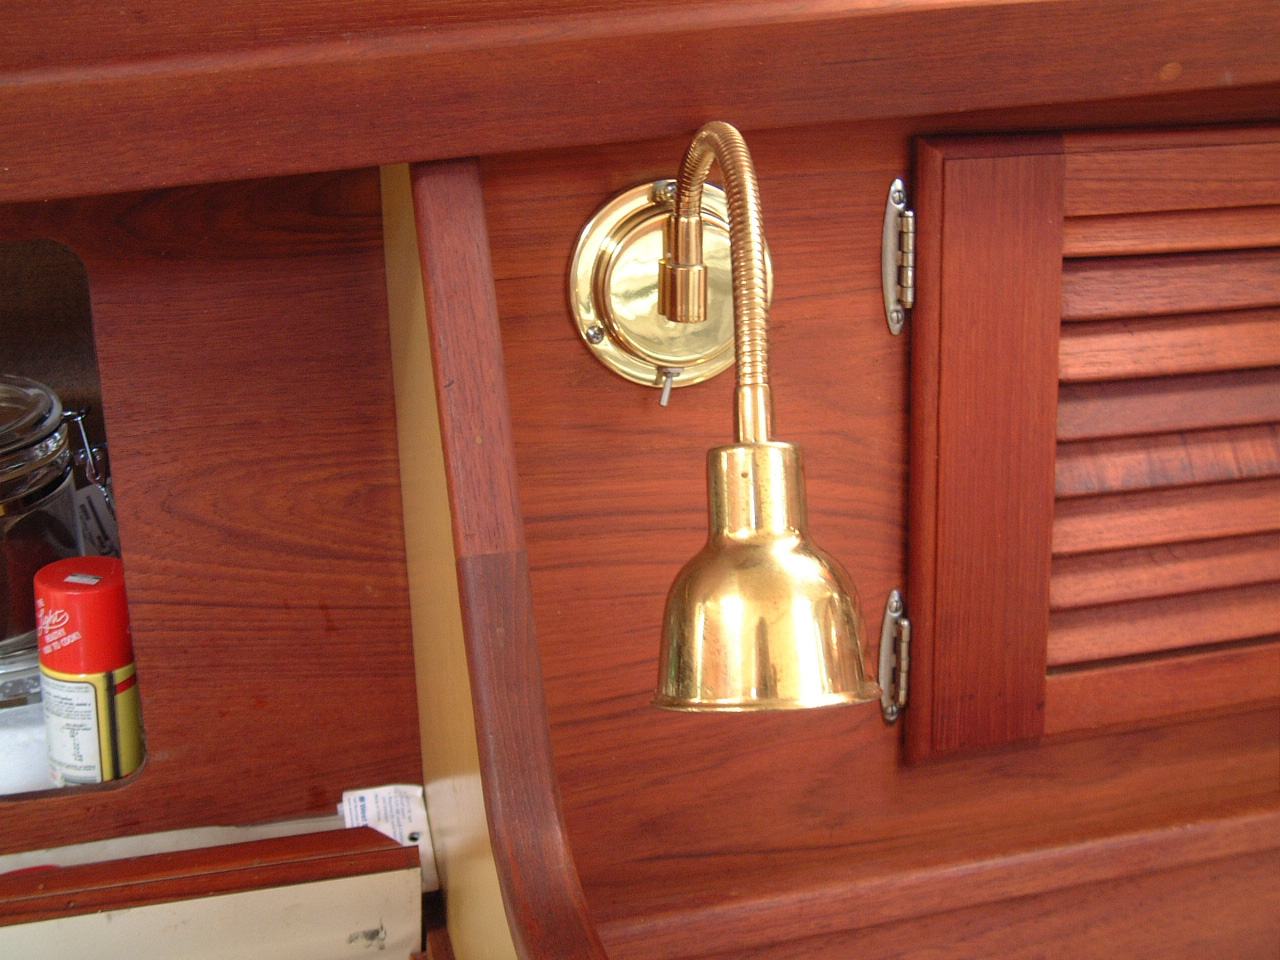 West Marine Gooseneck Lamps |
 Gooseneck Lamp Illuminates Lockers Above the Settee |
Because of their current draw I normally used these lights strictly for
reading. When I have shore power I used them for area lighting. Subsequently I replaced the Xenon bulbs with LED and no longer ration the use of these lamps. One of the advantages of using these goose-necked lights is that I didn't have to put lights in the upper lockers to find stuff. The gooseneck swings over the locker doors and the lamp fully illuminates the interior. No need for a flashlight. I did eventually replace all of the Xenon bulbs in these lamps with LED bulbs. |
|
The WM dome lights are a different story. All of them have been replaced with Alpenglow lamps (see update below). |
|
| Cabin Lighting, Update | |
 Alpenglow Lamp Over Nav Station |
Well after four years of replacing switches, bulbs, and whole fixtures of the West Marine dome lights I have finally given up on these lights at least for the principal area lighting in the main and aft cabins. The WM lights shown above have proven to be unreliable. I believe it is the result of the heat these lights generate, but for whatever reason all of the original dome lights I installed failed within a year. Most of the failures were in the switches, not the bulbs. That was OK for some of the older lights which have a simple toggle switch. The later models have a molded switch that matches the curvature of the lamp case and are not easily replaced. |
|
I had been contemplating the Alpenglow lights for a number of years. The reputation of these lights appears unparalleled for the quality and efficiency of the lighting, and the reliability of the fixtures. The thing holding me back every time I was faced with repairing one of the WM lights was the price of the Alpenglow. A single Alpenglow fixture goes for $90 and up, three times the cost of the WM lights. Finally my investment in the WM lights had exceeded what would have been required to go with the Alpenglow in the first place and I had enough. So I ordered three Alpenglow lamps in January, 2005. |
|
| I replaced the two WM lights in the aft cabin with Alpenglow
9 watt night vision fixtures. These lights offer two power levels for both
white and red (night vision) LED lighting. The night vision lighting is
shown in the picture on the right. The hole in the upper right corner of the electrical panel used to be filled with a music speaker. I removed the speaker and eventually filled the space with an additional breaker panel. |
 Alpenglow Night Vision Lighting |
|
The quality and efficiency of these lights is a major improvement over the WM lights they replaced. They have also proved very reliable. No failures as of 2012. After a month of experience with the initial lamps, I ordered two more to replace the dome lights over the galley and in the forward cabin. The new lamps were ordered with a single power level and no night vision light. Now in 2016 I have had over 11 years of experience with the Alpenglow lights and I am very satisfied with the performance and reliability. In retrospect I would not order the dual voltage feature. That feature depends on only using bulbs modified by Alpenglow. If you replace a burned out bulb with the commercial bulb, the bulb will not work at the lower voltage. Also the commercial bulbs will flicker before coming on. Alpenglow charges a fair price for their modified bulbs, but when cruising out of the country I had to purchase the bulbs locally and of course that meant the lower voltage and instant on features didn't work. I do not miss the lower voltage light feature so I could have saved a few bucks for not ordering that for several of the lamps. |
|
 Alpenglow Lamp in Main Cabin |
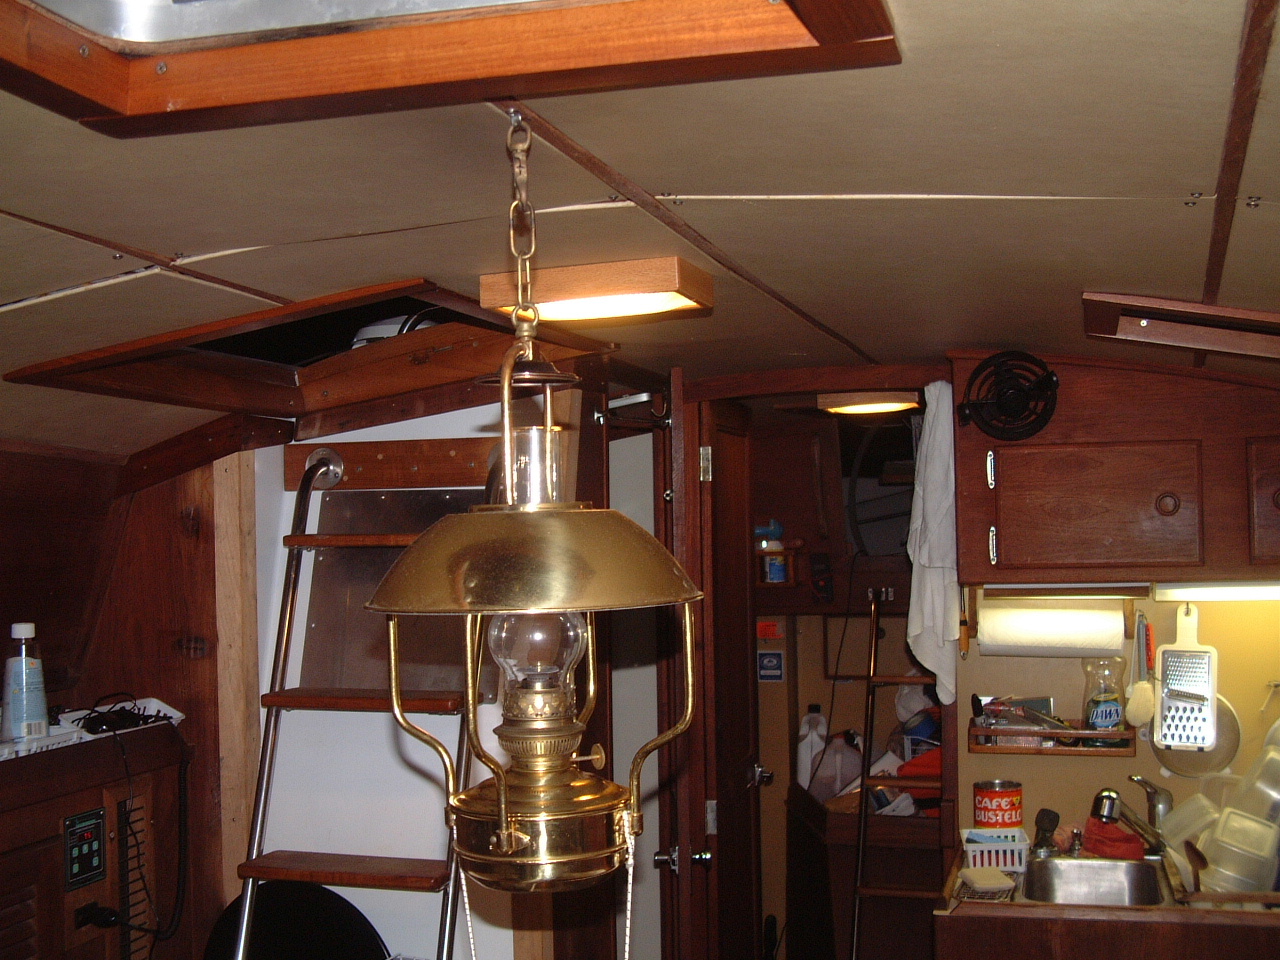
I replaced the primary WM overhead
light in the main cabin with an Alpenglow dual power fixture, shown in the
picture on the left. All of the fixtures have a natural Oak
wood trim. The kerosene lantern shown in the picture is no longer on board. The fitting that secured the chain to the top of the lamp came loose while rolling in the wake of a large powerboat off El Arenal, Mallorca and the lamp crashed to the cabin sole. |
The lantern was of some use when I wintered on the Chesapeake Bay as it gave out a fair amount of heat (and not very much light). As it had not been used at all since that winter I don't plan to replace it. In August, 2009 my supply of replacement bulbs for the Alpenglows is down to two bulbs, so it was time to restock. My decision was to go to a local lighting store and buy some of the standards Philips bulb or order the modified bulbs from Alpenglow. While I don't really use the low wattage setting on the three lamps that have that feature, I do like the non-flickering instant on feature. I also noticed that most of the bulbs that have failed have been the standard commercial bulbs, not the Alpenglow modified bulbs. I'm sure their modifications have nothing to do with extending the life of the bulbs, but clearly they do not shorten it. Since I was in the states, I ordered a set of replacement bulbs from Alpenglow. I want to add a few more area lights to the main cabin and Alpenglow is one of the sources from which I may order these lights. The only thing holding me back from another order with Alpenglow is I'm waiting to see if there are any breakthroughs in area lights using LEDs. |
|
|
In 2007 I replaced all of the Xenon bulbs in the main cabin gooseneck lamps with LED bulbs from DrLED and my friend Dick Juppenlatz of Cruising Services & Supplies. See below for further info on my implementation of LEDs. |
|
| More Lighting Changes | |
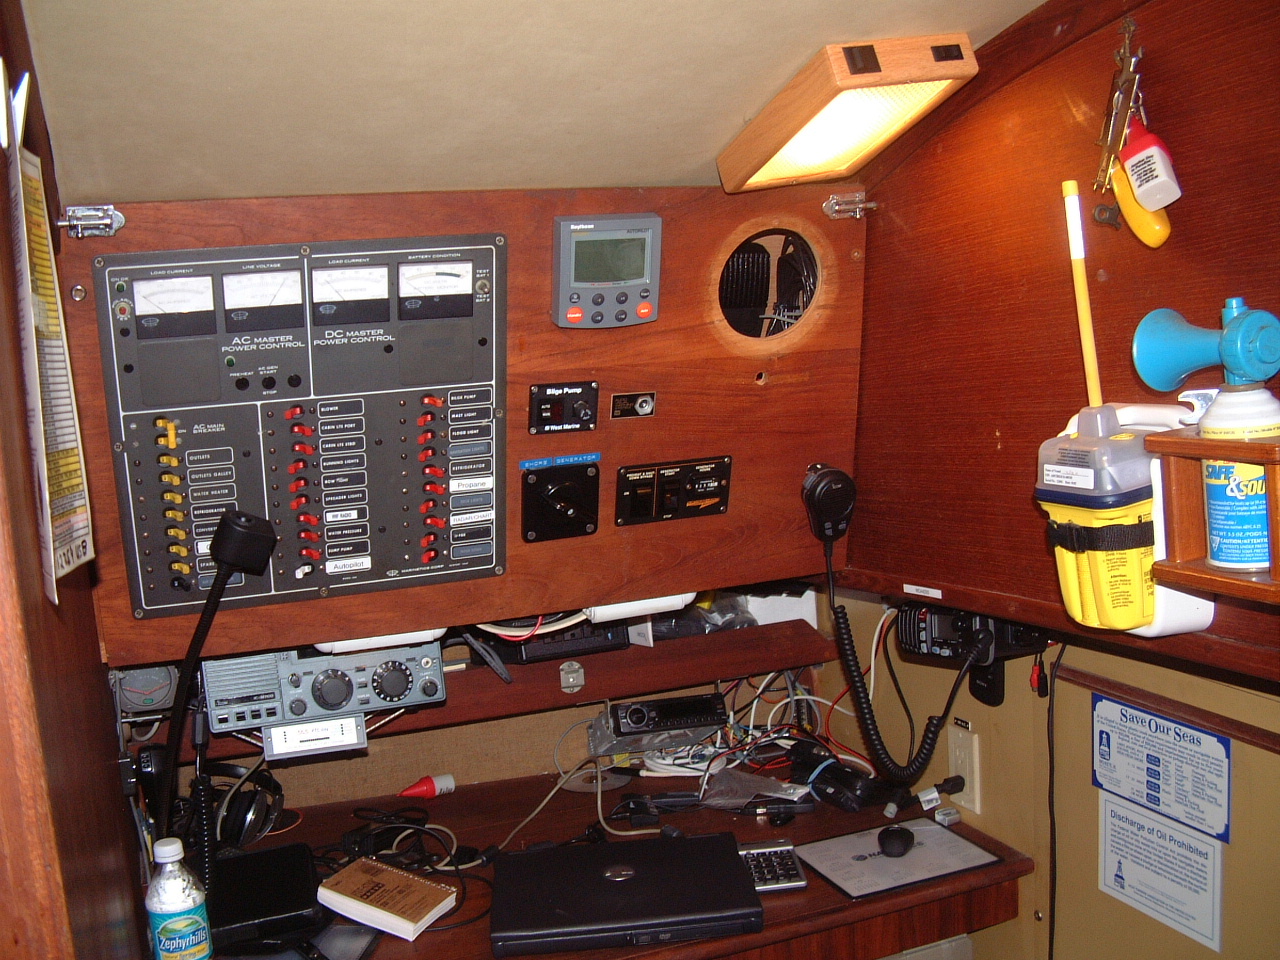
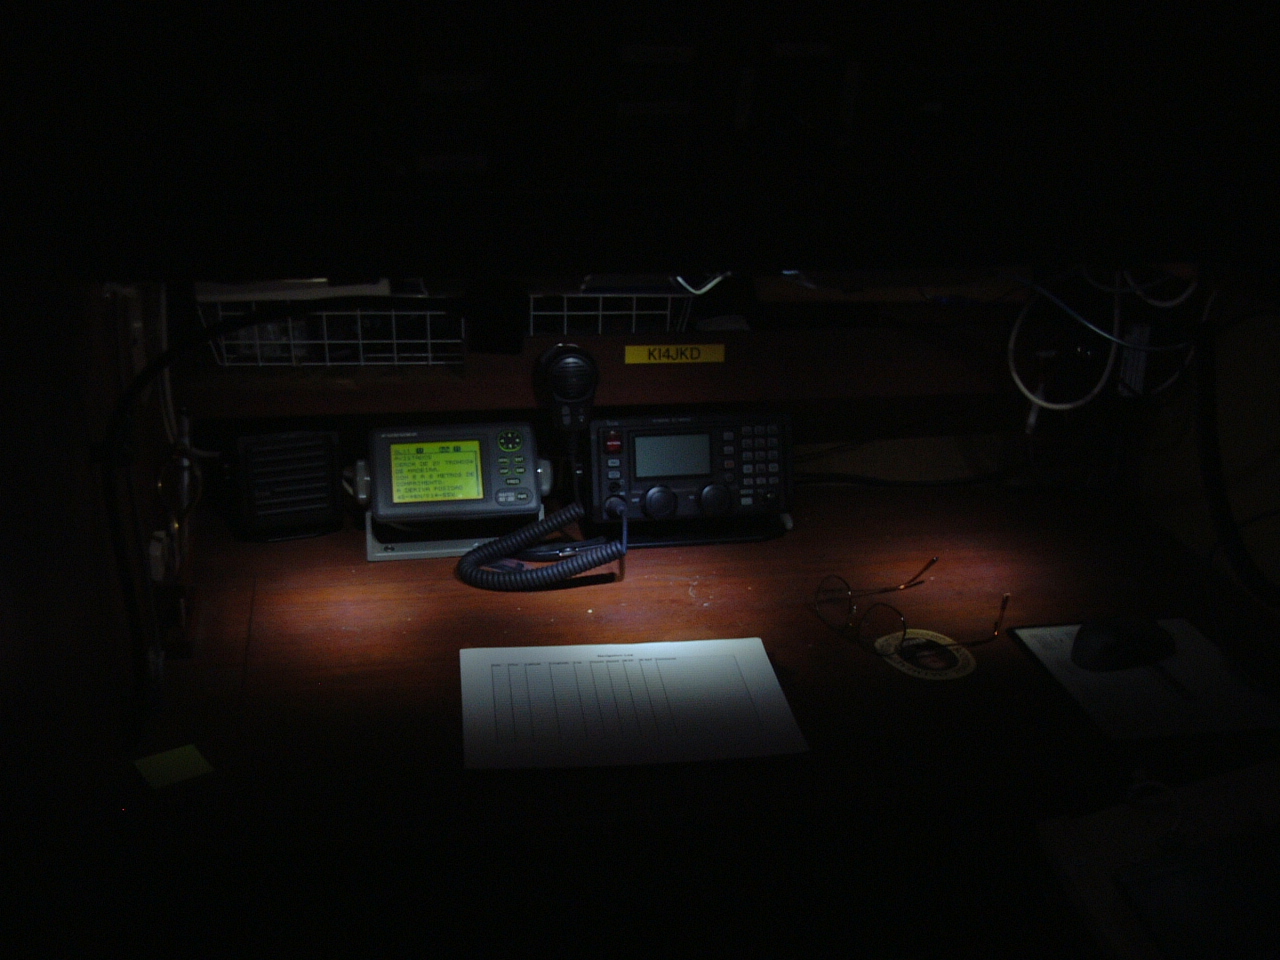
| I have never been satisfied with the lighting at the navigation desk
on Sarah. When I purchased the boat the desk lighting consisted of a
single goose-necked chart light which barely provided enough light to
operate the VHF radio, much less read a chart or write an entry in a
log. Initially I added some Xenon strip lights and upgraded the chart
light to a better model (Aqua Signal). I also added the Alpenglow
overhead light described
above. This was adequate for the several years, but the strip
lights failed and had to be replaced several times. They also pulled a
lot of current and generated a lot of heat for the amount of light they
produced. I was looking for a general low-level illumination that would
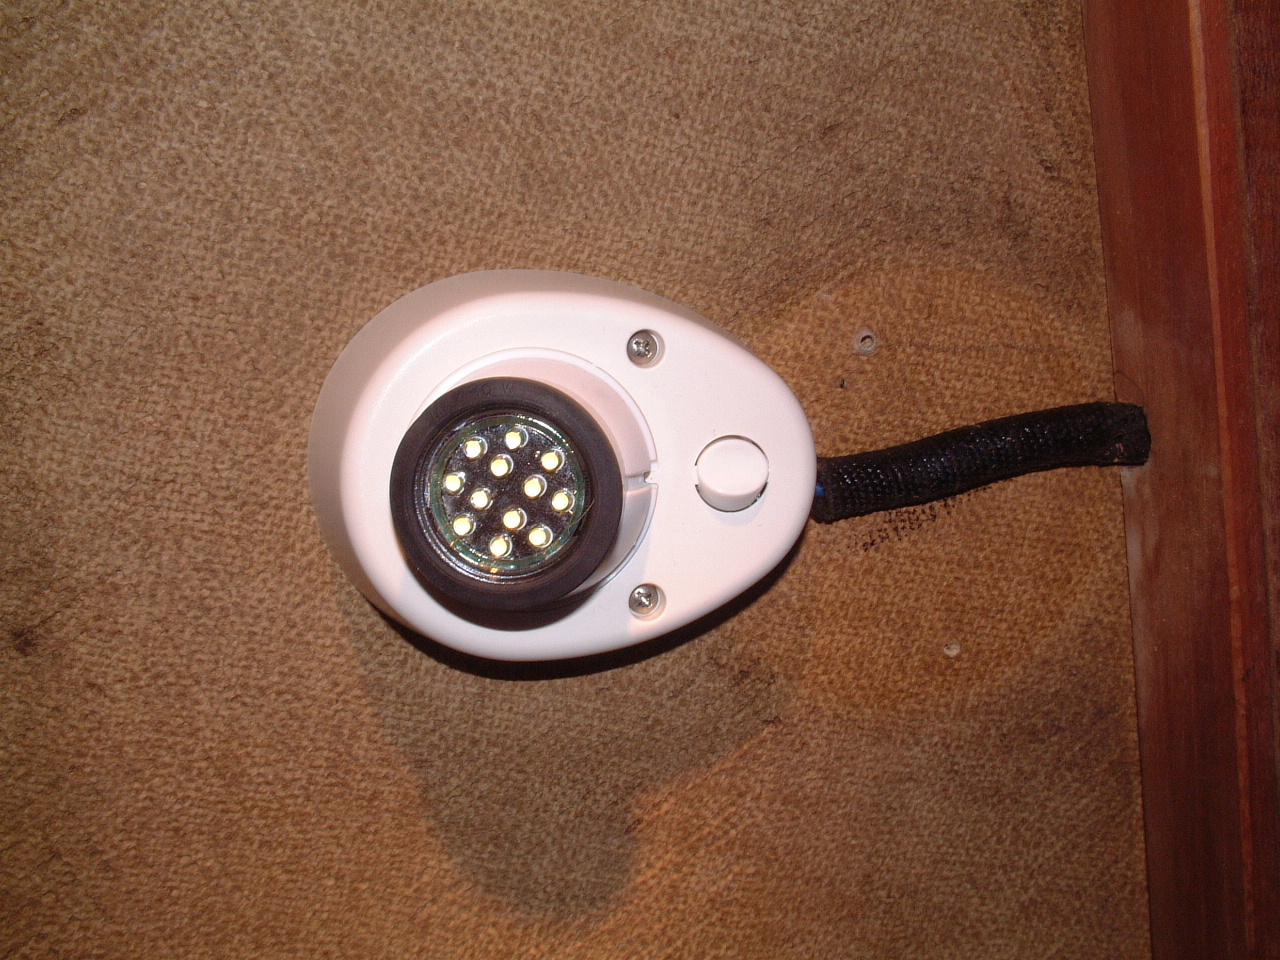
not draw much current and could be left on continuously. This past winter (2006/2007) I discovered several small LED lamps in one of my parts bins. I had purchased the lamps (called courtesy lamps) several years earlier with the intention of using them to light the inside of several cabinets, but never got around to installing them. |
|
| I took four of the lights and mounted them over the navigation desk. The light from just those lamps is shown in the picture on the right. They provide sufficient light to operate the radios, check the NAVTEX, etc. There is actually enough light to fill in a paper log (one is on the desk) but that would require placing the paper awkwardly on the desk. The important thing is that these four lamps do not even register on my amp meter when they are turned on. So they can remain on continuously on a voyage without a drain on the batteries. Given the long life of LEDs in general, I shouldn't have to worry about carrying spare lamps. |
 LED Lights Over the Nav Desk |
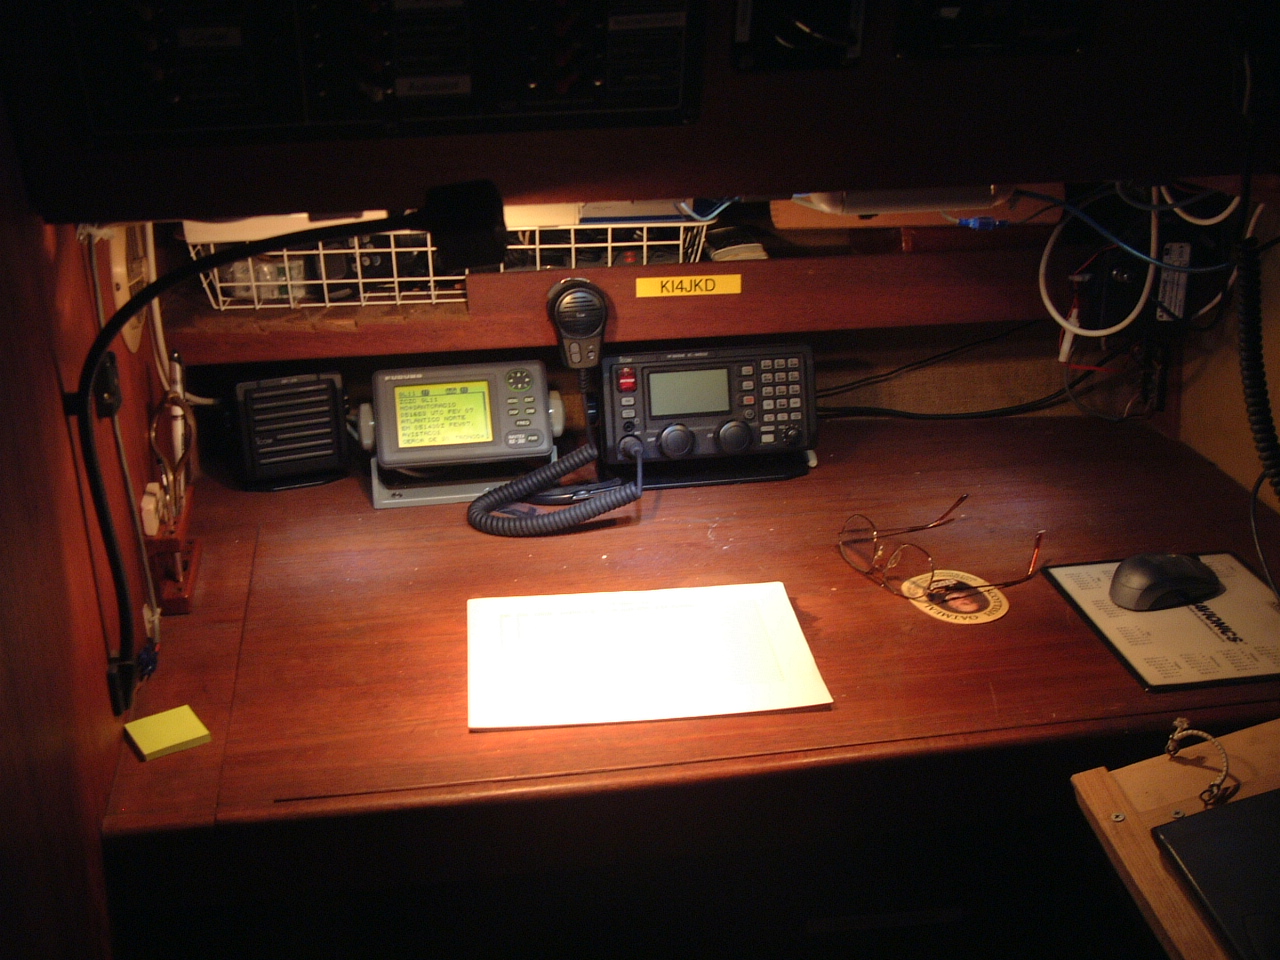 Nav Desk Illumination By the Chart Light |
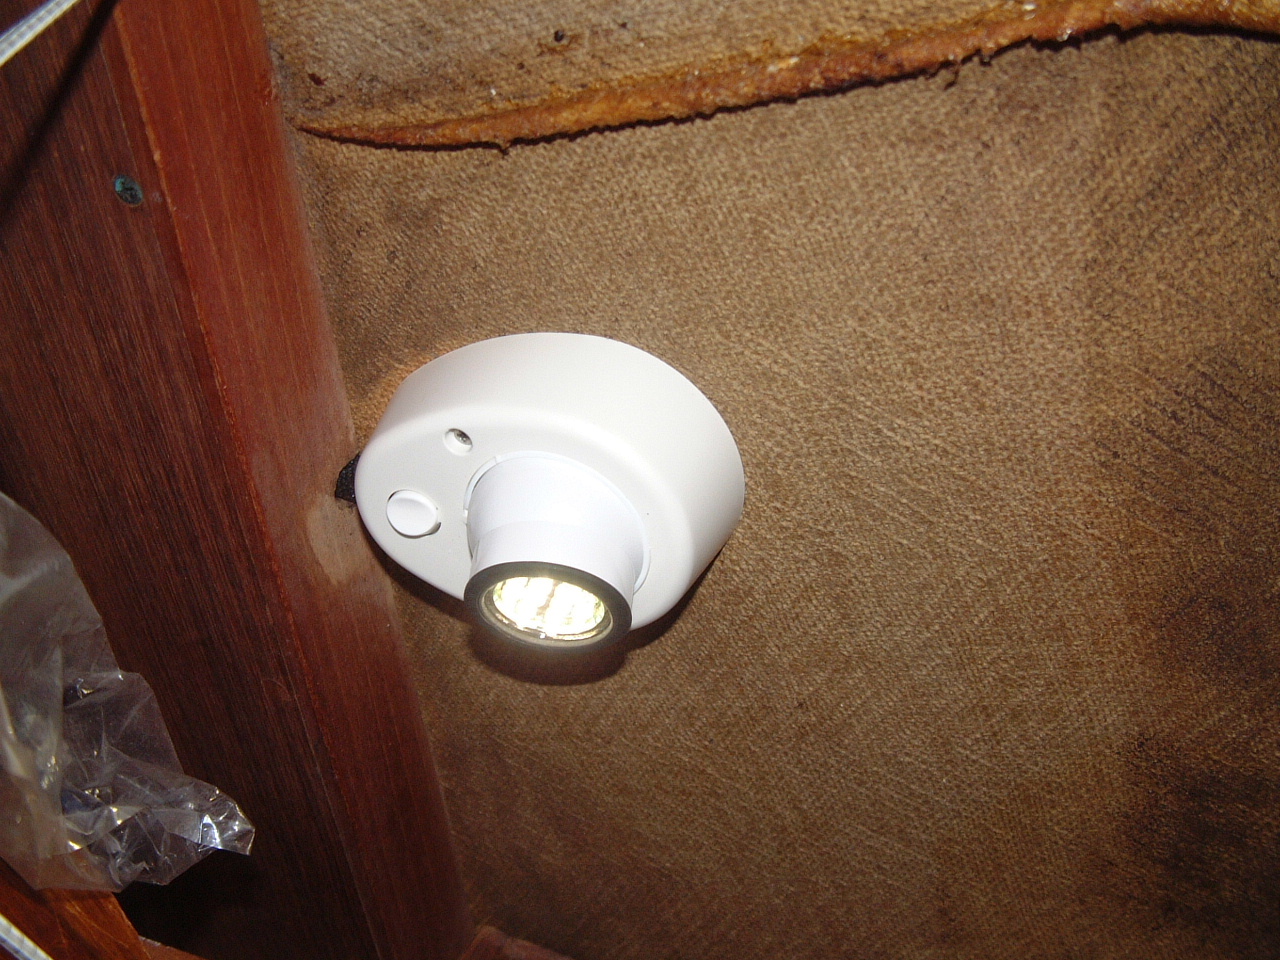
On
the left I have turned on the chart light
for maximum illumination of the desk. Plenty of light for chart reading
and writing when needed. Now the only incandescent light at the nav station is the gooseneck chart light. That will probably not change for some time. |
| I also installed those Xenon strip lights in the galley to illuminate the counter and stove top. They also failed and had to be replaced more than once. Finally I elected to not replace the strip light over the stove when it failed. For a year or so I used just the overhead Alpenglow fixture and on occasion the goose-necked reading light at the aft end of the port settee. | |
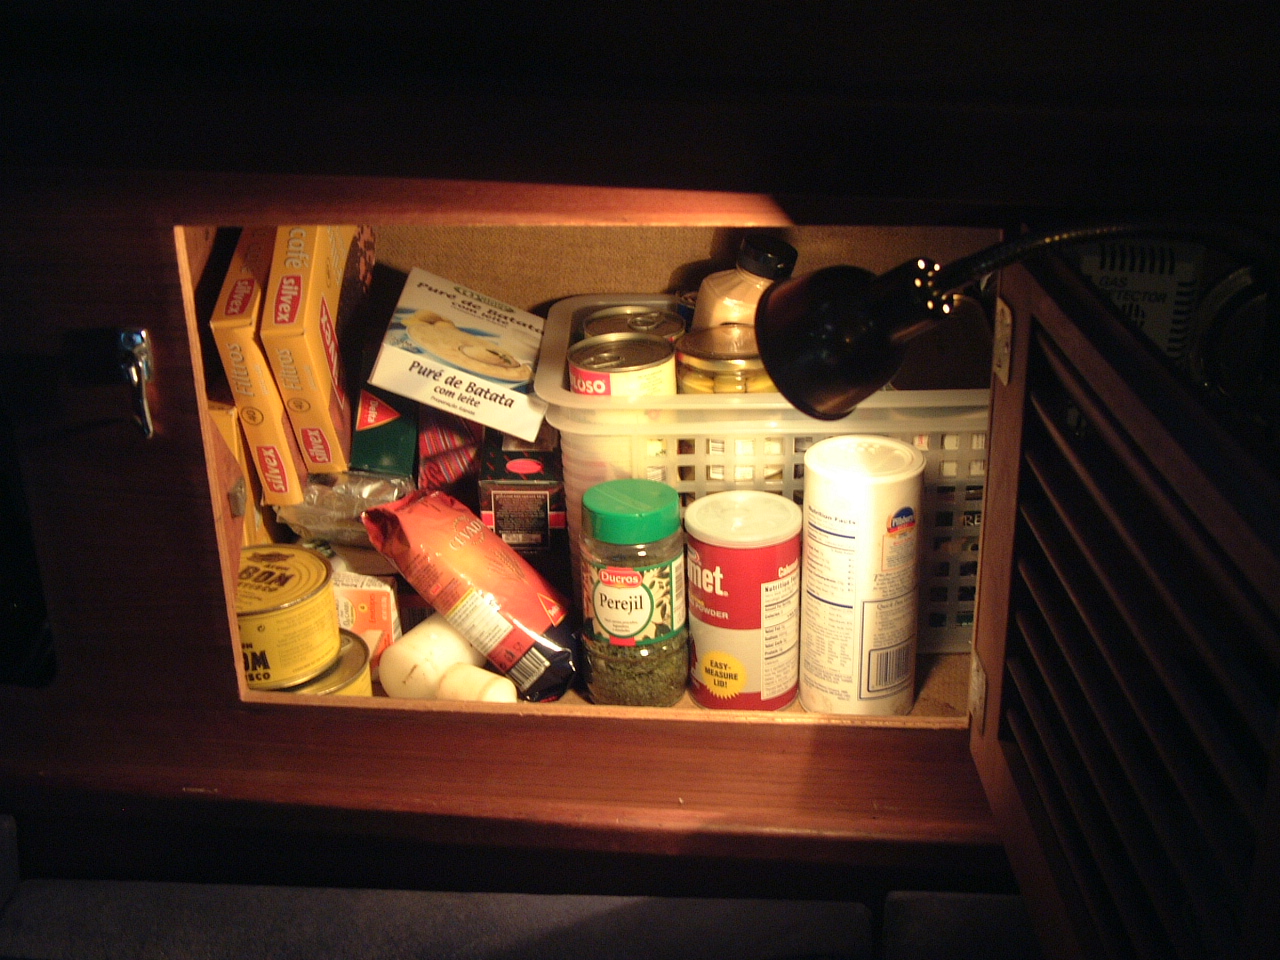
I had several Thin Lite fluorescent light fixtures in my parts bin, so I installed one over the stove. This is one of the very long Thin Lite fixtures (around 18"') and it provides a lot of light for minimal current draw. This is an excellent place for the light as it is hidden under the deck and does not glare in the eyes of anyone standing or sitting in the cabin. Also with the close proximity of the teak paneling the light picks up a little color and is not quite so monochromatic as most fluorescent lighting. |
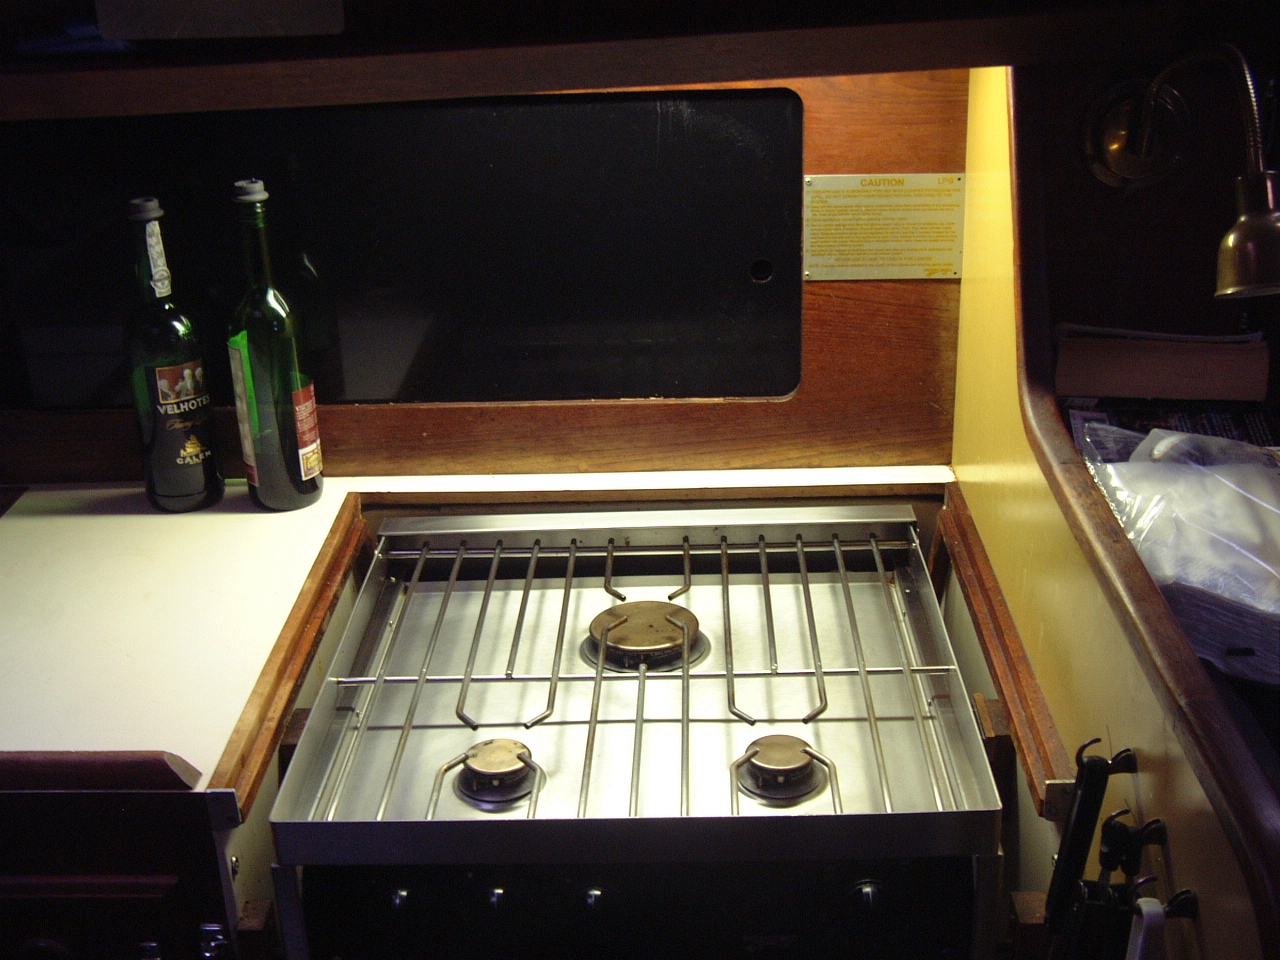 Thin Lite Fixture Over the Stove |
| Eventually this Thin Lite fixture failed and was replaced by a DrLED fixture, see below. | |
| Forward Cabin Lights | |
 Original Forward Cabin Bunk Lights |
I
had previously replaced the overhead dome light in the forward cabin
with an Alpenglow fixture. There are also two bunk lights outboard of the V-Berth, one on each side. These are 12V spotlight fixtures, which put out a lot of light but also draw a lot of current (25W). Although the spotlights are housed in a swivel allowing them to be directed to some extent, they really don't work well as a reading light and they draw a lot of current for an area light. |
| Because of the high current draw and the poor performance as a reading light I have been looking to replace them for several years. During that period I have not been able to find a suitable replacement, although I really wasn't looking that hard. Since I hardly ever sleep in the forward cabin, the lights haven't really been a big issue for me. Also none of my guests have ever complained about the lights. |
 Replacement LED Bunk Light |
| Finally
while Sarah was at Zahniser's Yachting Center for the
repower I was
forced to move into the forward cabin for a couple of months. By this
time one of the lights was broken. So it was time to replace them. |
|
 Replacement LED Bunk Light |
I finally found an LED replacement in the SailorSams catalogue and ordered two. These lights are not as robust as the ones they replaced. The bodies are very thin plastic, while the original lights had metal bodies. They are not quite as bright as the spotlights, but the current draw cannot be detected on the electrical panel ammeter. |
| They still are not very good reading lights, I'll probably add a couple of gooseneck fixtures at the head of the bunk for that purpose. | |
| As of March, 2008 there are only 7 incandescent lights remaining on Sarah. Three are in the head, two are over the aft cabin berth, one is the chart light at the nav station and the last one is in the galley. All other lights on Sarah are either fluorescent (Alpenglow, ThinLite, Taylor) or LED. I expect to replace all of the remaining incandescent bulbs with either fluorescent or LED bulbs by the end of this year. | |
| LED Cabin Lights | |
| I
had been looking for several years to replace the area and reading
lights in the main cabin with LEDs to save on power drain. However
the cost of the LED bulb replacements was exorbitant and the light
output did not appear to be adequate for either area lights or reading. In 2007 I discovered the DrLED product line which offered direct replacements for most of the lights used on Sarah. My friend Dick Juppenlatz is a dealer for DrLED and I purchased replacements for the navigation lights (masthead tri-color and anchor) and the main cabin reading lights (West Marine gooseneck lights). |
|
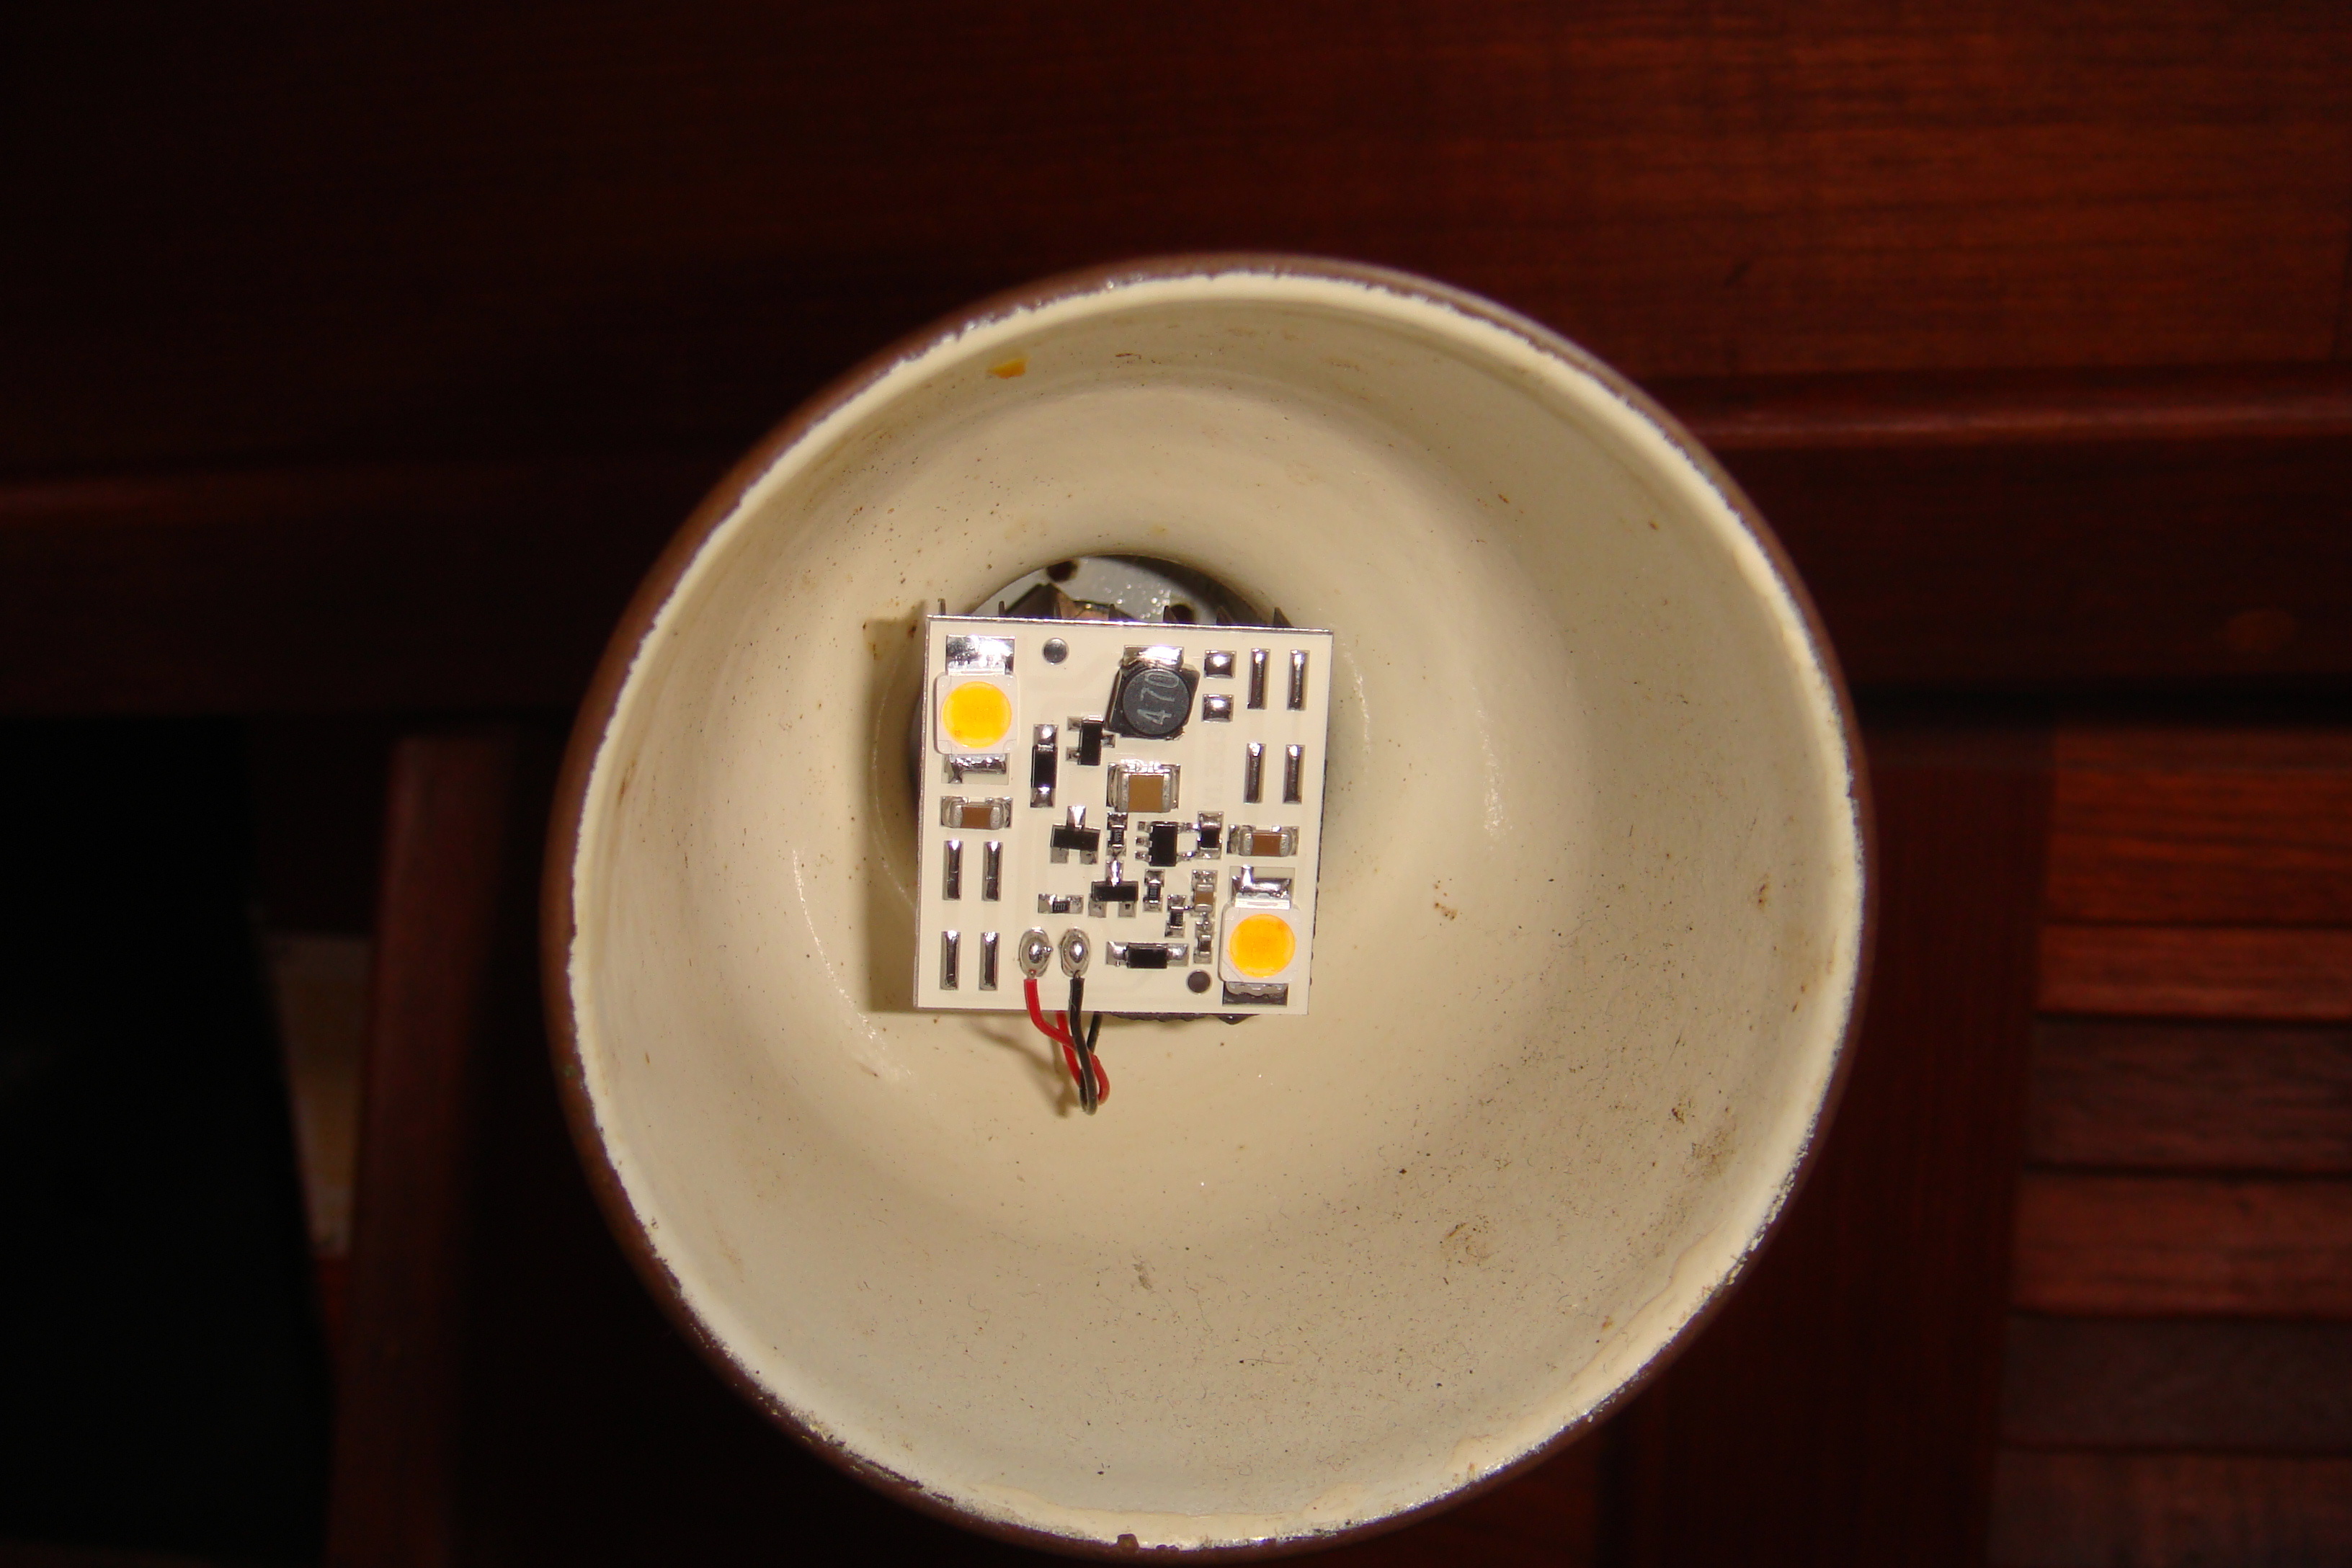
In the picture on the right is the DrLED bulb in one of the main cabin reading lights. This replaced a Xenon G4 bulb, which produced lots of light, but also lots of heat and drew a lot of current. |
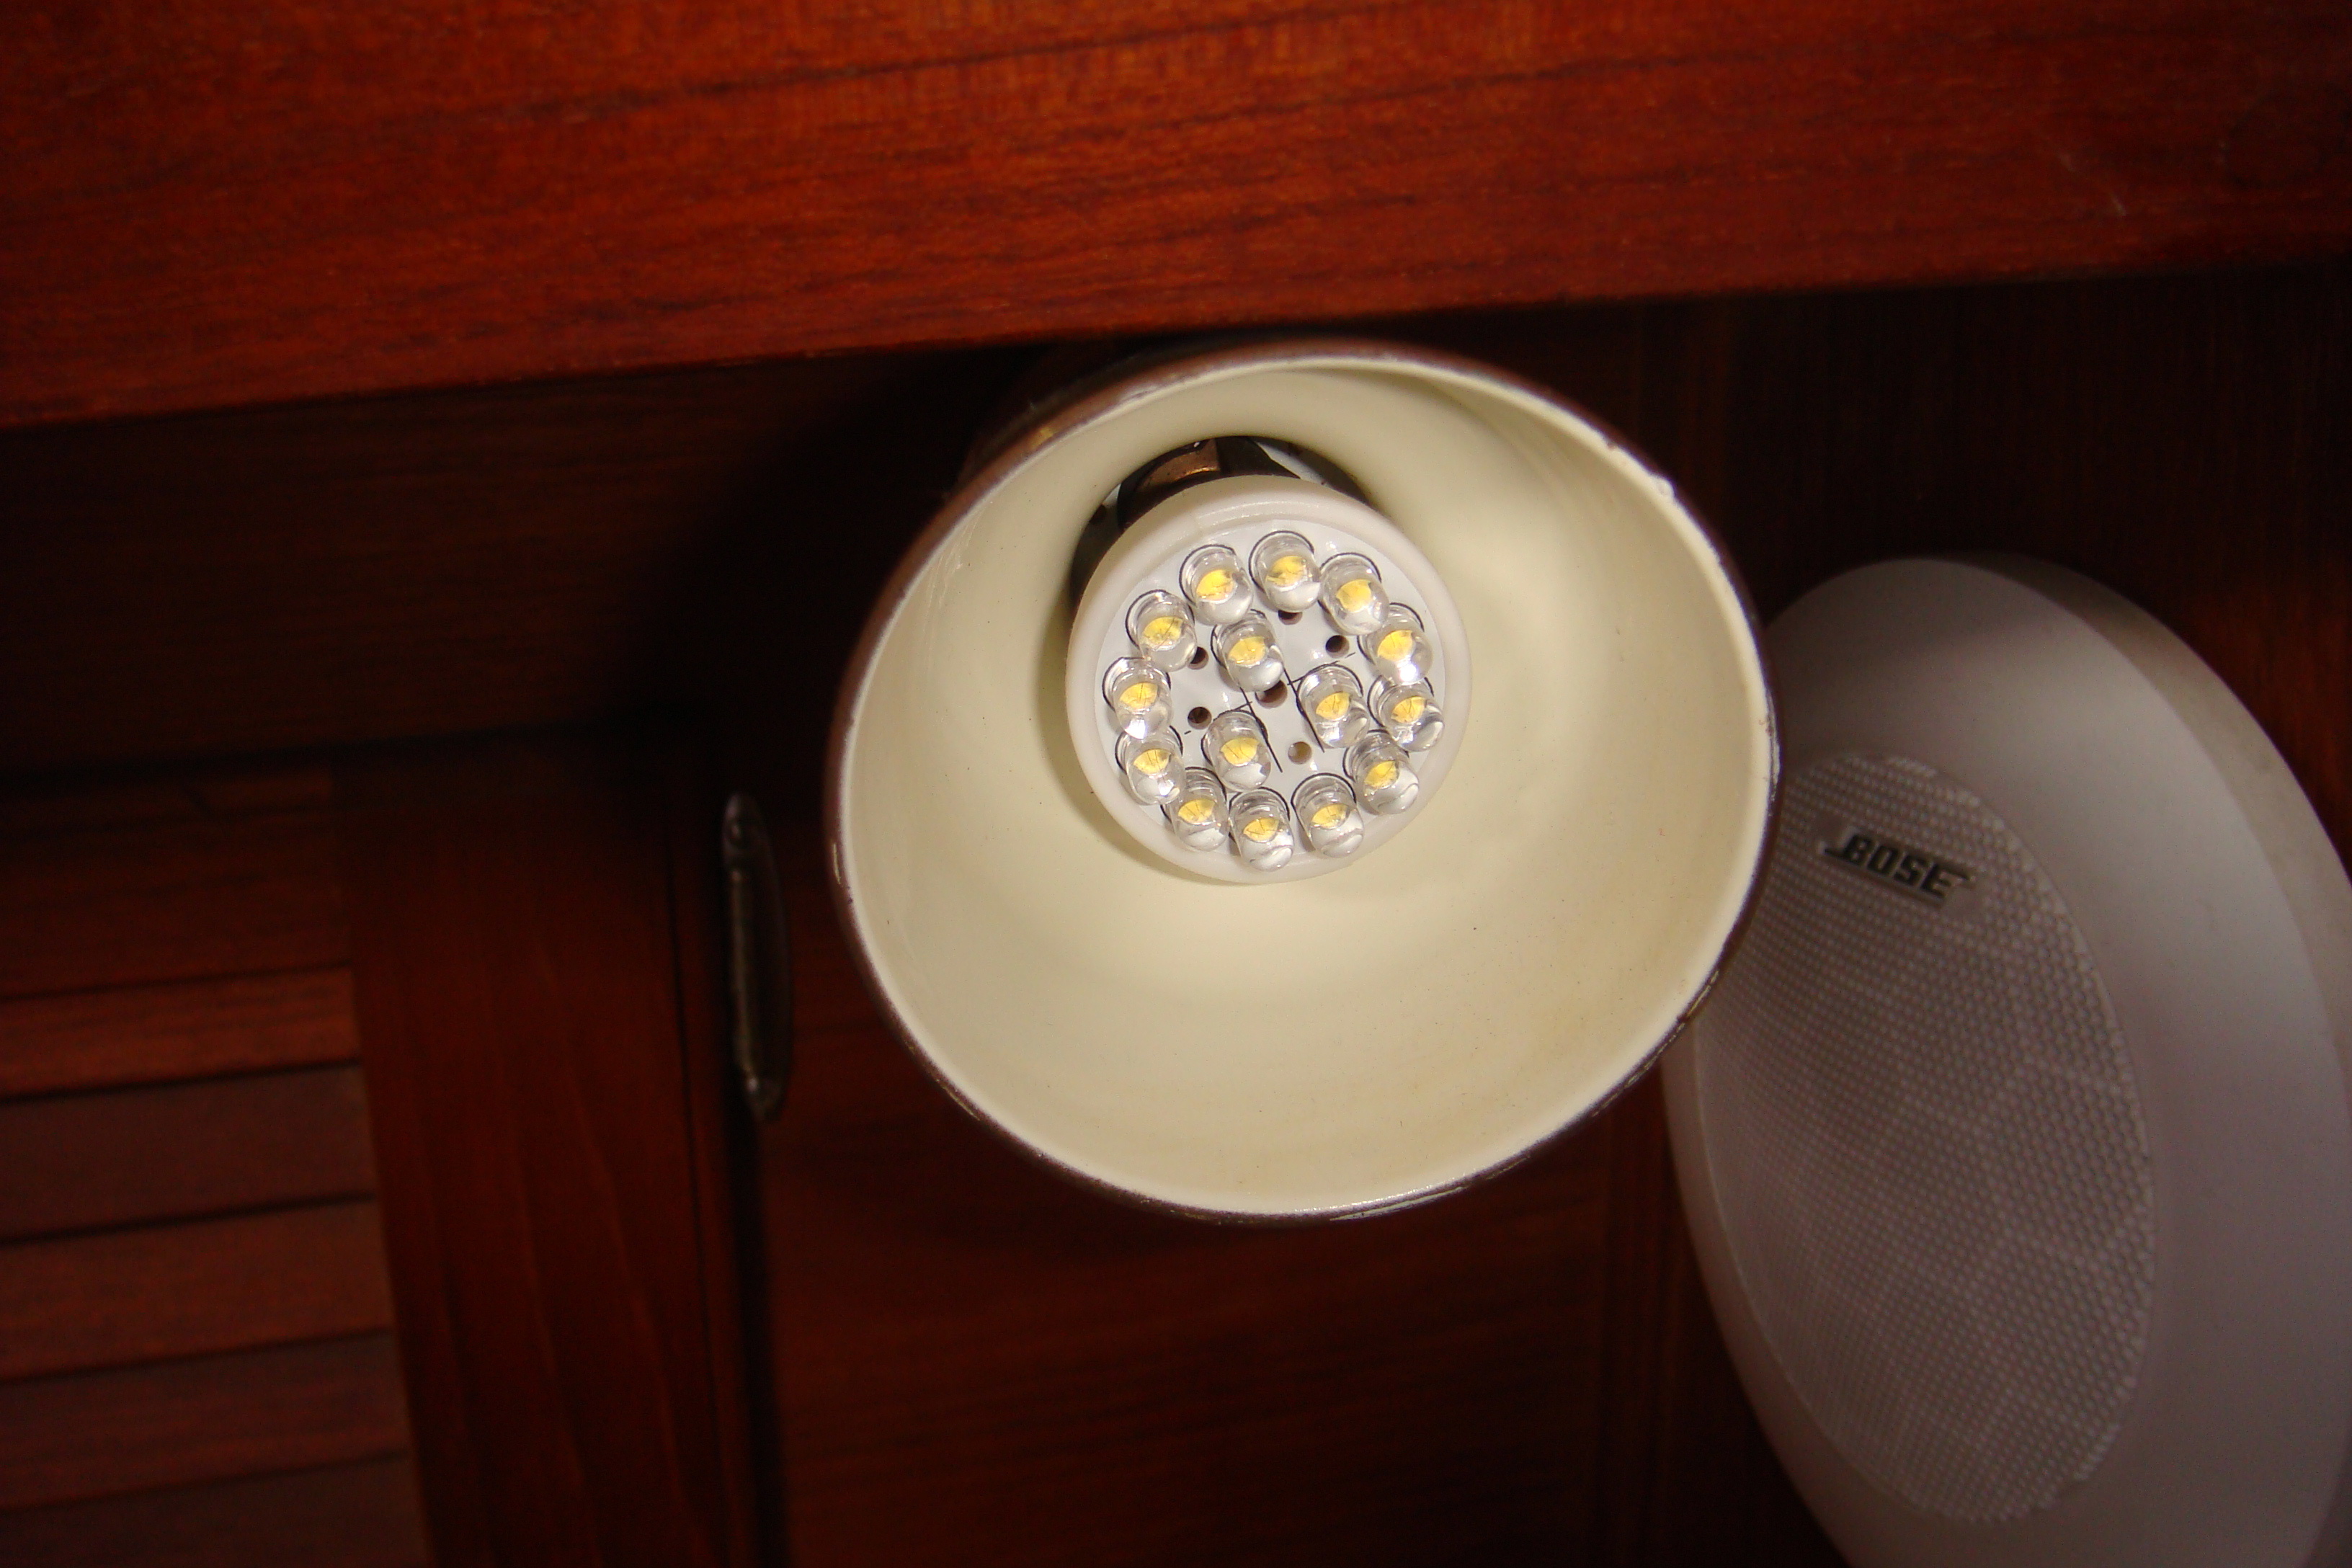 DrLED Replacement For G4 Bulb |
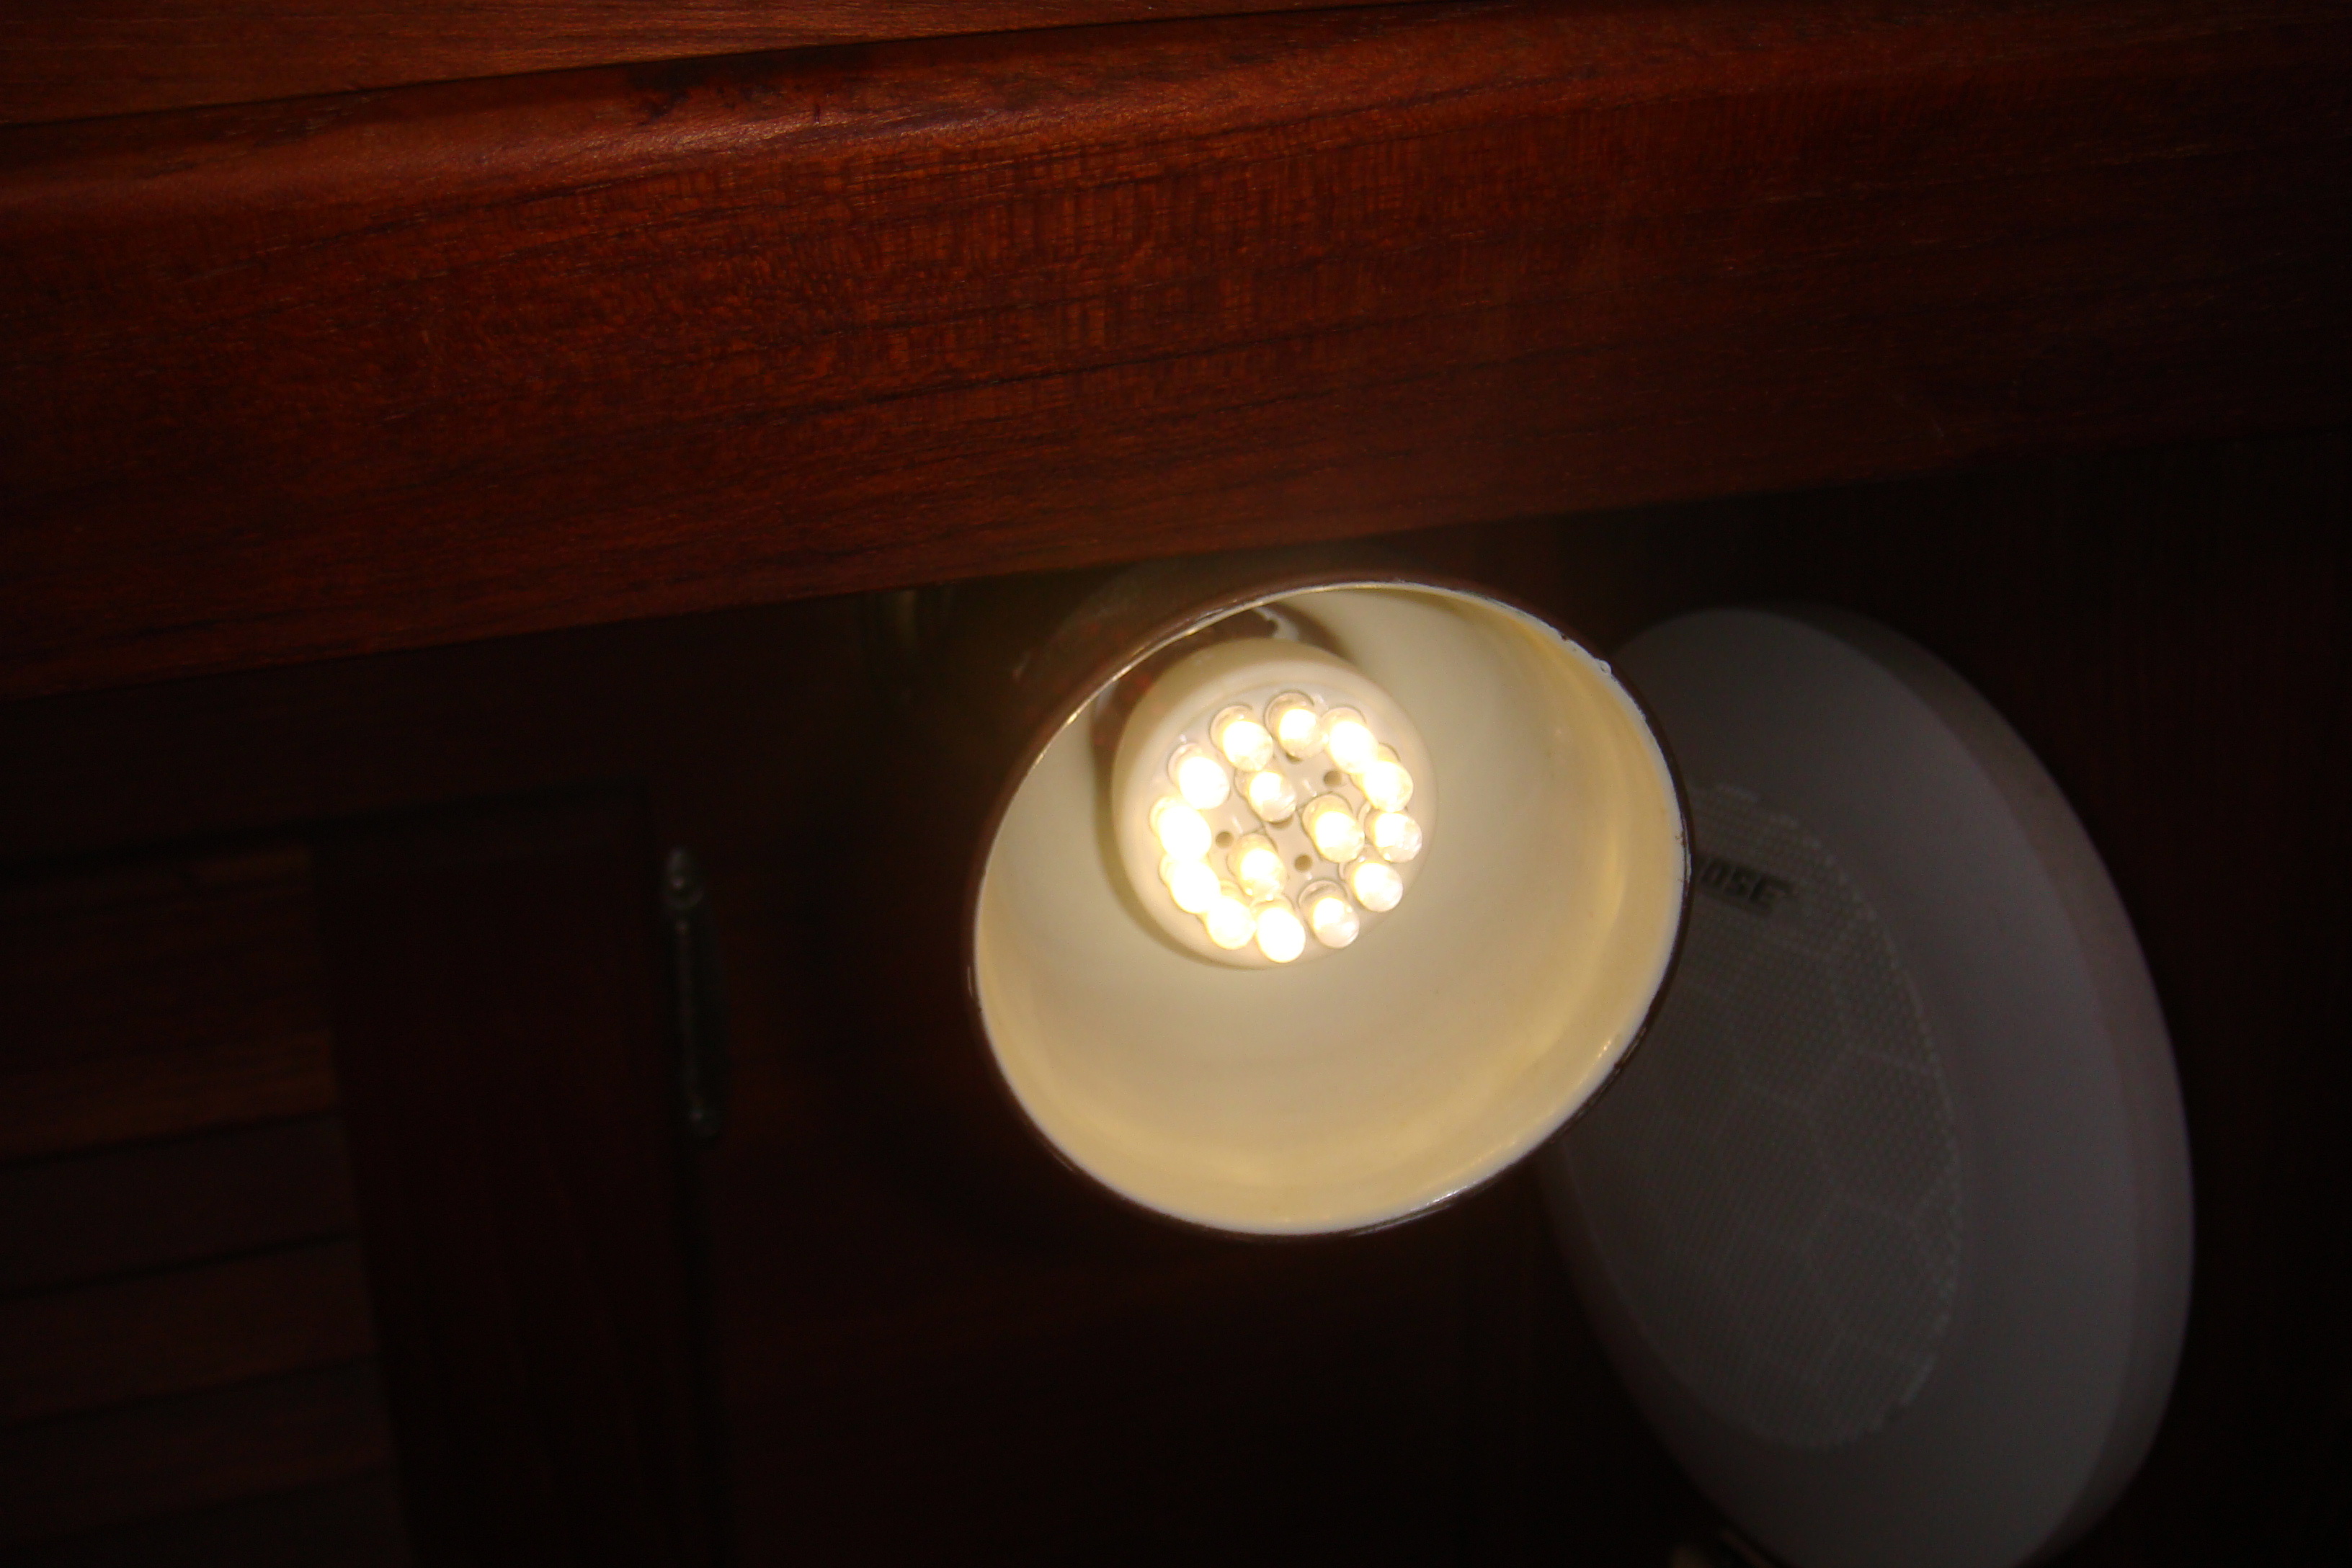 DrLED Replacement For G4 Bulb |
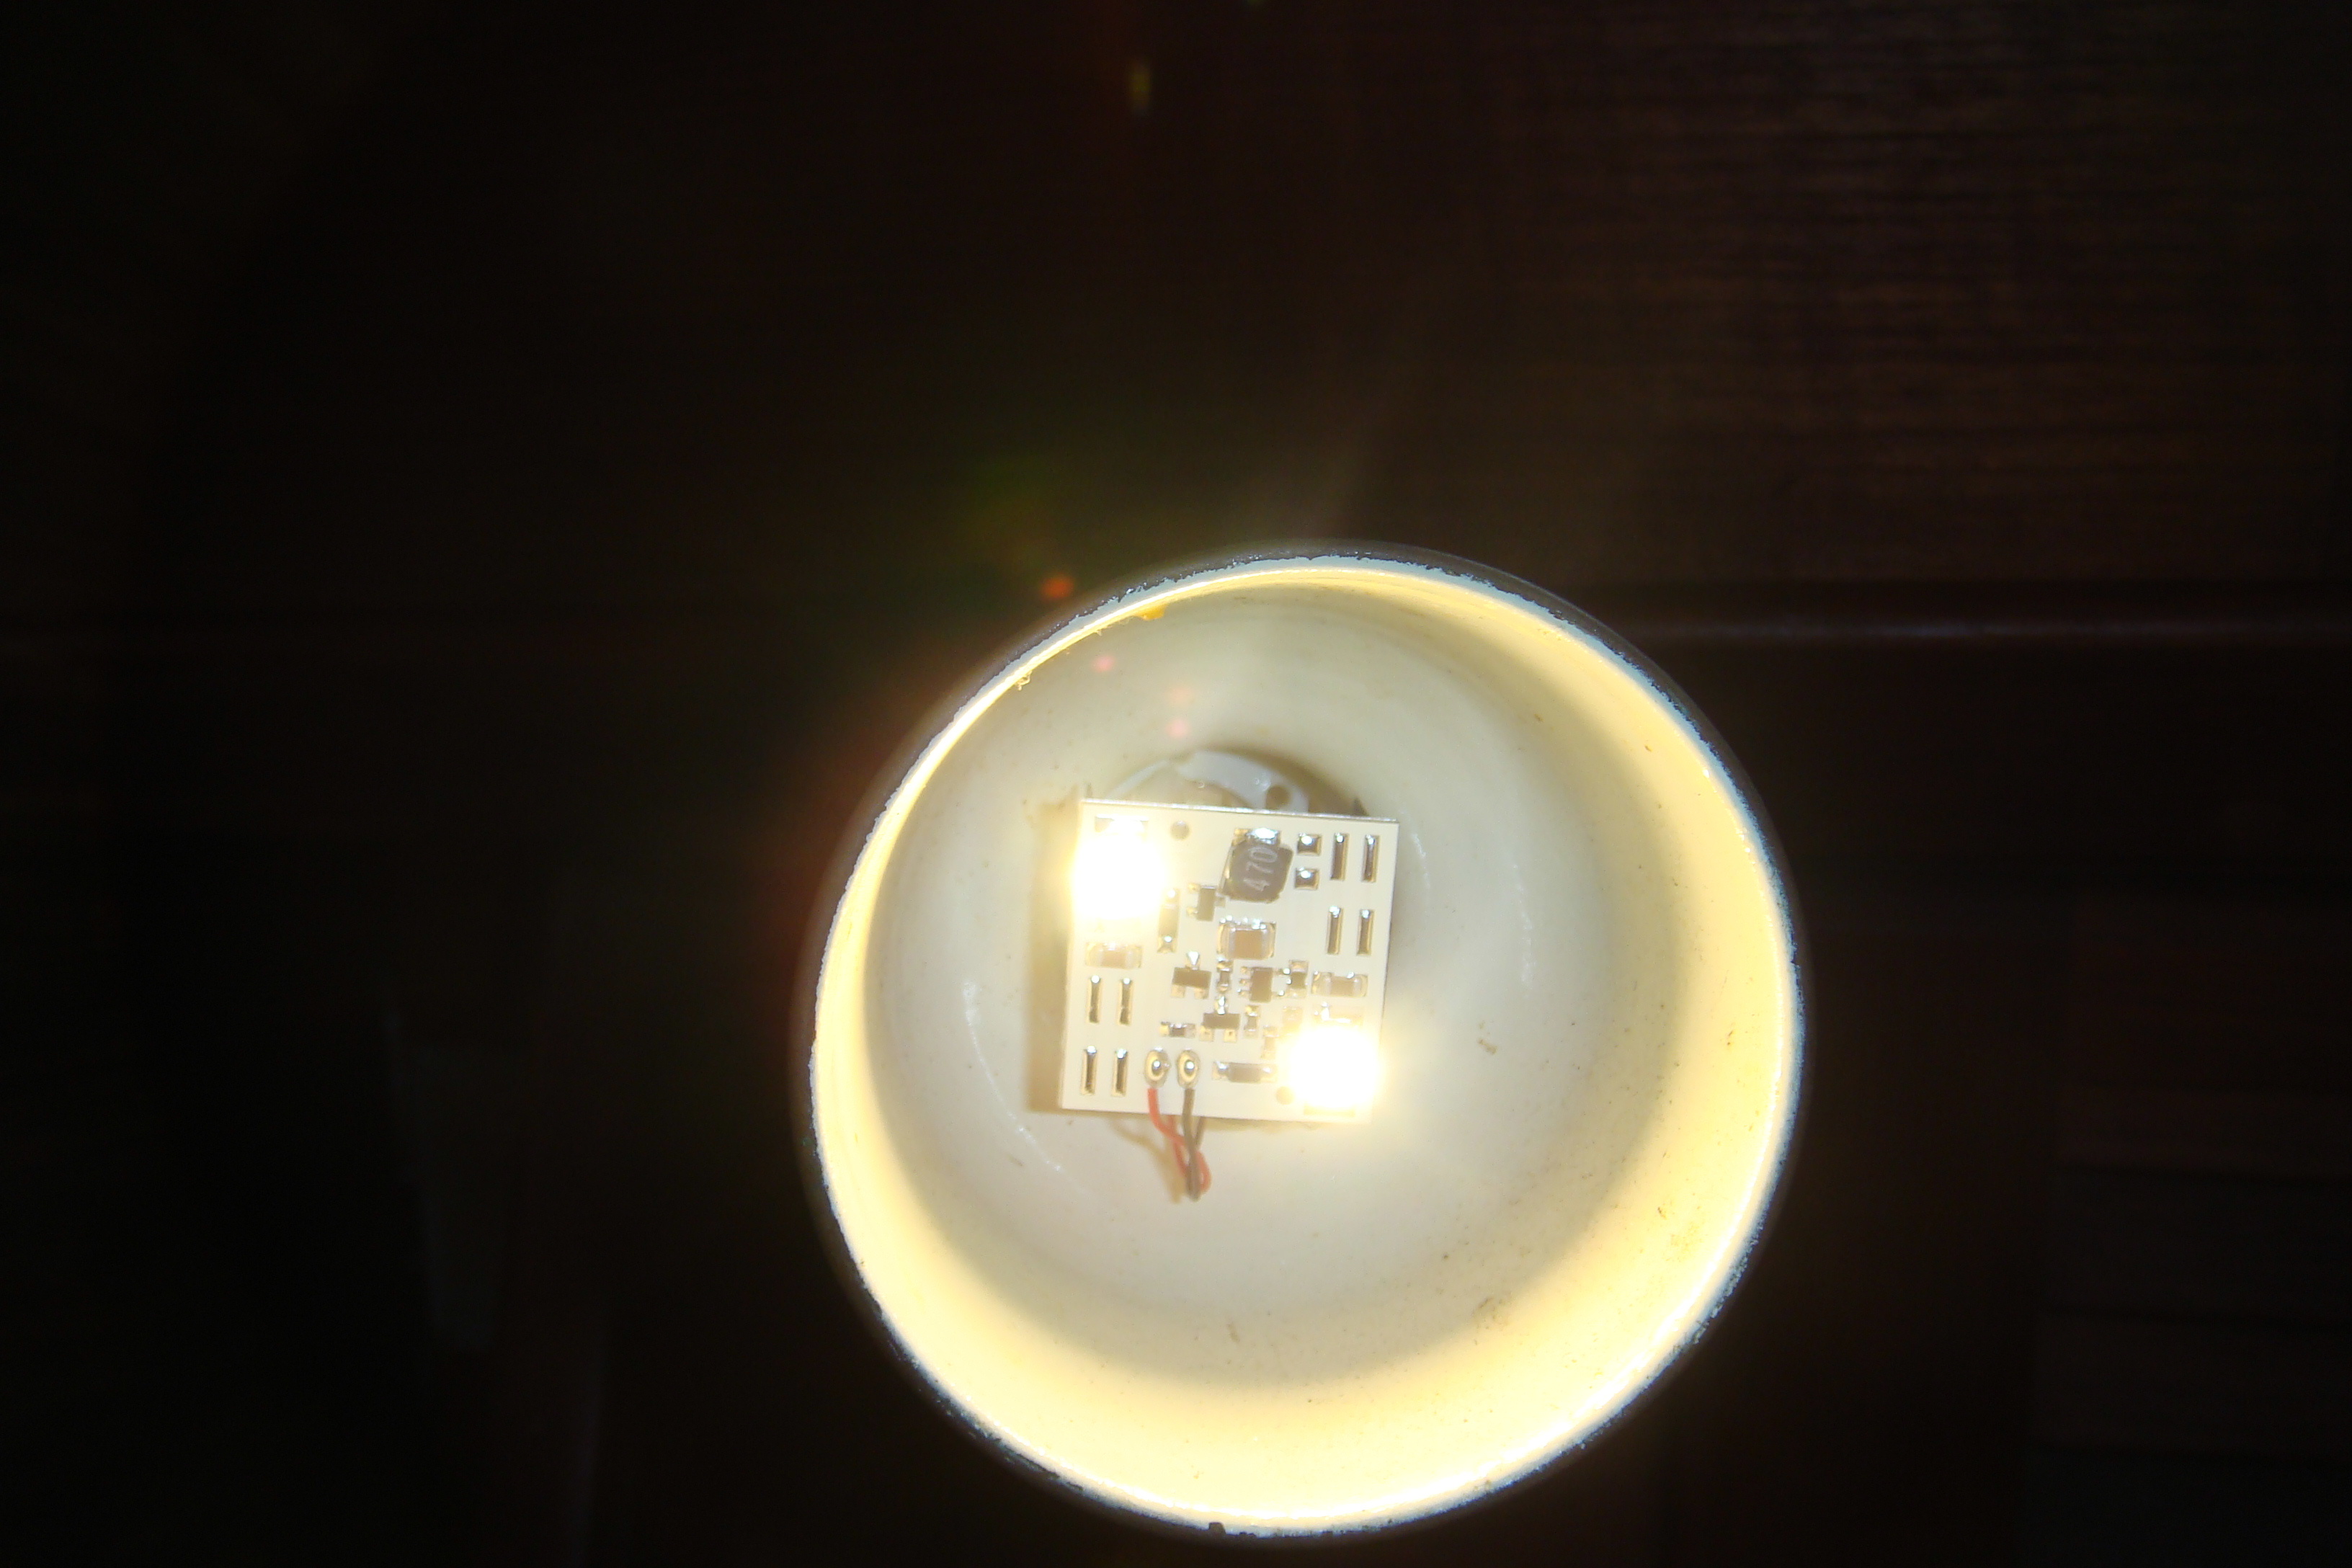
The
picture on the left shows the same bulb, turned on. My digital
camera compensates the for the bulb light by reducing the exposure so
this is not really a meaningful record of the output of the bulb in this
lamp. However this bulb did produce an adequate reading light and the current draw was negligable. |
| Shortly
after I purchased and installed the DrLED cabin lights I learned of the
Sensibulb LED light bulbs. One of the principals in the
development of the Sensibulb product is a fellow P424 owner, Pete
Dubler. I was very interested in these bulbs, but since I had just replaced all of my cabin lights, other than the Alpenglows, with DrLED bulbs I didn't immediately jump on the Sensibulb wagon. |
|
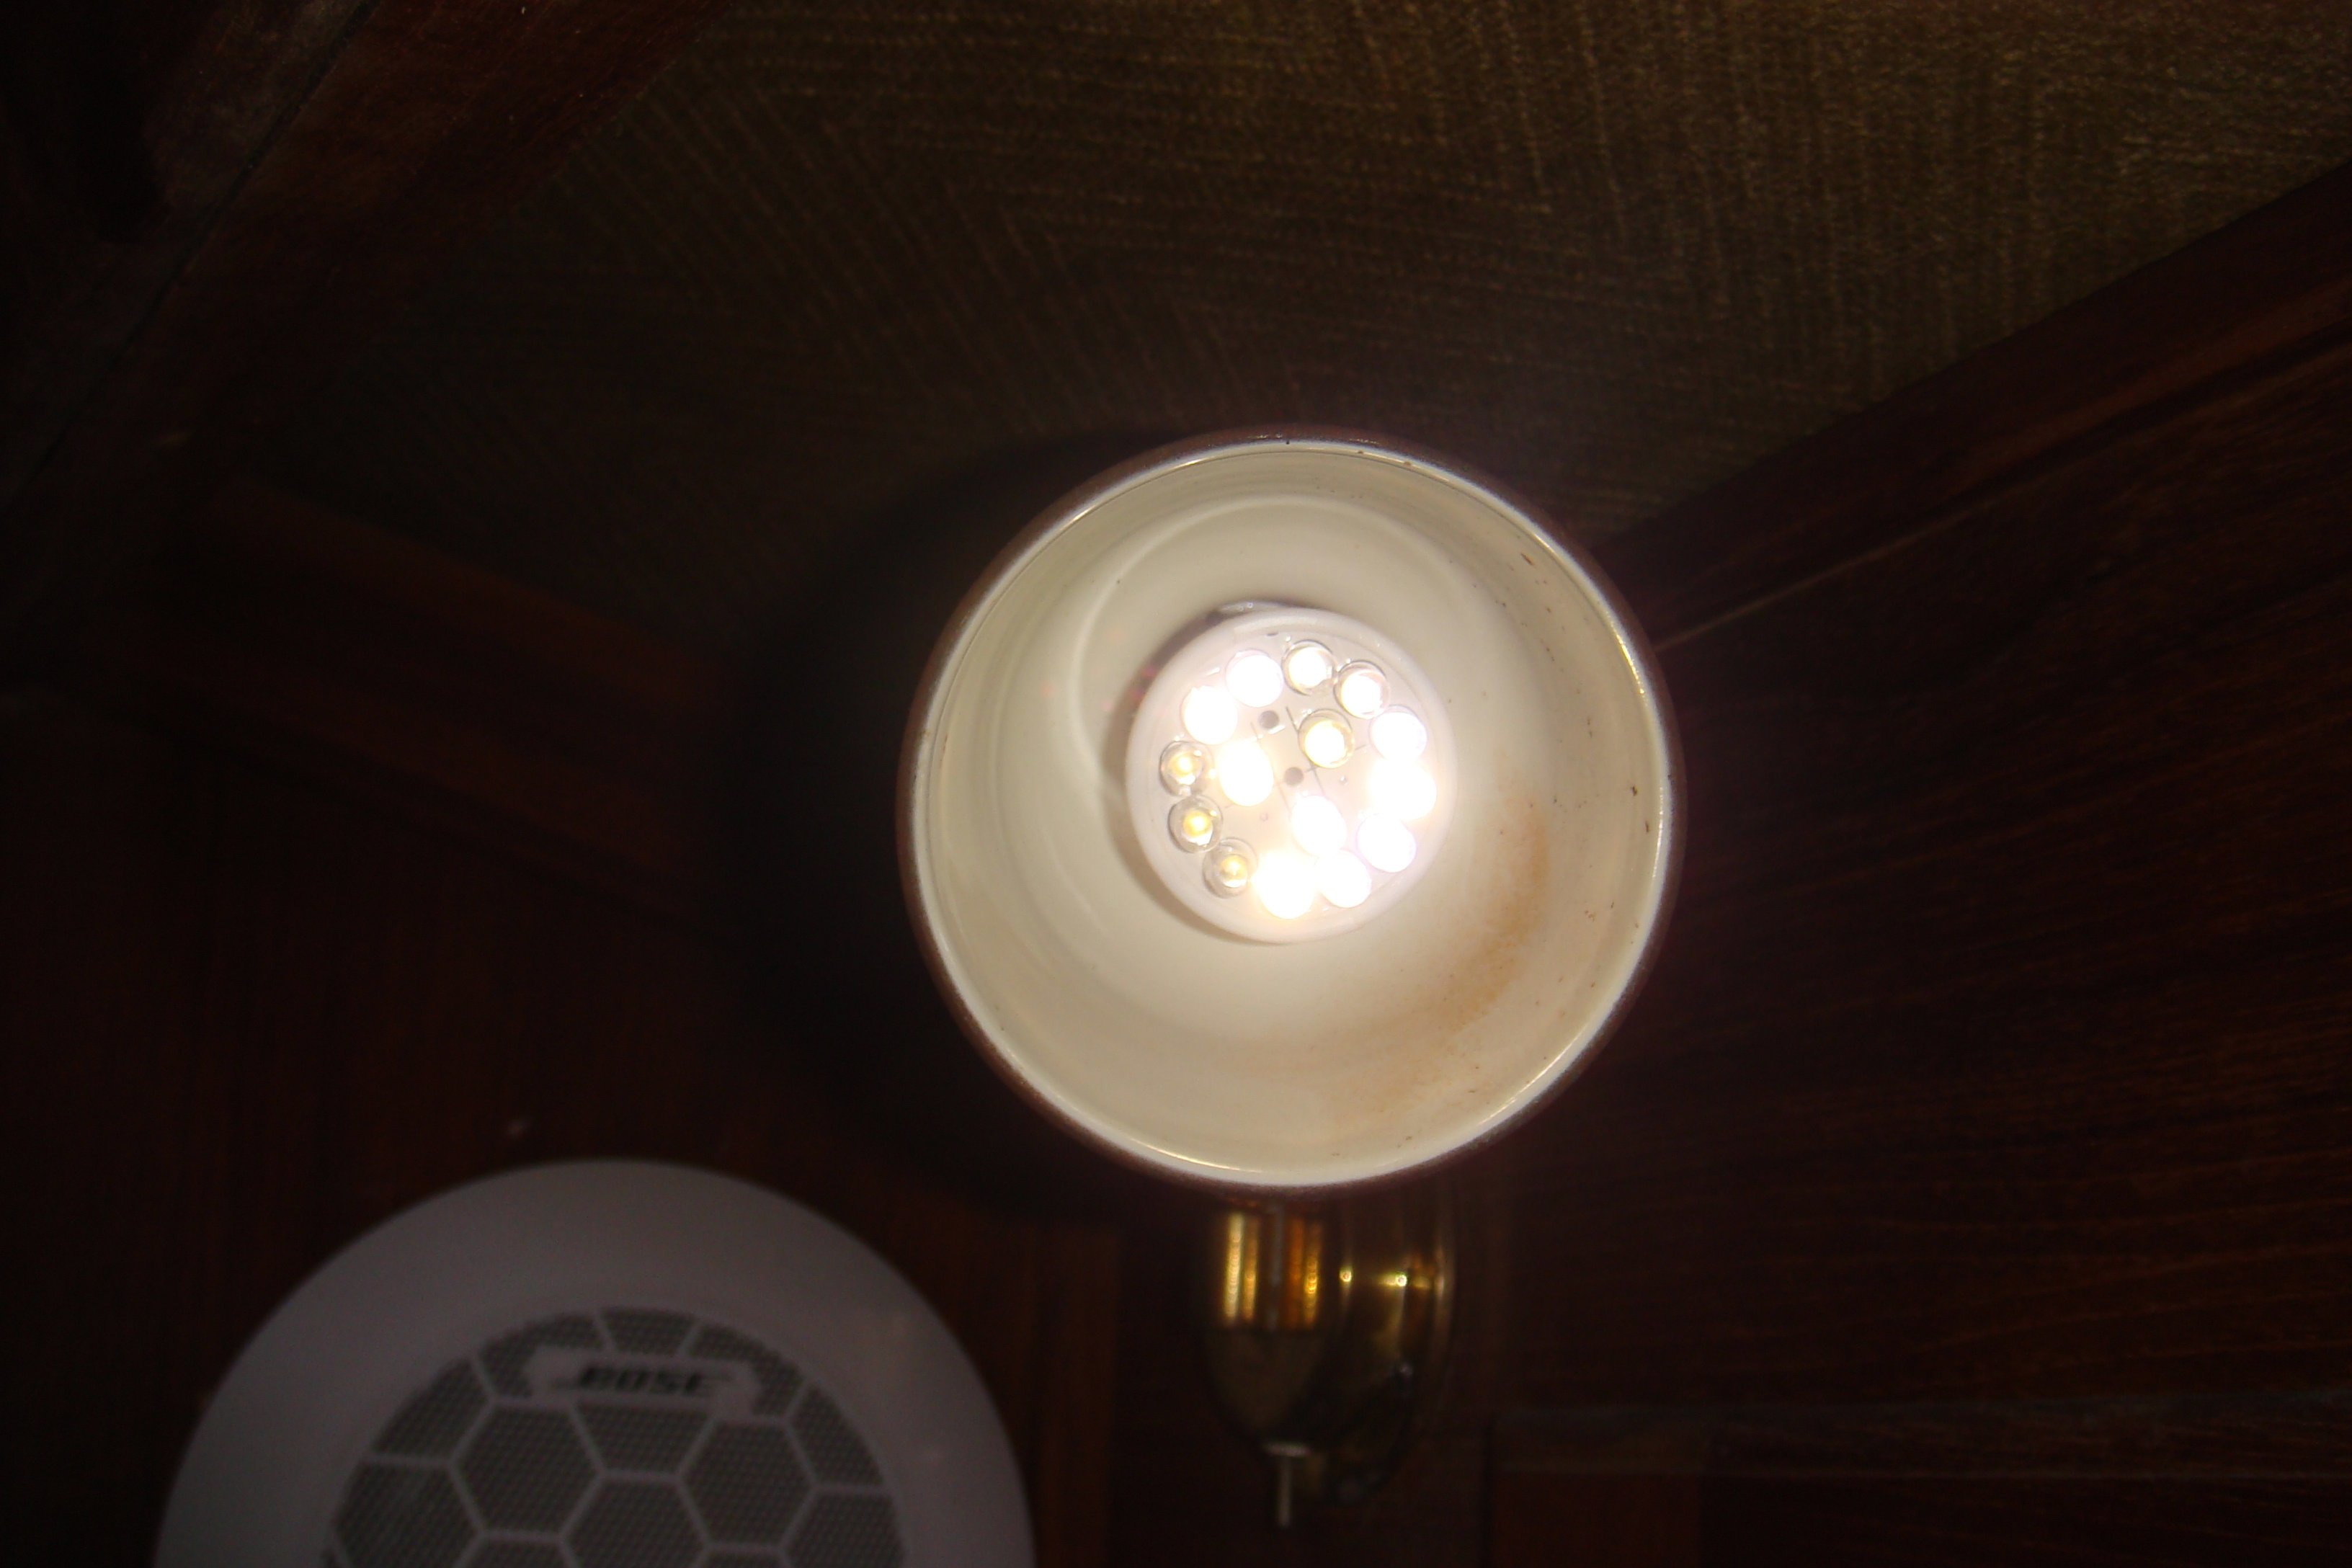
However, I was aware of many independent reviews of the Sensibulb that made me want to give it a try. Even the Alpenglow manufacturer, who wasn't quite ready to jump on the LED band wagon, expressed the opinion that the Sensibulb folks were on the right track. So finally in Sep, 2008 I ordered 2 Sensibulbs for comparison to the DrLED bulbs I have been using. The picture on the right shows a Sensibulb installed in one of the lamps that previously had a DrLED bulb. |
 Sensibulb Replacement For G4 Bulb |
 Sensibulb Replacement For G4 Bulb |
The
picture on the left shows the same Sensibulb turned on. Instead
of an array of LEDs, the Sensibulb uses only two LEDs of what I assume
is a later generation than those used in the DrLED bulbs I own.
Again the digital camera pictures does not really provide a comparision to the picture of the DrLED bulb, but I can say that the Sensibulb produces a much brighter and warmer light that the DrLED bulbs they replaced. |
|
I've noticed that DrLED now offers a bulb with what looks like the same
LED as those used in Sensibulb. However, the DrLED lights I've
seen only have a single LED as opposed to the dual LED of the Sensibulb.
There may be other DrLED bulb options that also provide two LEDs. This technology is changing very rapidly and the price-performance ratio is rapidly reducing. Like with many evolving technologies, most of the early providers will drop by the wayside until the technology matures. However my experience with these two manufacturers leads me to believe they will be among the finalists. In the meantime, I believe these companies (and others) are producing quality products that represent a significant improvement in both price and performance over the now obsolete Halogen/Xenon technology. |
|
|
A
few weeks after I took the pictures above I noticed that my remaining Dr
LED bulbs were getting dimmer. Although it is difficult to see in
the picture on the right, 2 of the 15 LEDs have burned out and 3 others
have reduced output. Looks like these bulbs are on their way to failing. I've ordered 2 more SensiBulbs to the replace these Dr LED bulbs. I have no reason to expect the SensiBulbs to outlast the Dr LED bulbs, but they are brighter so I'll give them a try. |
 DrLED Bulb Failing |
| SuperBrightLEDs.com | |
| While I have been very satisified with the performance and longevity of the SensiBulb LEDs, I found the clips that attach the electronics to the heak sink base a little clunky. Also the G4 pins did not fit the sockets on one of my West Marine reading lamps. The SensiBulb would fall out of the lamp periodically. This led to the only failure I've had with this product - the wires between the electronics and the base broke. That could have been repaired, but I decided to look at some of the other LED lights that are available. | |
 SuperBrightLED.com Bulb in Reading Lamp |
One source recommended by a friend was SuperBrightLED.com. This company has a wide range of LED lights for home, RV/Marine, and industrial uses. I decided to experiment with this source to see if they were as good or better than SensiBulb, and ordered a few of of their products. On the left is one of the SuperBrightLED.com bulbs in my principal reading lamp. The bulb consists of 6 SMD LEDs. The SensiBulb has two LEDs. I assume the number of LEDs is the reason for assertion of being super bright. They are noticeably brighter than the Sensibulb. They are also much less expensive than the SensiBulb. |
| However this bulb's construction is similar to the DrLED bulbs that failed in the past. The electronics are encased in plastic, with no large heat sink as on the SensiBulb. I compared the temperature of the two bulbs using an infrared thermometer. The SensiBulb is about 10°F cooler than the superbrightleds.com bulb. I don't know if that is just due to Sensibulb heat sink or the additional LEDs on the superbrightleds or if it is even significant, but I will hold off ordering more of these bulbs until I see if they have the same failure problems as the DrLED bulbs. | |
|
I also ordered a different style of bulb from superbrightleds.com.
I still have a few fixtures with the very inefficient Xenon G4 bulbs.
These are rail lights like the one in the galley shown on the right.
The SensiBulb LEDs will not fit these fixtures.
Superbrightleds.com does offer a flat LED that fits. I have
installed two of these bulbs in the left two sockets of this lamp.
The Xenon bulb on the right end of the lamp has burned out. I removed the diffuser glass from this lamp to provide the bulbs as much ventialation as a possible to keep them from over heating. |
 SuperBright Flat Bulb in Rail Light |
 SuperBright Flat Bulbs Mount Sideways |
These bulbs have six 5050SMD LEDs. I don't pretend to understand
what those designations really mean. Like the bulb I put in my reading lamp, these bulbs do not have a heat sink and are measurably hotter than the SensiBulbs. The main problem with these bulbs for this type of lamp is that the pins on the bulbs are 90° off from the lamp sockets (click on the photo on the left to view it at full resolution). The result is the bulbs do not face directly out of the lamp. However, the bulbs are bright enough that they put out as much or more light as the Xenon bulbs did. |
| Again, I intend to monitor these bulbs to see if they suffer the same problems as the DrLED bulbs before ordering any more. | |
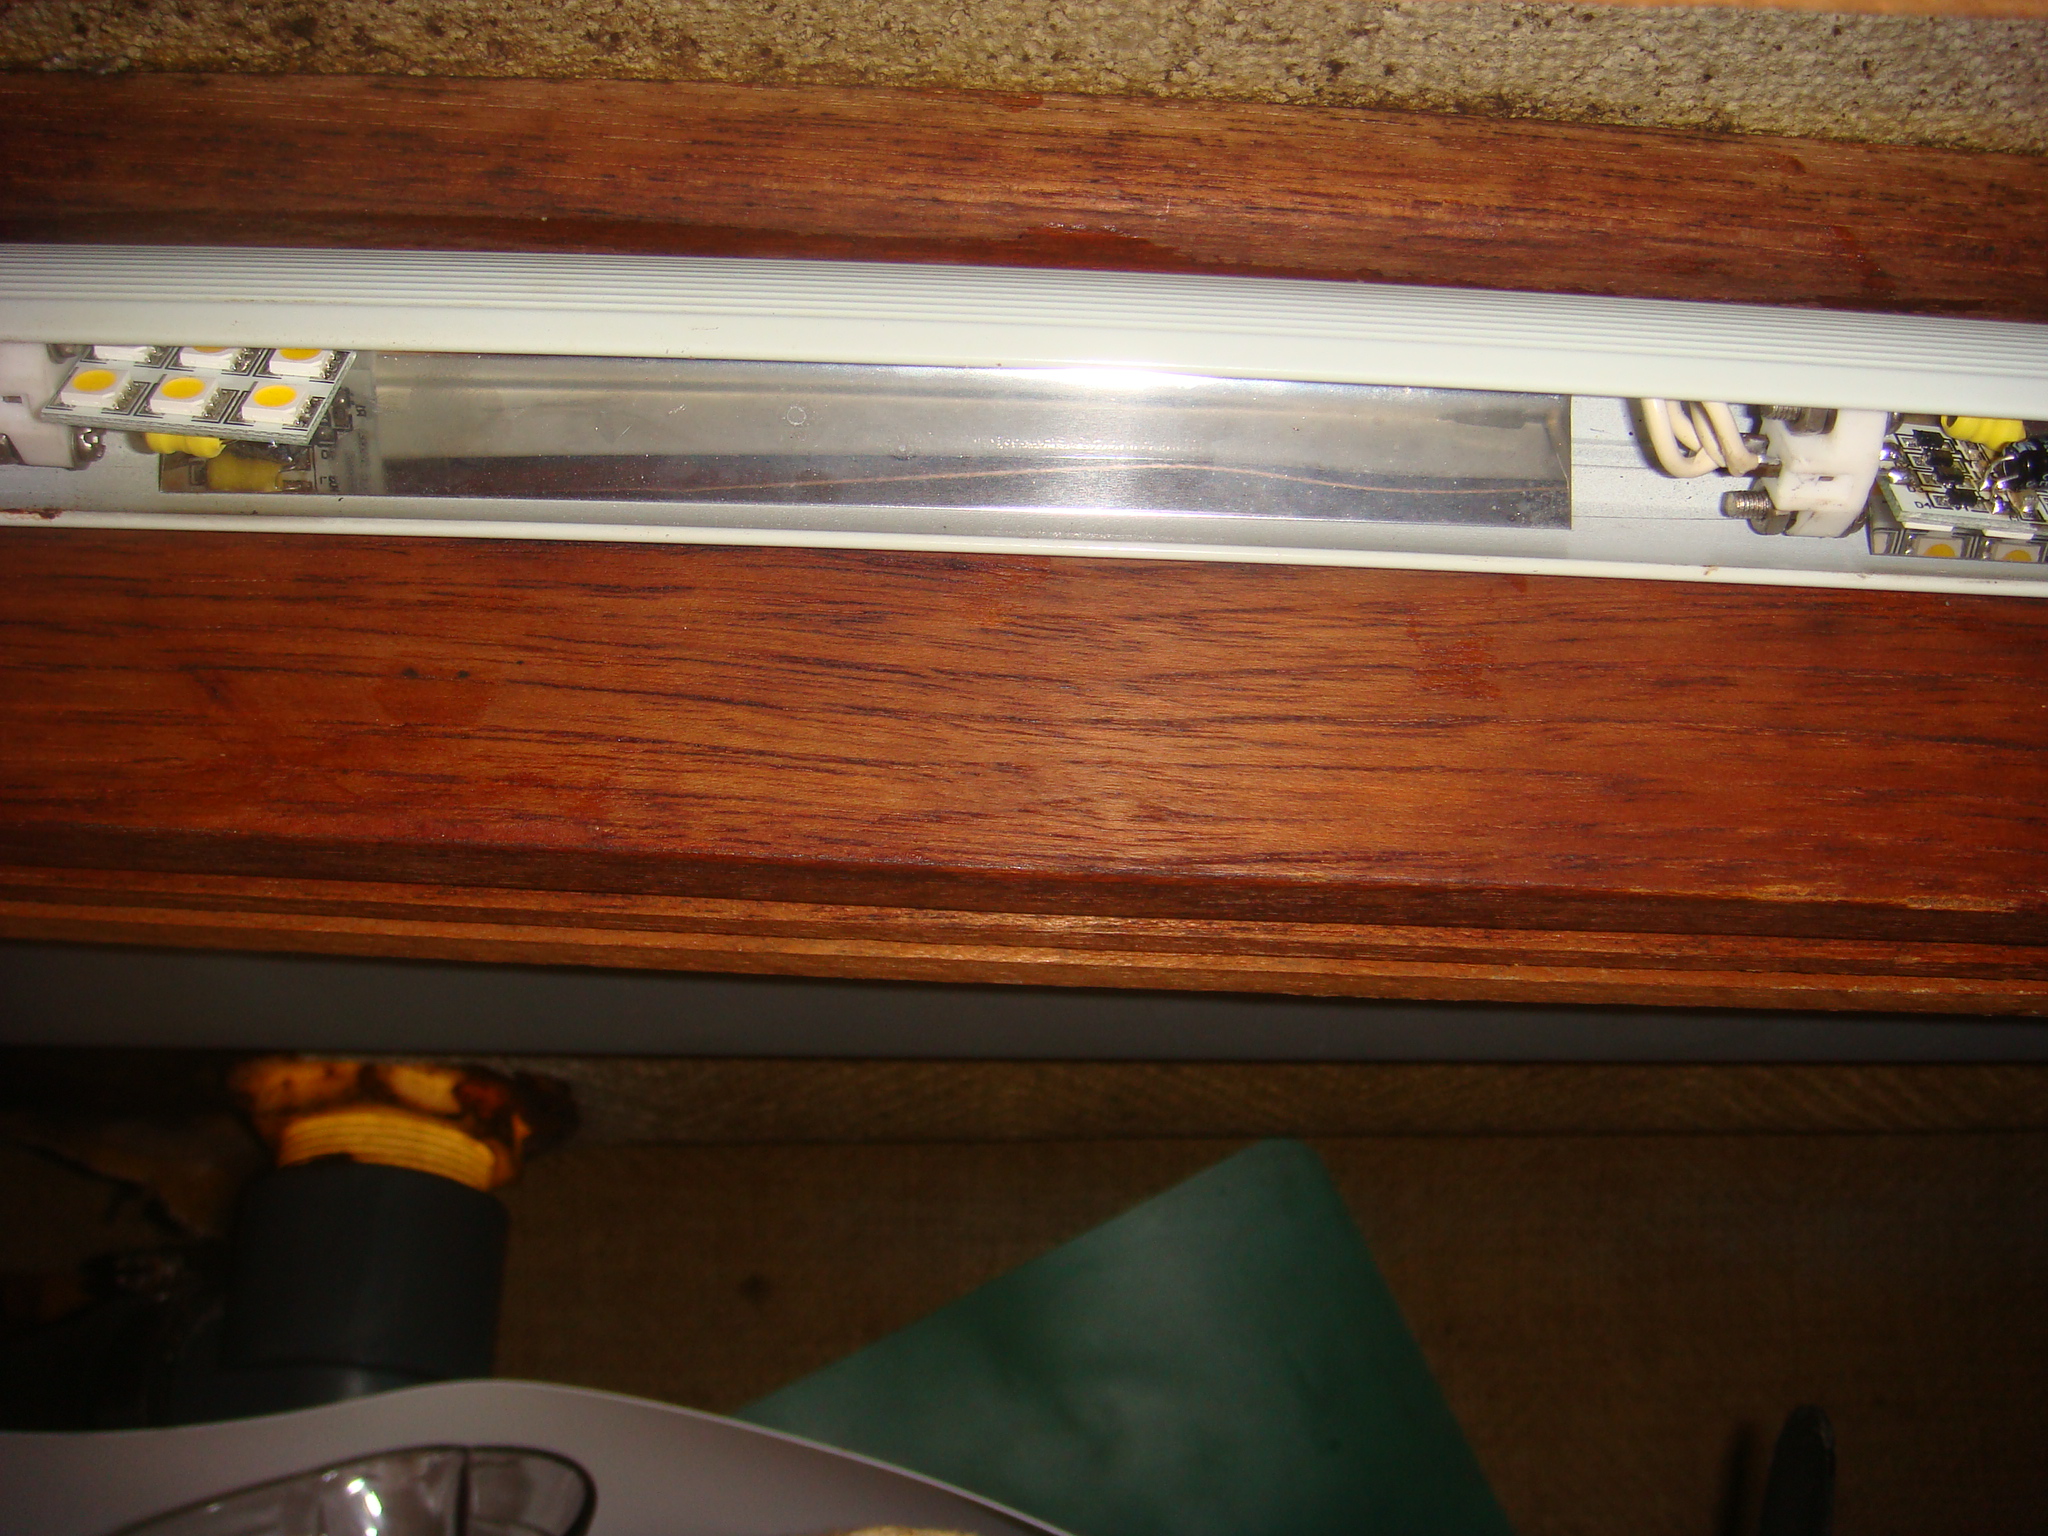
| Back to DrLED (for one lamp) | |
|
Although I have pretty much given up on DrLED as a supplier of LED
replacement bulbs for my lamps that use G4 Xenon bulbs, I did add one DrLED fixture to the
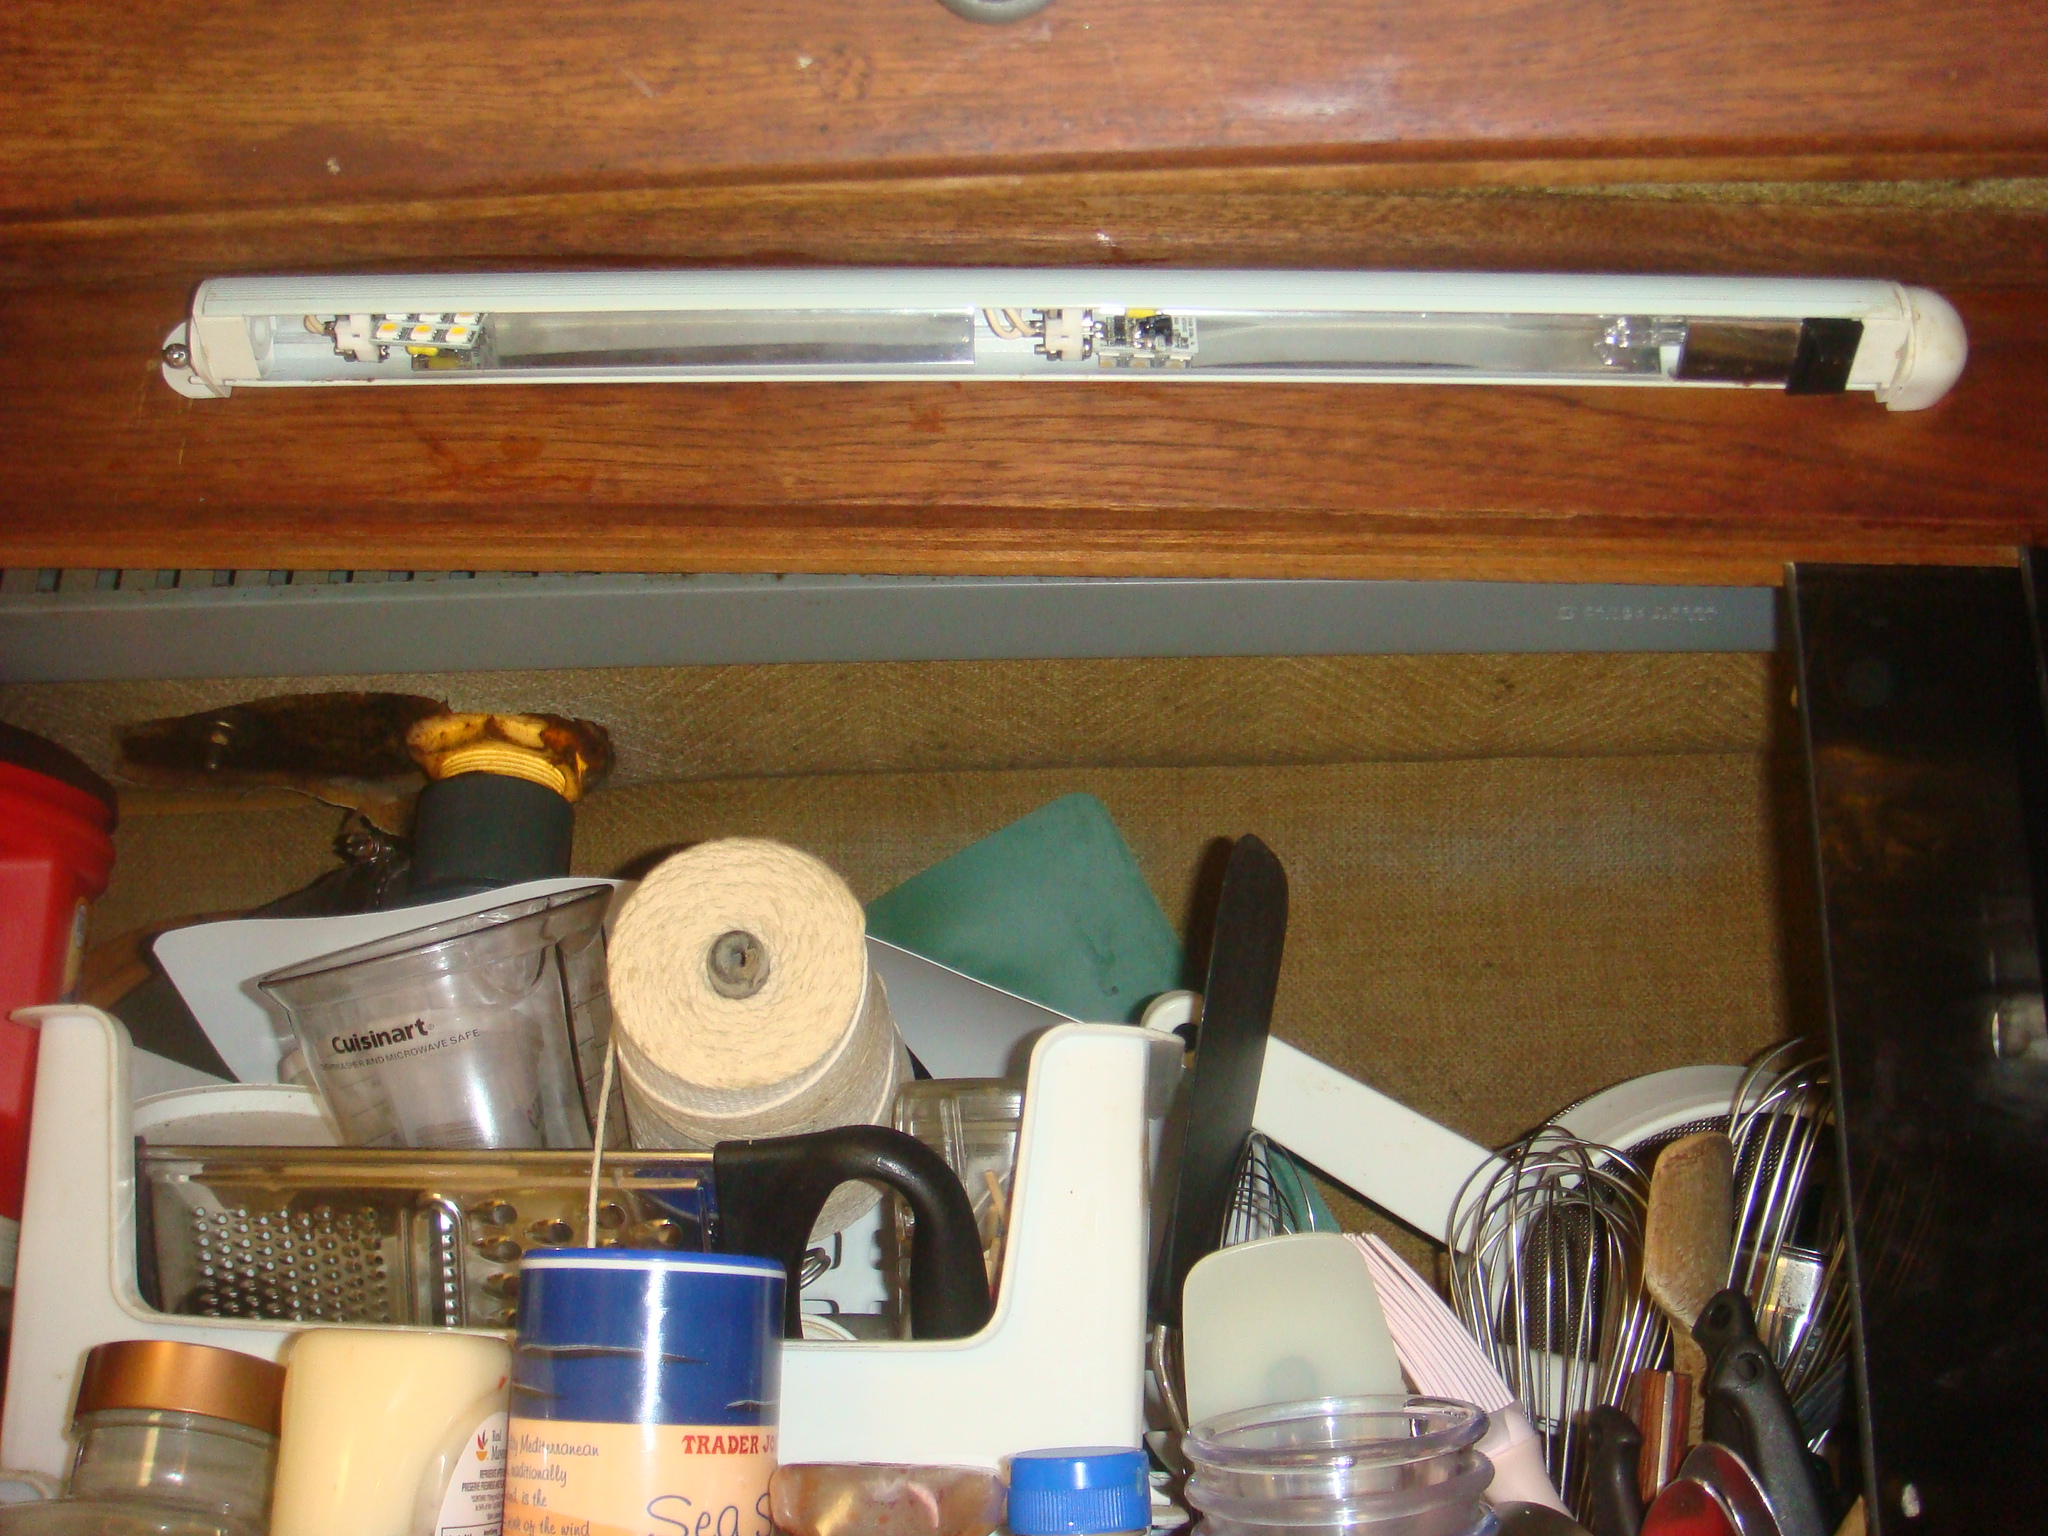
galley in February, 2012. Previously I installed a long Thin Lite flourescent
fixture under the deck and outboard of the stove. This provided
good lighting on the stove top when cooking. Sometime in 2011 that fixture failed, and needed a replacement. In this case I needed the complete lamp, not just replacement bulbs. I found a DrLED fixture (shown on the right) in the Defender catalogue and ordered one. This lamp provides adequate lighting for cooking, but I also use the Alpenglow fixture on the overhead above the stove. When underway at night this LED fixture can be left on, drawing neglible current, without disturbing anyone sleeping in the main cabin. |
 DrLED Galley Lamp |
 LED Light for the Stove Top |
The active watch crew can make coffee, cocoa or tea without having to
turn one one of the bright Alpenglow area lights. One other nice thing about these lamps is that they can be daisy-chained. There are center-pin power sockets on each end of the lamp. If I want to add another of these lamps next to this one, I don't need to run another power cord, just use the power cable supplied that fits the sockets on the fixture. These are standard power sockets, so a power cable could also be assembled from a few cheap Radio Shack parts. If these lamps prove reliable, I may add 1 or 2 more in this location. You cannot have too much lighting in the Galley. |
| Adding More Alpenglows | |
|
With the lighting changes described above I long ago replaced all the
orignal Pearson light fixtures. I am reasonably satisfied with all
of the changes I've made, but I still needed more area lighting in the
main and forward cabins. I've delayed doing anything about this
issue for years because I was waiting for LED area lights to become
brighter and less costly and also waiting until I could figure out how
to run wiring to the new fixtures. All of the changes to date have been to either replace the original fixtures, using the existing wiring or adding a fixture where the existing wiring could be tapped into. The places I need to fixtures in the main and forward cabin do not have any wiring I can tap into and there is no simple way get wiring to those places. Over the winter of 2009/2010 I finall decided to do something. Since I am very satisfied with the Alpenglow fixtures, the cost of LED fixtures have come down much, I purchased two and started the installation. I decided to install the first fixture in the forward portion of the main cabin on the port side. There is no existing wiring behind the overhead panels in this area, So the first step was to remove the overhead panel on the forward port side of the cabin and the port side panel in the forward cabin, where wiring existed. |
|
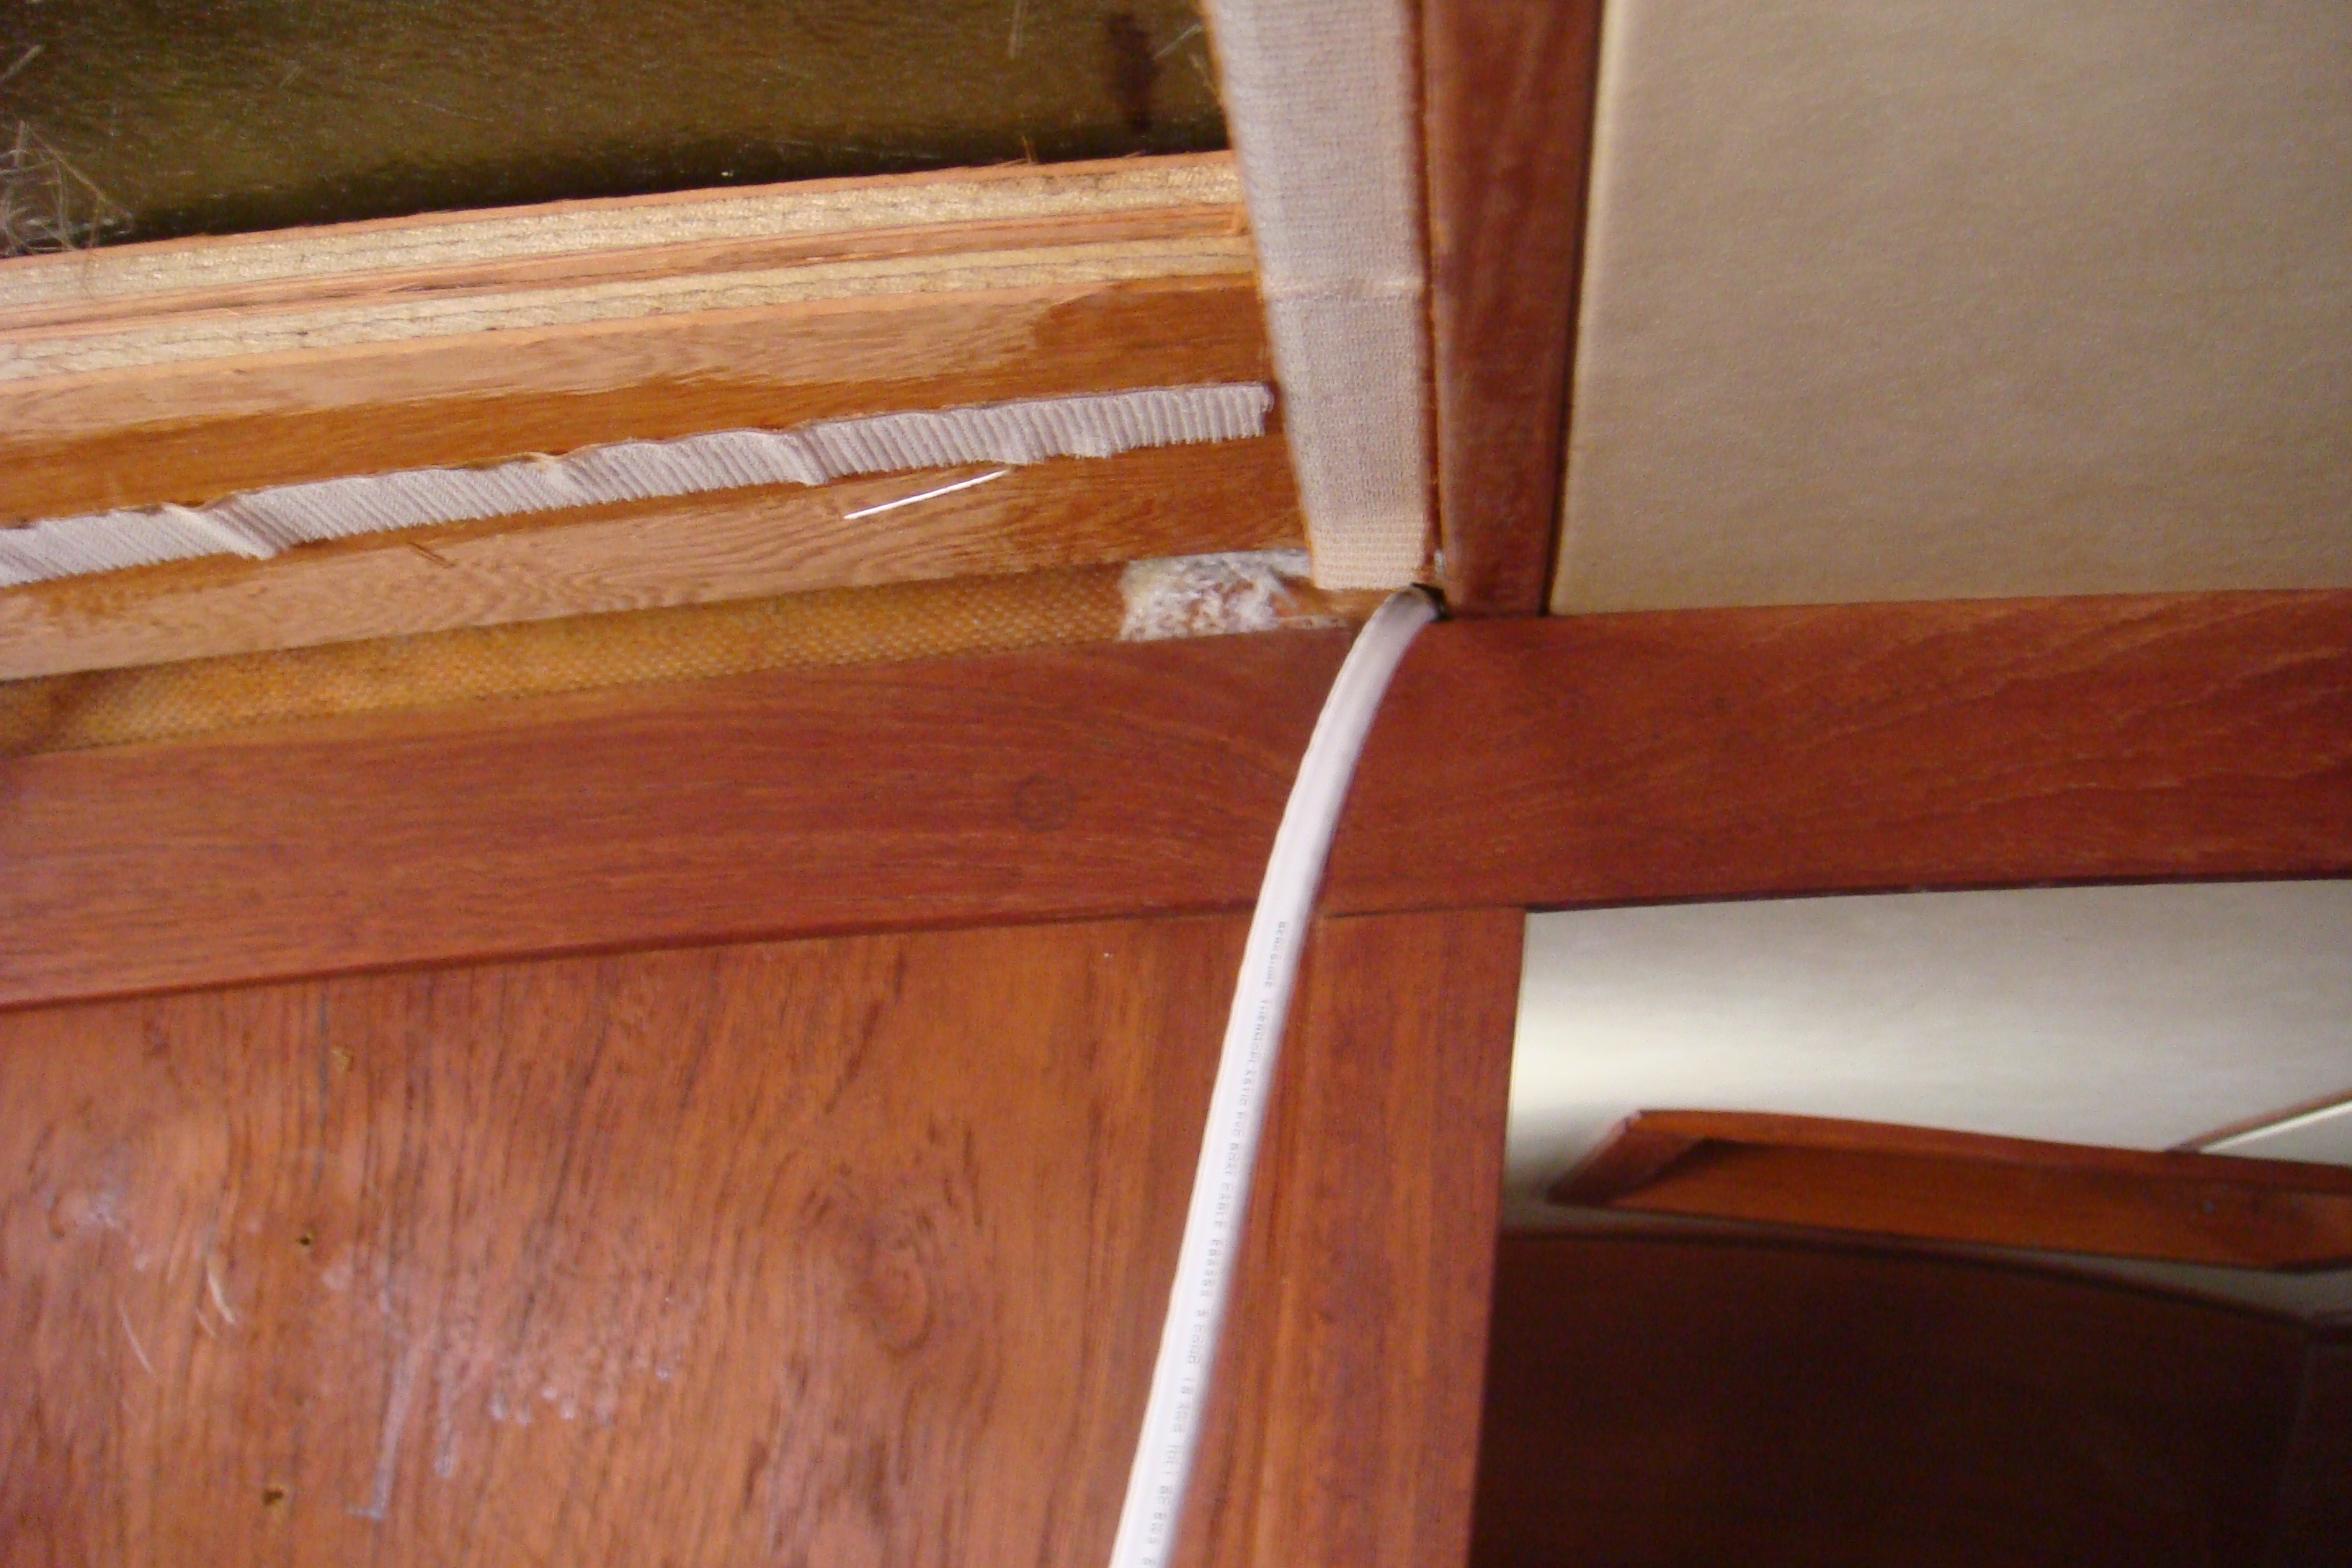 Running Wire Through Gap in Bulkhead |
Quickly I discovere this wiring installation would be much easier than I thought. I found a small gap between the inboard edge of the structural bulkhead and the trim around the forward cabin door. This gap is perfectly sized for 18-2 wire as shown in the picture on the left. |
| In the forward cabin I disconnected the wire to the existing Alpenglow in that cabin and connected the wire to a terminal strip with jumpers so I can use that 12VDC service to power two or more fixtures. |
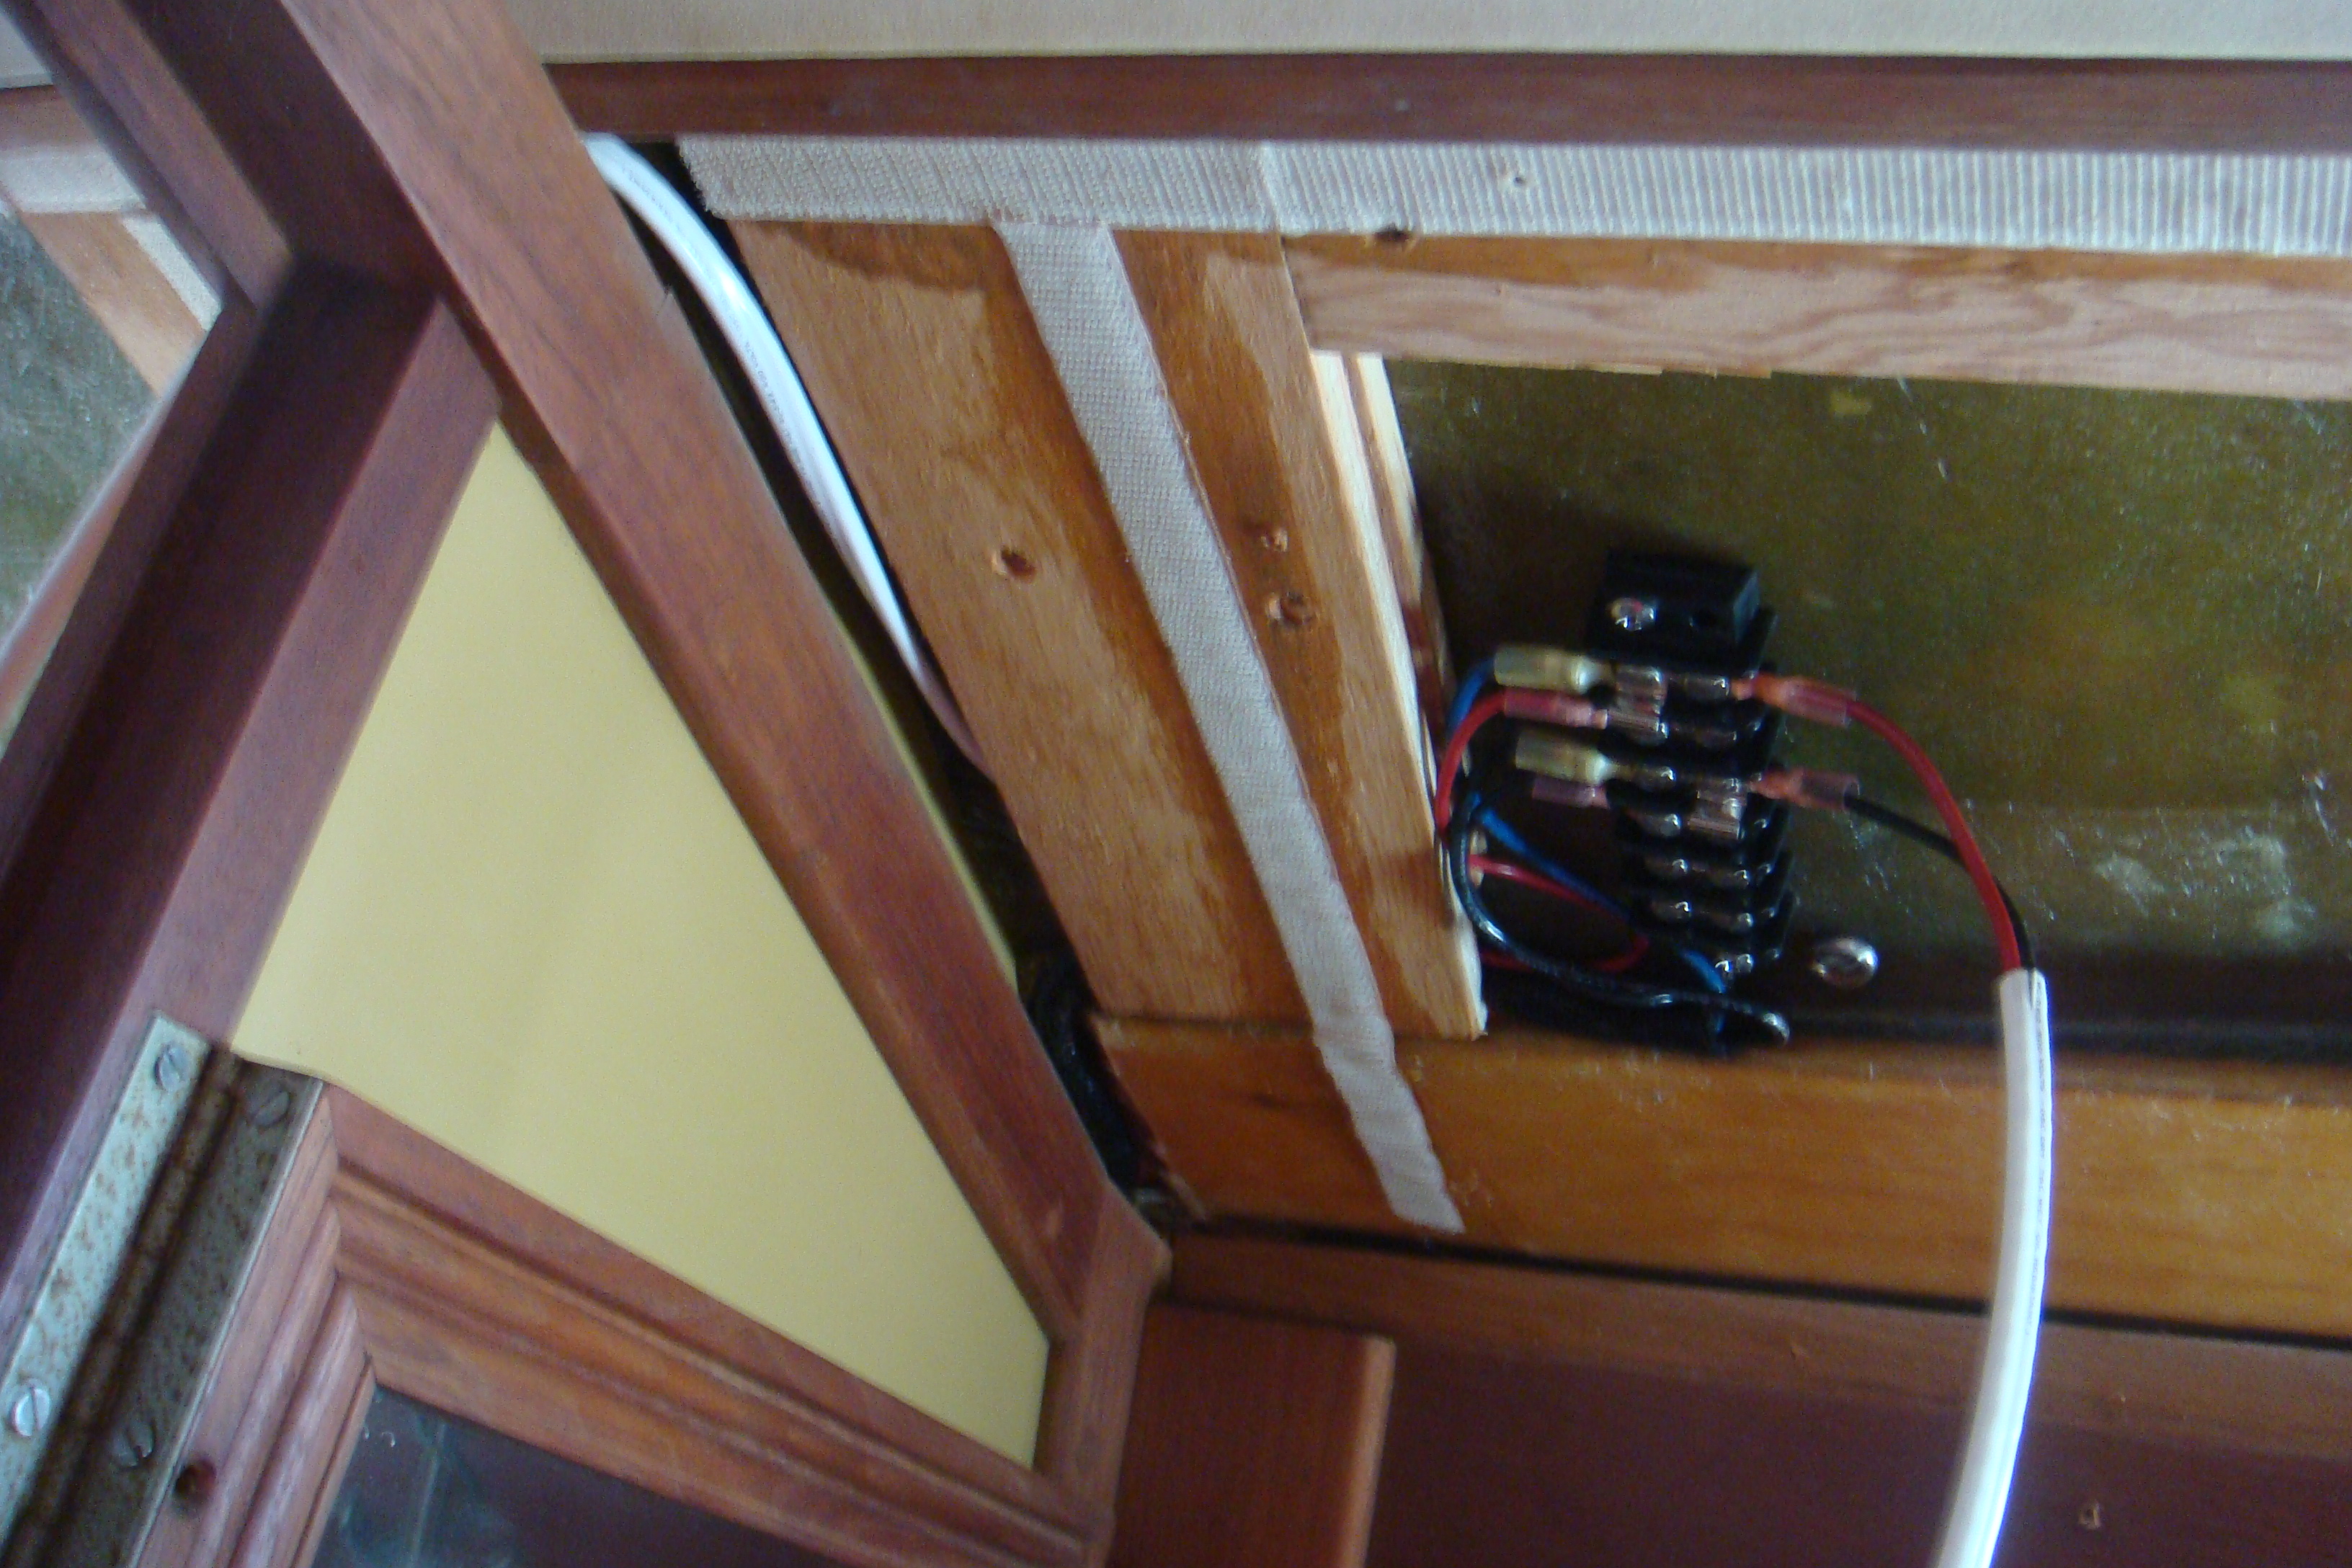 Terminal Strip Behind Overhead Panel in Forward Cabin |
 Alpenglow Lamp in Port Side of Main Cabin |
Then
it was just a matter of drilling a hole in the overhead panel for the
new fixture wiring, re-install the two panels, and then connect up the
new Alpenglow fixture as shown on the left. Now I've got more than adequate area lighting on the forward port side of the main cabin. I'll use the other purchased Alpenglow either for the forward starboard side of the main cabin or the starboard side of the forward cabin. I hope I get as lucky with the wiring run for those locations as I did for this one. |
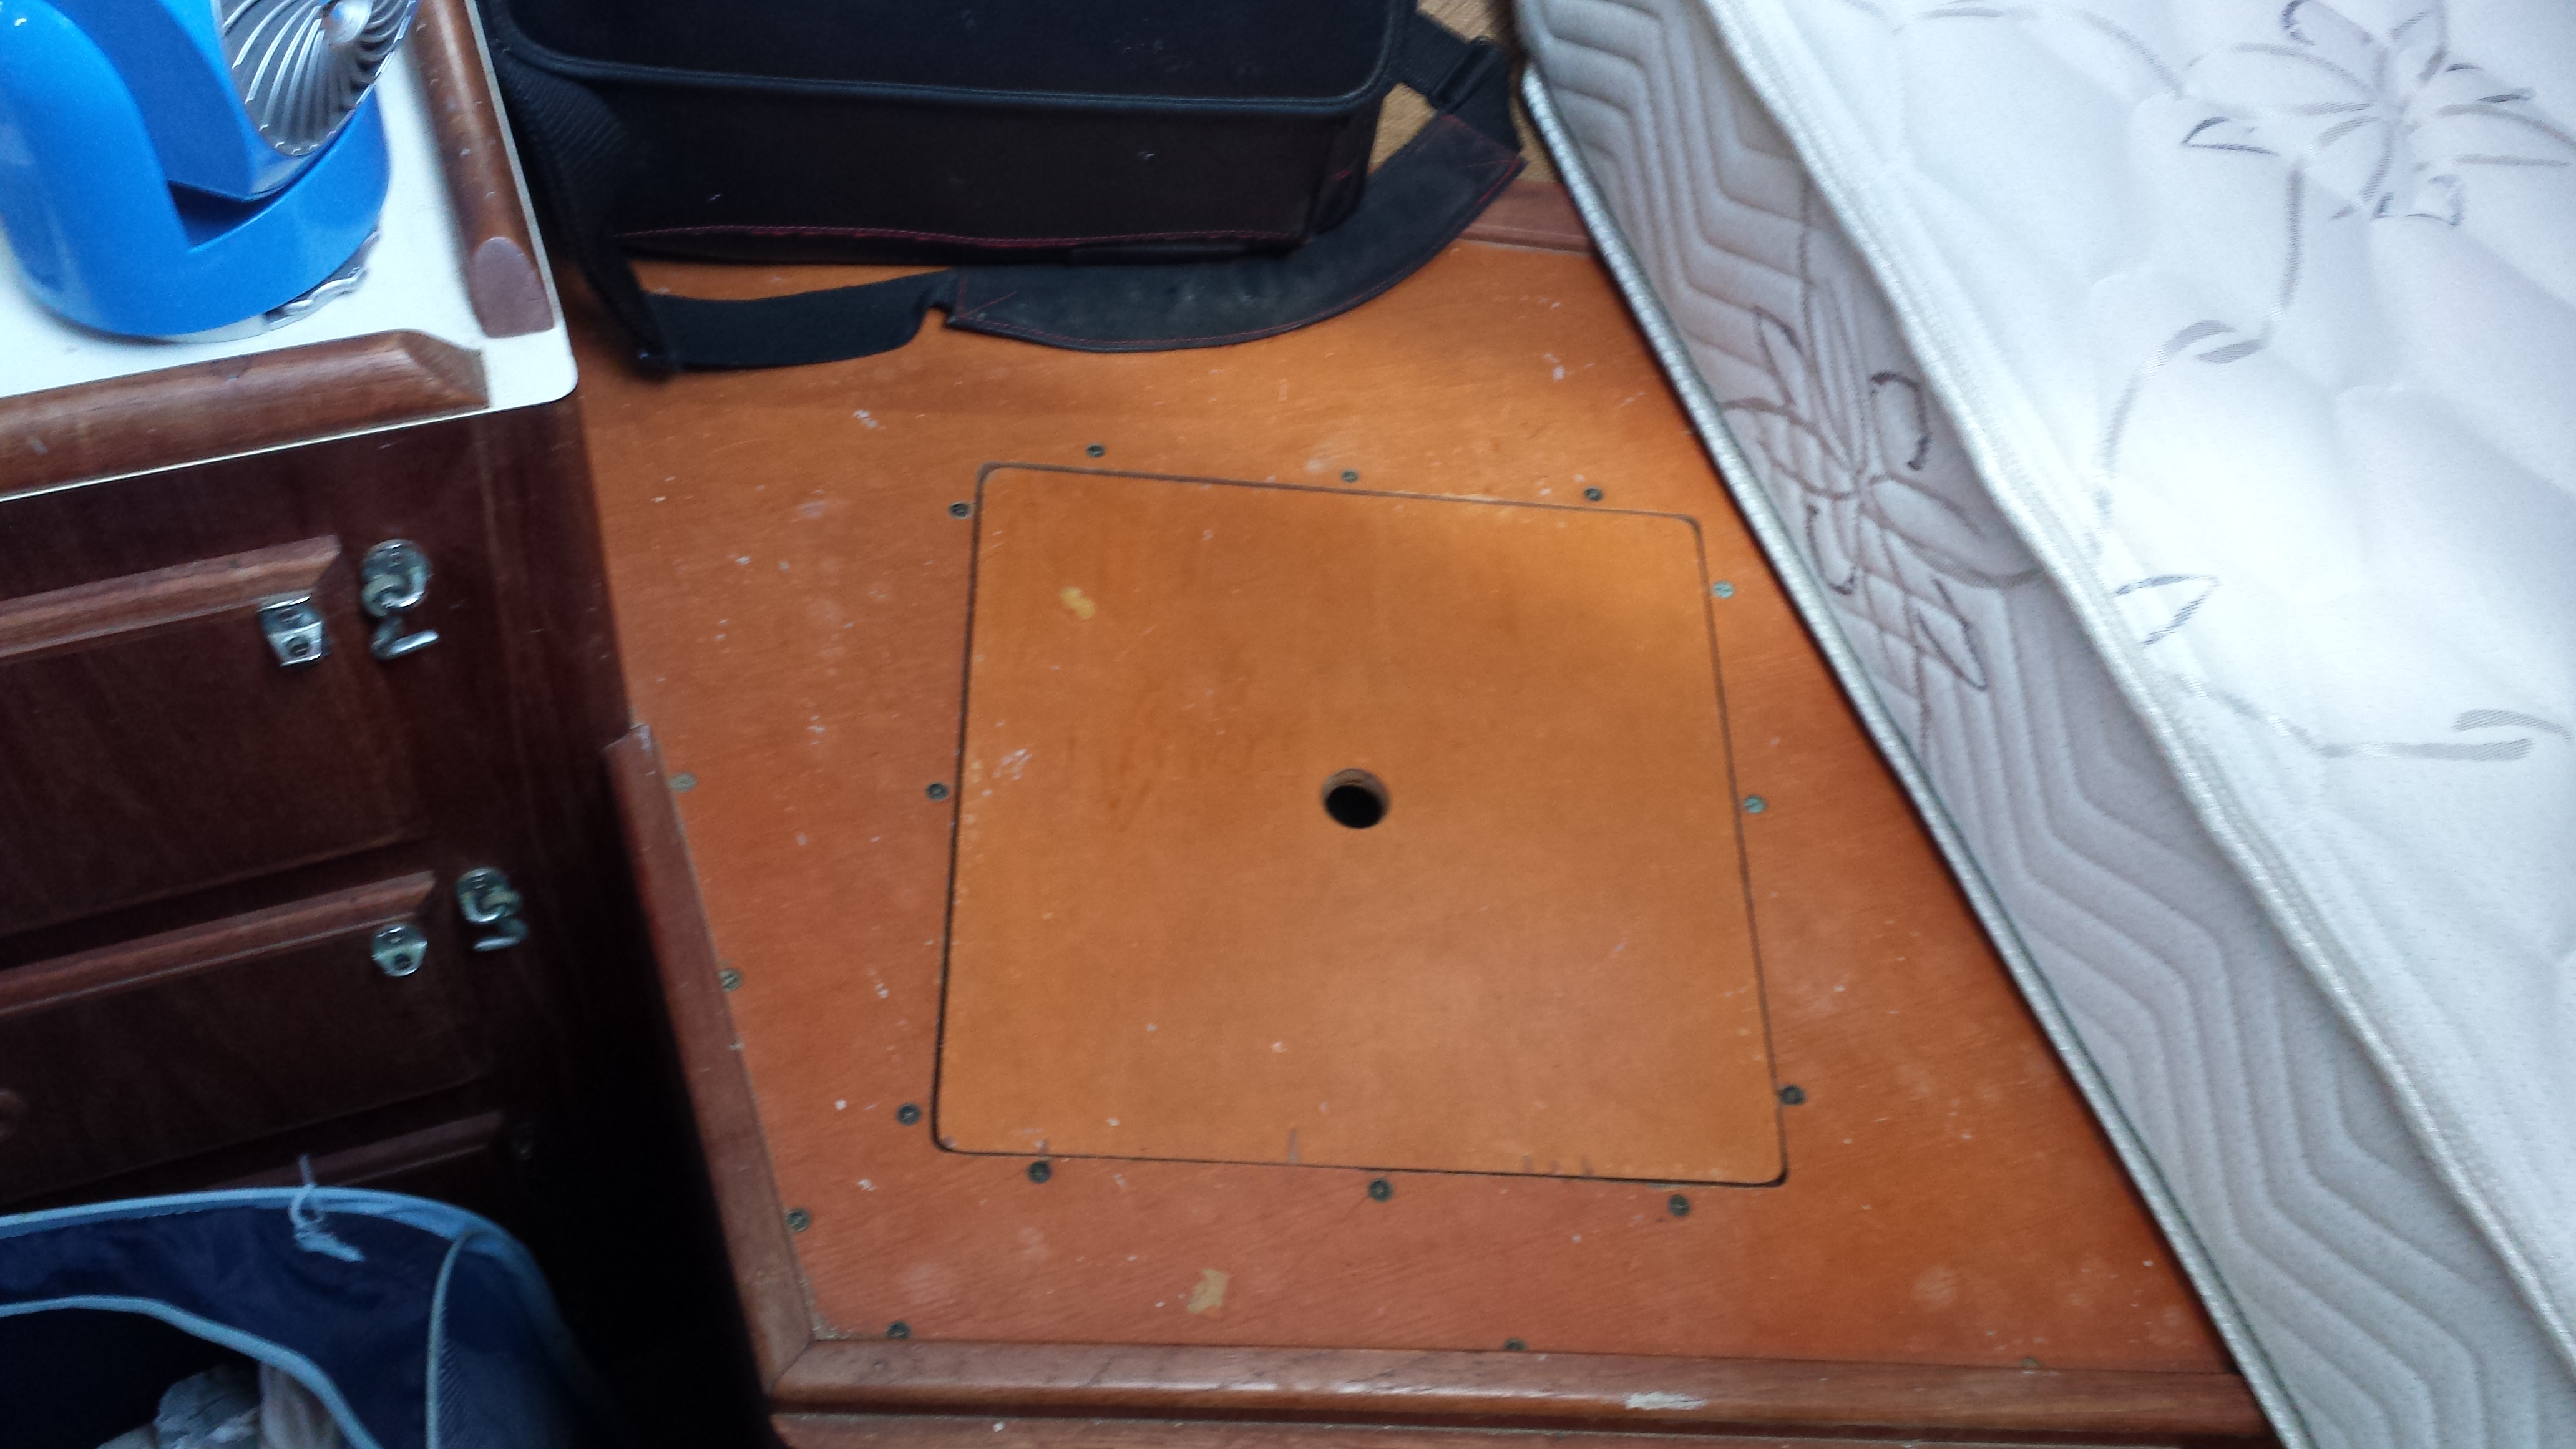
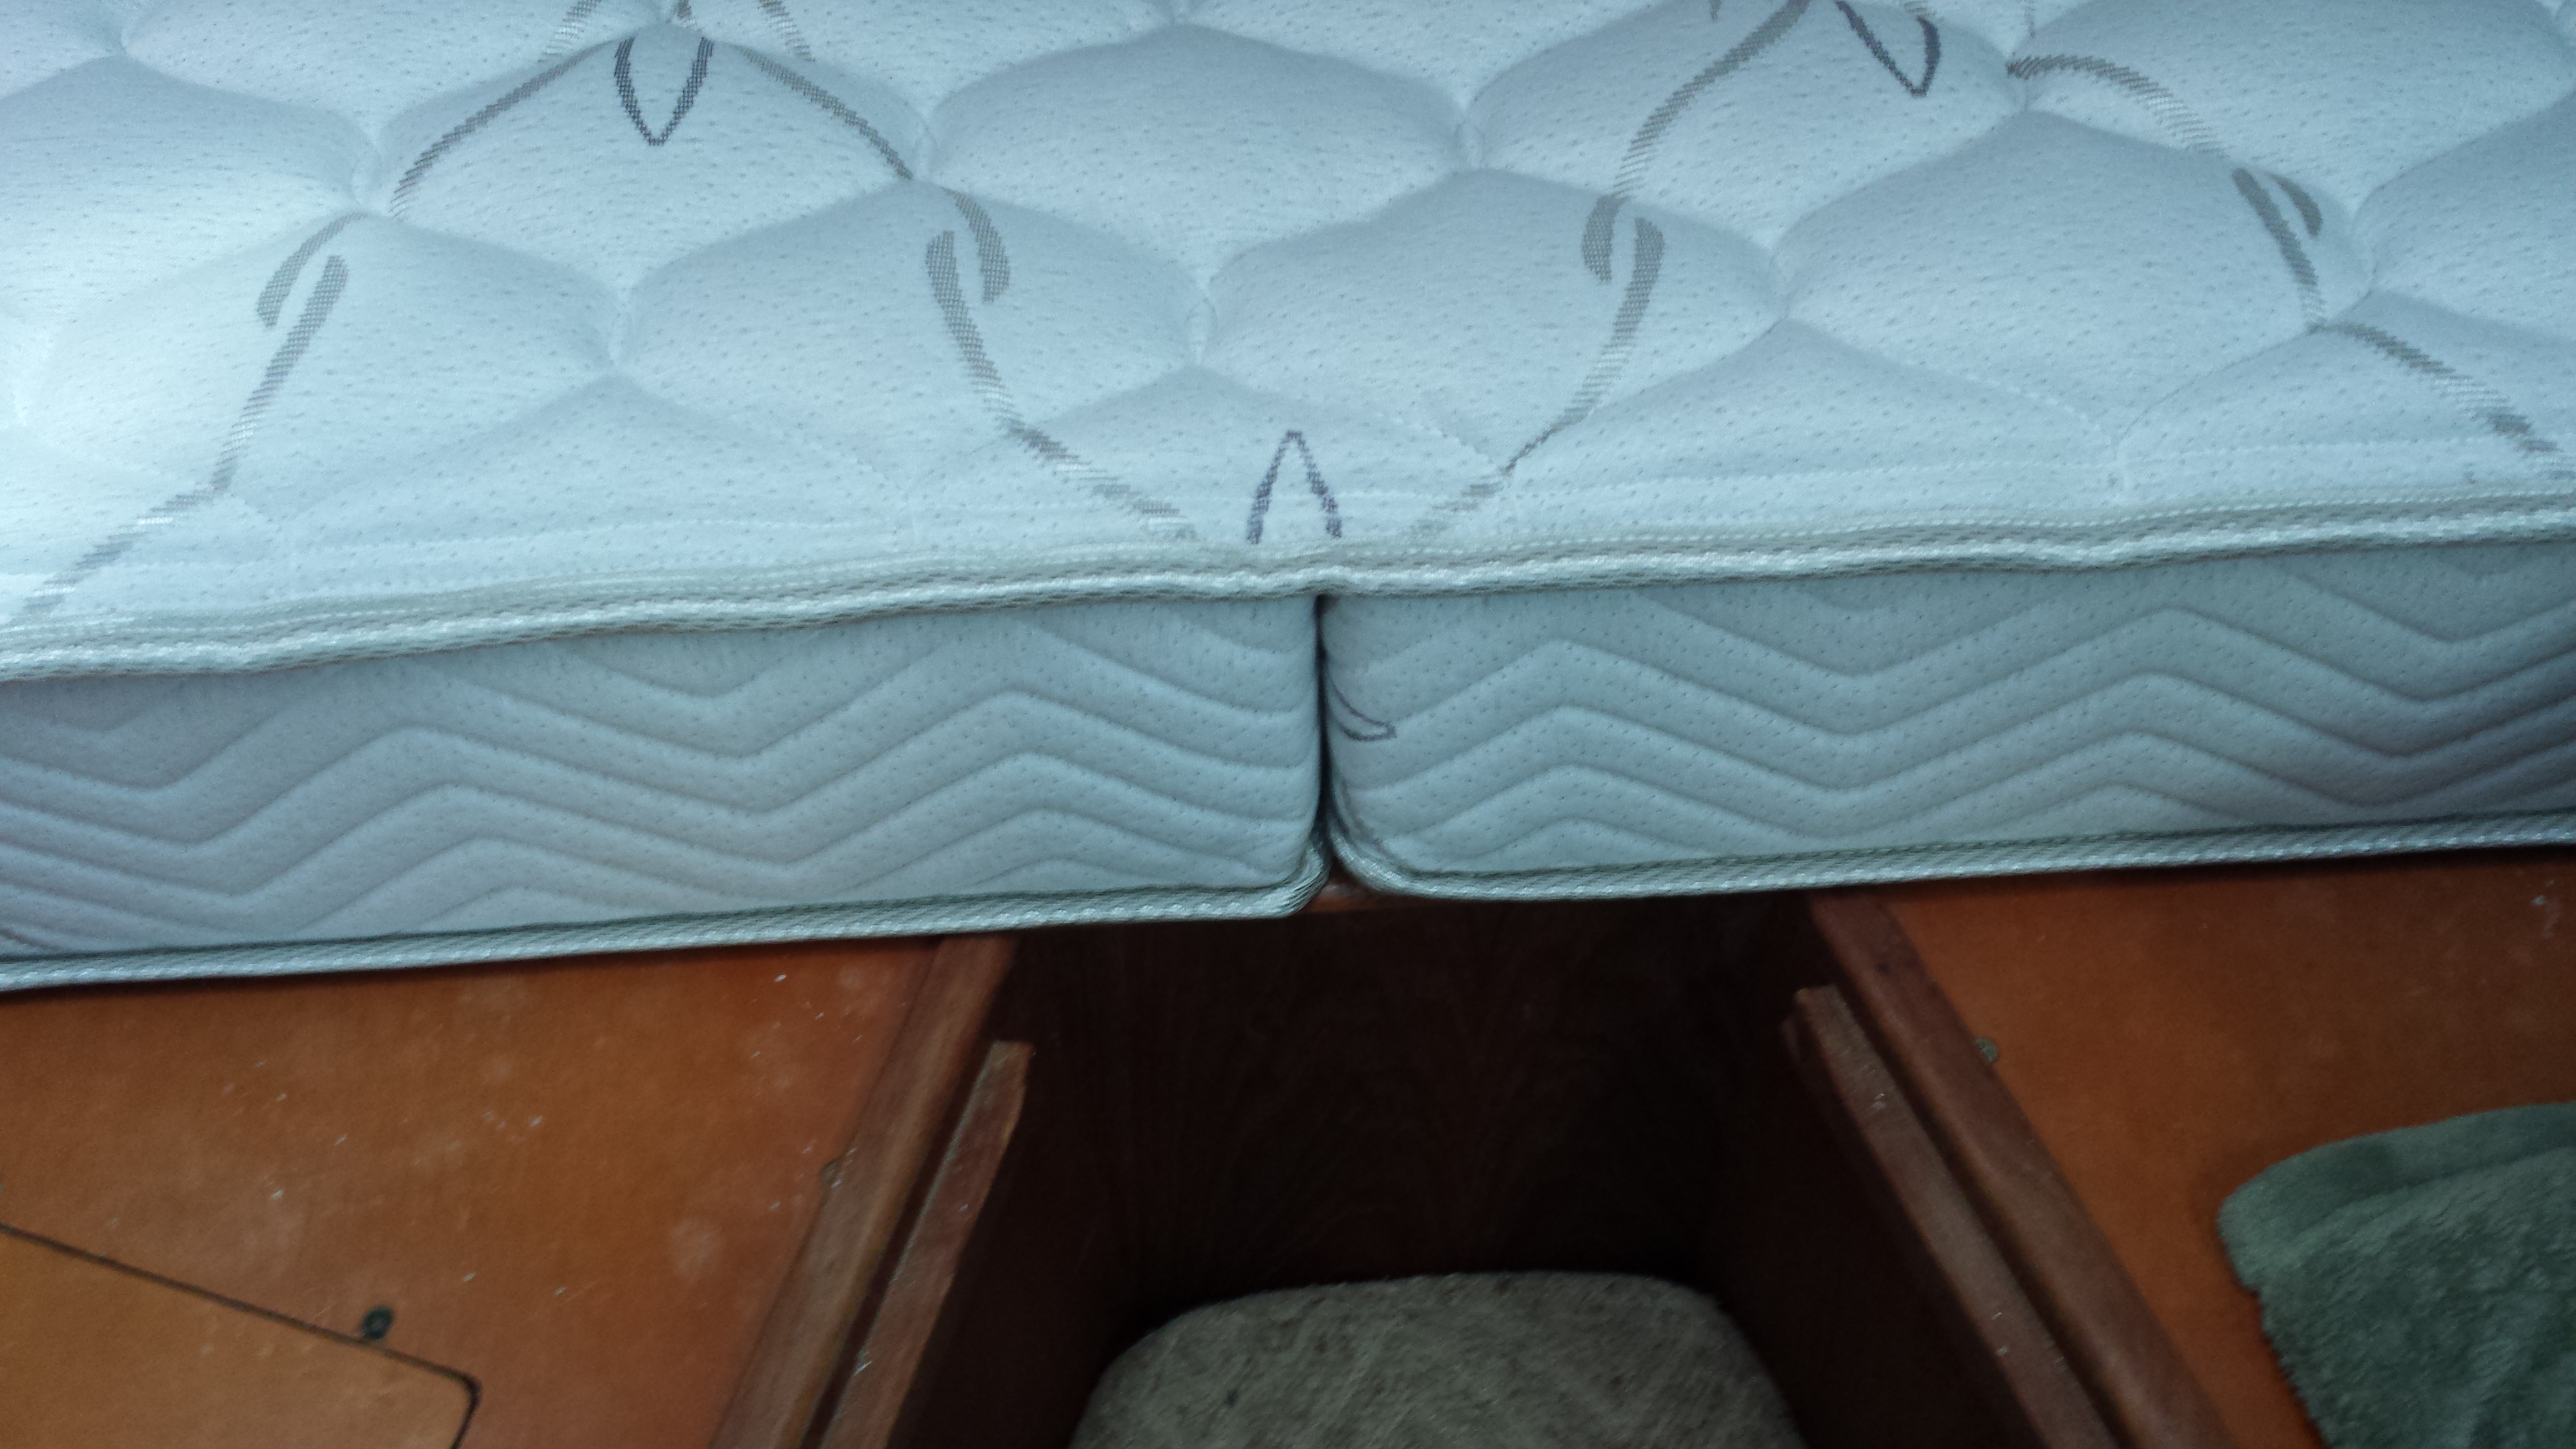
| Aft Cabin Mattress | |
 HMC Latex Foam Mattress |
Because the aft cabin is my bedroom since I moved
permanently on board I decided the bunk should be more of a bed than a
berth. I purchased a custom fitted 7" latex mattress from the
Handmade Mattress Company
(HMC), shown on the left and below. I had a pleasant surprise when I measured this mattress for sheets and found it to be very close to a standard Full size matrress. It is a little narrower at the foot, but a Full size fitted sheets fits almost perfectly. |
|
The mattress was fitted with a hinge which allows the head of the mattress to be flipped over giving access to the hatch under the berth. There are also two hatches under the aft end of the berth, which contain the hot water heater and AC refrigeration compressor. To get access to aft-most of these lockers (frig compressor) I only have to slide the folded mattress forward. To get to middle locker I have to raise or remove the mattress. |
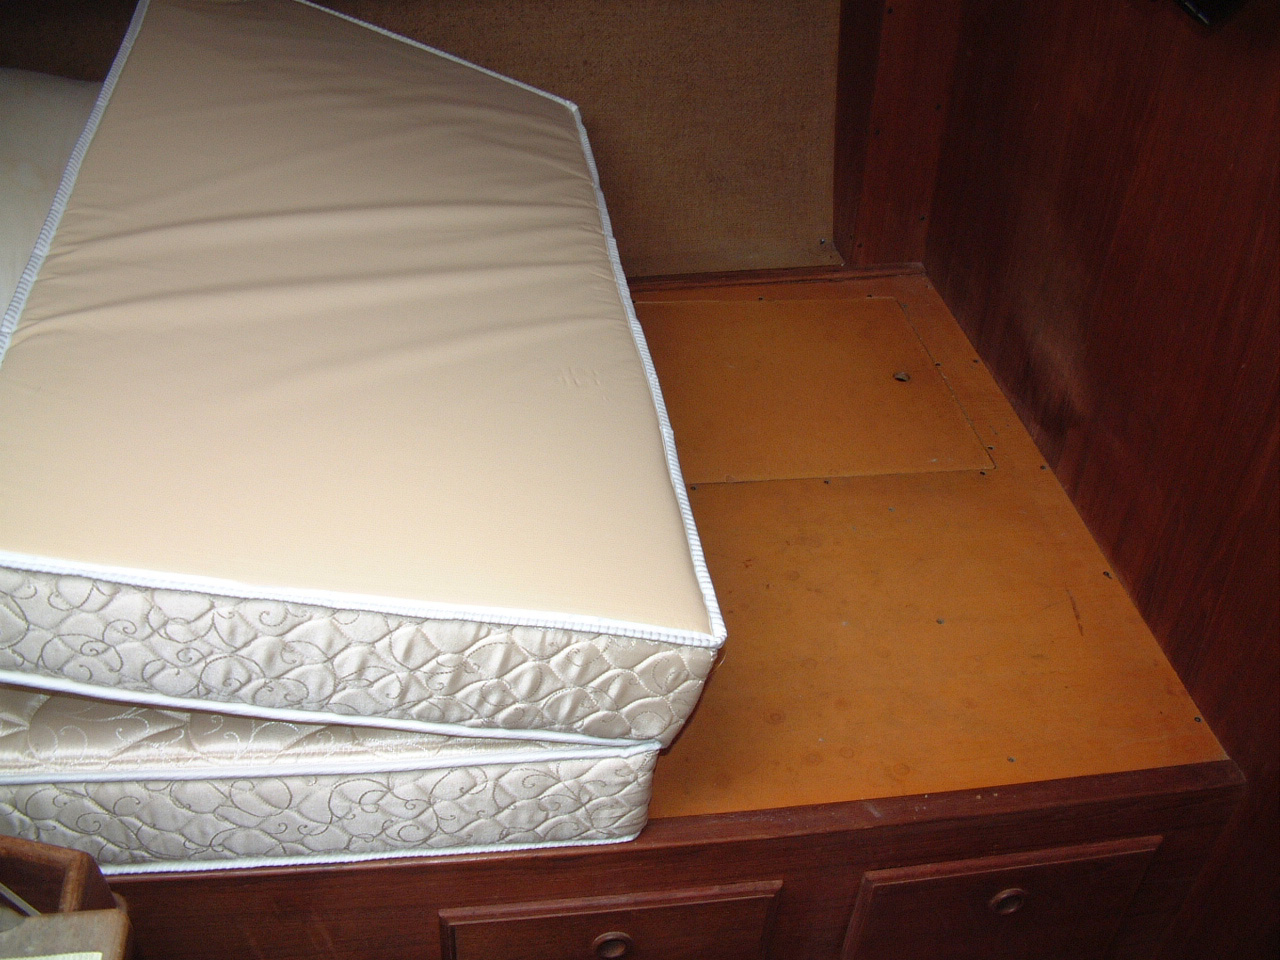 HMC Mattress Hinge |
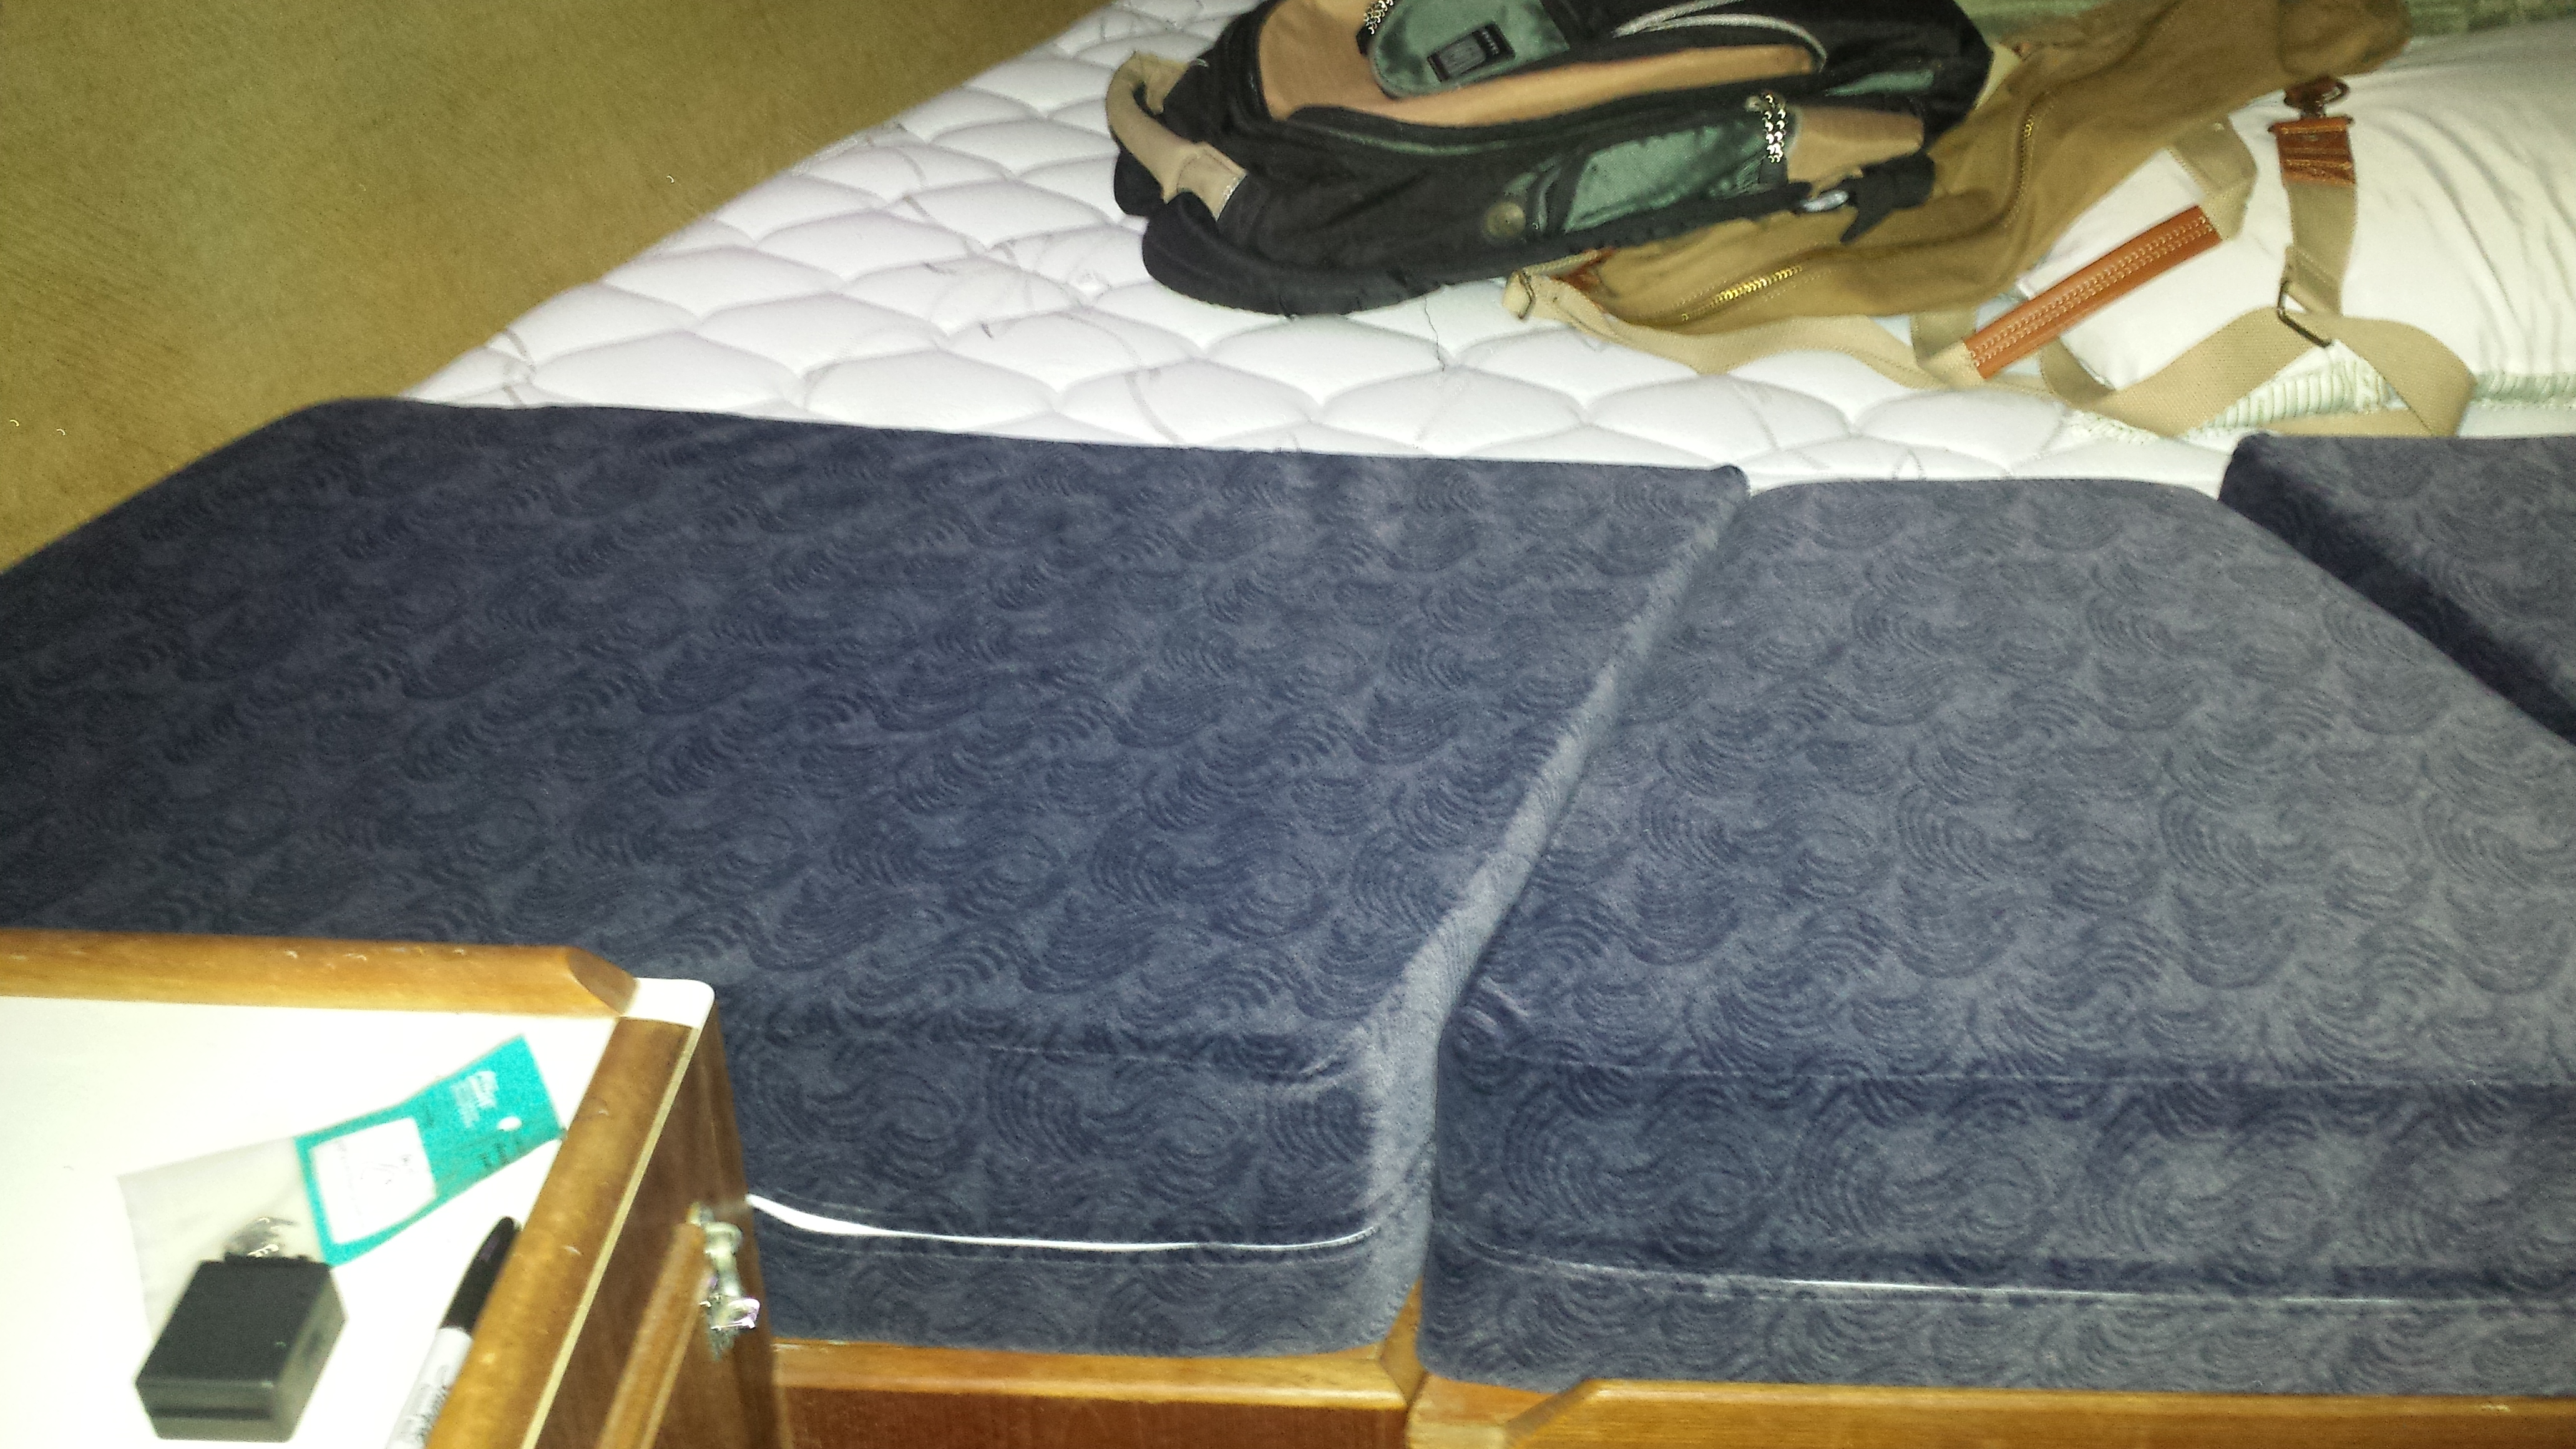
| V-Berth Mattress | |
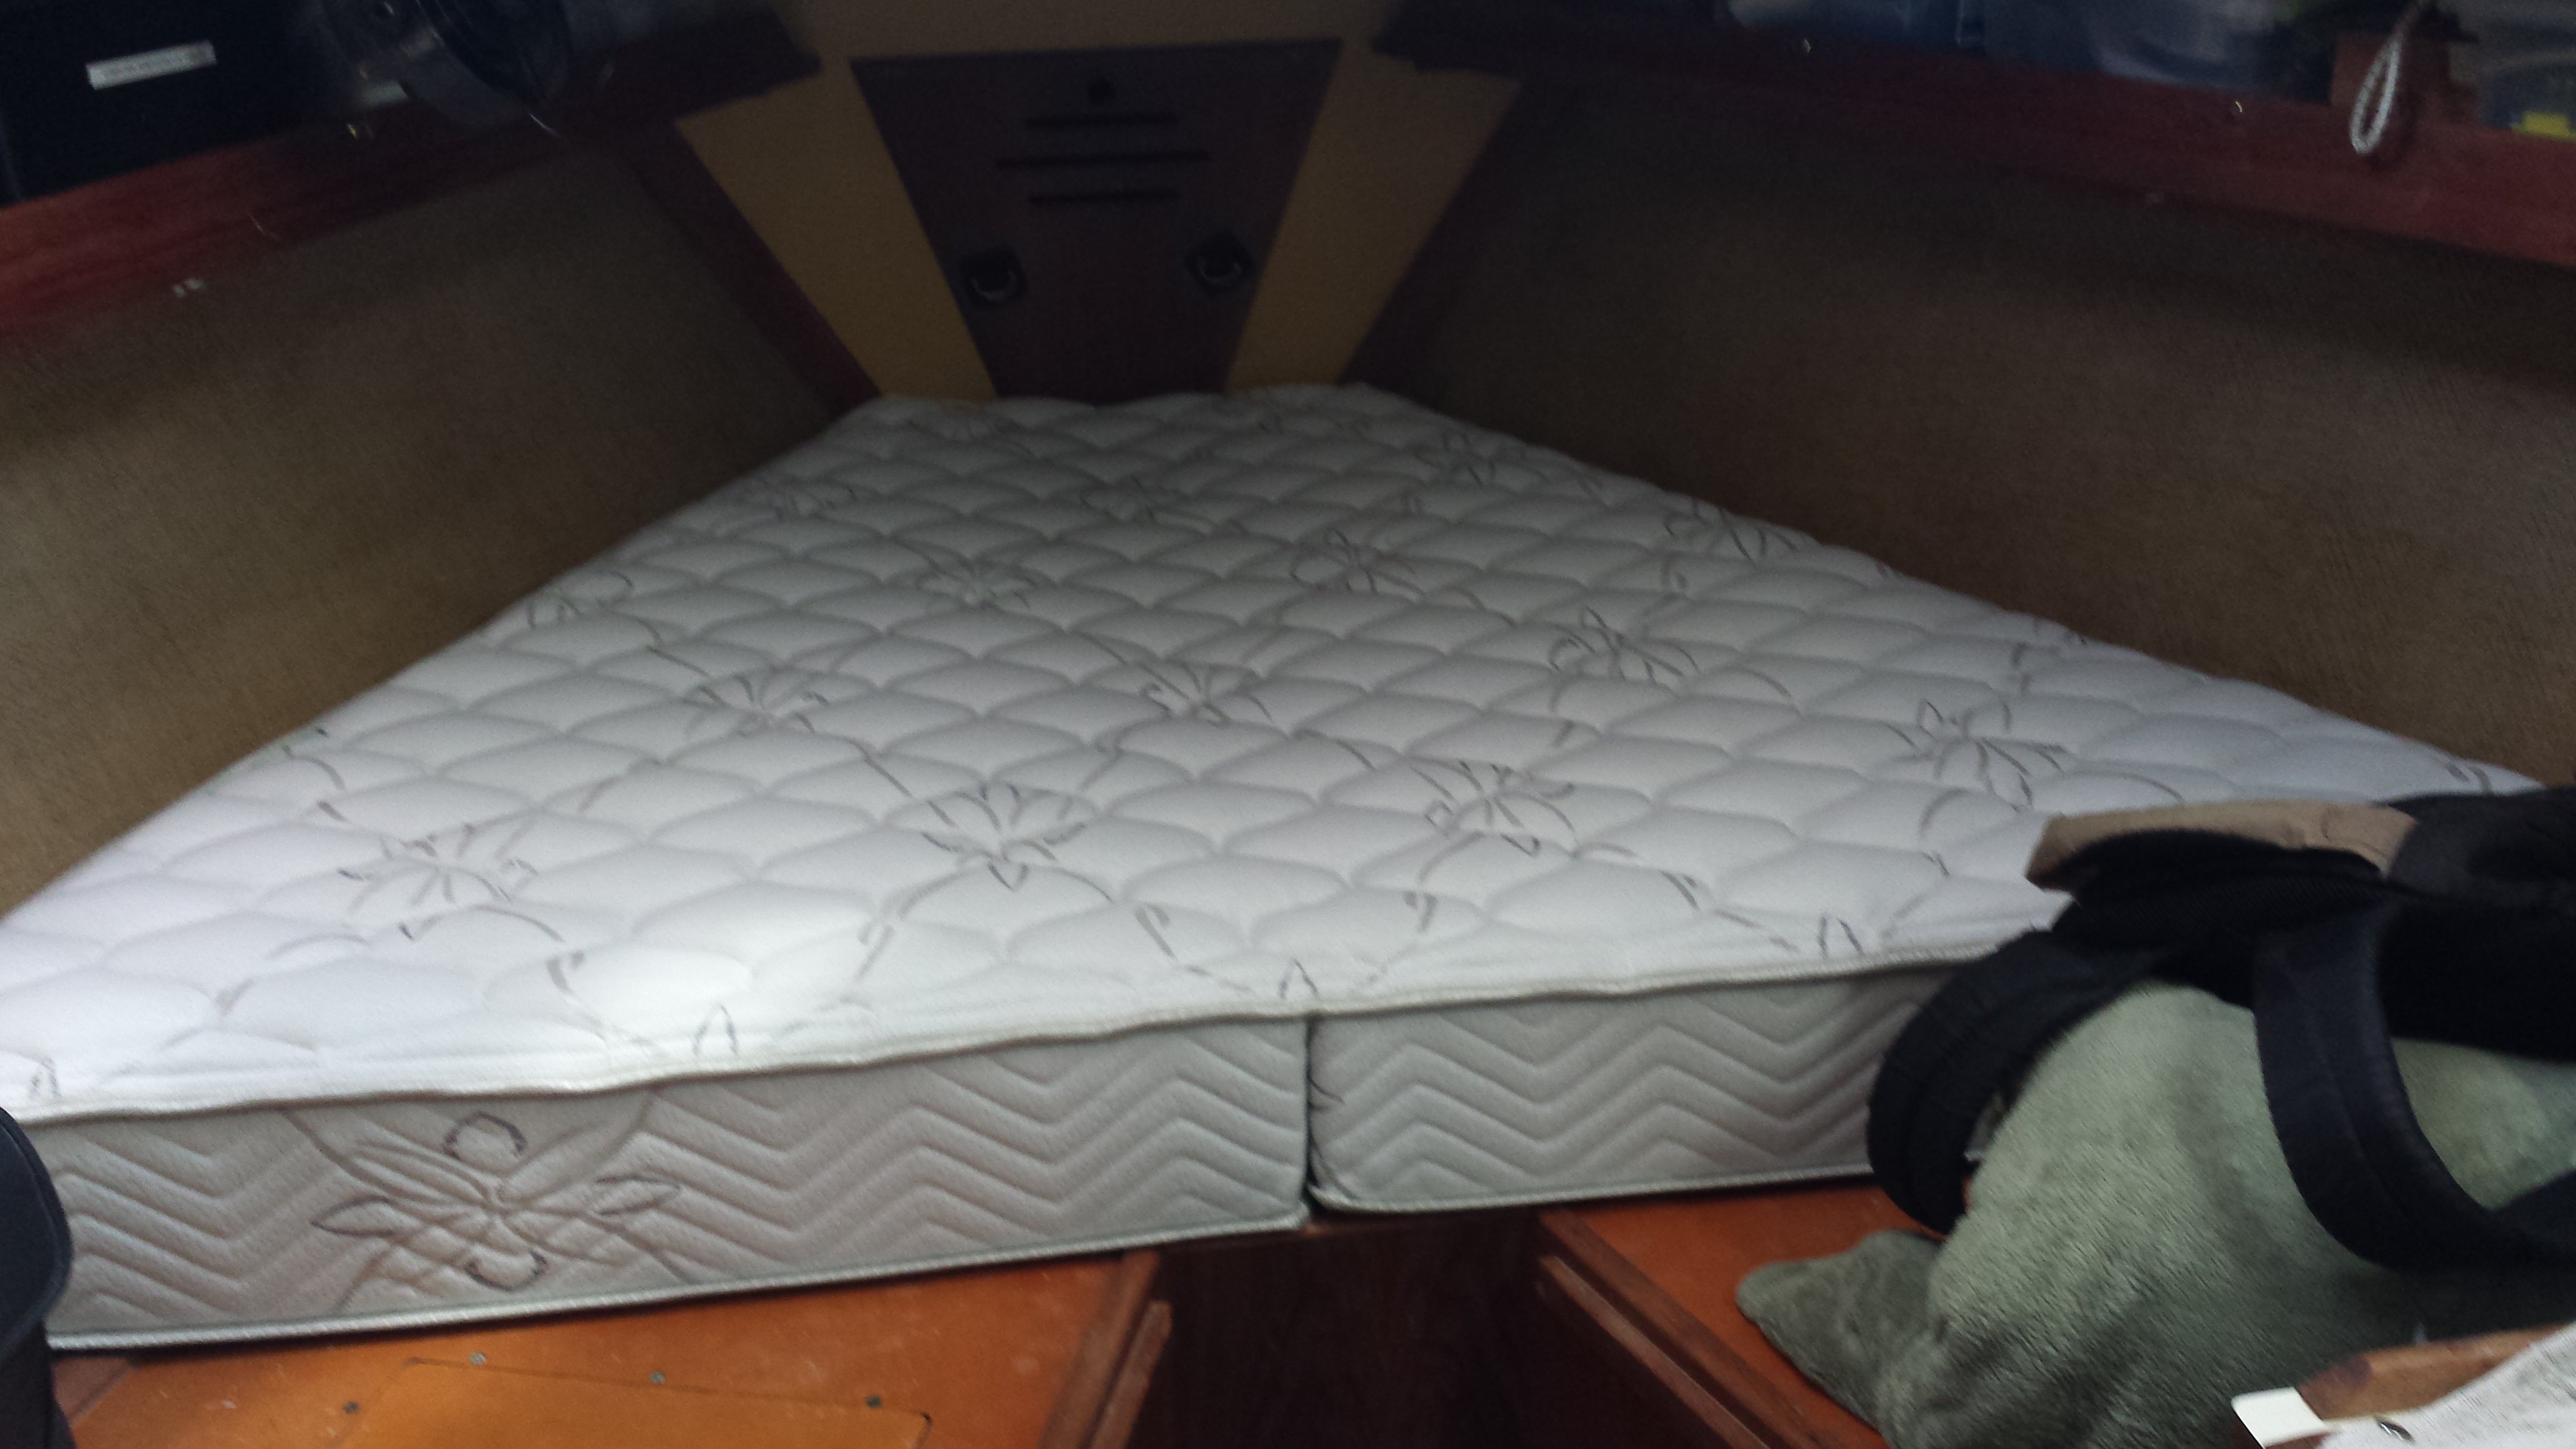 V-Berth Mattress by HMC |
I moved on board Sarah in the fall of 2003 and have been sleeping on the HMC
mattress described above almost every night since. It is the most comfortable mattress
I've ever owned - ashore or on board. By 2014 it was finally necessary to replace the V-Berth cushion in the forward cabin. This was the original berth cushion delivered by Pearson to the original owner in 1979, so I guess I got decent value from it. I decided to go once more with HMC for a real mattress (shown on the left) rather than just a cushion. This mattress has a hinge down the center allowing it to be folded in half for removal and access to the hatch underneath. |
| Cabin Cushions | |
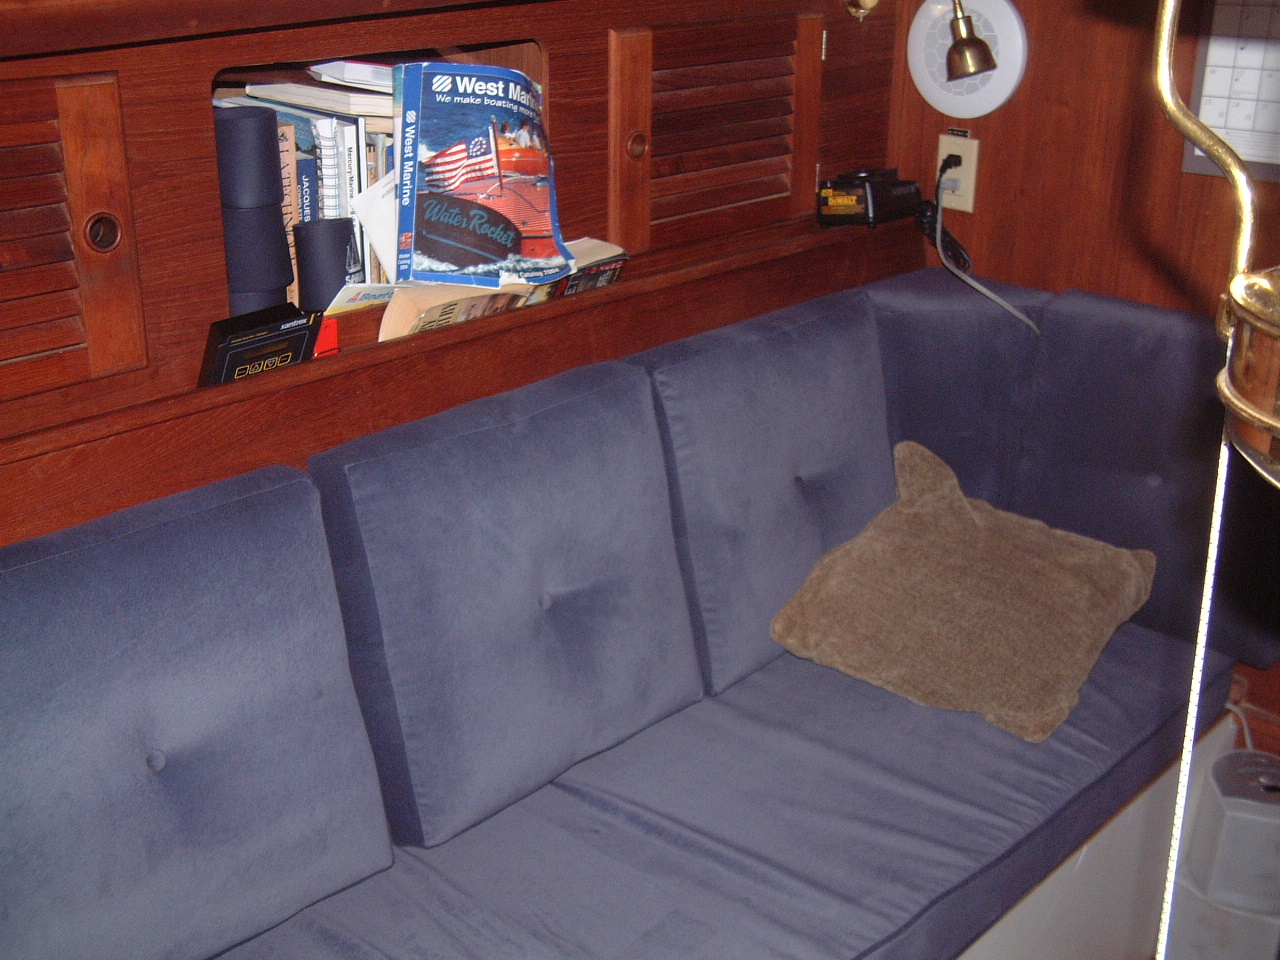 Settee Cushions, New in 2005 |
I lived with the cheap, uncomfortable white vinyl cushion covers since I purchased Sarah in 2000. Every year it was on my list to replace, but always got bumped by something else. The foam material was also shot and the cushions were very uncomfortable after sitting for more than a half hour or so. |
| Finally in December, 2004 I ordered a new set of cushions from Karen's Canvas Shop in Melbourne, FL (Eau Galle Yacht Basin), and I picked them up in January. Much, much better looking and very comfortable. The material is called Micro Suede, a cheaper version of Ultra Suede (material cost was 1/5 that of Ultra Suede). |
 Cushions in Micro Suede |
| Securing Drawers for Off Shore Sailing | |
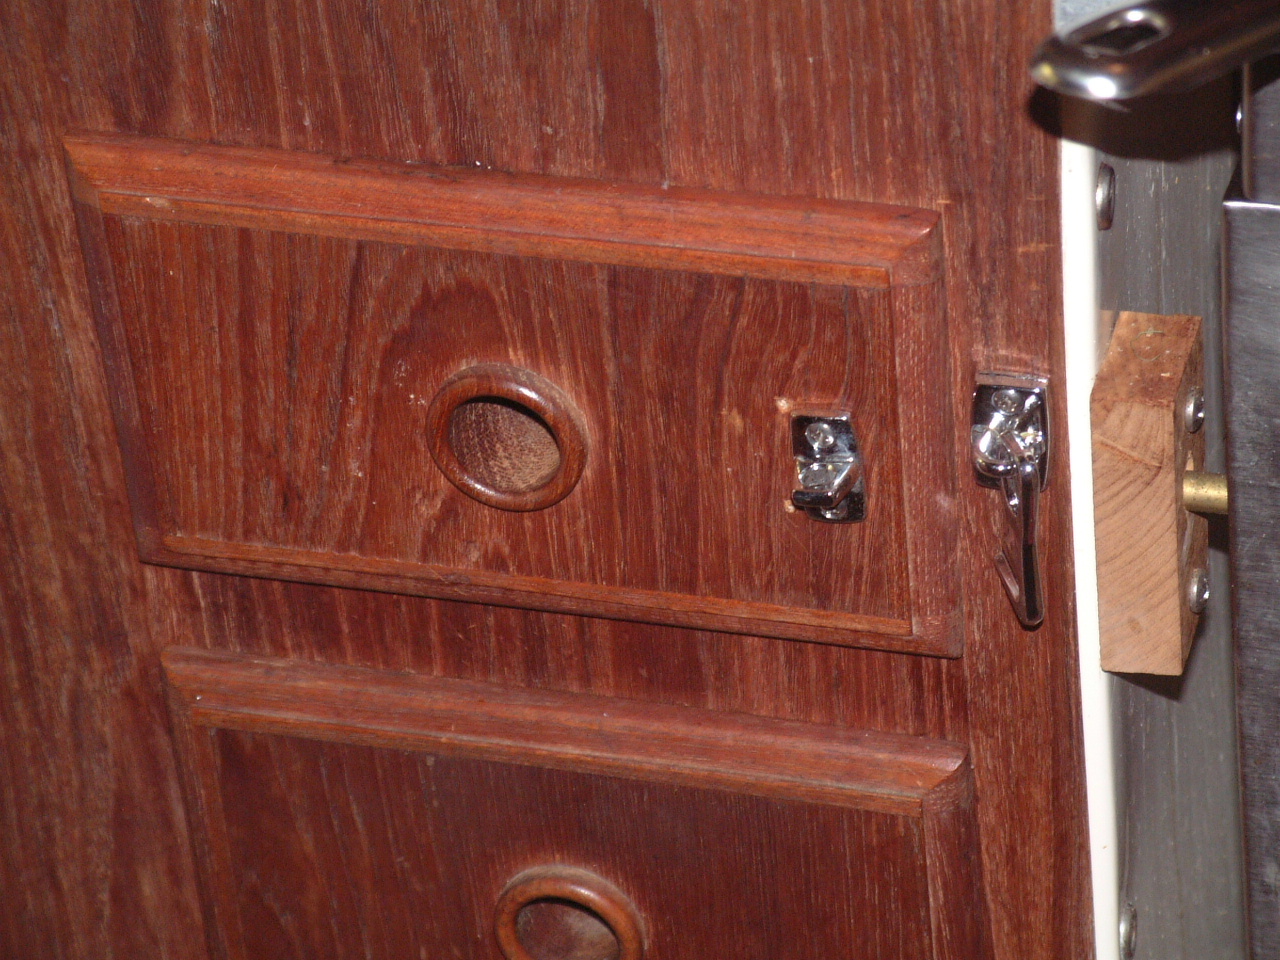 Hook On Galley Draw |
One of the lessons learned from the Bermuda Ocean Cruise on Sarah in 2001 was the need to secure the draws and closet doors on Sarah when sailing off-shore. The drawers and doors were secured with spring loaded latches. These provide security for most sailing, but during an overnight storm returning from Bermuda the galley drawers were launched across the cabin. The face of one of the drawers was broken and the contents, which included my cooking knives, ended up on the cabin floor. Clearly I needed a better way to secure these items. |
| The simple solution I've implemented is to put small door hooks on each drawer and locker door. The pictures on the right and above show the hook on one of the galley drawers. |
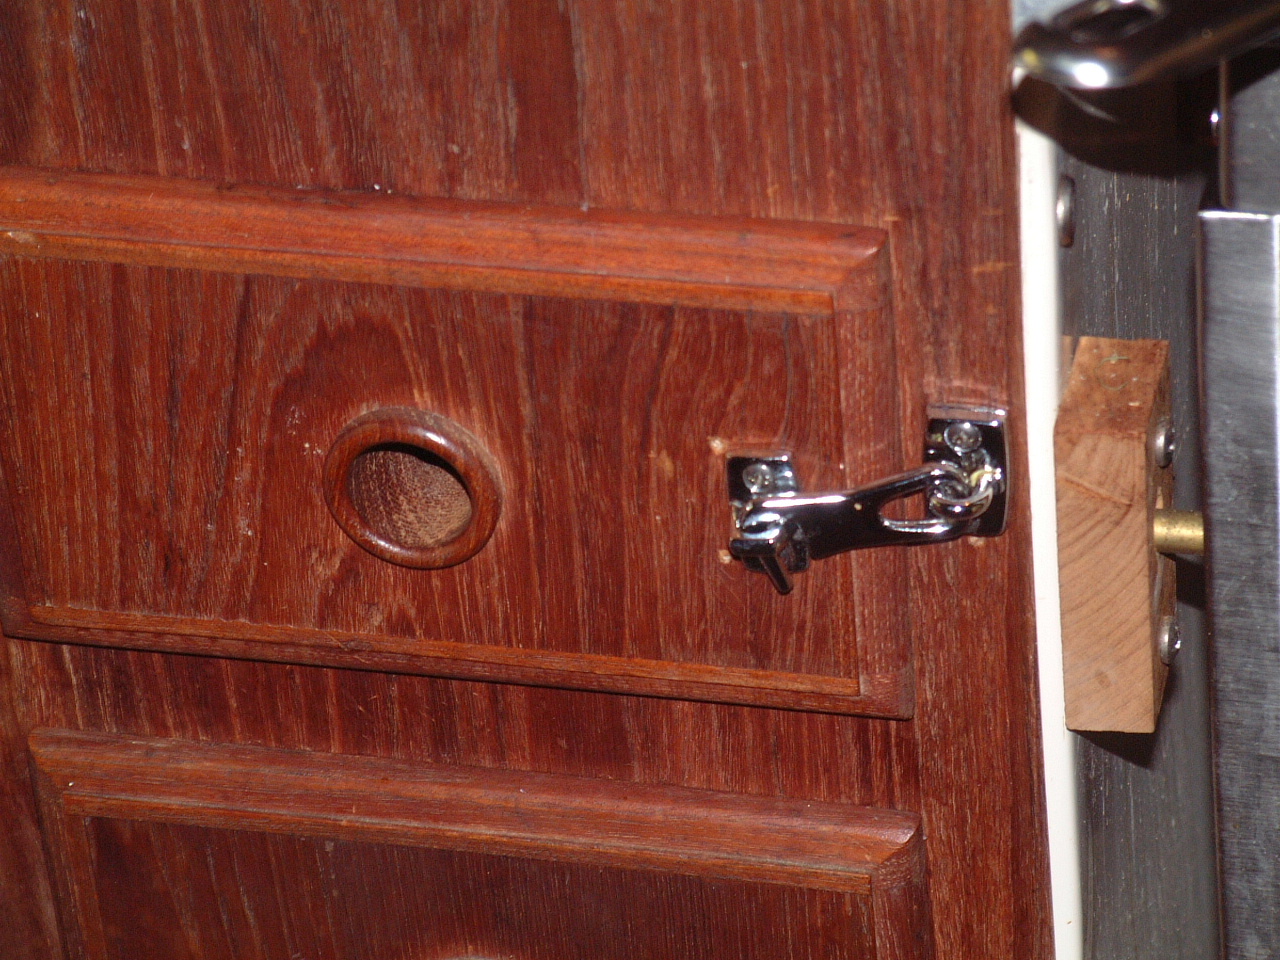 Galley Drawer Secured by Hook |
| Securing Table Leaves | |
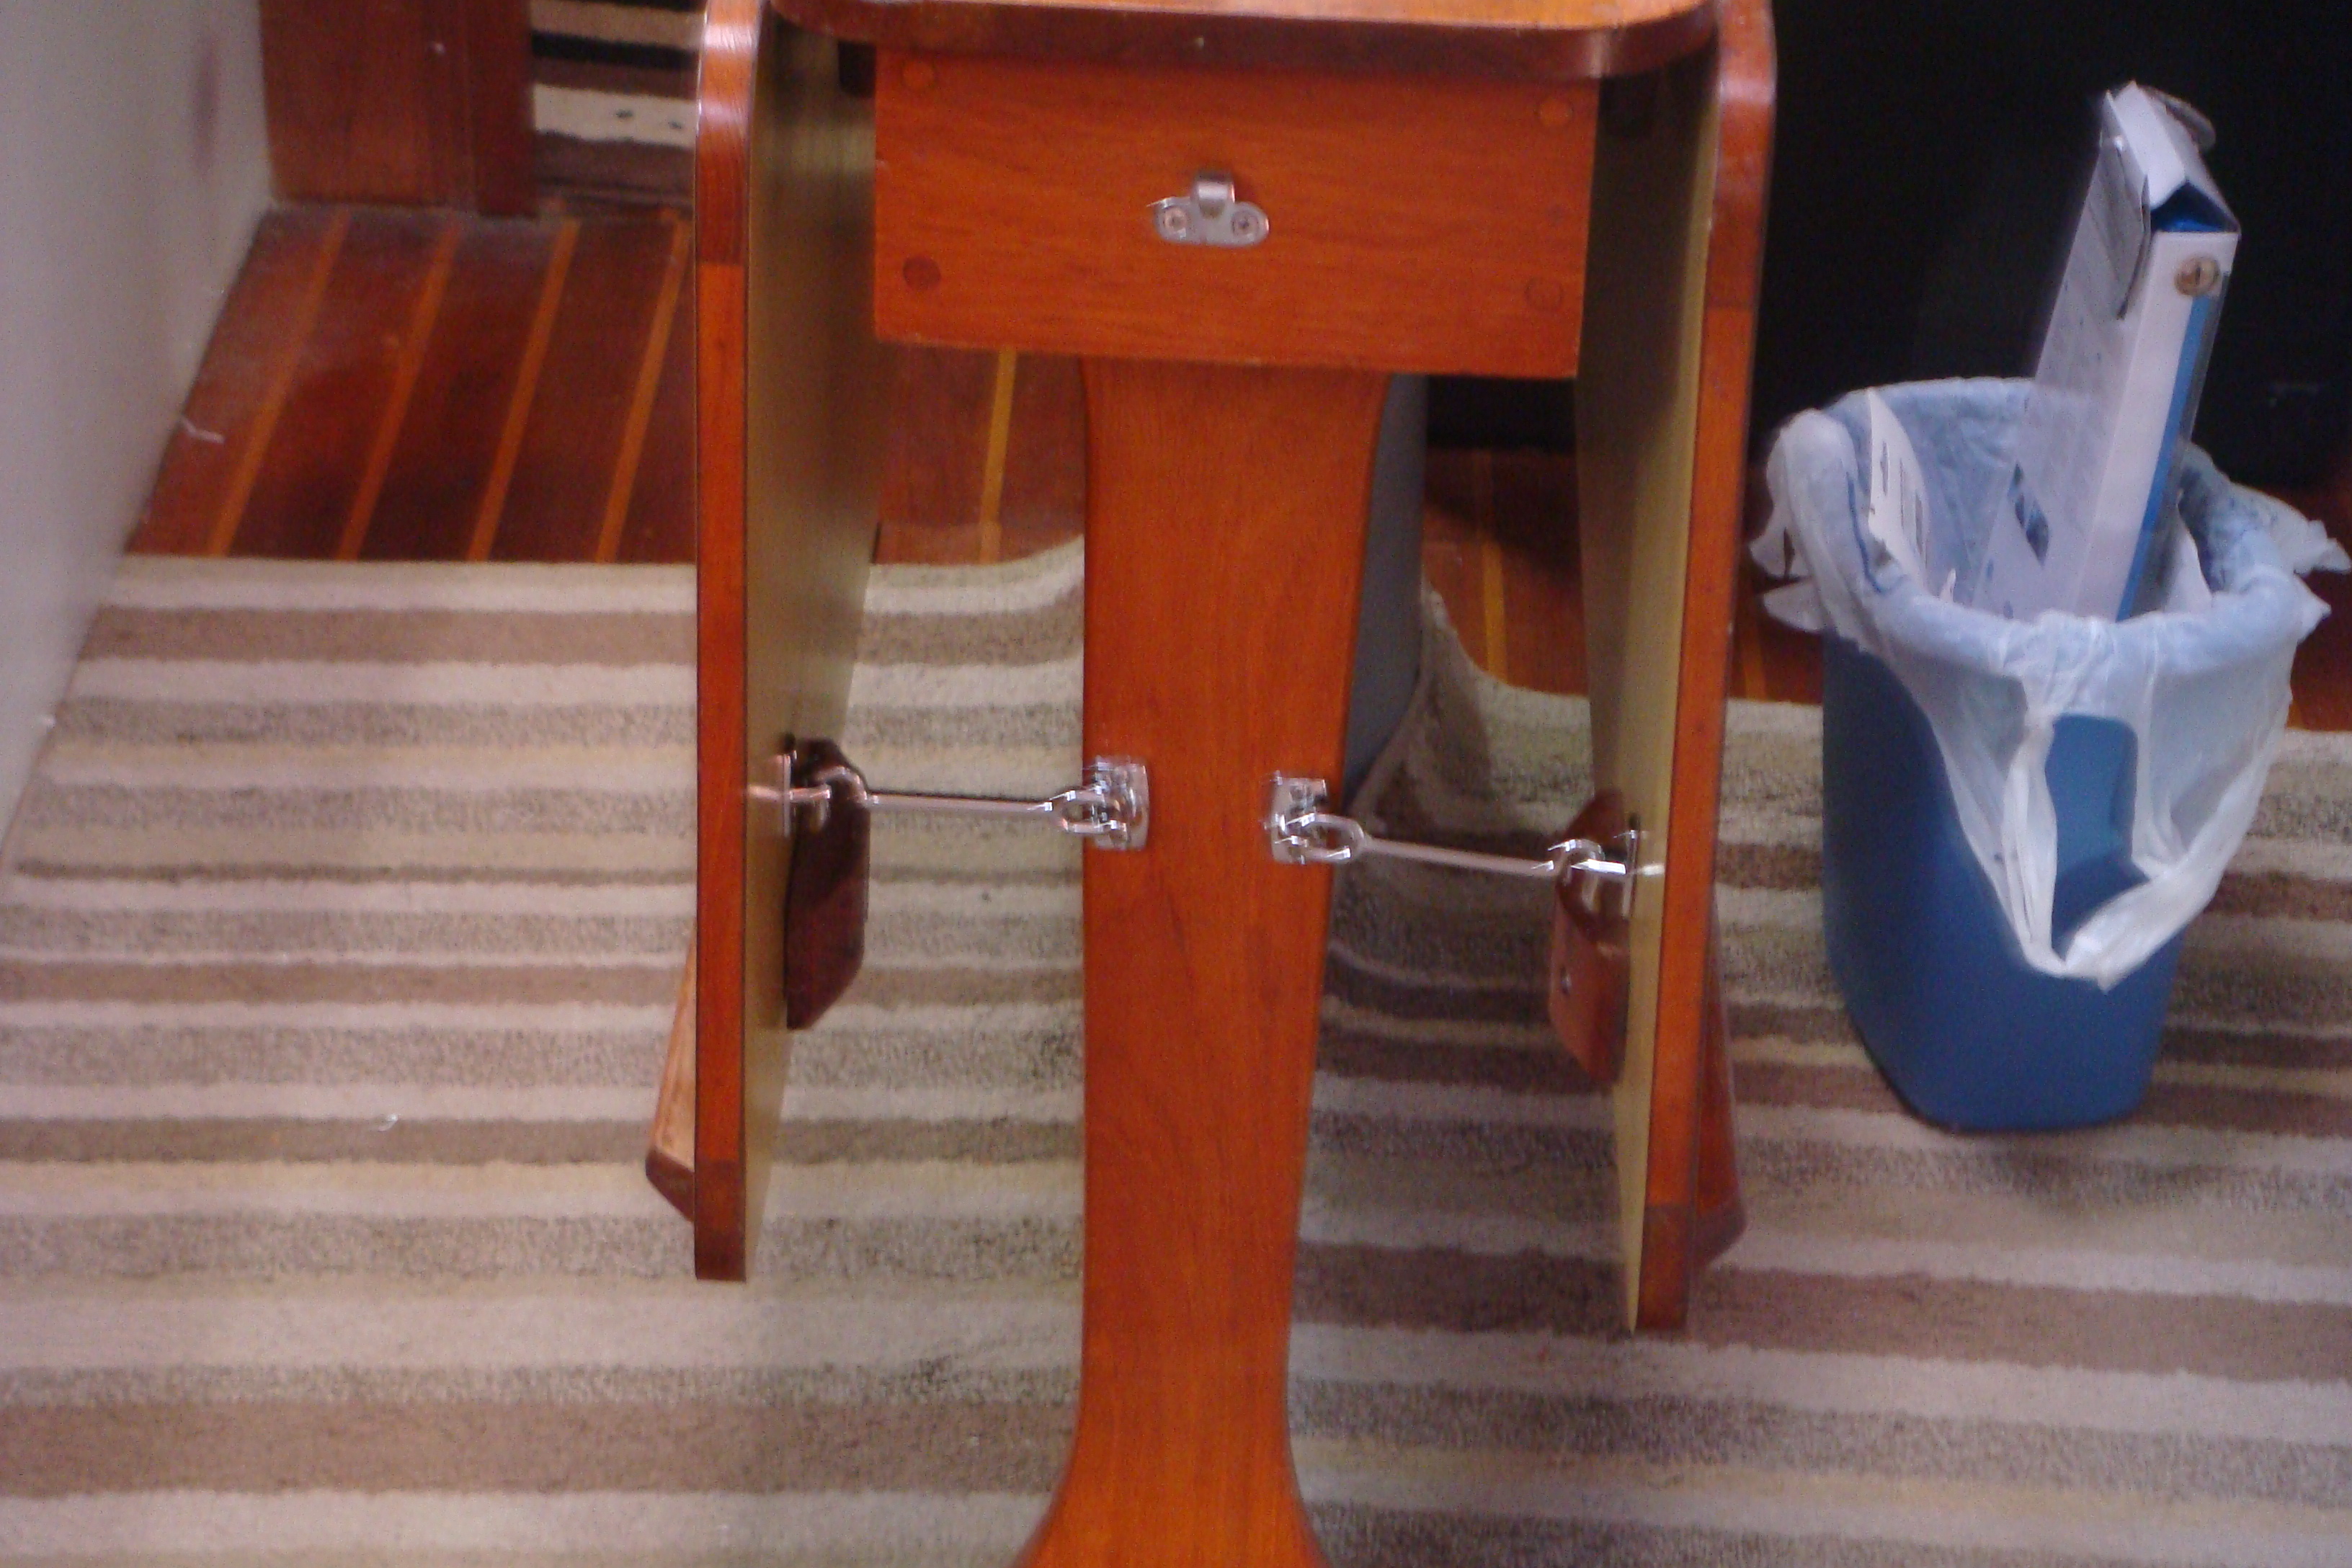 Table Leaves Secured by Hooks |
Hard
to believe I've made two ocean crossings and numerous coastal passages with
those table leaves swinging as they please. For what it's worth the
piano hinges on each leaf are pretty stiff and they don't flop around a lot,
but they really need to be secured when underway. Beyond just laziness, the reason I never secured the leaves is that I never had the right hooks for the job. WM and the other chandleries don't stock hooks of the right length. They have to be ordered from the catalogue. |
| Finally over the winter of 2010 I got motivated and ordered two 4" Perko hooks (Perko Nr: 1199DP4CHR). Then it was 10 minute job to install then and the leaves are finally secured. |
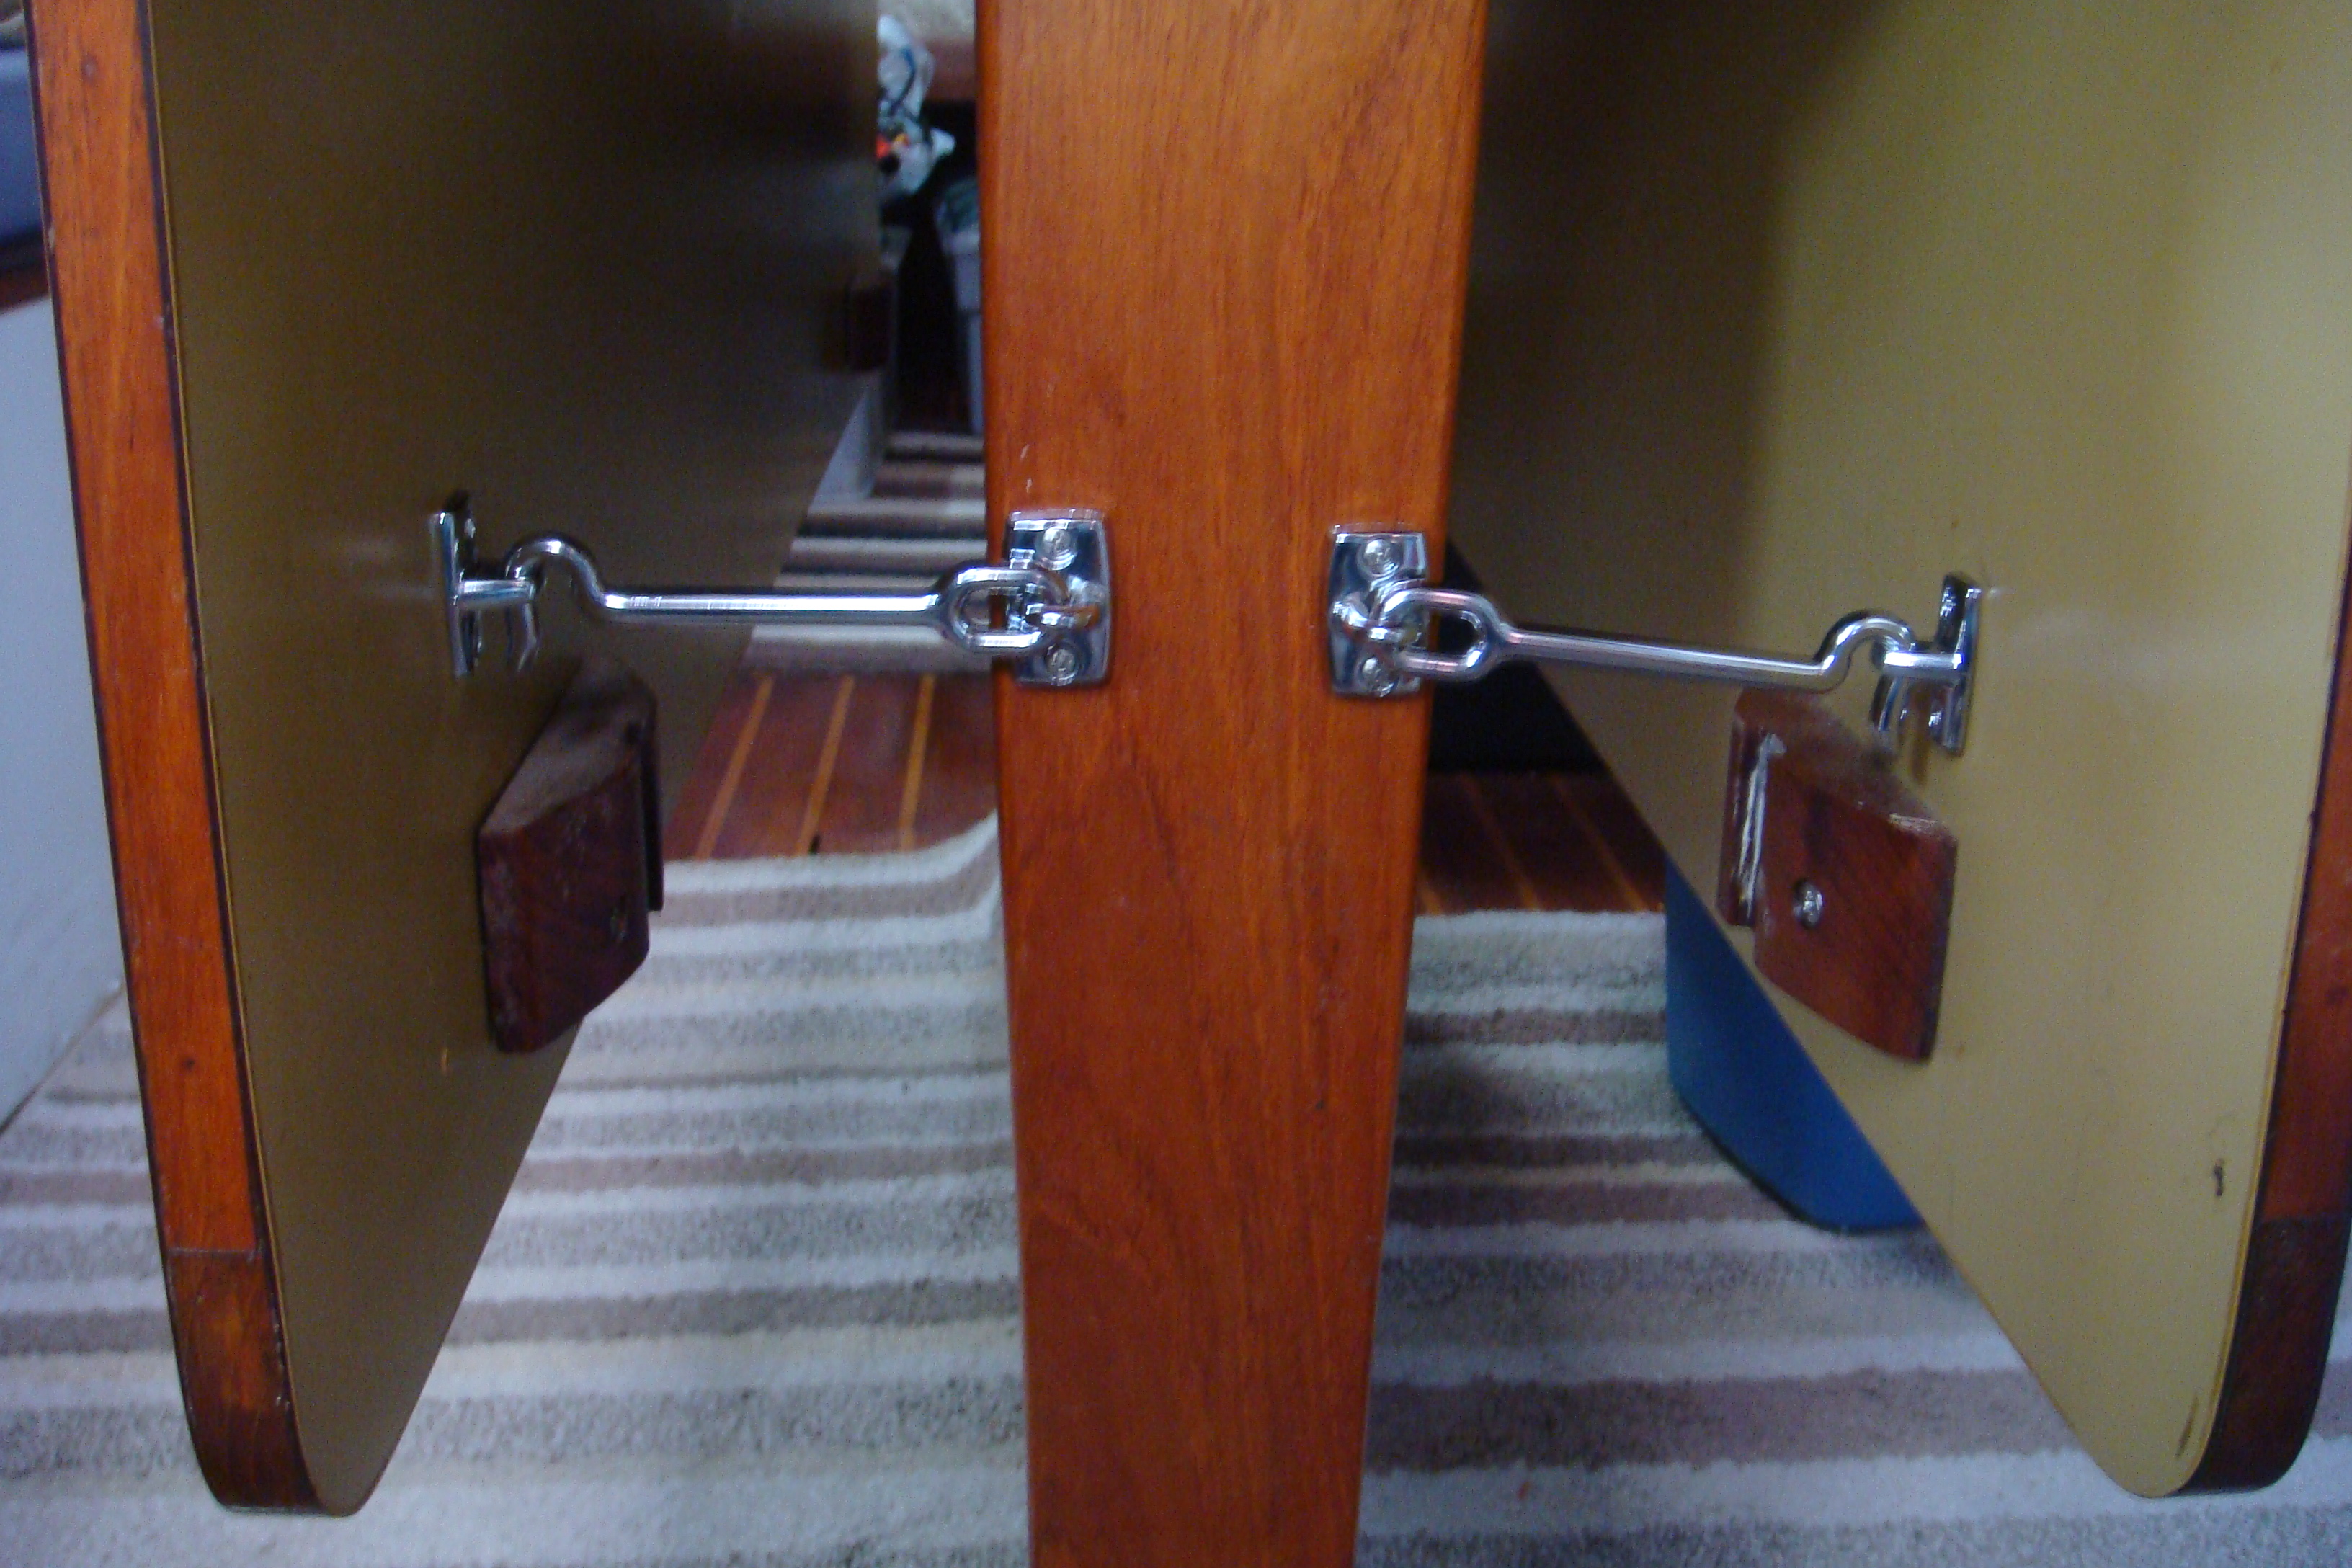 Table Leave Hooks |
| Labels for Fresh Water Valves | |
| This hardly qualifies as an upgrade. It certainly is one of the least
expensive upgrades I have done for the boat (< $0.50).
There are three freshwater valves located under the galley sink. Each valve opens or shuts off water flow from one of the three 50 gallon water tanks on Sarah. These are gate valves, so you cannot tell by inspection if the valve is open or closed. Also, there are no gauges on Sarah to show the level of water in each tank. I have found it difficult to manage the water supply on Sarah since I moved on board because it is easy to forget which tank is active, and whether the inactive tanks are full or empty. After a couple of instances were I started to take a shower, had the active tank run empty, after much fiddling with the valves discovered that the other tanks were empty, and then had to get dressed, get a hose and start filling the tanks. On other occasions I thought I had emptied all of the tanks and went to re-fill them only to discover one of the tanks was still full. These are not life or death issues (unless we empty all the tanks while 100's of miles from the nearest port), but they are nuisances. Finally I came up with a scheme I hope will make water tank management a little easier and more accurate. |
|
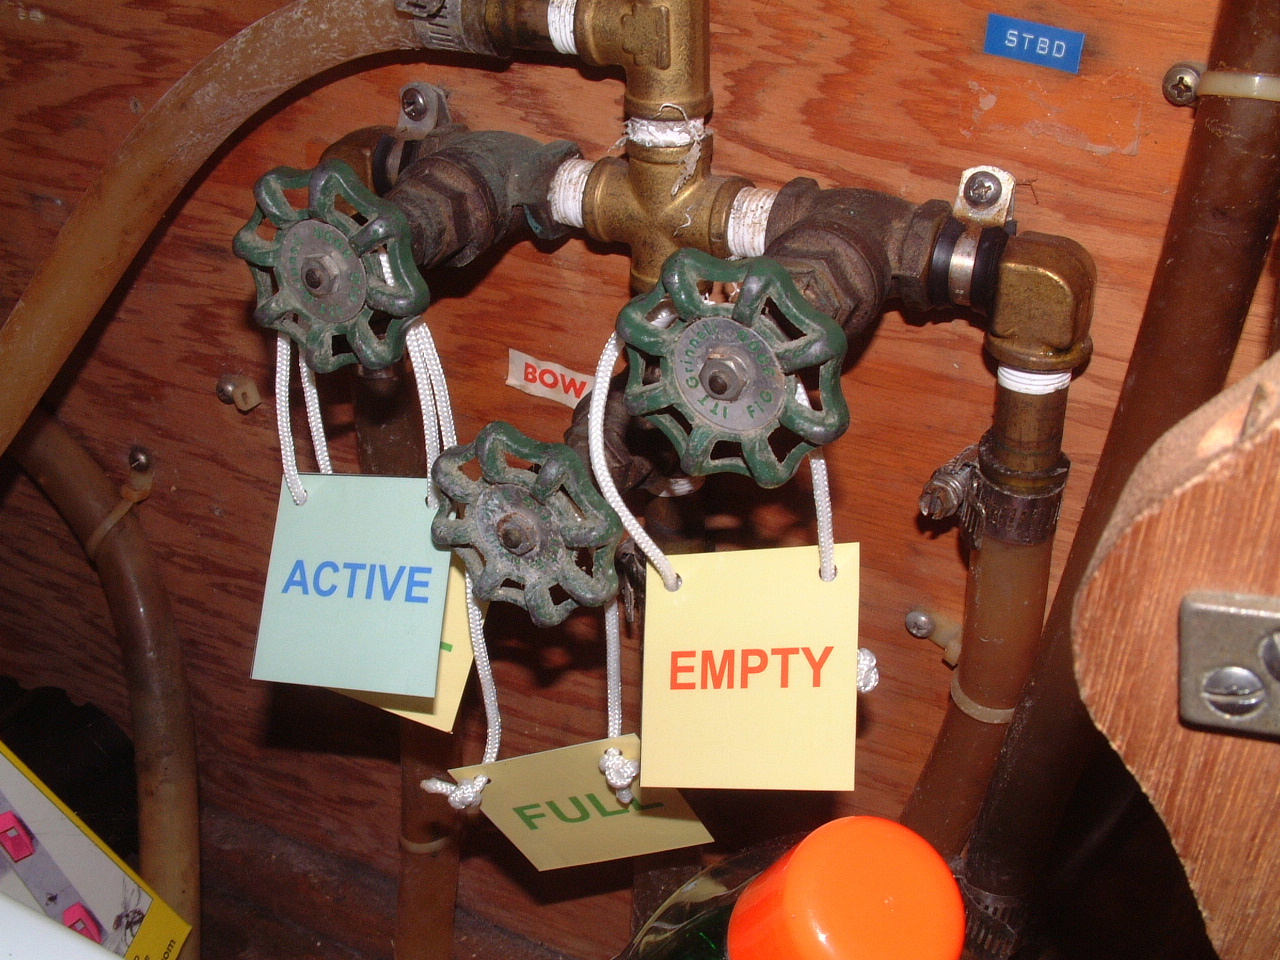 Fresh Water Valve Labels |
I made up small double-sided labels for each
valve, with "FULL" on one side and "EMPTY" on the other. I hung one
label on each valve to show the current status of each tank. When I
empty a tank I turn the label around to show that tank is empty. I
made up a fourth label with "ACTIVE" on both sides. I hang that label
on the open valve to show which water tank is active. I made the labels out of heavy paper stock and laminated them between two sheets of plastic. |
|
If any of these valves every fails I will replace it with a ball valve, which will make the "ACTIVE" label unnecessary. Some day I may get around to putting a gauge on each tank. |
|
| Fresh Water Tank Valves | |
| The valve labels described above solved one of the problems with the valve manifold, but not all. The real problem is the use of gate valves instead of ball valves. In the picture on the left are the three gate valves that control from which tank the pump draws water. Just looking at the valves you can't tell which valves are open and which are closed (hence the ACTIVE label). | |
 Gate Valves and Ball Valve |
Contrast the gate valves with the ball valve at the top of the picture. This valve allows water to flow to the foot pump (bottom of the picture), and must be closed when the pressure pump is on. If the valve is open the pump will draw air through the foot pump and will not prime. It is easy to see in the picture that this valve is closed. |
|
I had wanted to replace the gate valves with ball valves since I've owned Sarah, but the system worked so I left it alone. Then in 2007 it stopped working, and the gate valves bit me on the sail from Madeira to Bermuda that summer. We left Madeira believing we were drawing water from a full Bow tank. After about 4 days that tank came up dry. Even though we weren't making a great effort to conserve I was surprised at how quickly we emptied that tank, but we till had 100 gallons to last 3 weeks - plenty of reserve. Then 2 or 3 days later the Port tank came up dry. I thought we must have a leak in the system, but I could not find any problems on the pressurized side of the system. Possibly those two tanks had leaks. It was hard to believe both tanks had developed leaks at the same time, but I hadn't really used the bow tank for over a year so maybe it wasn't such a coincidence. When I got back to the states I tested each tank, and there were no leaks. In retrospect I think a combination of a crew member unfamiliar with the operation of the valves and my not checking things before we departed Portugal caused the problem. My crew filled the tanks before our departure and I think he may have gotten the valve operation backwards and left the valves for all three tanks open, when I believed only the starboard tank was open. When we left Portugal we topped of the Starboard tank one more time. During the sail to Madeira we were drawing water from the all tanks, not just the starboard one. On departure from Madeira we only topped off the Starboard tank, thinking that was only one in use. I then closed the starboard tank valve and "opened" the Bow tank. I must have noticed the Port and Bow tank valves were already opened, but it easy to get confused with the valves and I may have turned the valves closed then open again before getting the Port valve closed and the Bow valve open, not thinking about the fact they might all have been open on the way to Madeira. |
|
|
If my assumptions about the tank valve settings is correct we left Madeira with the Starboard tank full and the Port and Bow tanks partially empty. When the Bow tank came up dry I switched to the Port tank, which only lasted a few days. Fifty gallons is still a lot of water and the Starboard tank easily lasted the next 2 weeks until we arrived in Bermuda with only moderate conservation on our part. It is very easy to have the valves open when they should be closed and visa versa. The labels don't help if you don't whether the valves are closed or not. One more reason to dump the gate valves.The valve settings weren't the only problem we had with this system on the sail from Madeira. Within a day of switching to the Starboard tank the pressure pump started running open indicating a dry tank. If all three tanks were dry we had a real problem. We had at least two more weeks of sailing to reach Bermuda. Madeira was 1,000 nm to windward. The Azores were about 1,000 nm to the north. Fortunately we quickly determined that the Starboard tank was still nearly full. There must be a problem with the delivery system. I disconnected the delivery hose for the Starboard tank from the gate valve and water flowed from the hose. So the problem must be in the gate valve or in one of the other fittings. I disconnected the Bow tank delivery hose from that gate valve and connected the Starboard tank hose to that valve. With that change water again flowed to the pressure pump and the foot pump. In Bermuda I purchased a new gate valve and replaced the Starboard tank valve (red valve in the picture above) and things seemed to be working again. We sailed back to the USA with no freshwater problems and I lived on board for six months switching between the Port and Starboard tanks with no problems. Then in early January, 2008 the pump once again could not draw water from a nearly full Starboard tank. I once more moved the Starboard tank delivery hose to the Bow tank valve (see picture above)and water once more flowed. So the problem wasn't fixed by the new gate valve. |
|
| I'd had enough. So I finally replaced the entire system with a set of ball valves. I also added a small filter to the hose going to the pump. The new setup is shown in the picture on the right. At this point I had not replaced the hose from the foot pump to the faucet. |
 Gate Valves Replaced with Ball Valves |
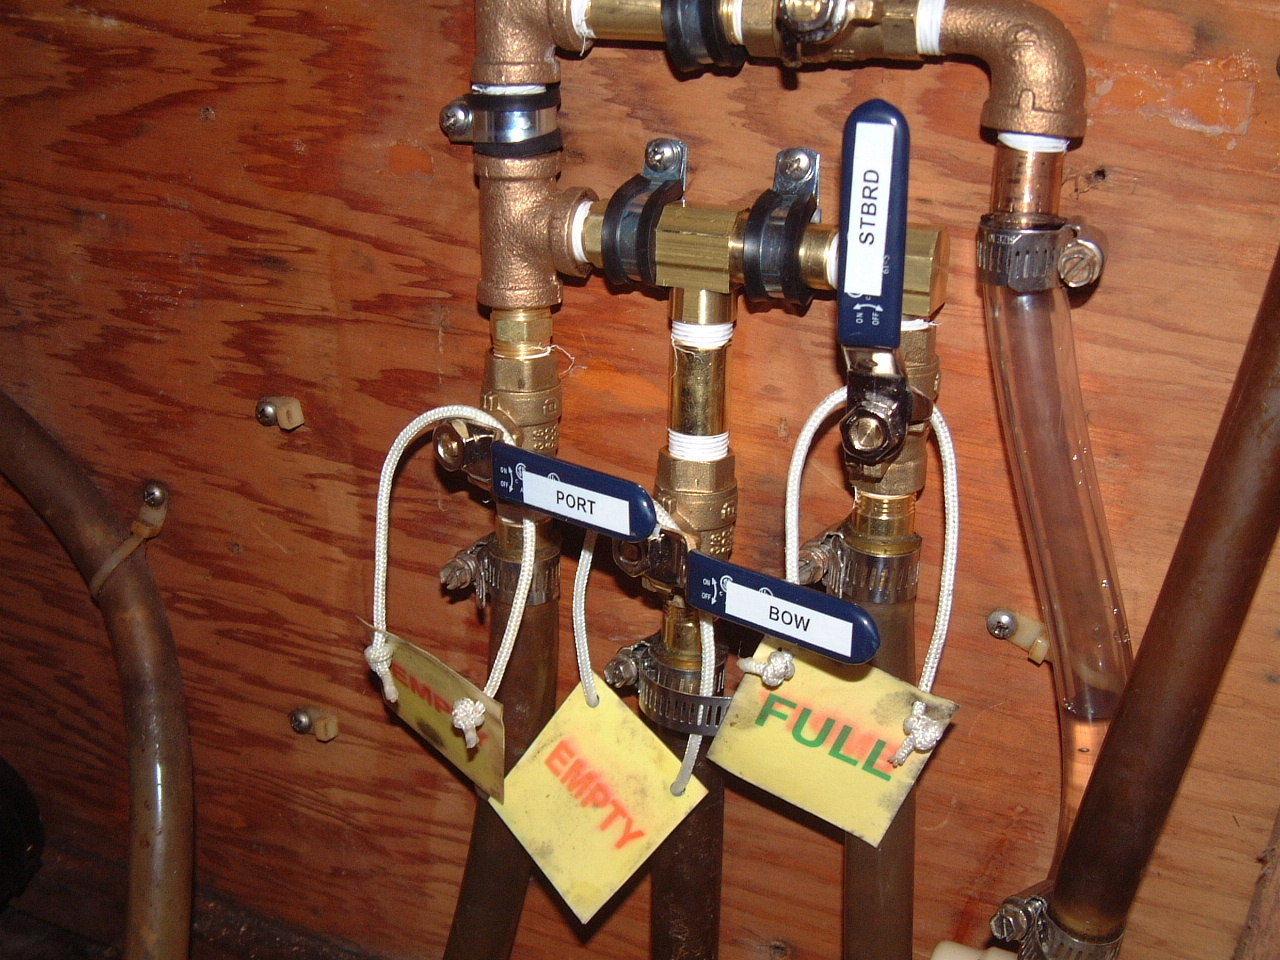 Starboard Tank Valve is Open, Others are Closed |
It
is very easy to look at the picture on the left and determine that only
the Starboard tank valve is open. I still need the status labels to
remind me which
tanks are full and which are empty.
I put this valve manifold together using brass fittings from Loews and some bronze fittings that were in my parts bin. |
| I wish I could say this new manifold solved all of my pressure water
problems, but it certainly didn't. I still had the problem of the
pump not drawing water from the Starboard tank, but now it had
difficulty drawing water from all the tanks. Clearly this manifold
was letting air into the system, now much worse than before. I removed this manifold, took it apart, and re-tightened all of the connections with additional Teflon tape. Still the problem persisted. I replaced the pressure pump with a new one of the same kind (Jabsco Sensor Max VSD) that I had purchased in Bermuda as a backup. With the new pump things improved somewhat. I was still getting air in the system, but once the pump finally pressurized the system it no longer "creeped" a few pump cycles every 15 - 30 seconds as the old pump did. Finally I removed the strainer from the manifold and the pump immediately pressurized the system. My air leak problem appeared to have been solved. I do need to put a strainer on the suction side of the system. There is a lot of debris in the water tanks and I suspect that may have contributed to the problems with the other two pumps. However, for now I have a working system and I'll worry about the strainer later. |
|
| This system continued to cause me problems and I eventually replaced the galley faucet when it started to leak. The saga continues here. | |
| Table Repair | |
|
While I had the table off the mast to install the
hatches in the cabin sole,
I needed to make a better repair of the crack in pedestal just aft of the
mast. This has been a recurring crack that I've attempted to repair
with adhesives on several occasions. None of these attempts have
lasted more than a few years before this piece of wood started to separate
again. The source of the problem is two-fold. The original crack appears to have been caused by one of the screws that holds an aluminum bracket to the underside of the table pedestals, which mates to a bracket on the mast and provides the forward support for the table. If the crack had not formed at this screw hole, the bracket might have provided enough support to keep the crack from widening. A second problem is that the table leaves produce a force on this piece of wood that will separate any crack. |
|
 Crack in Table Pedestal. View From Below |
So for this repair to be permanent I need change the position of the brack
screws to avoid the crack and then provide some re-inforcement to this
section of the table to resist the force from the leaves. In the picture on the left I have started the repair by once more gluing the crack closed. This will not be sufficient to keep the crack from separating again. |
| My
first attempt to fix this crack was to install a threaded rod through
the pedestal. I hope the rod will provide the necessary brace to
keep the crack from expanding. Once I have the table back on the mast I
will tighten this rod a bit more. I also drilled two holes in the bracket for screws to replace the one that was in the crack. |
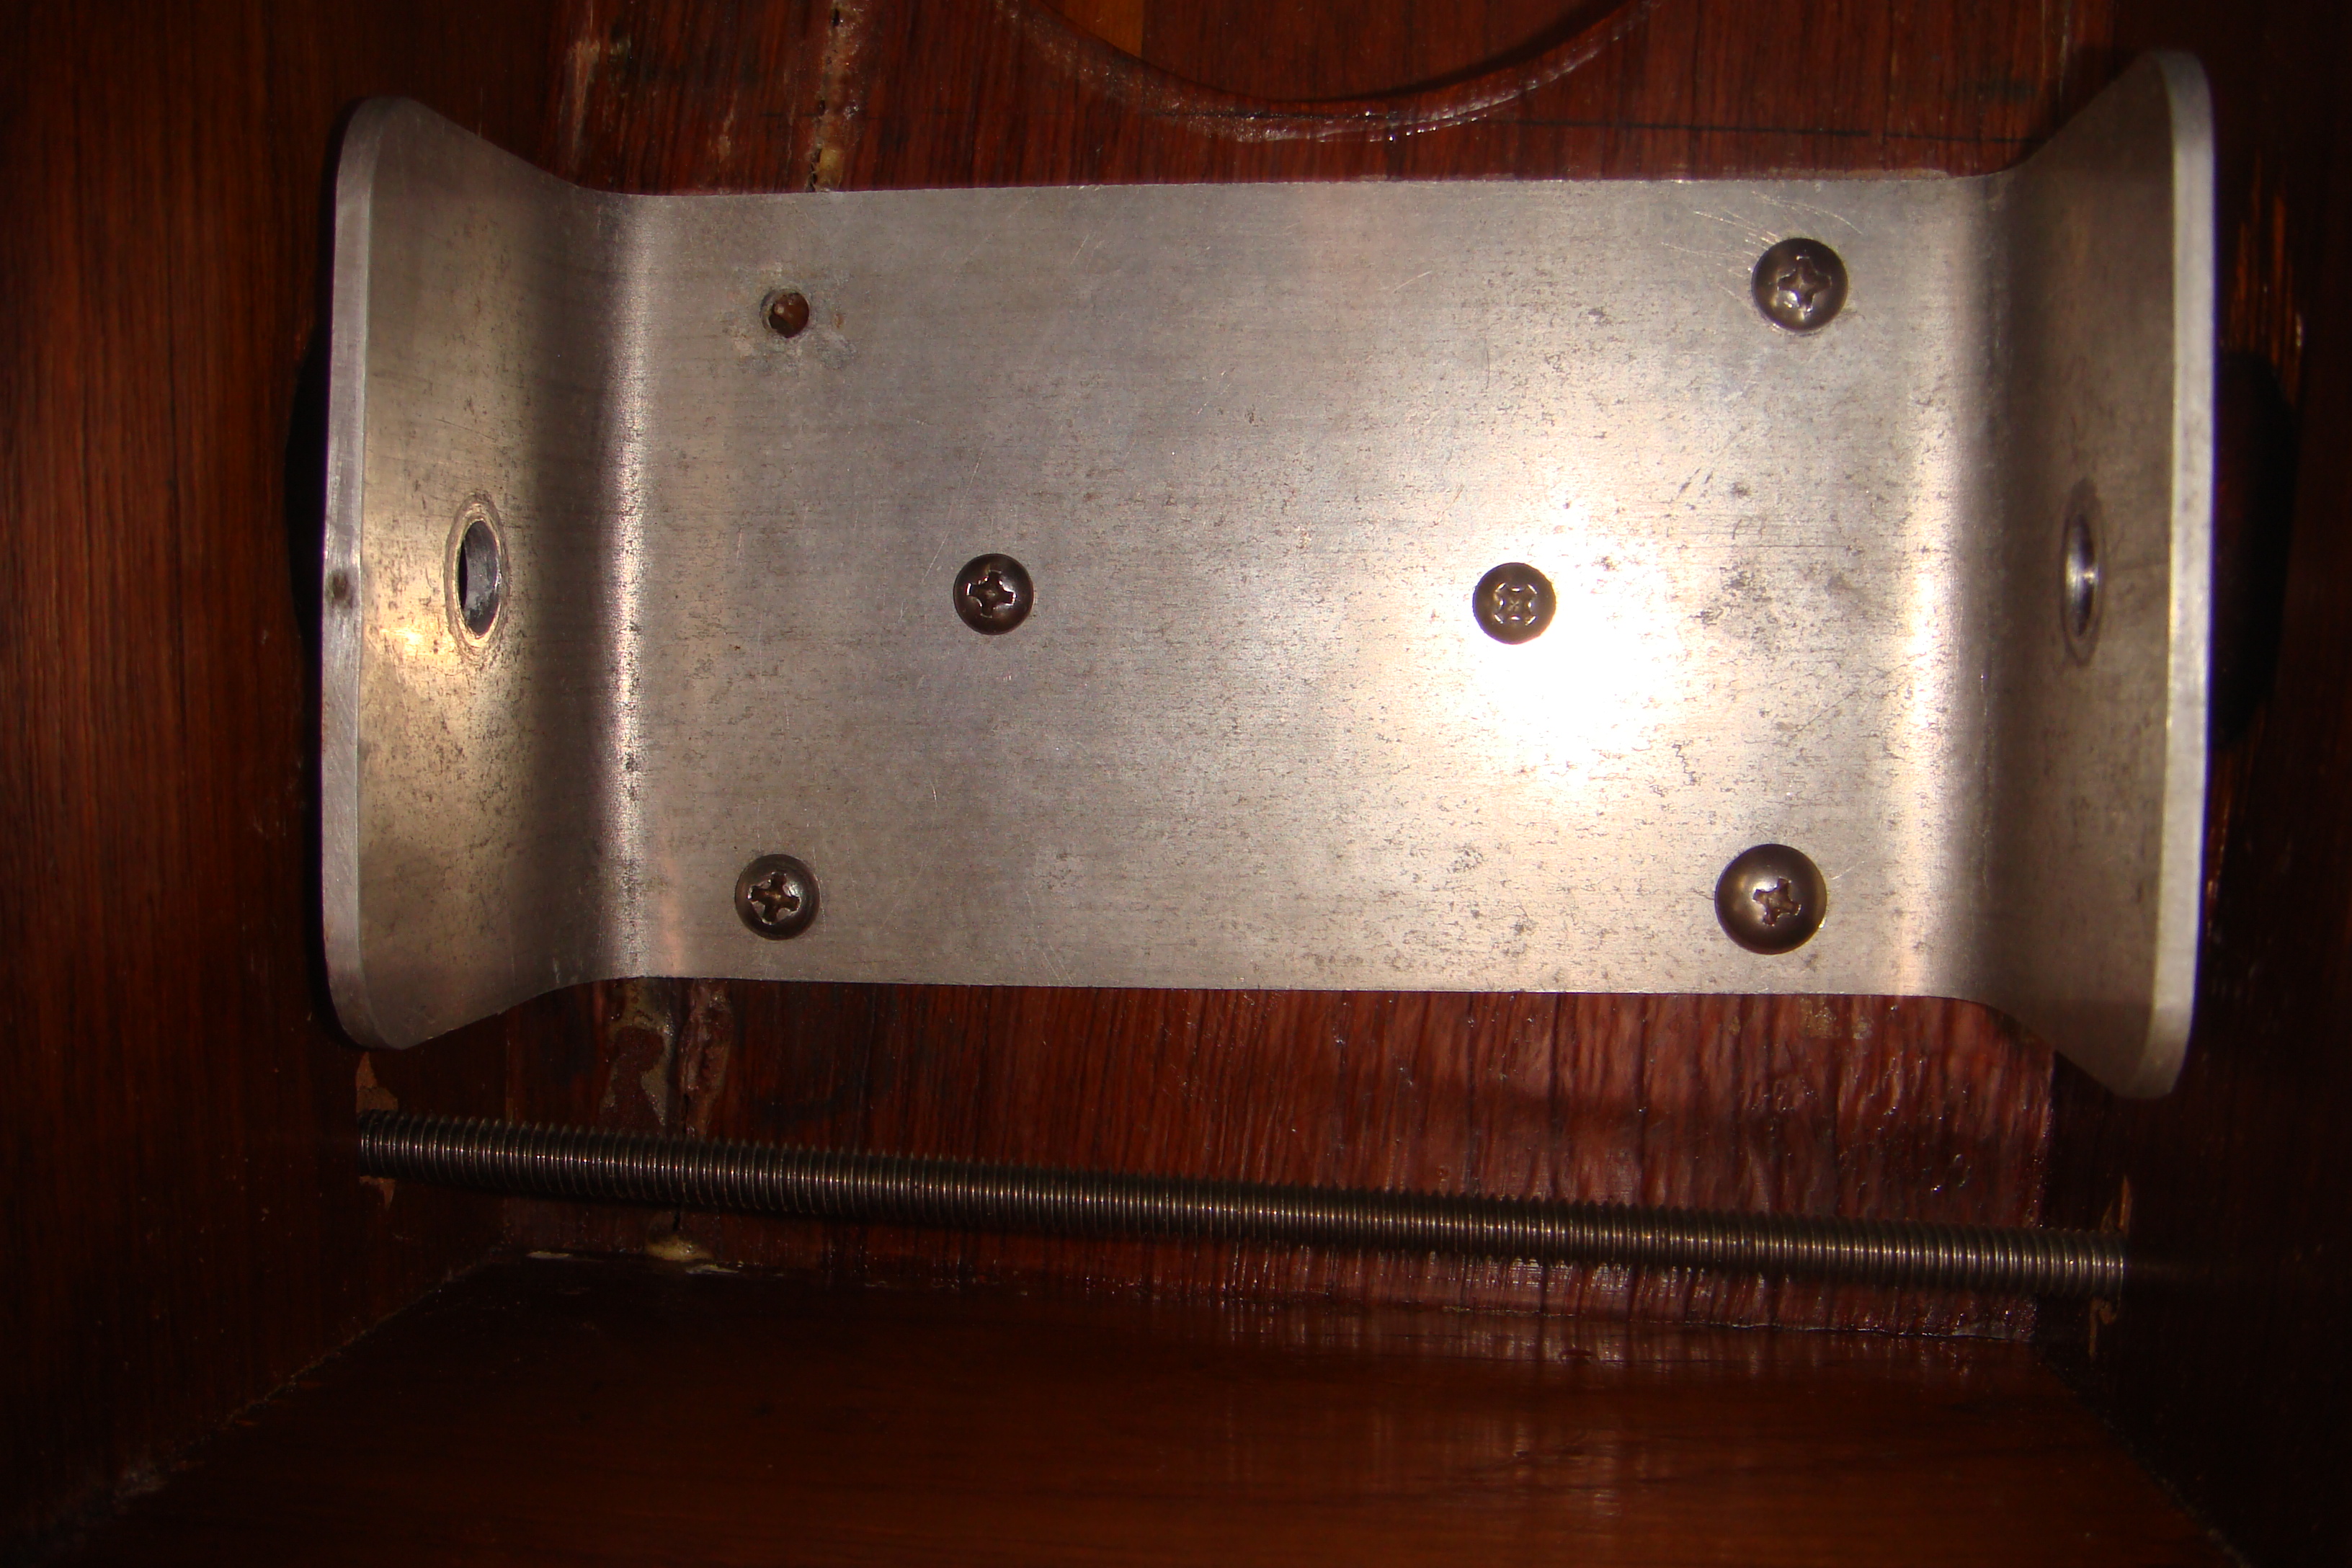 Threaded Rod Through Pedestal |