Sailing Vessel (SV) Sarah
Sarah has a new owner as of 7/26/2021. There will be no more updates to these SV Sarah pages
Sarah has a new owner as of 7/26/2021. There will be no more updates to these SV Sarah pages
| Rub Rail Damage and Repair | |
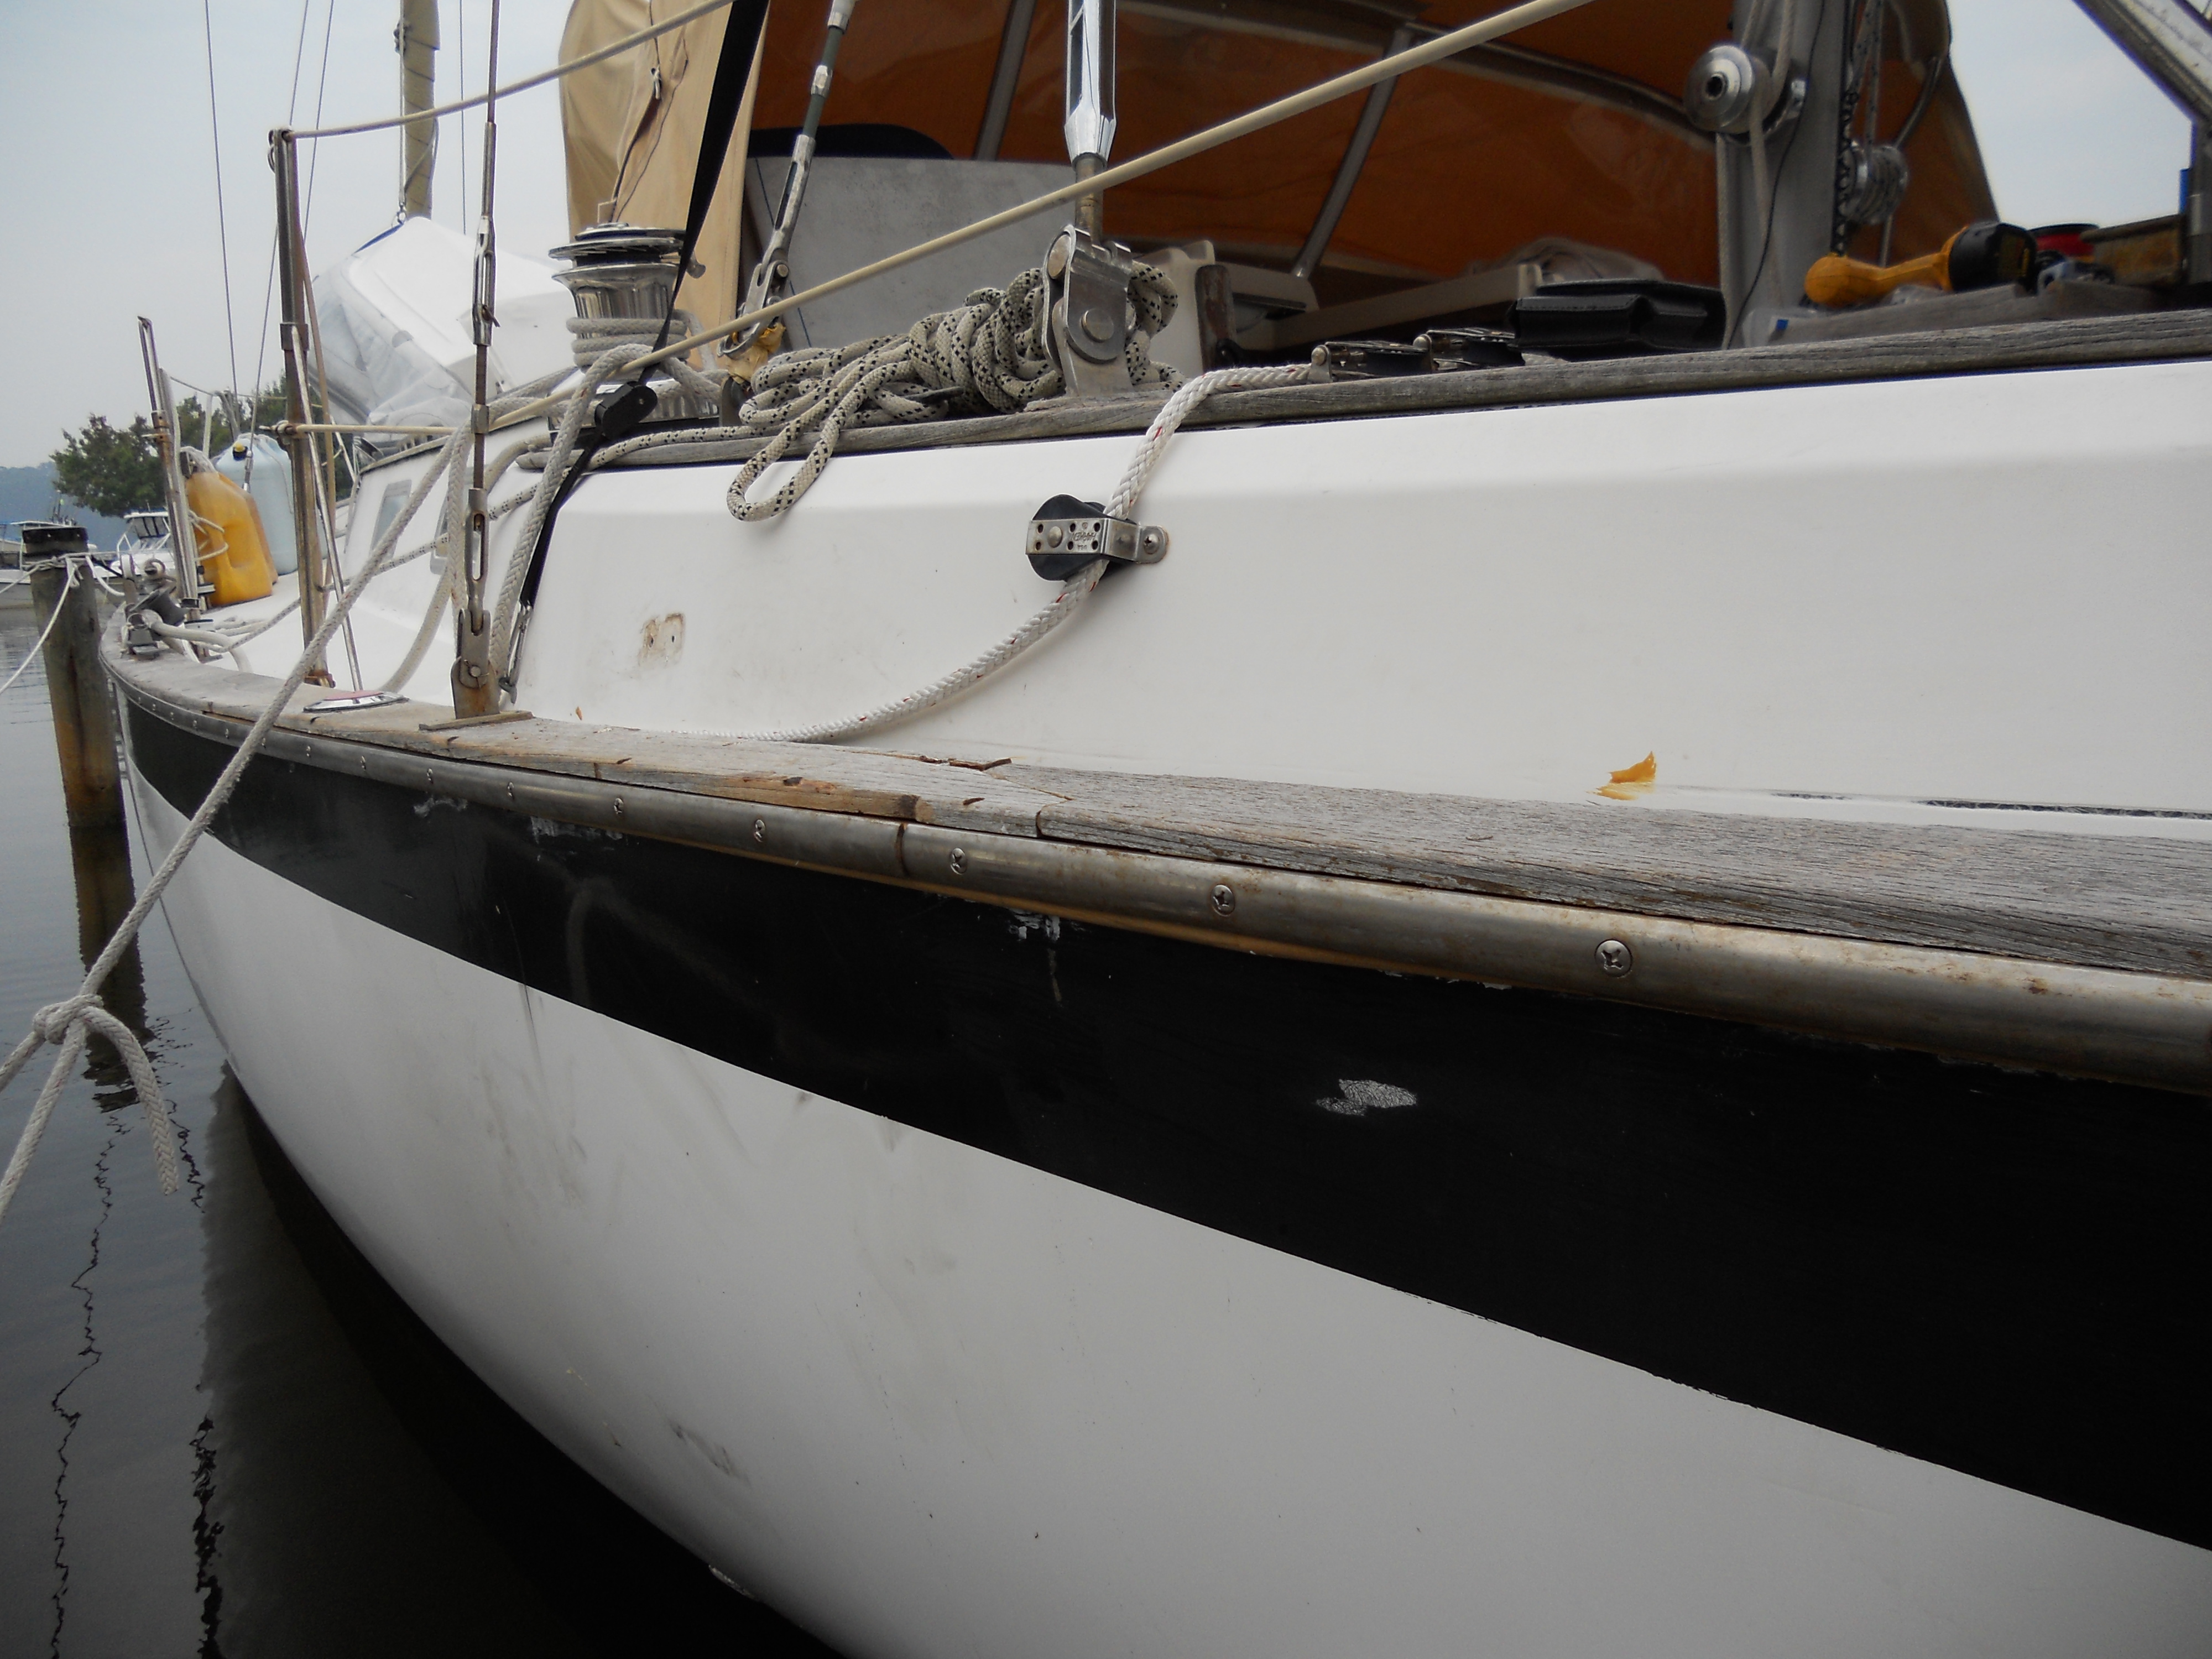
| In the evening of July 19, 2011, while Sarah was
berthed at a dock owned by friends just off the Patuxent River, a
line of thunderstorms were approaching. On the NOAA Radar
Webpage the thunderstorms did not look severe, just some heavy
shower cells. The showers arrived around 1830 with
moderate wind and heavy rain for about 1/2 hour. As soon
as the rain started to taper off I got some food together and
was just waiting for the rain to stop so I could fire up
the grill and begin cooking. Then I heard more thunder and saw more lightning to the north. I re-checked the NOAA Radar and saw that a very intense cell had blown up almost overhead. Then all hell broke loose. I watched the wind speed increase to over 50 kts and stay there with gusts over 60. The rain was so heavy I couldn't see past the cockpit through the Perspex drop board. Because of the strong wind and heavy rain most of my hatches started dripping. I could see a flashing light in the yard of a neighbor of my friends. I assumed that was an electrical cable that had become disconnected and was arcing. In the strong winds I could hear and feel that Sarah was striking the piling at the end of the finger pier for the berth. I had returned to the berth a few hours earlier and it appeared I had not properly set up the dock lines to prevent contact with the piling. I had not anticipated the amount of stretch 60 kts of wind would put in the starboard stern line. |
|
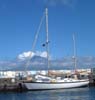
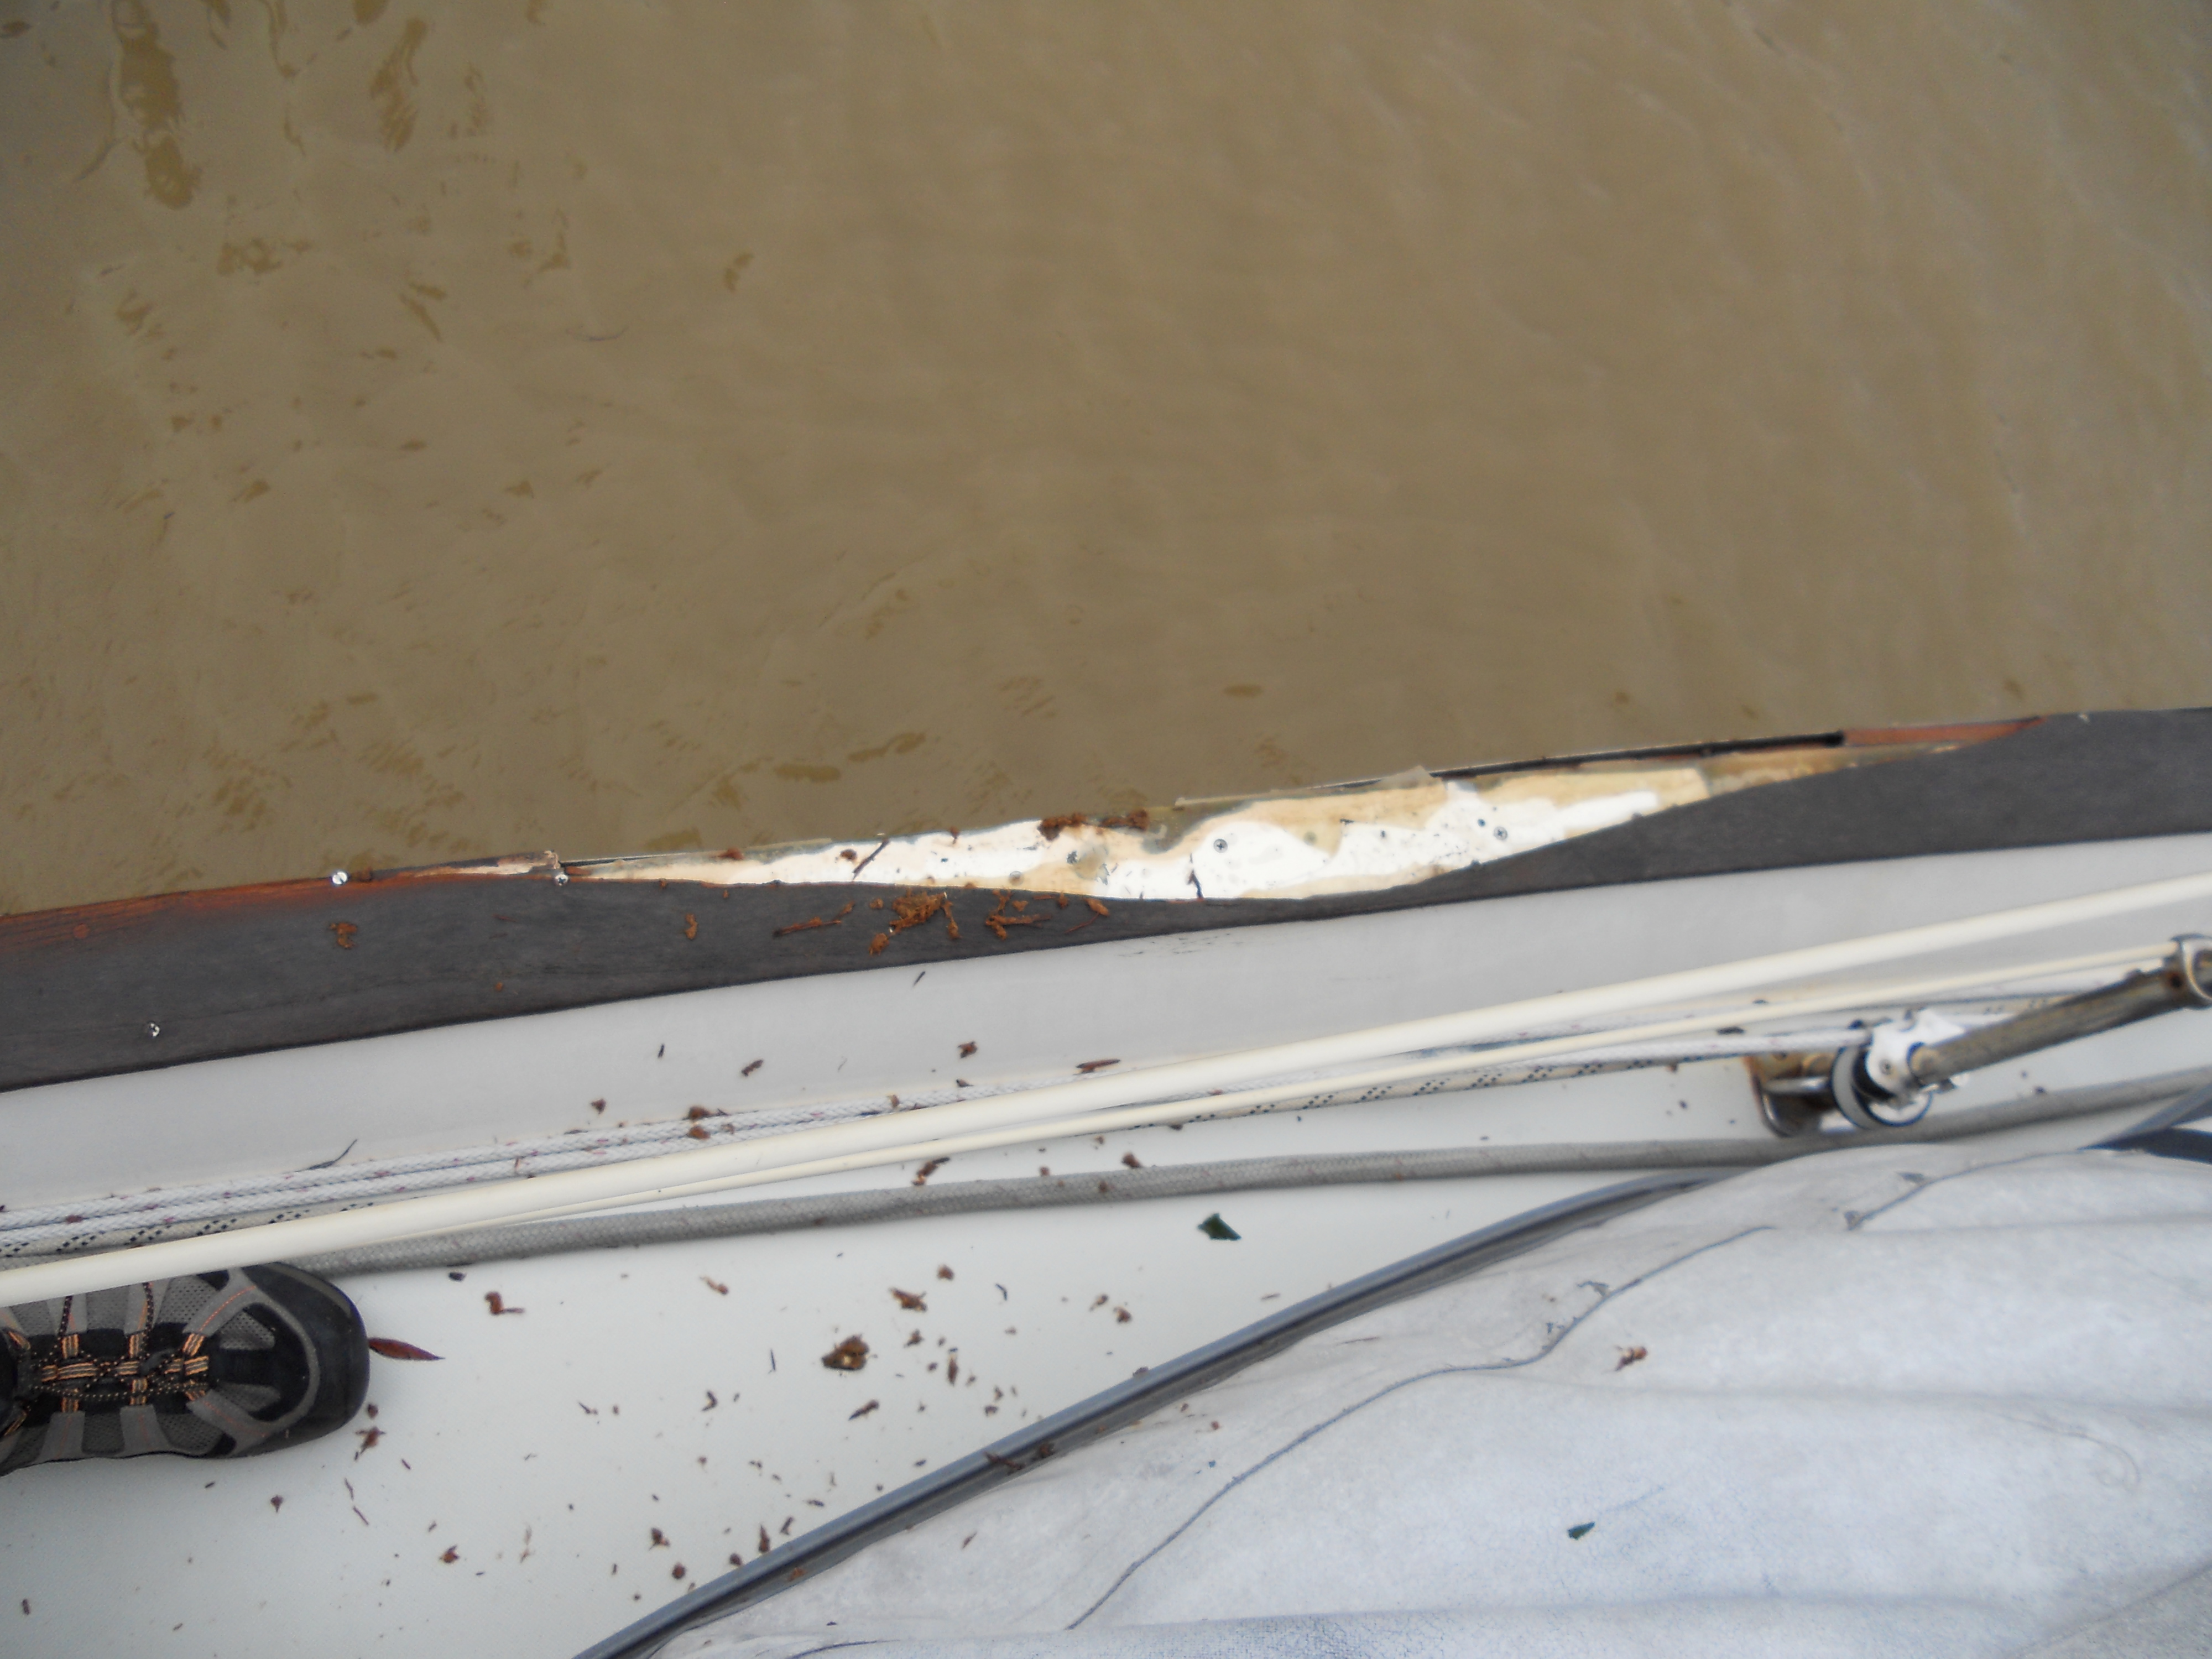
 The Damaged Rub Rail From Above |
The
next morning I started to get off the boat to check on my
friends' property (no damage just small branches down and a lot
of debris), but the first thing I noticed was that the cap rail
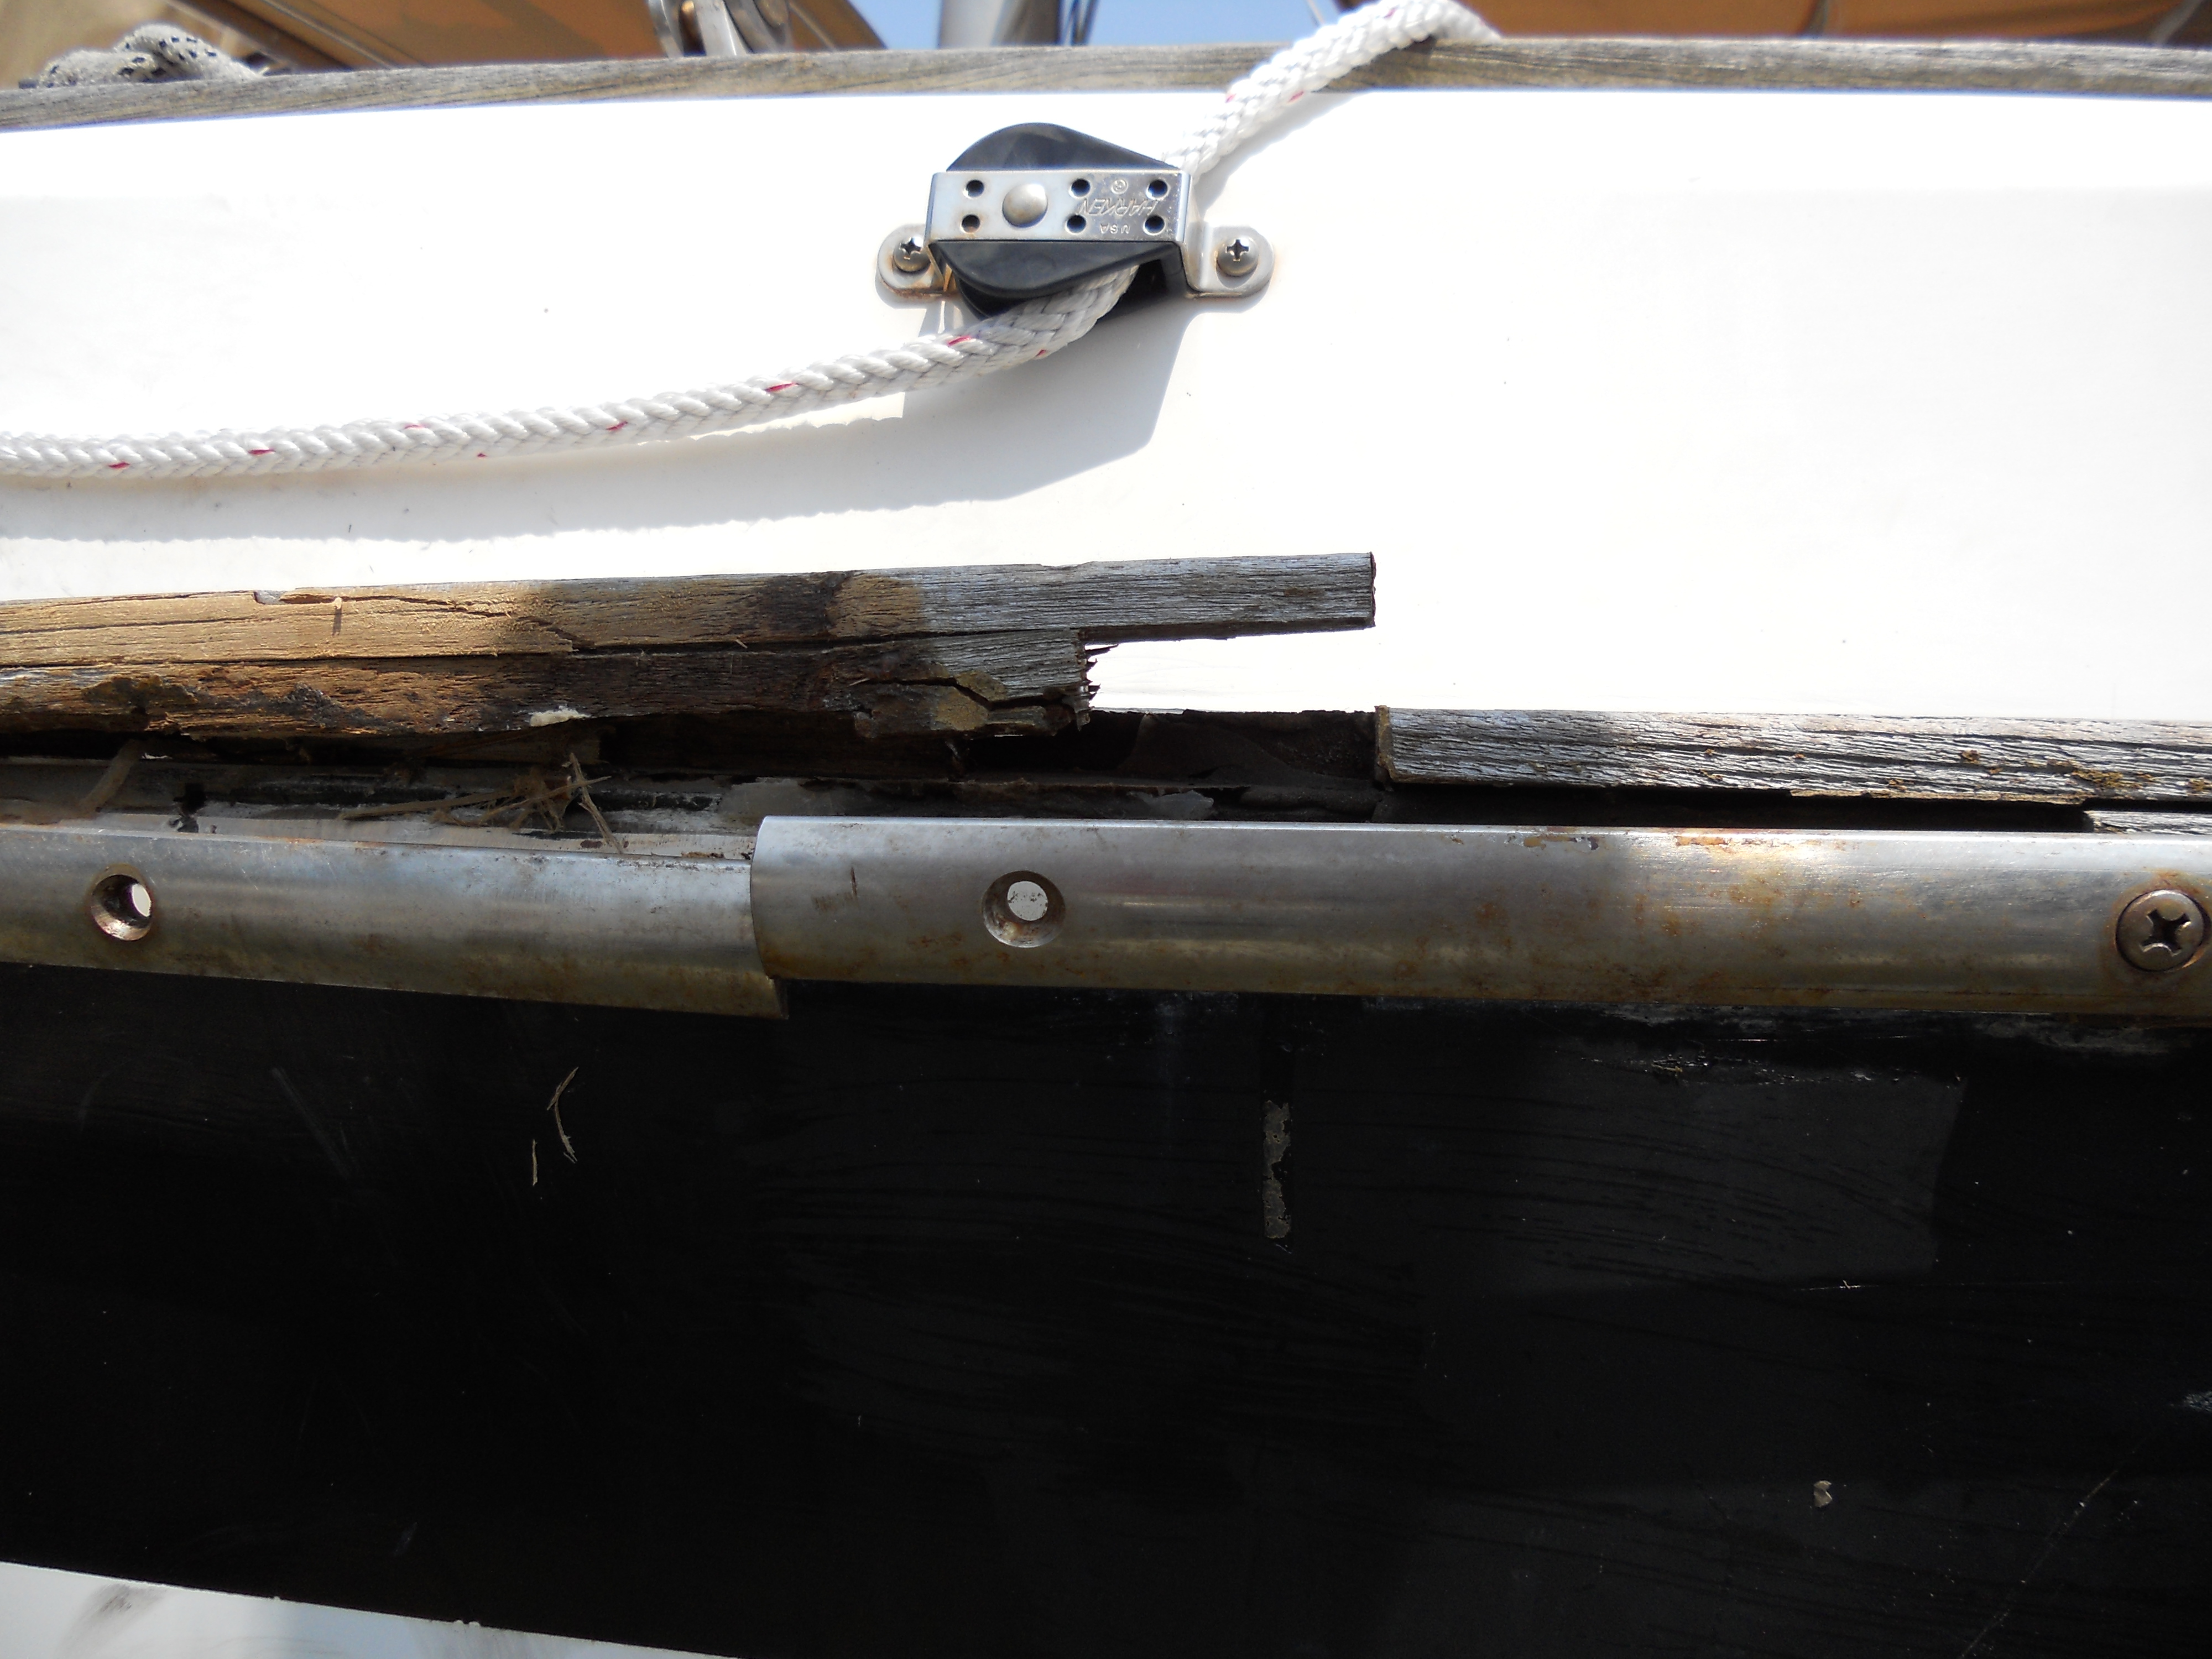
on the port side of the cockpit had been ripped up. In the picture on the left the scarf joint on the teak cap rail has been separated. It appears that the cap rail was pressed against the piling on the finger pier and the pounding from the wind and seas cause a portion of the cap to tear loose. |
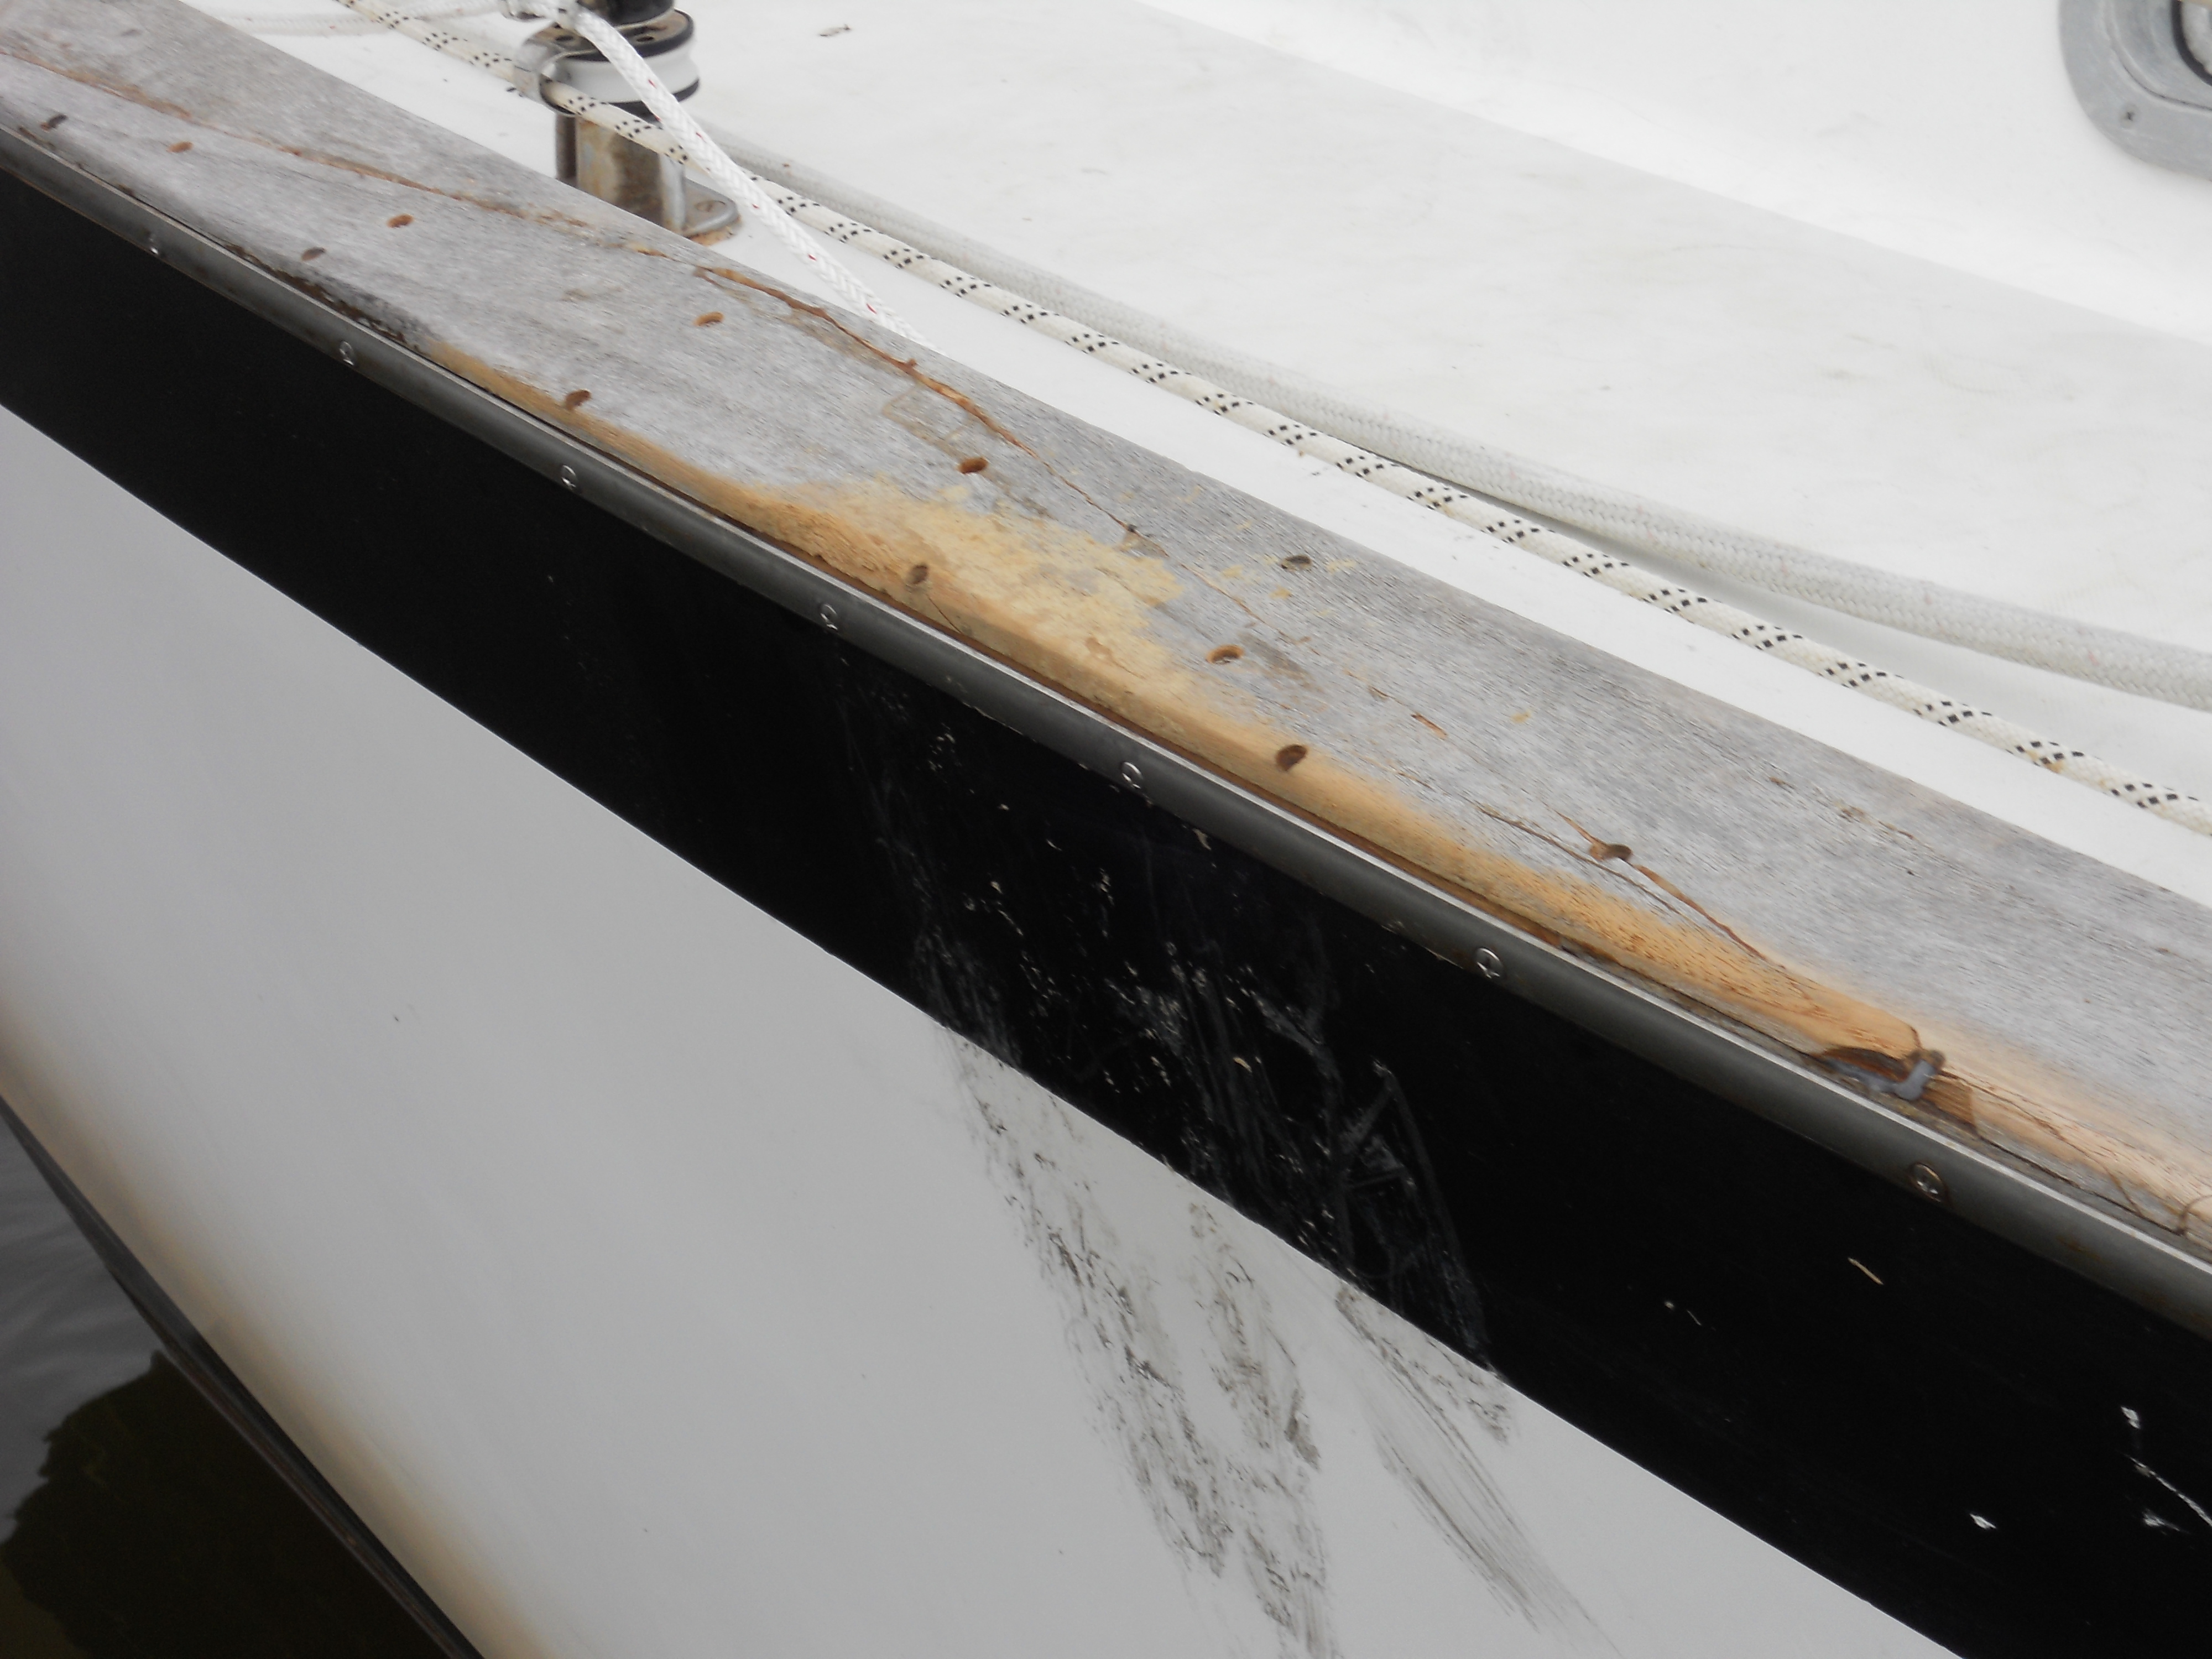
| In the picture on the right you can see the separation of the teak cap on the rail at the scarf joint. The cap is held to the rail with wood screws which were ripped through the wood. |
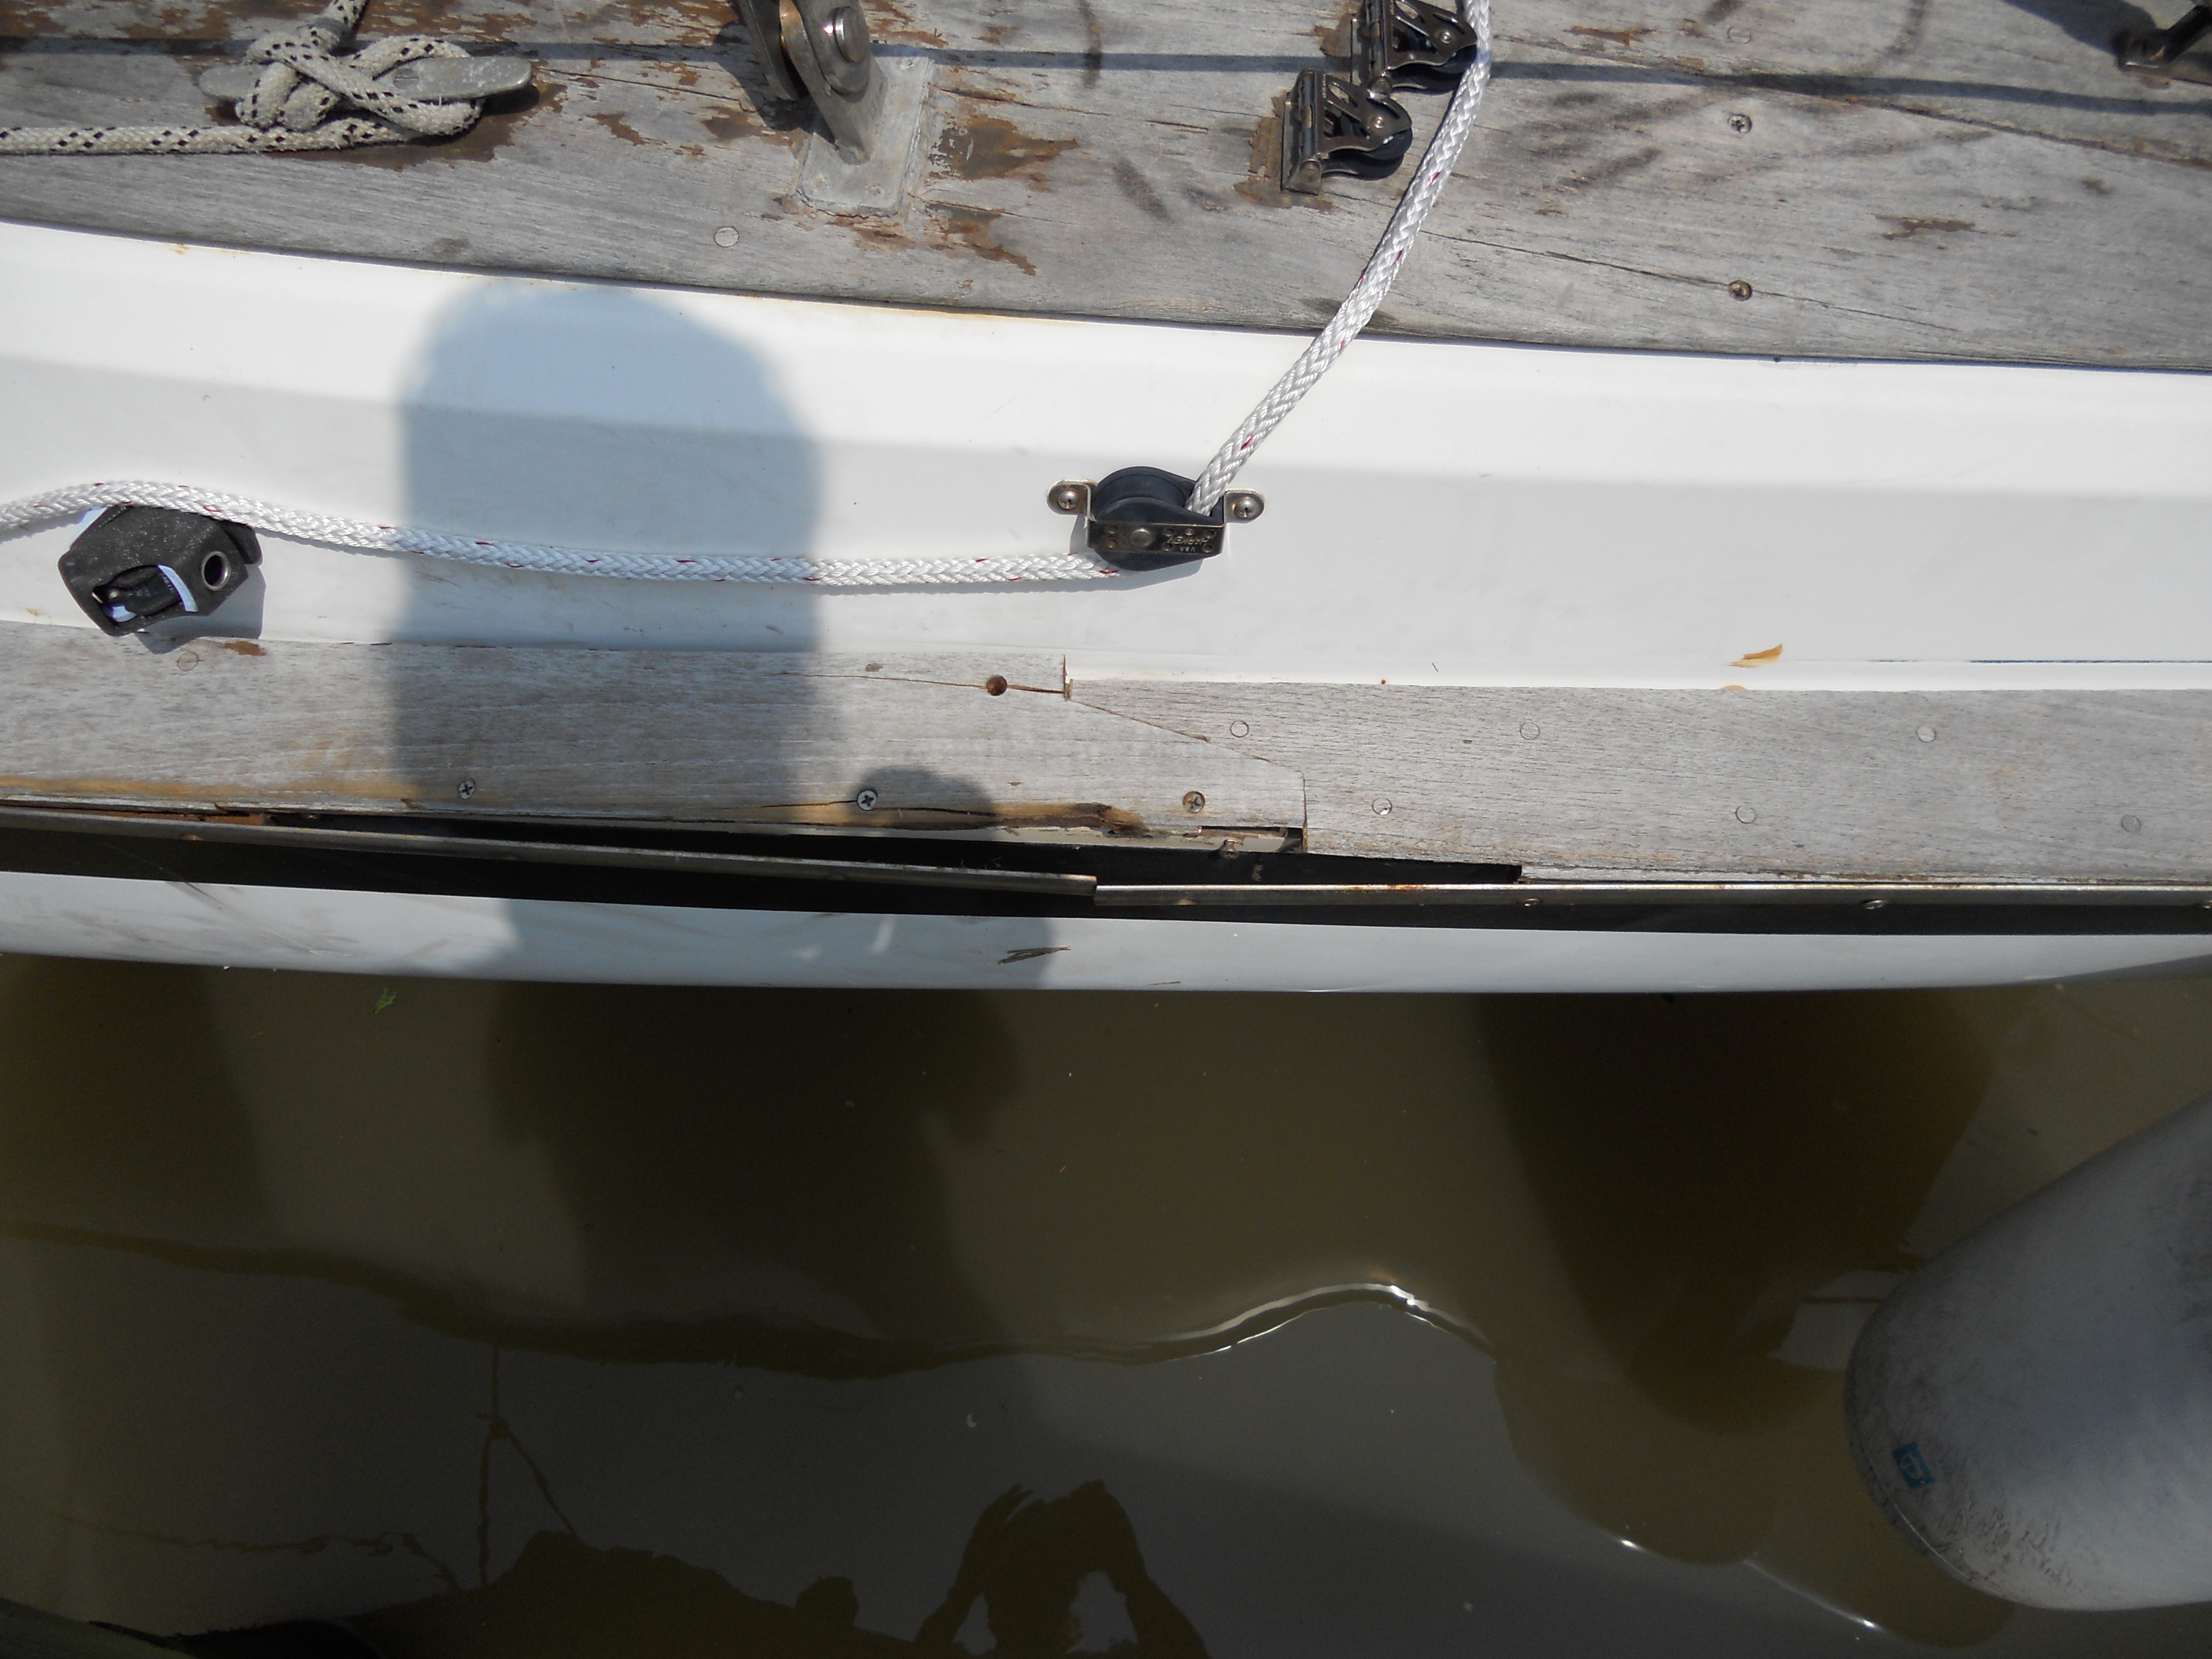
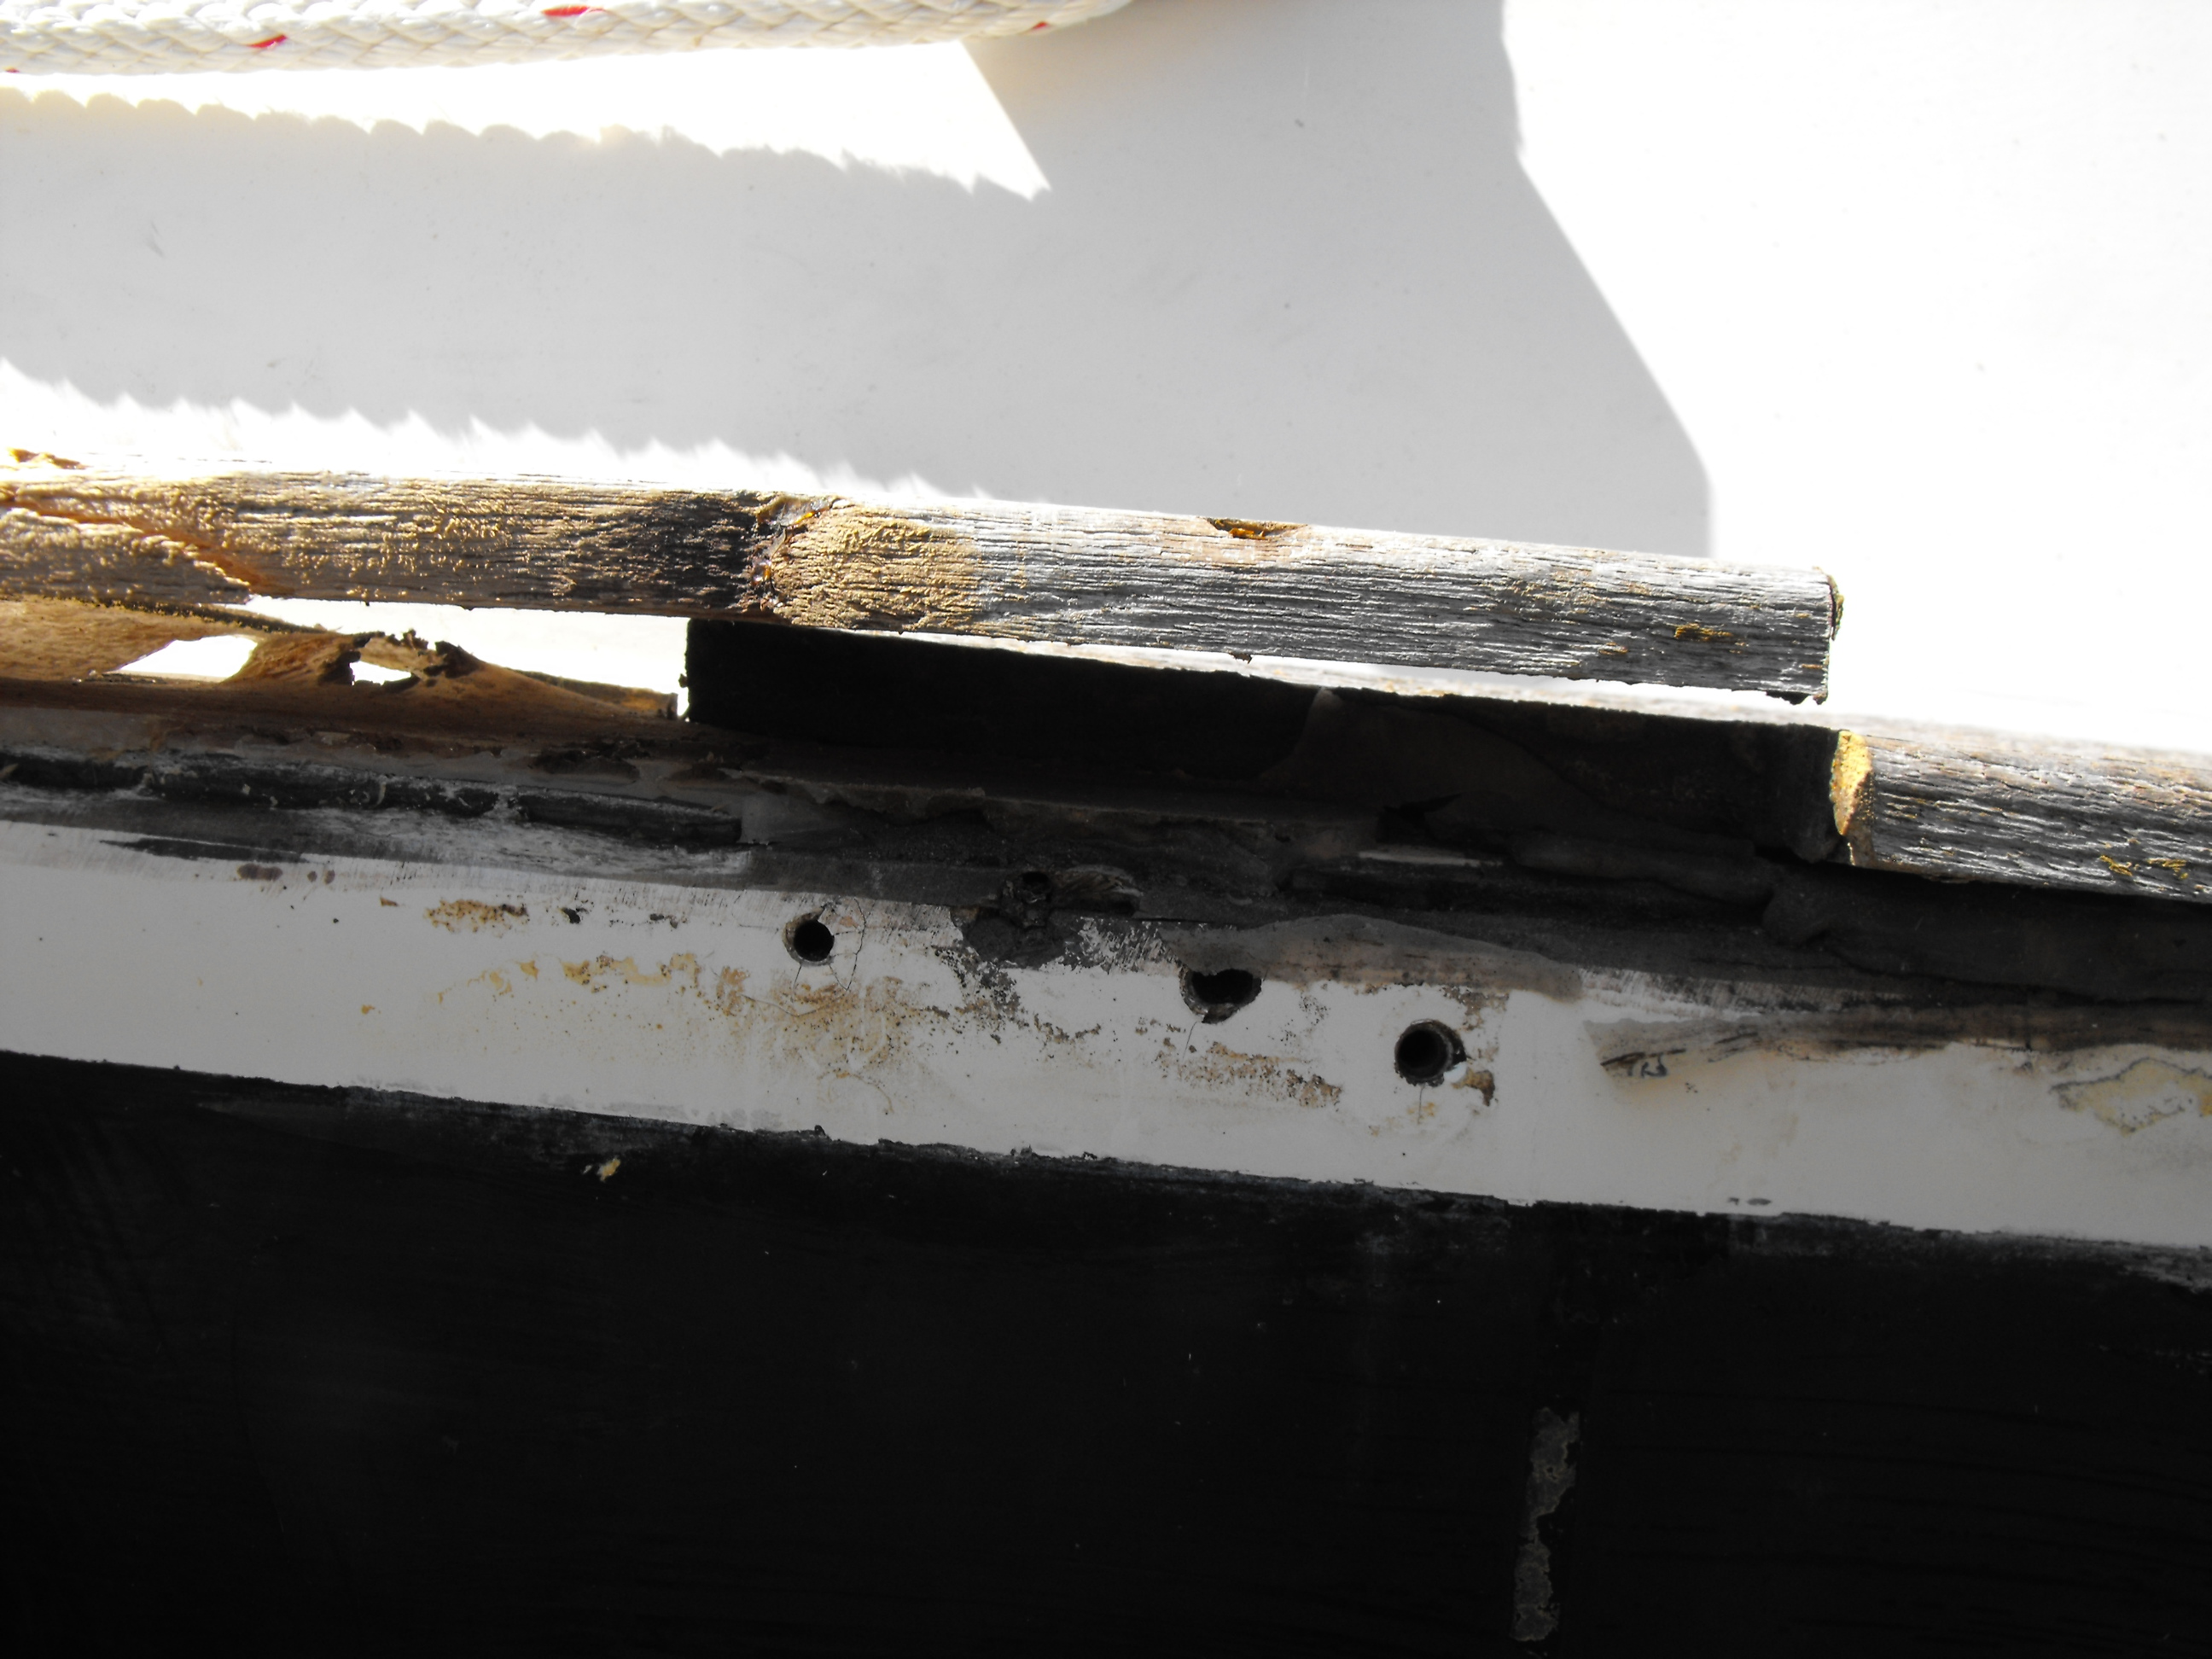
 Rub Rail Damage From the Side |
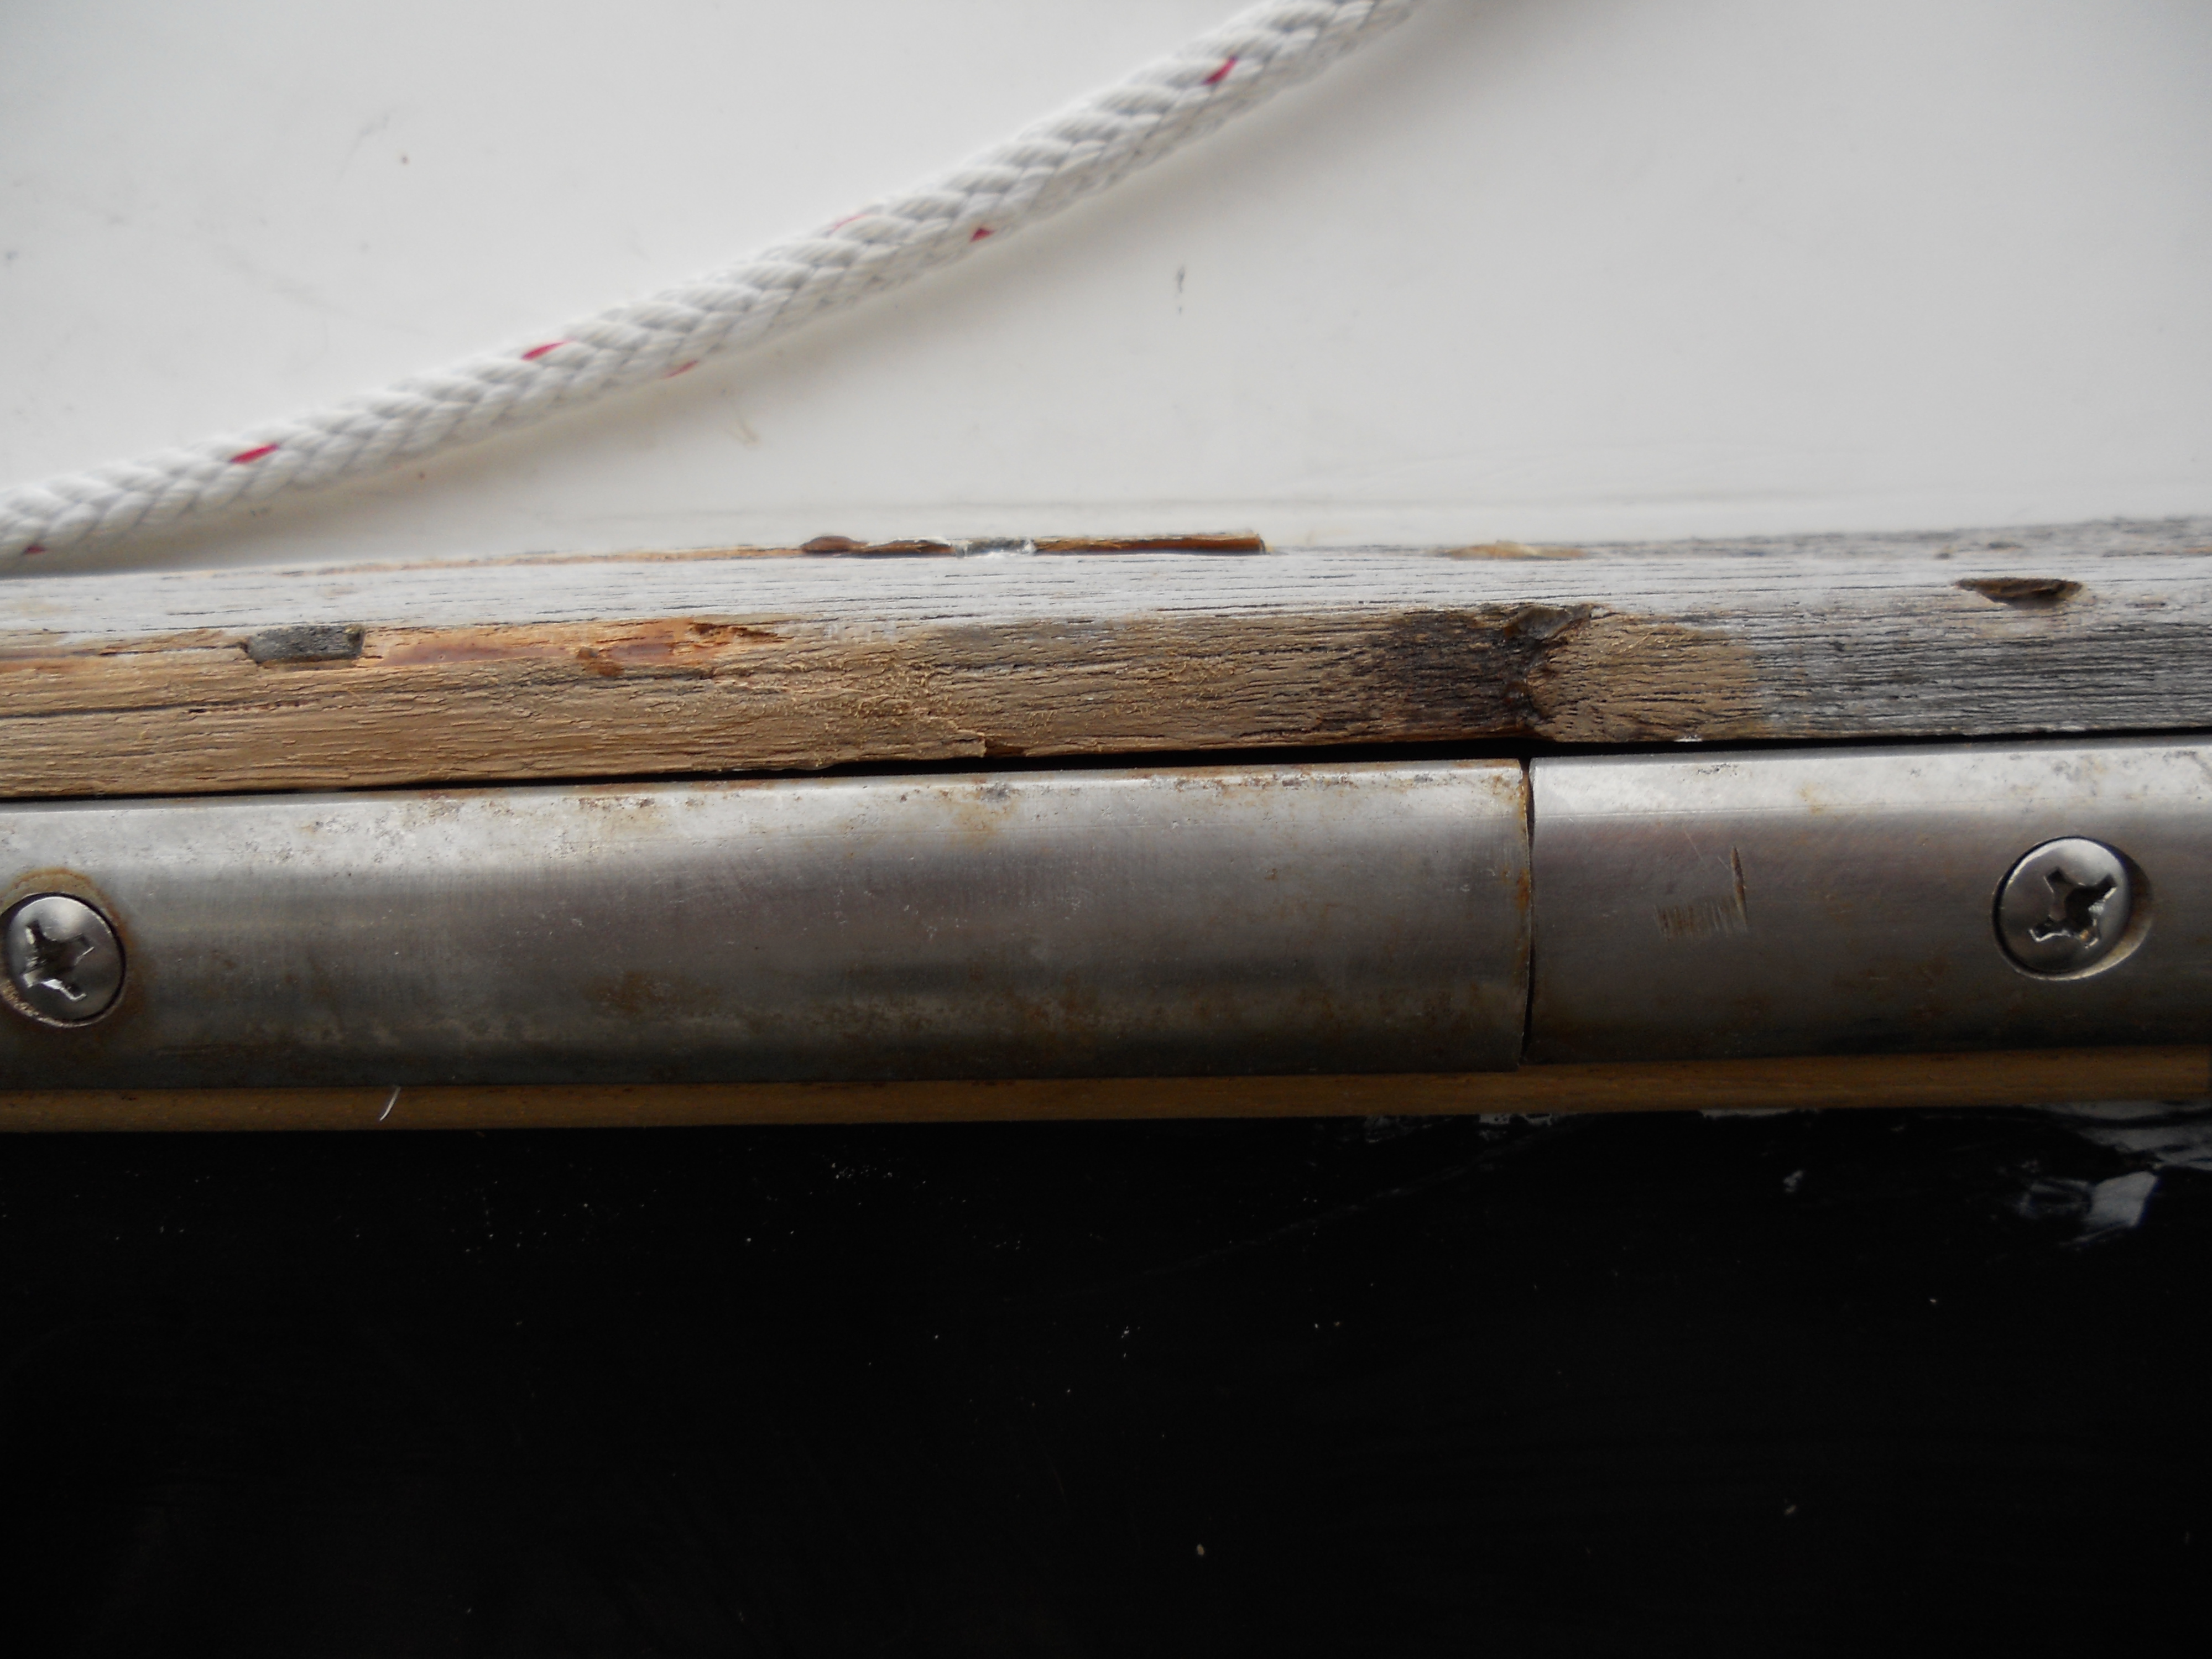
 Close Up of the Damage |
This is a close up of the damage. Fortunately the Teak cap is largely intact and can be saved. There is a 1-1/8"x1/2" strip of Teak that was screwed into the hull below the cap and the SS rub rail was screwed into that strip. This Teak backing strip took most of the damage. Several years ago I had removed and re-attached the SS guard rail and there had already been some damage to this portion of the Teak strip. This storm was just the coup de gras for the strip. |
| So I need to replace about 3' of the Teak strip, then rebed the cap. Looks like Pearson just used Silicone sealant under the cap. Glad they did. If they'd used 5200 or similar adhesive the cap would likely be in pieces and have to be replaced - something beyond my limited Boat Wright skills. | |
| The Repair, Step 1: Remove the Damage Rail | |
| The first step was to remove the SS rub rail and the damaged 1-1/8"x1/2" strip of teak under it. The picture on the right shows the rub rail and teak strip removed. |
 The Rail and a Portion of the Teak Strip Has Been Removed |
 The Separated Scarf Joint |
On the left is a close up of the area where the scarf joint in the cap rail separated. |
| All of the holes in the hull where the teak strip and the rub rail were secured with fasteners will have to be filled with MarineTex, before I replace the strip. Fortunately this strip is nearly a standard size stocked by West Marine and I did not have to go to a wood working shop to a have a replacement milled from a larger piece of Teak. |
 Close Up of the Area Covered by the Teak Strip |
| Repair, Step 2: Repair the Cap Rail | |
 Gluing the Cracks in the Cap Rail |
The
Teak cap rail, which covers the hull-deck joint was
cracked when the scarf joint separated. Before I can
re-attach the cap rail to the hull I needed to glue those cracks
back together. To properly mend those cracks I would have
to remove this section of cap rail so the cracks could be
clamped while the glue is setting. That would have
involved removing a lot more hardware than just the rail cap
(e.g., chain plates). Instead I elected to clamp it in place using cable ties. |
| Since
the cap rail was lifted off the deck it was easy to run a bunch
of cable ties around the rail. This isn't as good as a bar
or c-clamp, but I think it will work. Before I re-attach the rail to the deck I will need to fill the old screw holes, as the screw heads tore through those holes. I will drill and counter sink new holes for the screws. |
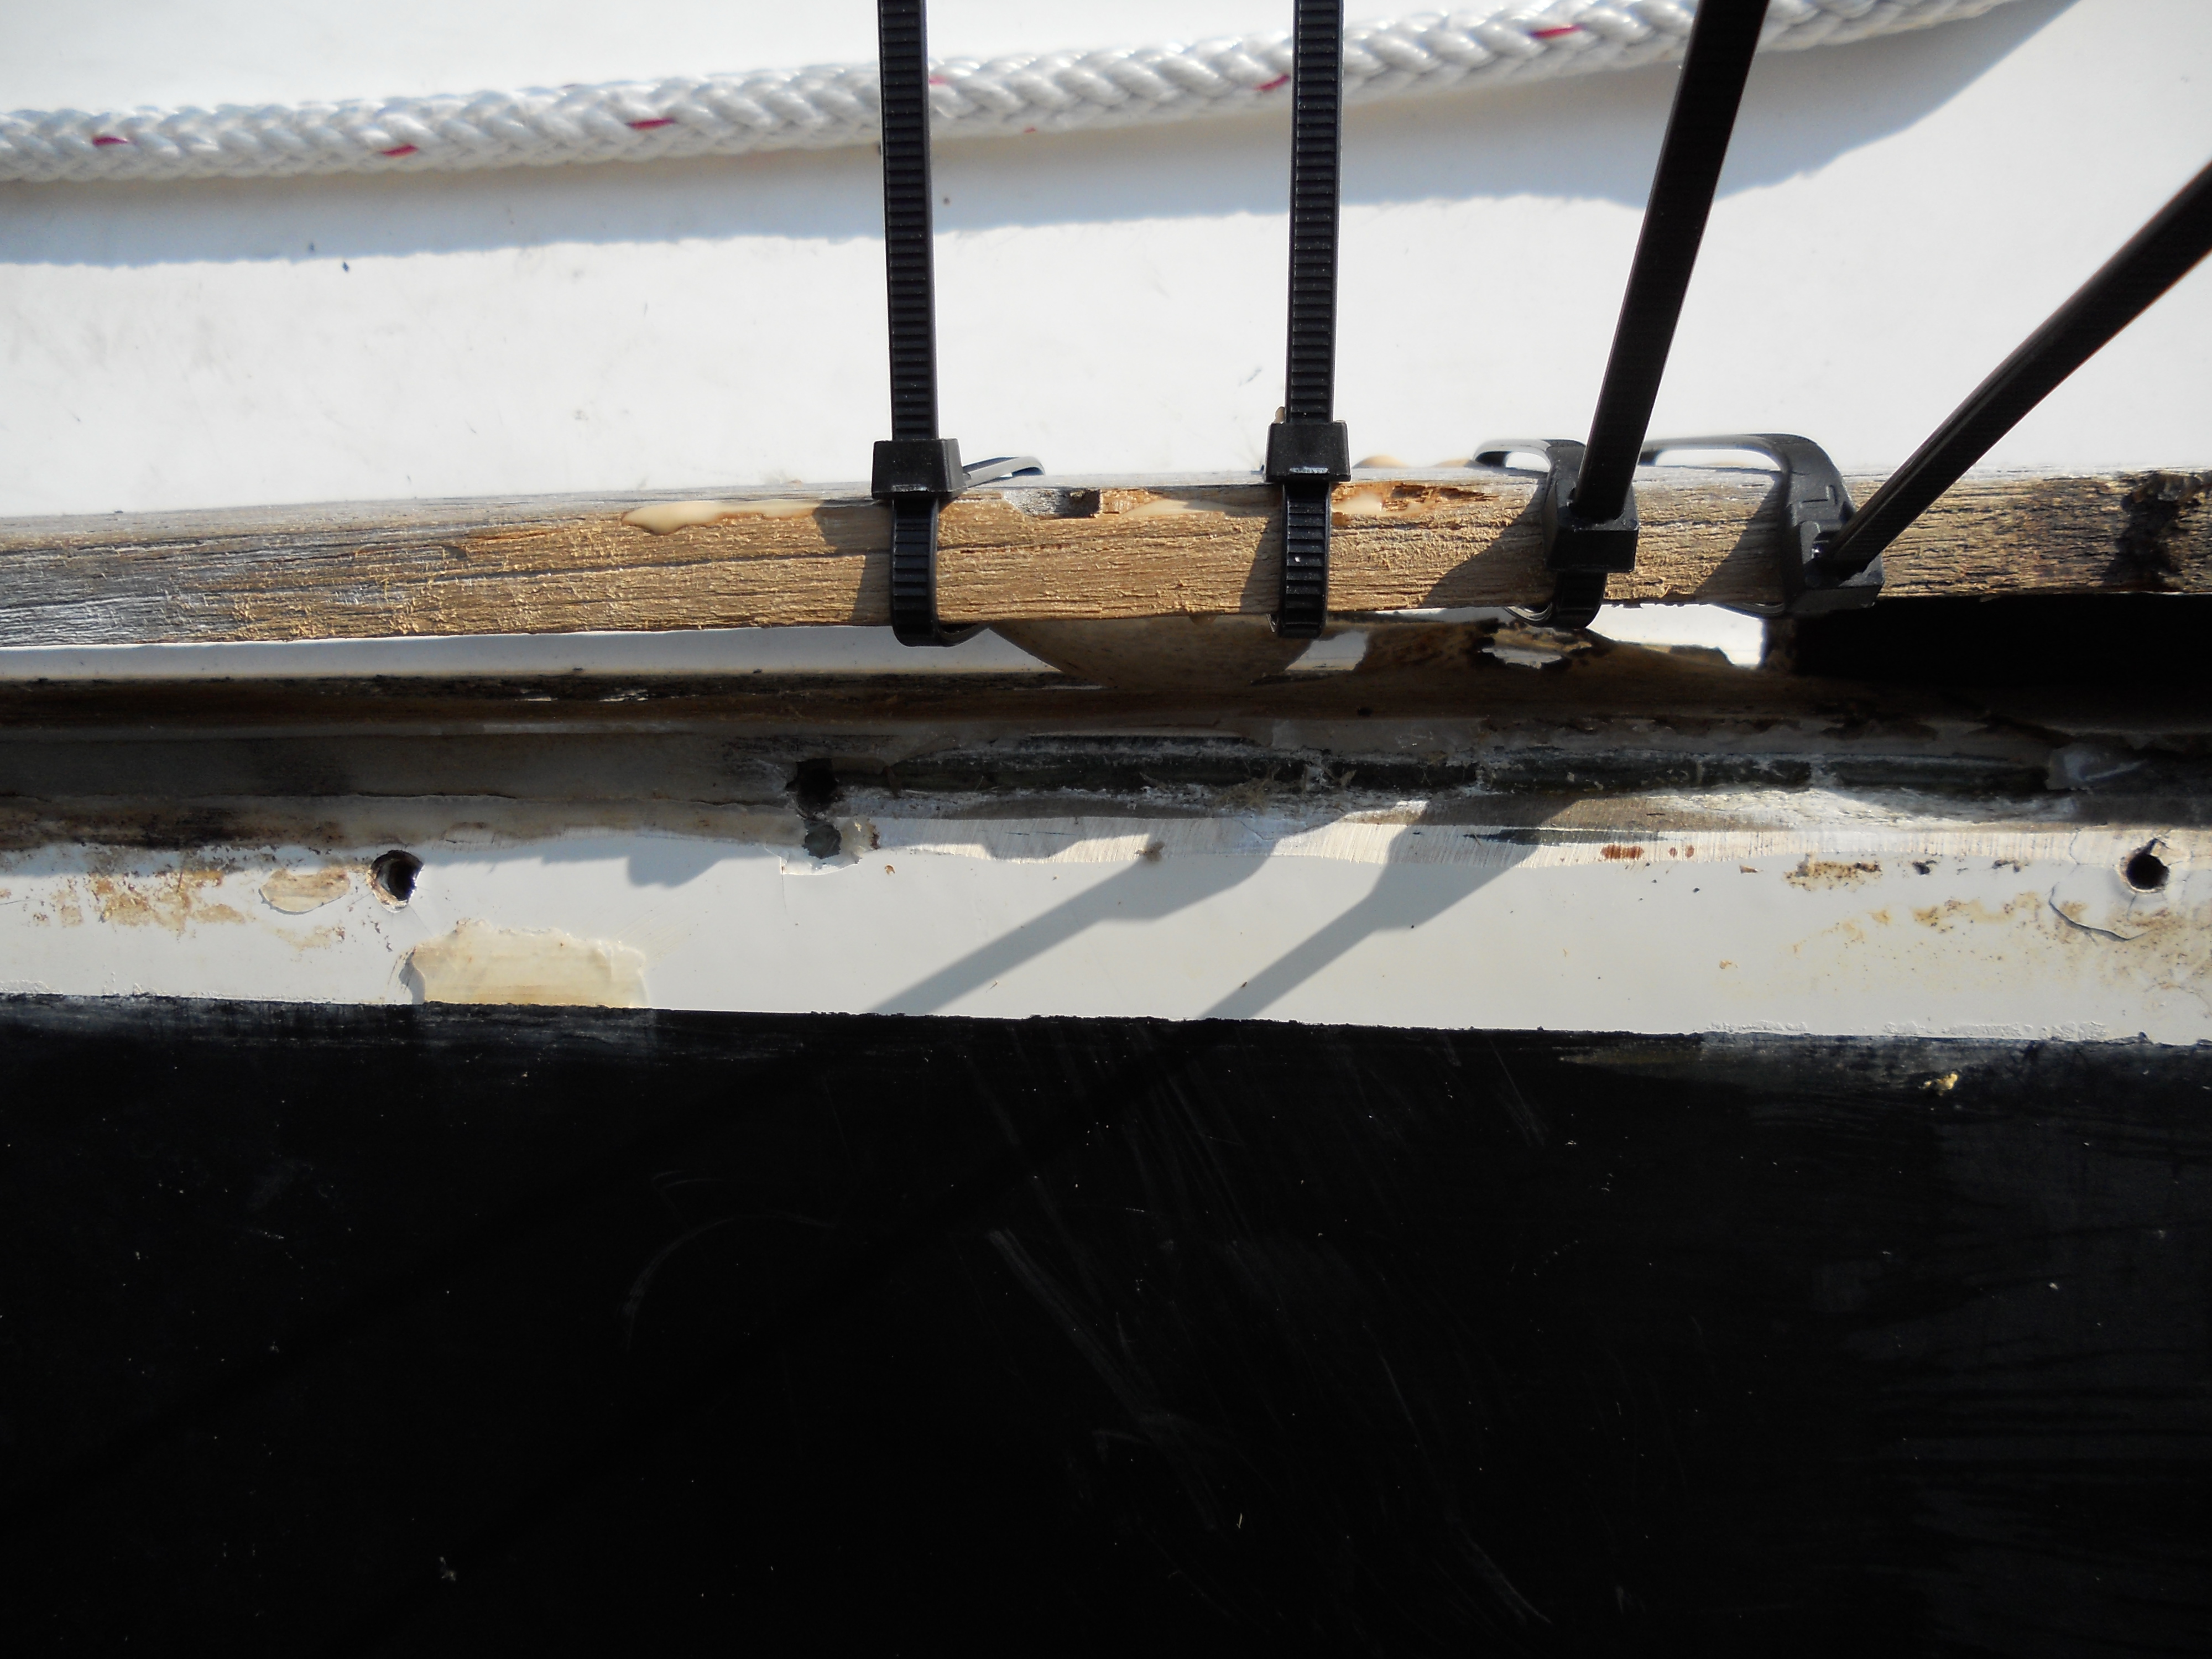 Clamping the Cap Rail with Cable Ties |
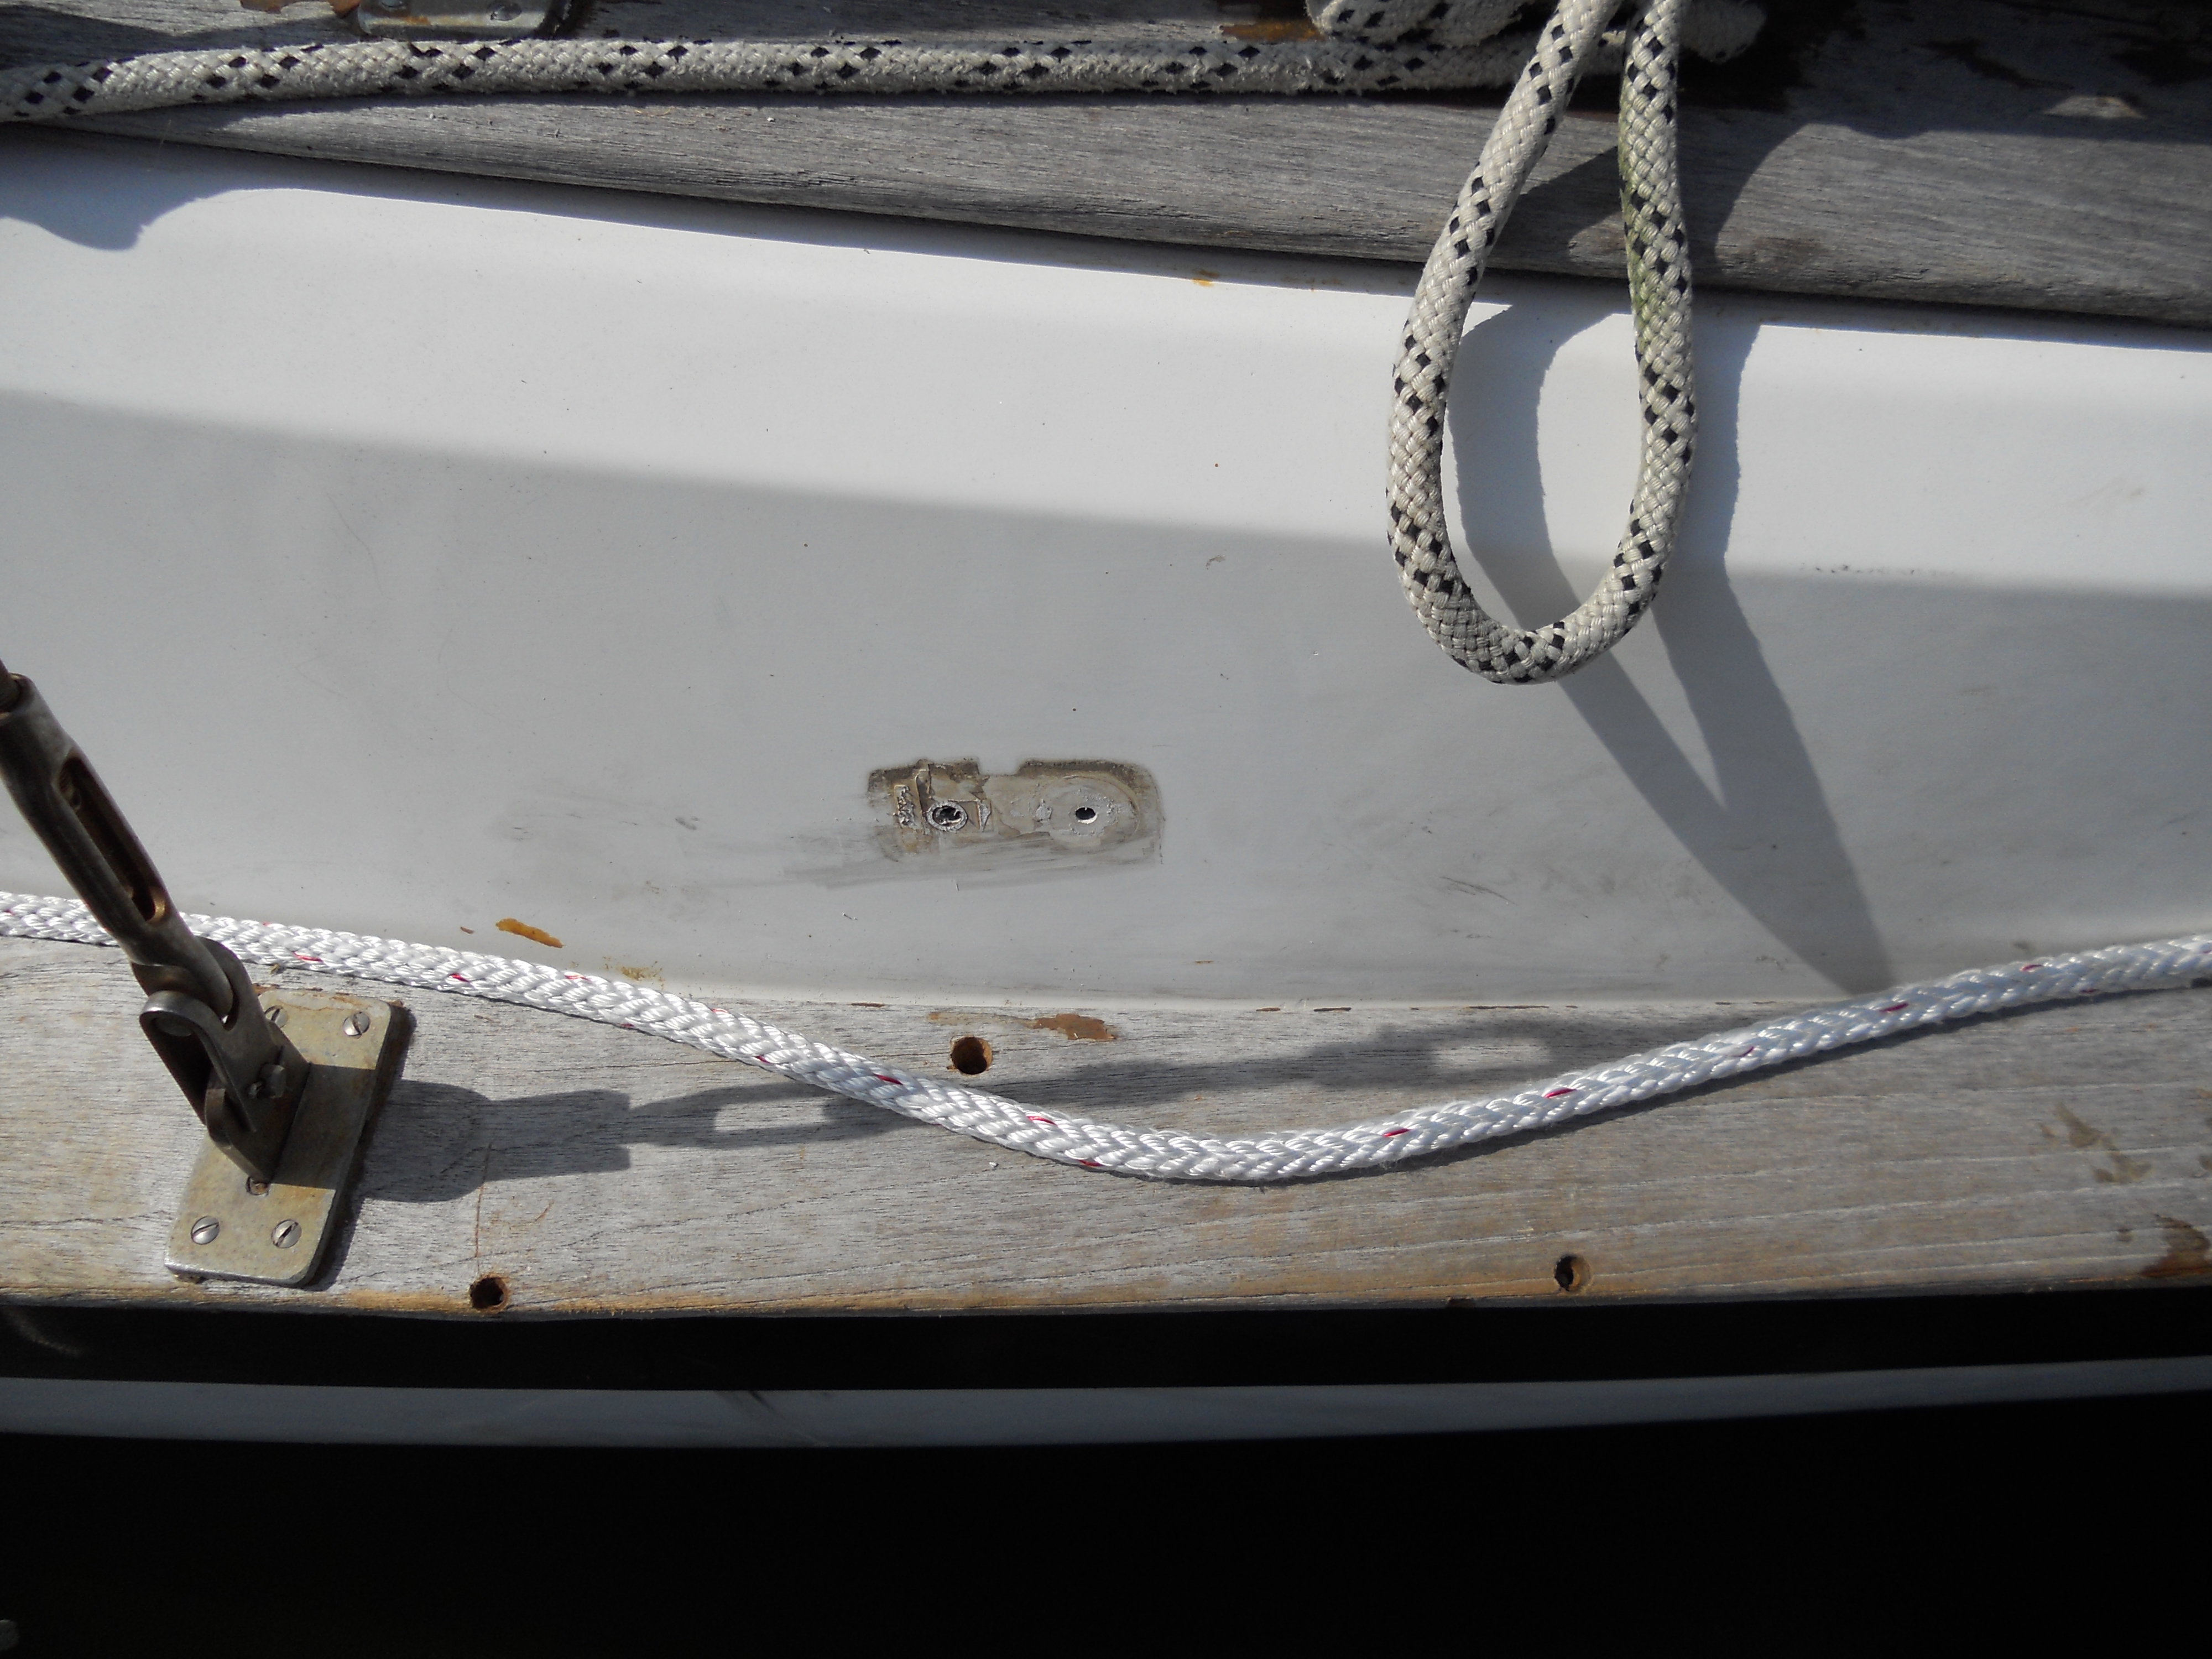 Useless Rope Clutch Removed |
Before I could start to secure the cap rail, I had one last screw that needed to be removed. I could not get a screw driver on that screw because the small rope clutch I installed for the roller furler line in 2006 was in the way. This rope clutch was a failed installation, and I just never got around to removing it. So now I had a motivation. Once the clutch was removed (picture on the left) I still could not get the screw out. It would not turn and I partially stripped the head. My intention now is to leave it in place and plug it. |
| Repair, Step 3: Replace the Teak Strip Under the Rub Rail | |
| I drilled and counter sunk holes in the Teak strip to secure it to the hull. It is really not necessary to counter sink these holes as the back of the SS rub rail is concave and will fit over truss head screws. I did have to be carefull to not align any of these screw holes with the holes in the SS rub rail. I think I got it right, but if not I'll just remove any of the screws on the Teak strip that align with the rub rail holes and use a longer screw on the rail to go through the strip and into the hull. |
 The Teak Stip Replacement |
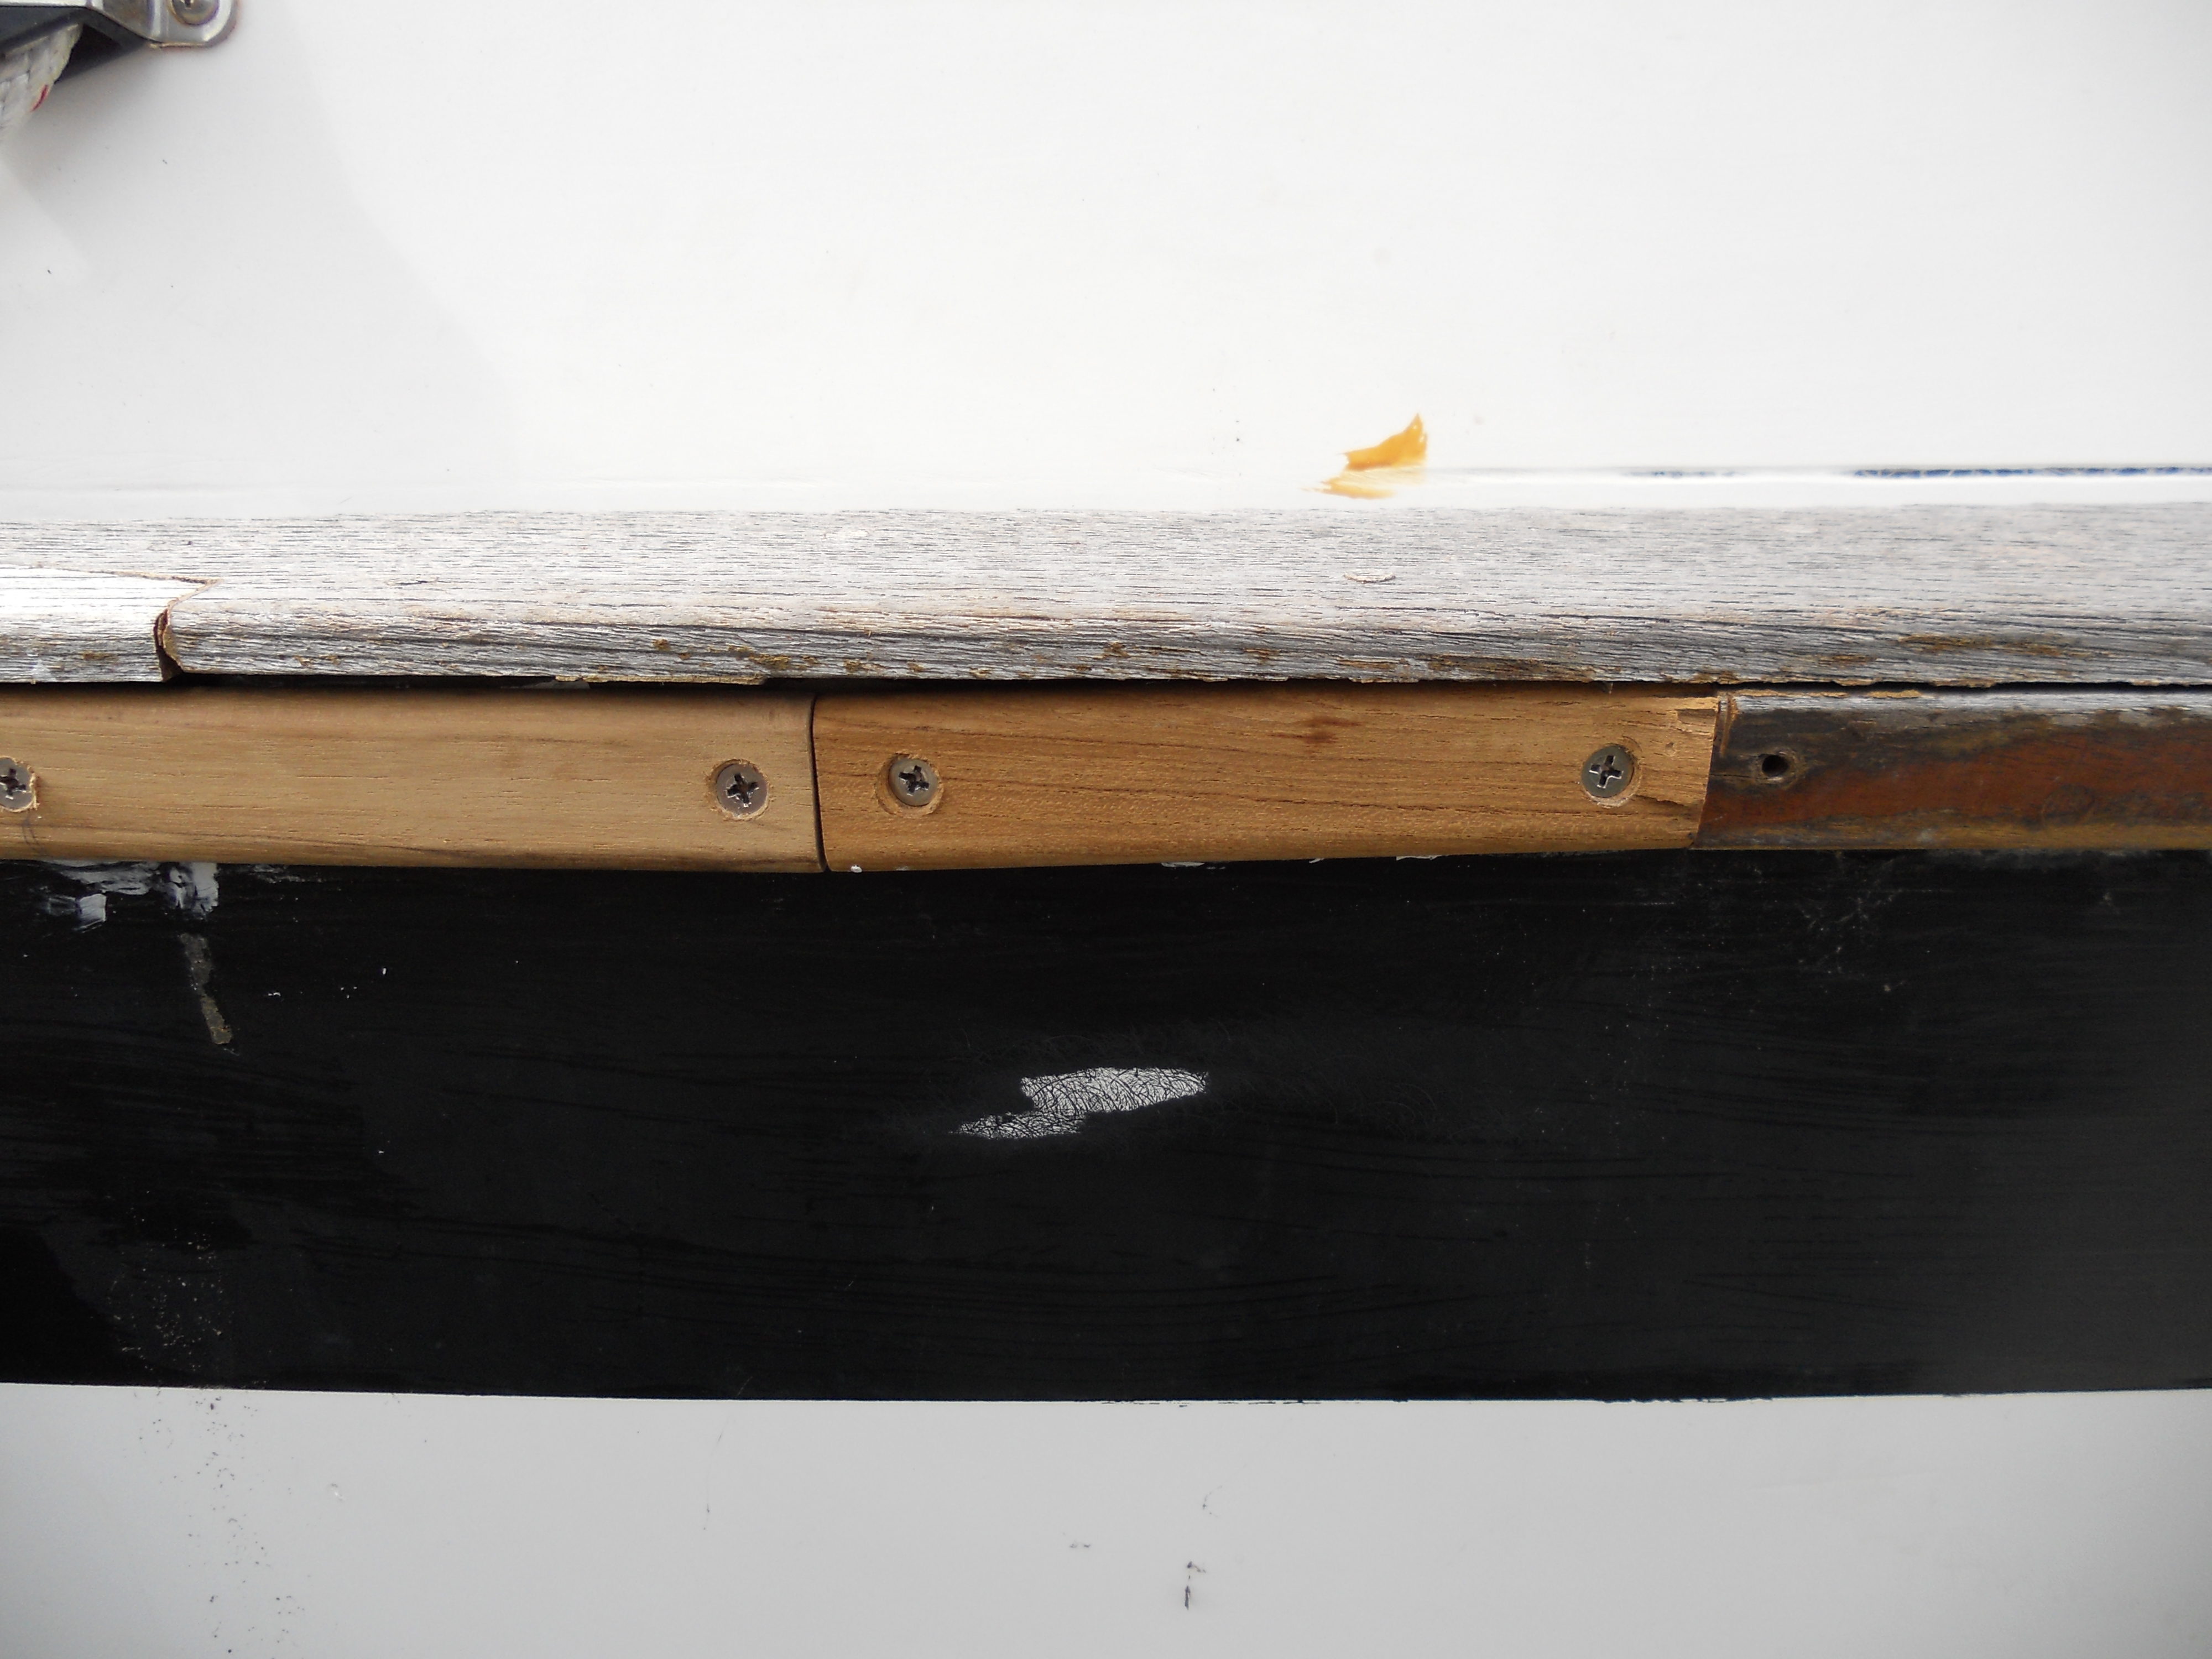 Teak Strip Extension |
The Teak strip I purchased at WM was
just a little too short and I had to buy a second strip, cut off
about 4" and use that to extend the strip and fill the gap. I still need to remove each of these screws and bed them before I start to re-install the rub rail. I also need to replace the screws on the outer edge of the cap rail that went into the side of the strip. There really isn't enough Teak left on the cap rail for effective plugs, so I'll just seal these screw holes with polysulfide sealant. |
| Repair, Step 4: Re-Install the SS Rub Rail | |
| Finally on Aug 9, 2011 the rail is back in place. A number of the screw holes in the original Teak strip have been chewed up too much and the screws will no hold. I can't increase the size of the screw (from 10 to 12) because I would have to drill out the holes in the rub rail for the larger diameter. What I can do is inject some thickened Epoxy in the holes, then insert the screws. When the Epoxy sets the screw will be secure, but still can removed. |
 The Rub Rail is Back in Place |
 The Joint Between Two Pieces of the Rub Rail |
On the left is the but joint between two sections of the rub rail. This has always been a problem area. There should be another screw hole on the section on the left, closer to the end of the section. As it is that end can lift off the rail. |
| The picture on right shows the end of the left section is proud of the right section and can snag a piling or dock. This is better than before the repair, but should still be addressed. That's another day's project. |
 Need Another Screw Hole to Make the Rails Line Up |
| Another Rub Rail Hit, This Time Hurricane Irene | |
 More damage to the Cap Rail and Rub Rail |
Only a few weeks after I completed the repairs described above, Hurricane Irene came through and did some more damage. On the left is a picture of the cap rail after a large piece was broken off. There was also some damage to the strip of Teak that provides backing to the rub rail. |
| The process to repair this damage was
pretty much the same as before, but with a bigger piece of the
cap rail to repair. I cleaned out the old Silicone sealant
under the cap rail, and drilled a couple of counter sunk holes
for screws to hold down the borken piece. Then I applied a layer of Silicone to the fiberglass surface and applied wood glue to the edge of the broken piece. I fitted the piece back in place and used C-Clamps to apply pressure to the glued edge. Then I used several screws to clamp the piece down onto the rail. |
 Gluing the Broken Cap Rail Back in Place |
 Repair Completed |
The next day I attached the Teak backing strip for the rub
rail, then the rub rail itself. Well, not exactly looking like new, but it will do until the entire cap rail is replaced sometime in the future. |